·5/20/2026
from
MĀO ĚR DUǑ
# · MĀO ĚR DUǑ ·
## Cat Ear Pasta — Two Ways to Eat One Dough
> You press the dough with your thumb, give it a little push forward, and it curls up into a small shell
> Takes about three seconds per piece. Nobody told you it would be this satisfying
> Same dough, two directions — one into broth, one into the wok
---
**Serves** 3–4 · **Active time** 50 min · **Total time** 1 hr
## Ingredients
**Main**
| Item | Amount |
|------|--------|
| All-purpose flour | 300 g |
| Warm water | ~150 ml |
| Fine salt | 1 tsp |
**Soup version toppings**
| Item | Amount |
|------|--------|
| Pork shoulder, thinly sliced | 100 g |
| Fresh spinach | 80 g |
| Clear pork bone broth | 600 ml |
| Toasted sesame oil | 1 tsp |
| Salt | to taste |
**Stir-fry version**
| Item | Amount |
|------|--------|
| Pork loin, shredded | 100 g |
| Eggs | 2 |
| Green onion, sliced | 2 stalks |
| Light soy sauce | 1.5 tbsp |
| Neutral oil | 2 tbsp |
| White pepper | pinch |
---
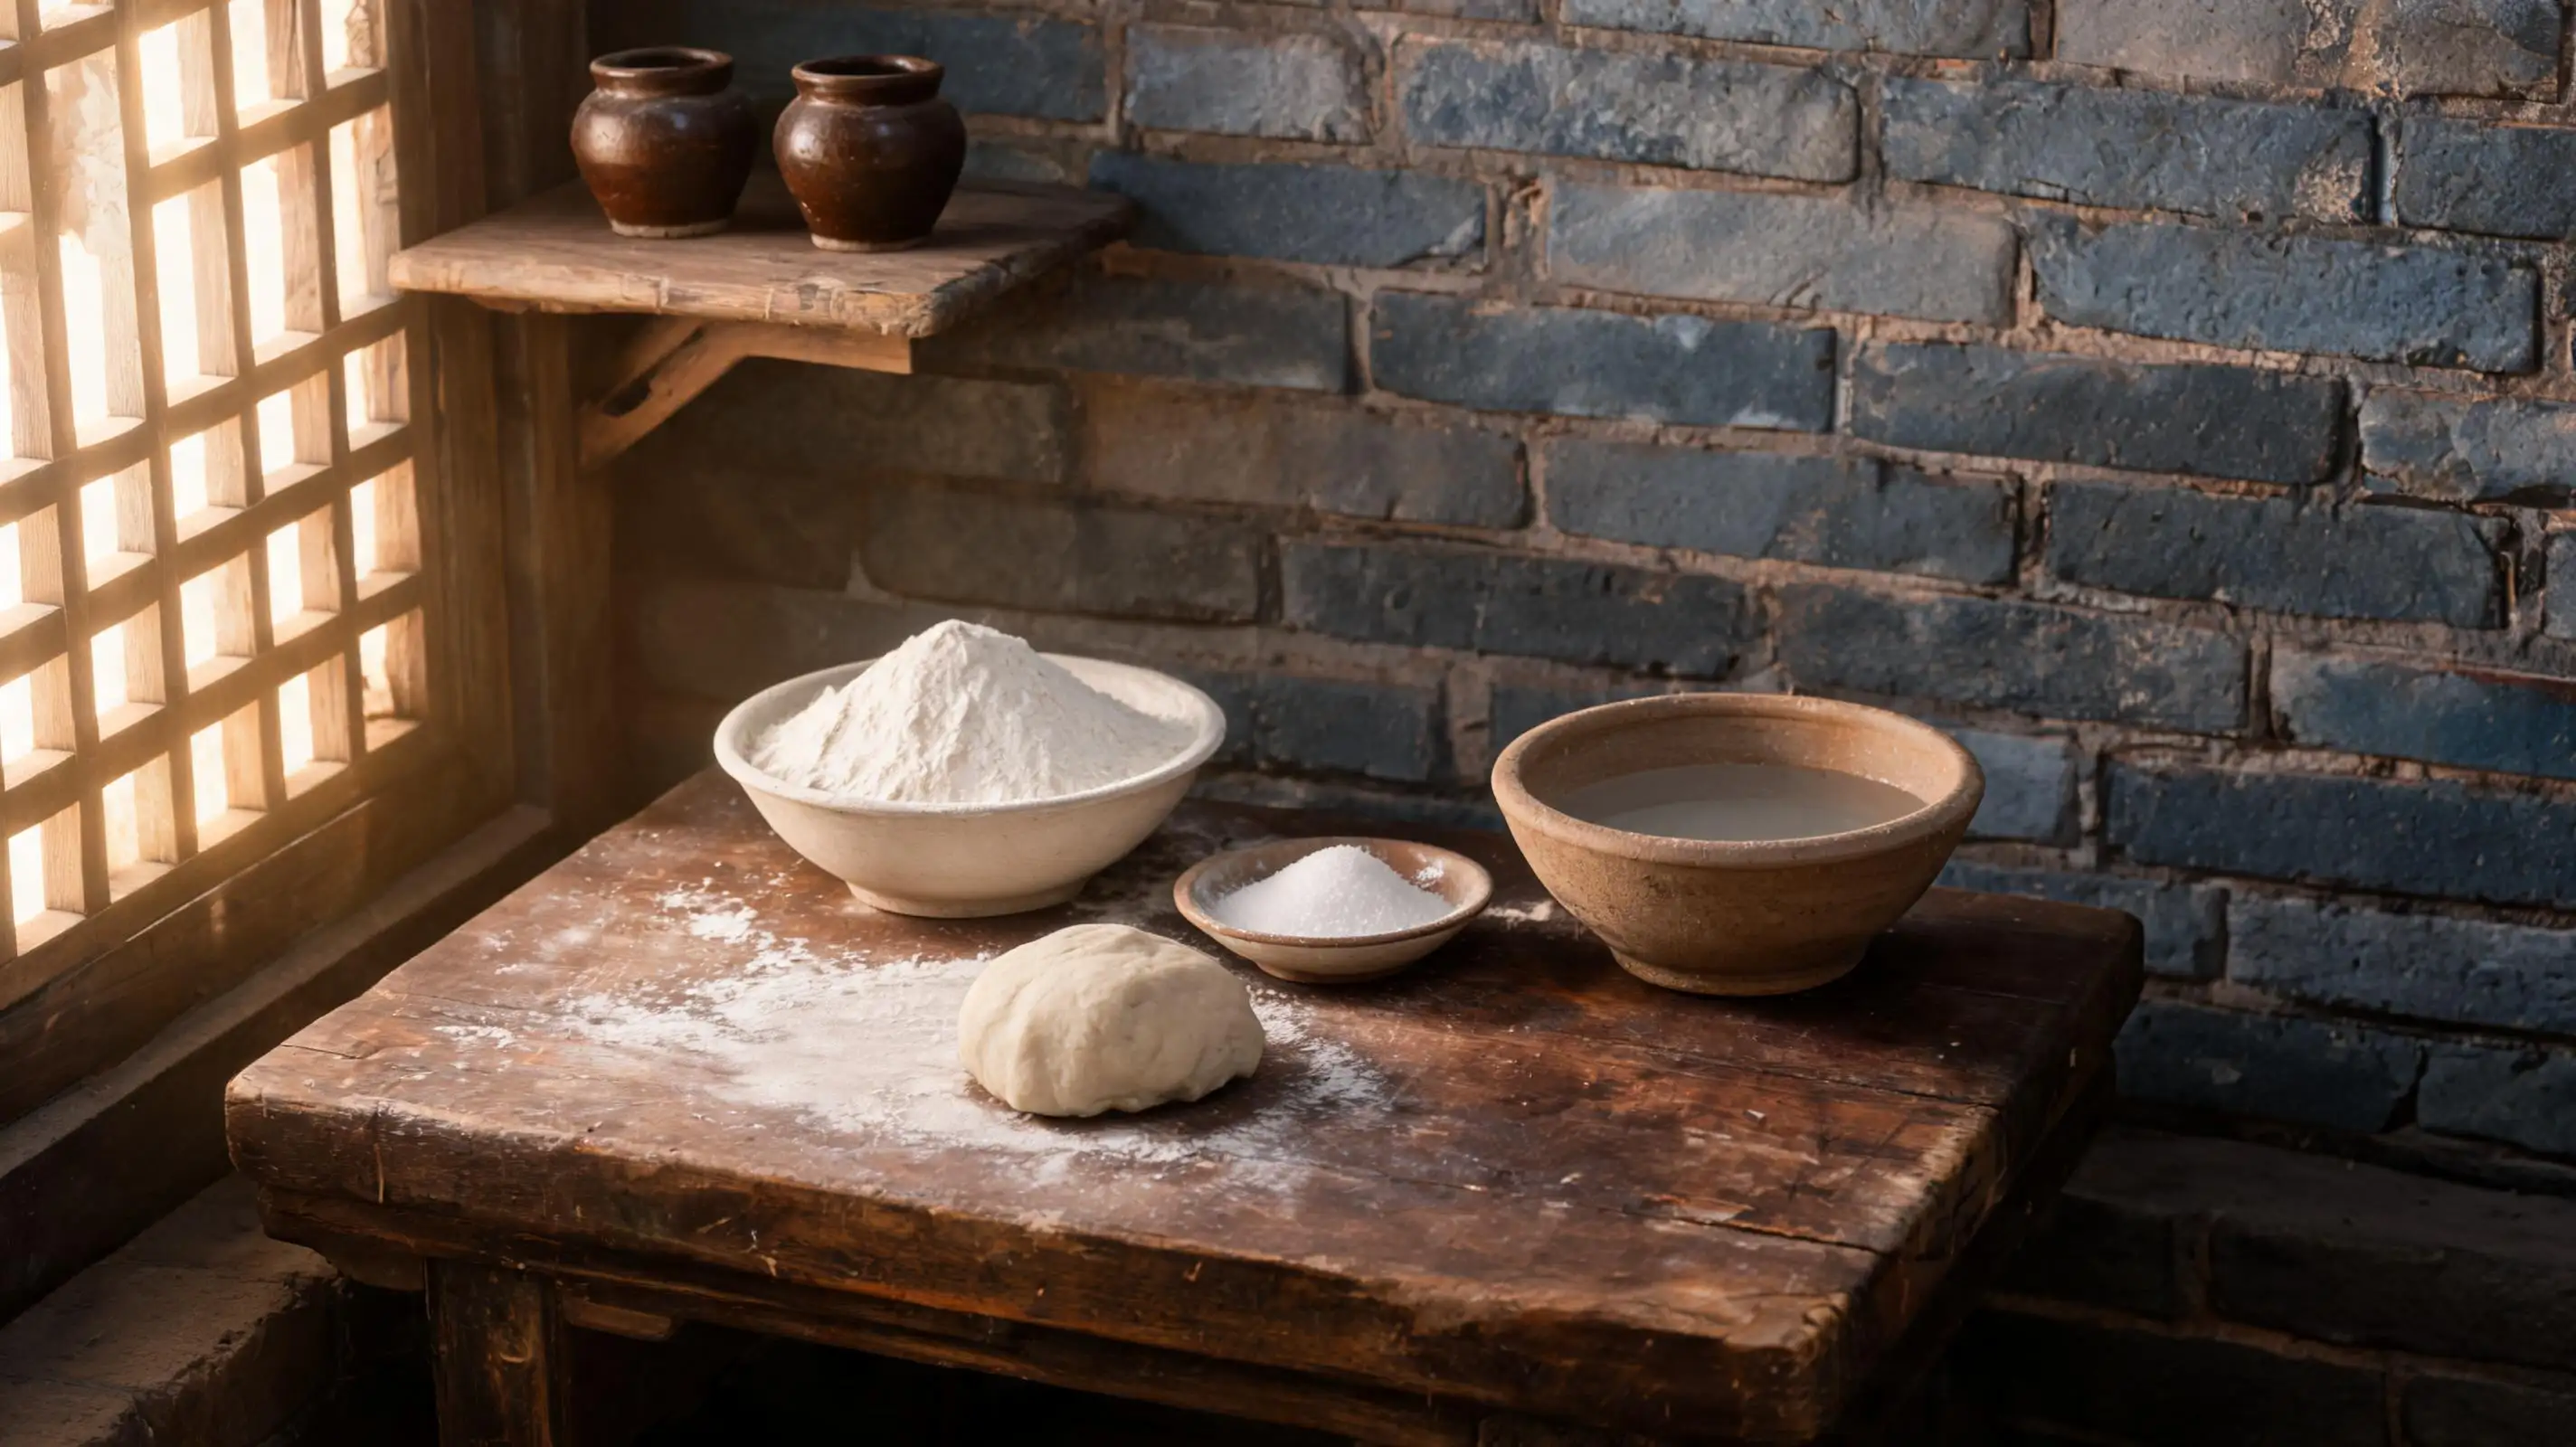
## Step 1 · The Lineup
### Three ingredients. That's all.
Flour, water, salt. Put the salt into the flour first and mix dry, then add warm water a little at a time. You don't want it too soft — this dough needs to hold its shape when you push it across the board. Aim for something smoother than bread dough, firmer than dumpling dough.
**The water temperature matters: around 40°C keeps the dough cooperative and easy to shape later.**
---
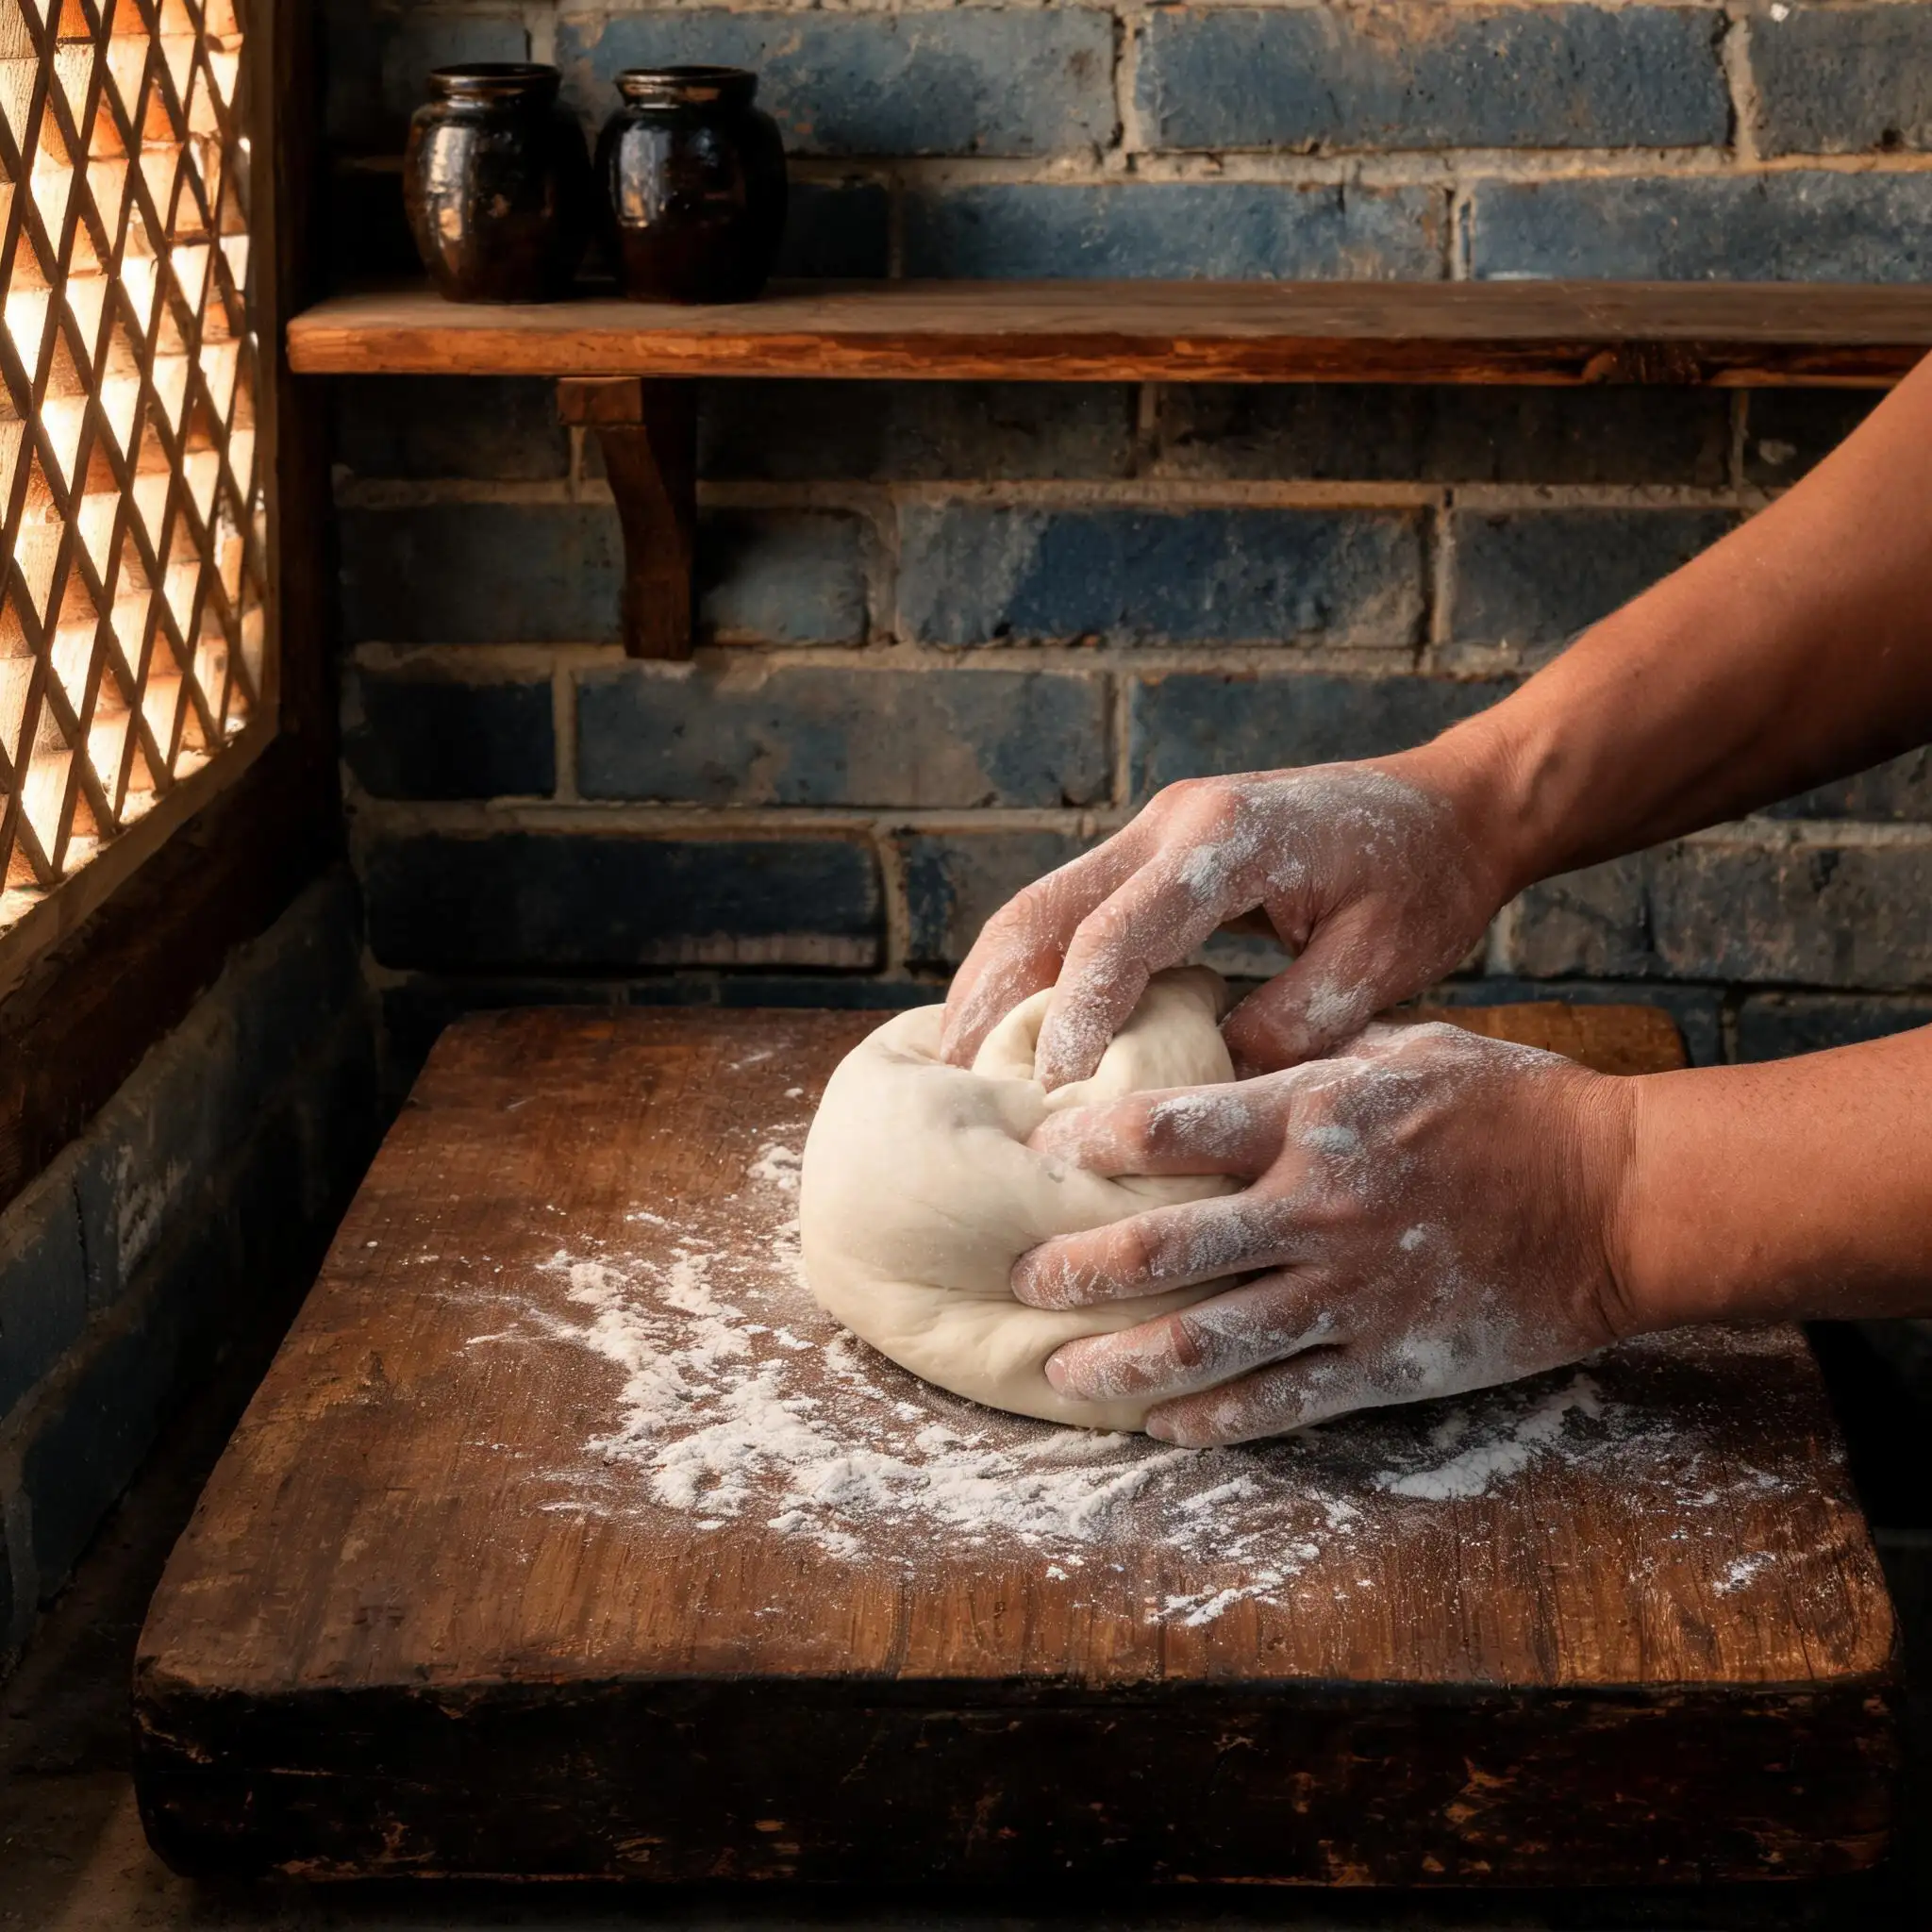
## Step 2 · The Knead
### Press until it stops fighting back.
Knead for at least 10 minutes. In the beginning the dough tears and resists; halfway through it starts to come together; by the end it should feel smooth and slightly elastic under your palm. This is the part people rush, and you can always tell in the final texture.
**Cover with a damp cloth and rest for 30 minutes.** The gluten needs time to relax or the dough will snap back when you roll it.
> ⚠️ Don't skip the rest. Dough that hasn't rested is stiffer to work and the cat ears won't curl as cleanly.
---
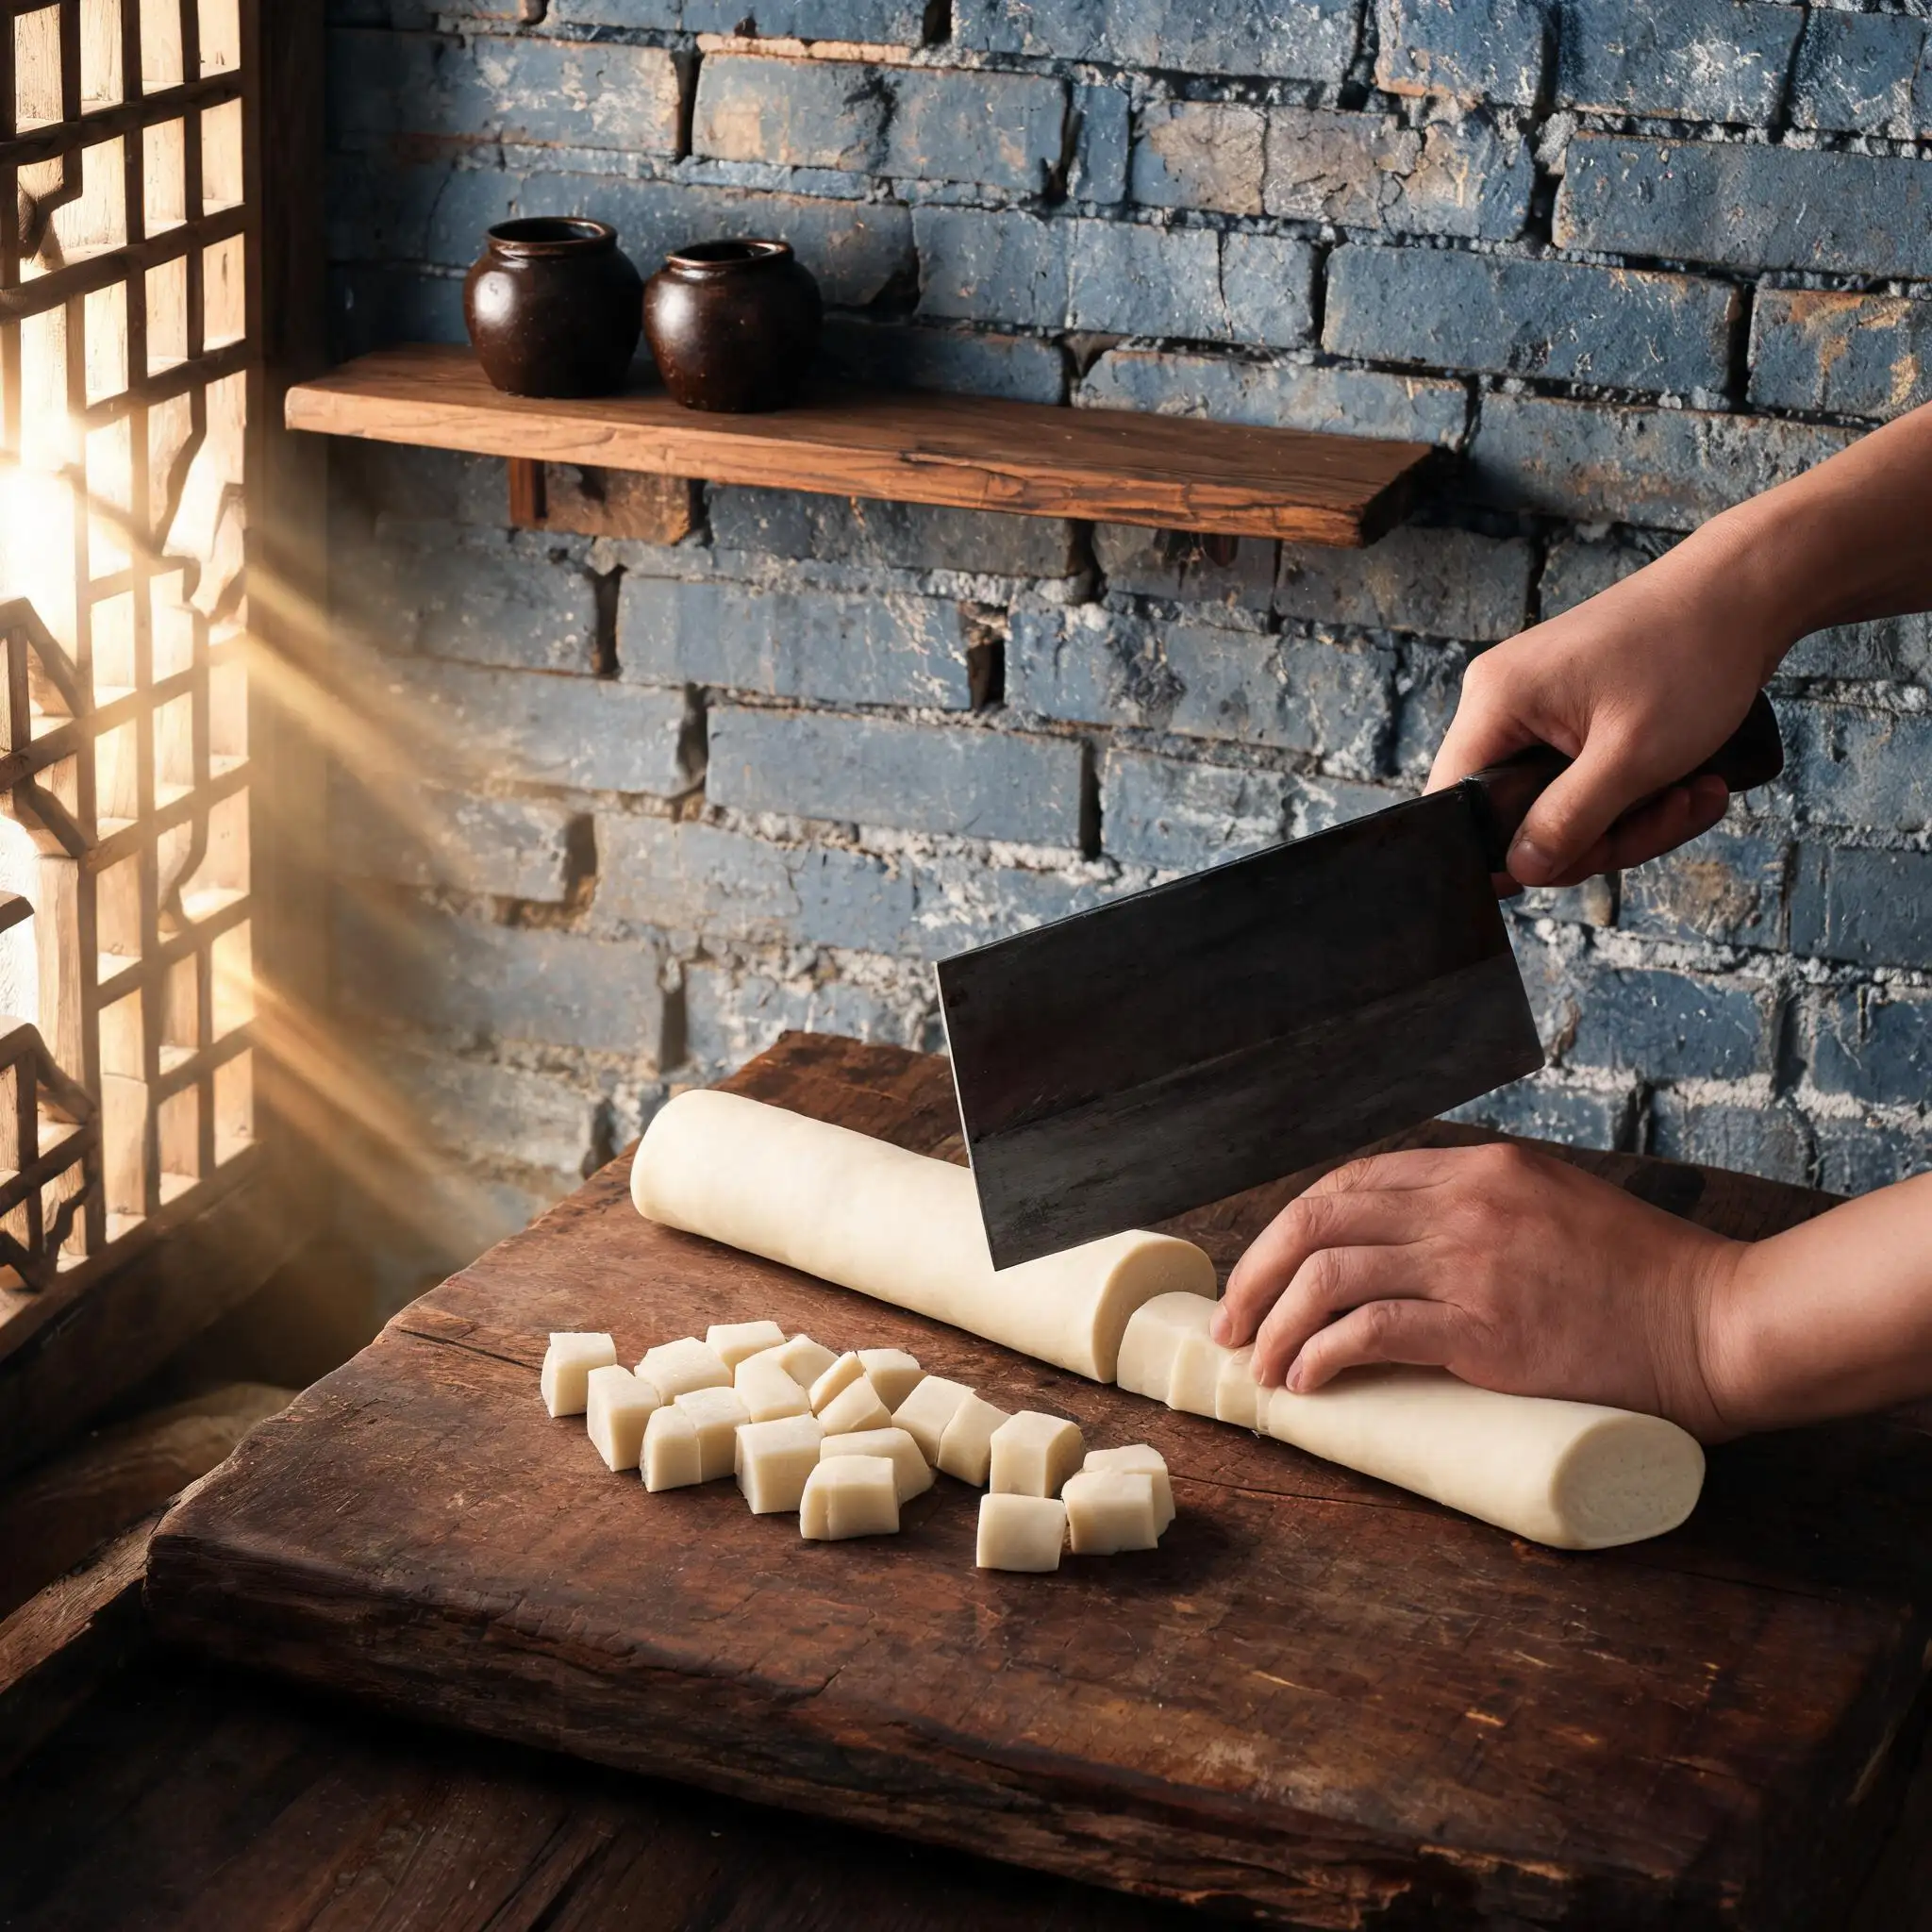
## Step 3 · The Cut
### Small cubes, consistent size.
Roll the rested dough into a thick log, then cut into small cubes — about 1 cm on each side, close to a dice. The size determines how the ears turn out: too big and they go thick and clunky, too small and they fall apart when you press them.
**Work in batches. Keep the uncut dough covered so it doesn't dry out at the edges.**
---
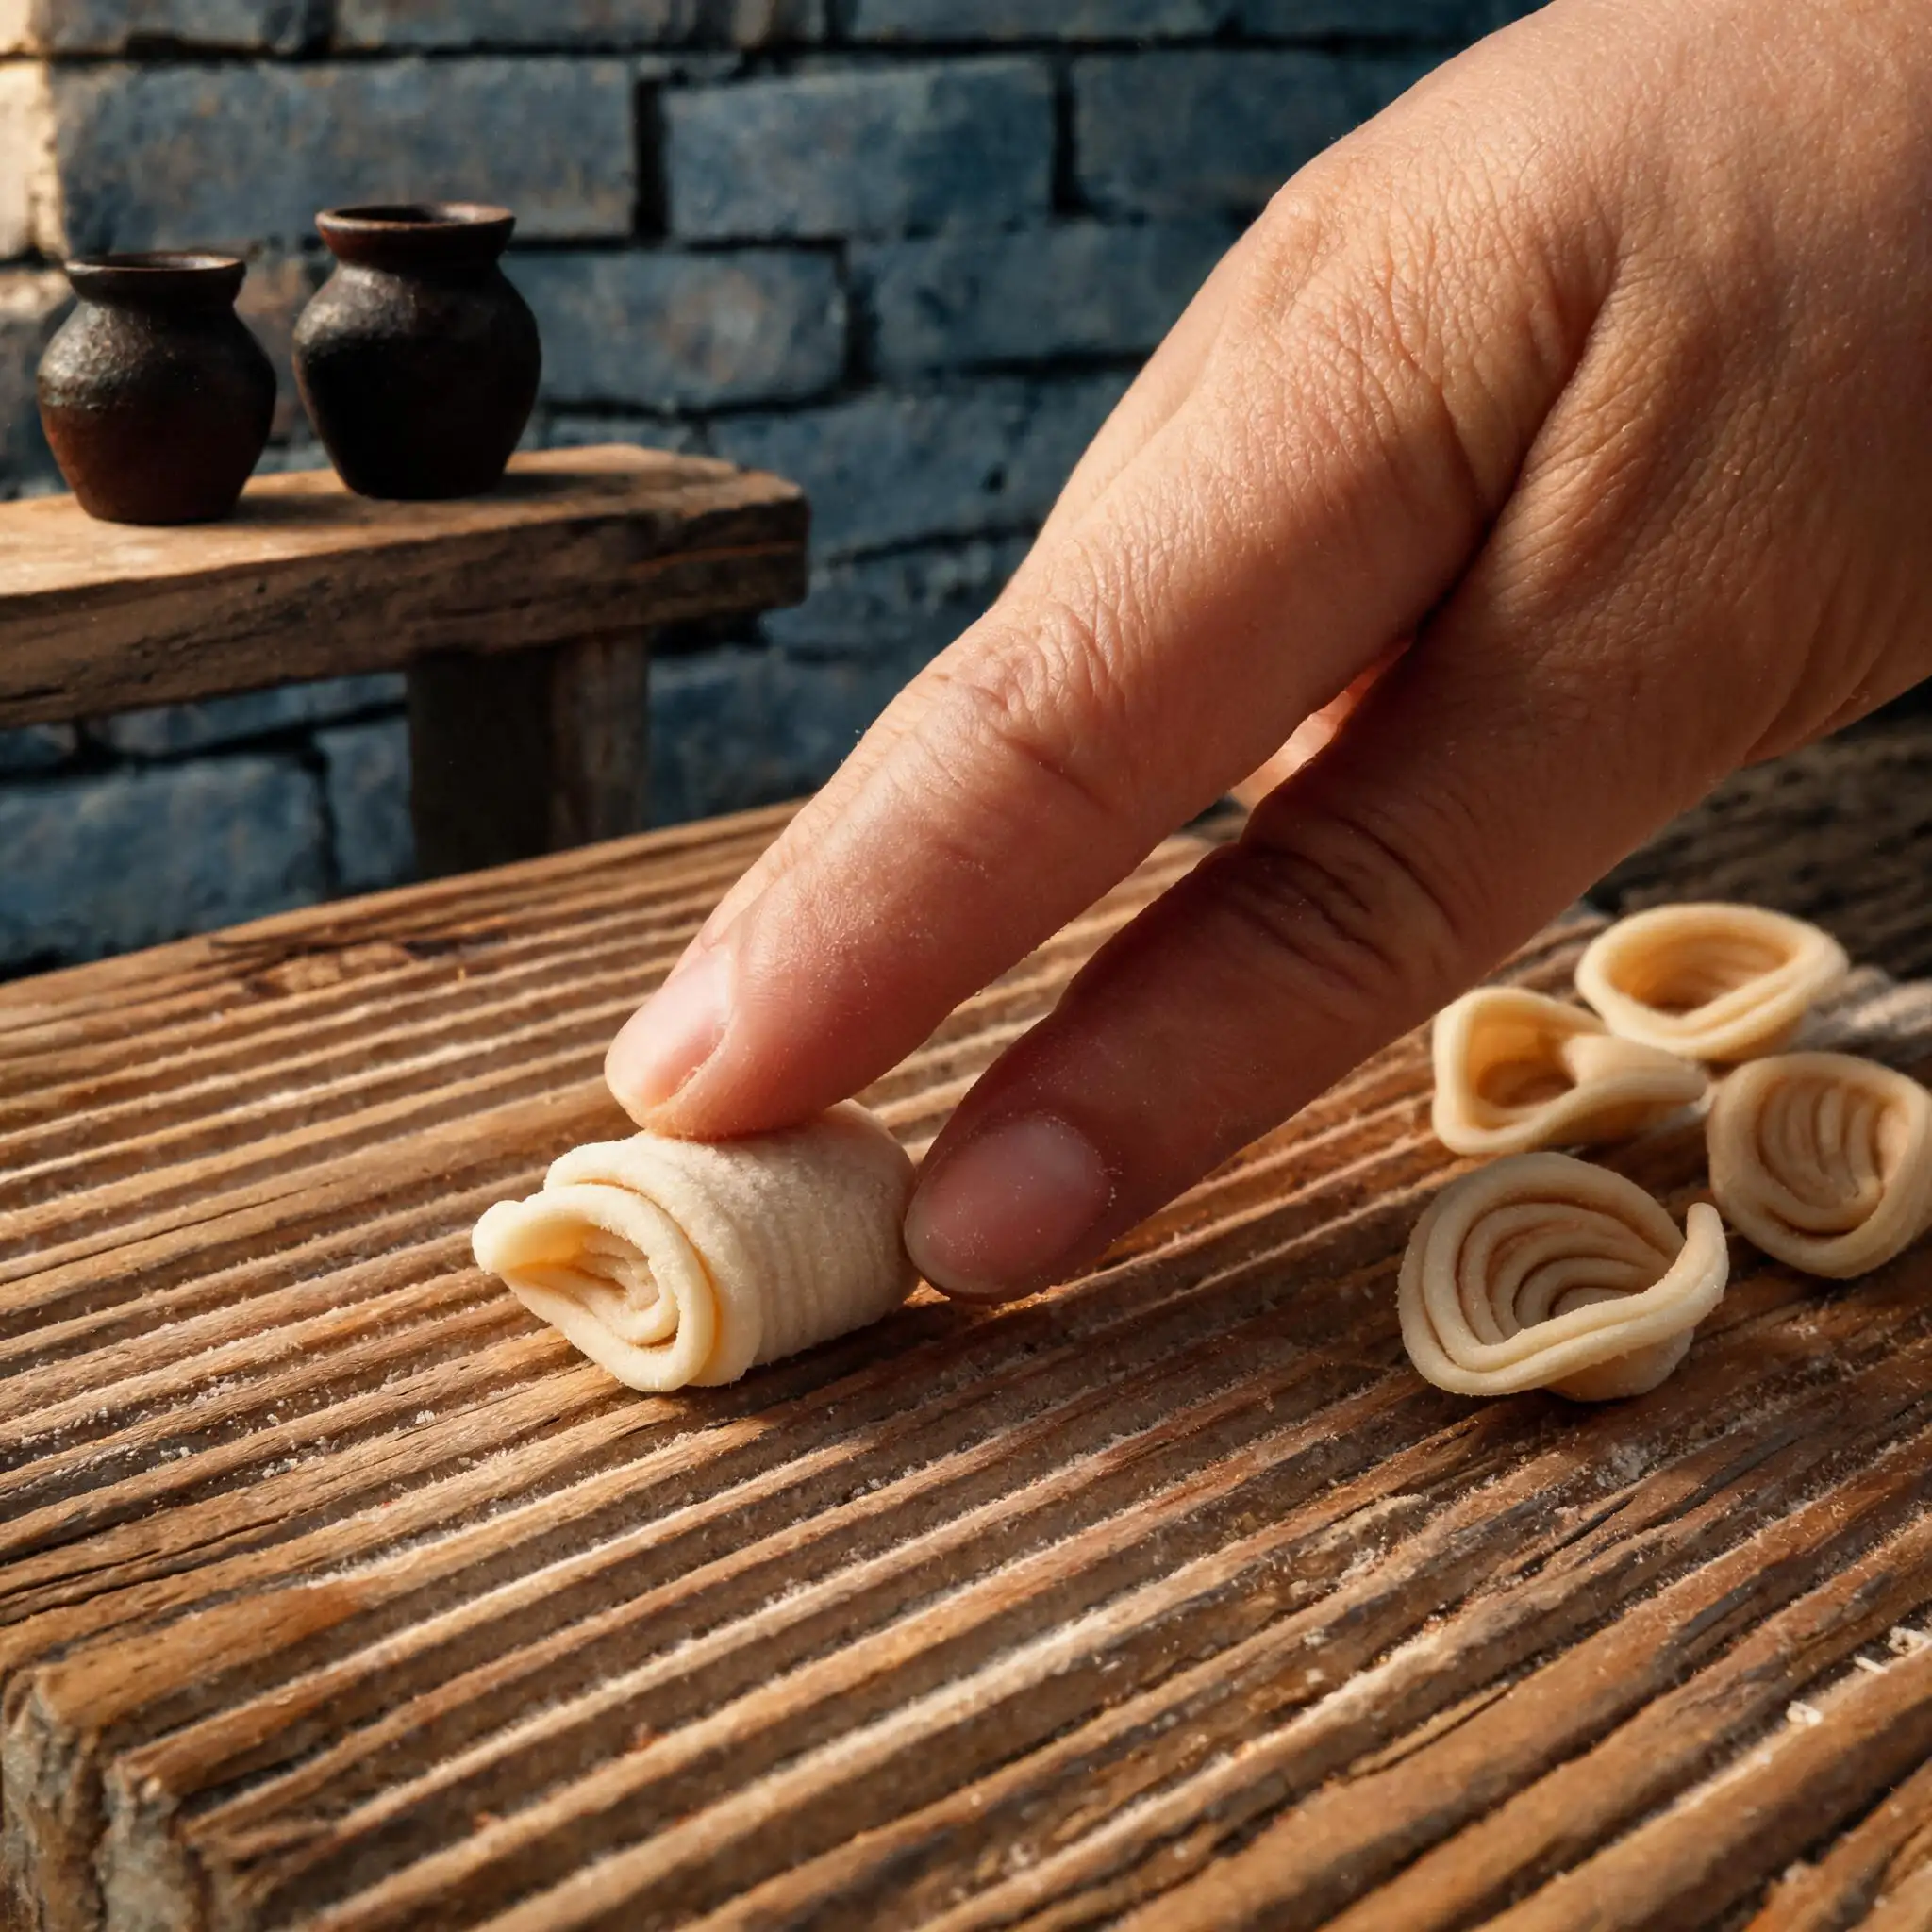
## Step 4 · The Shape
### One thumb, one push, one curl.
Place a cube on a ridged wooden board or bamboo mat. Press your thumb into the center and push forward in one motion — the dough flattens, the edges lift, and it rolls off the board as a small concave shell about 1 cm across. The grooves from the board leave ridges on the back, which is exactly what you want: they hold onto sauce and broth.
**The motion is press-and-push, not just press.** If you only push down, you get a flat disc. The forward momentum is what creates the curl. After a few dozen pieces your thumb starts to find its own rhythm — you'll know you've got it when the ears come off the board looking consistent without you having to think about it.
---
## Step 5 · The Ears
### Let them sit and dry slightly before cooking.
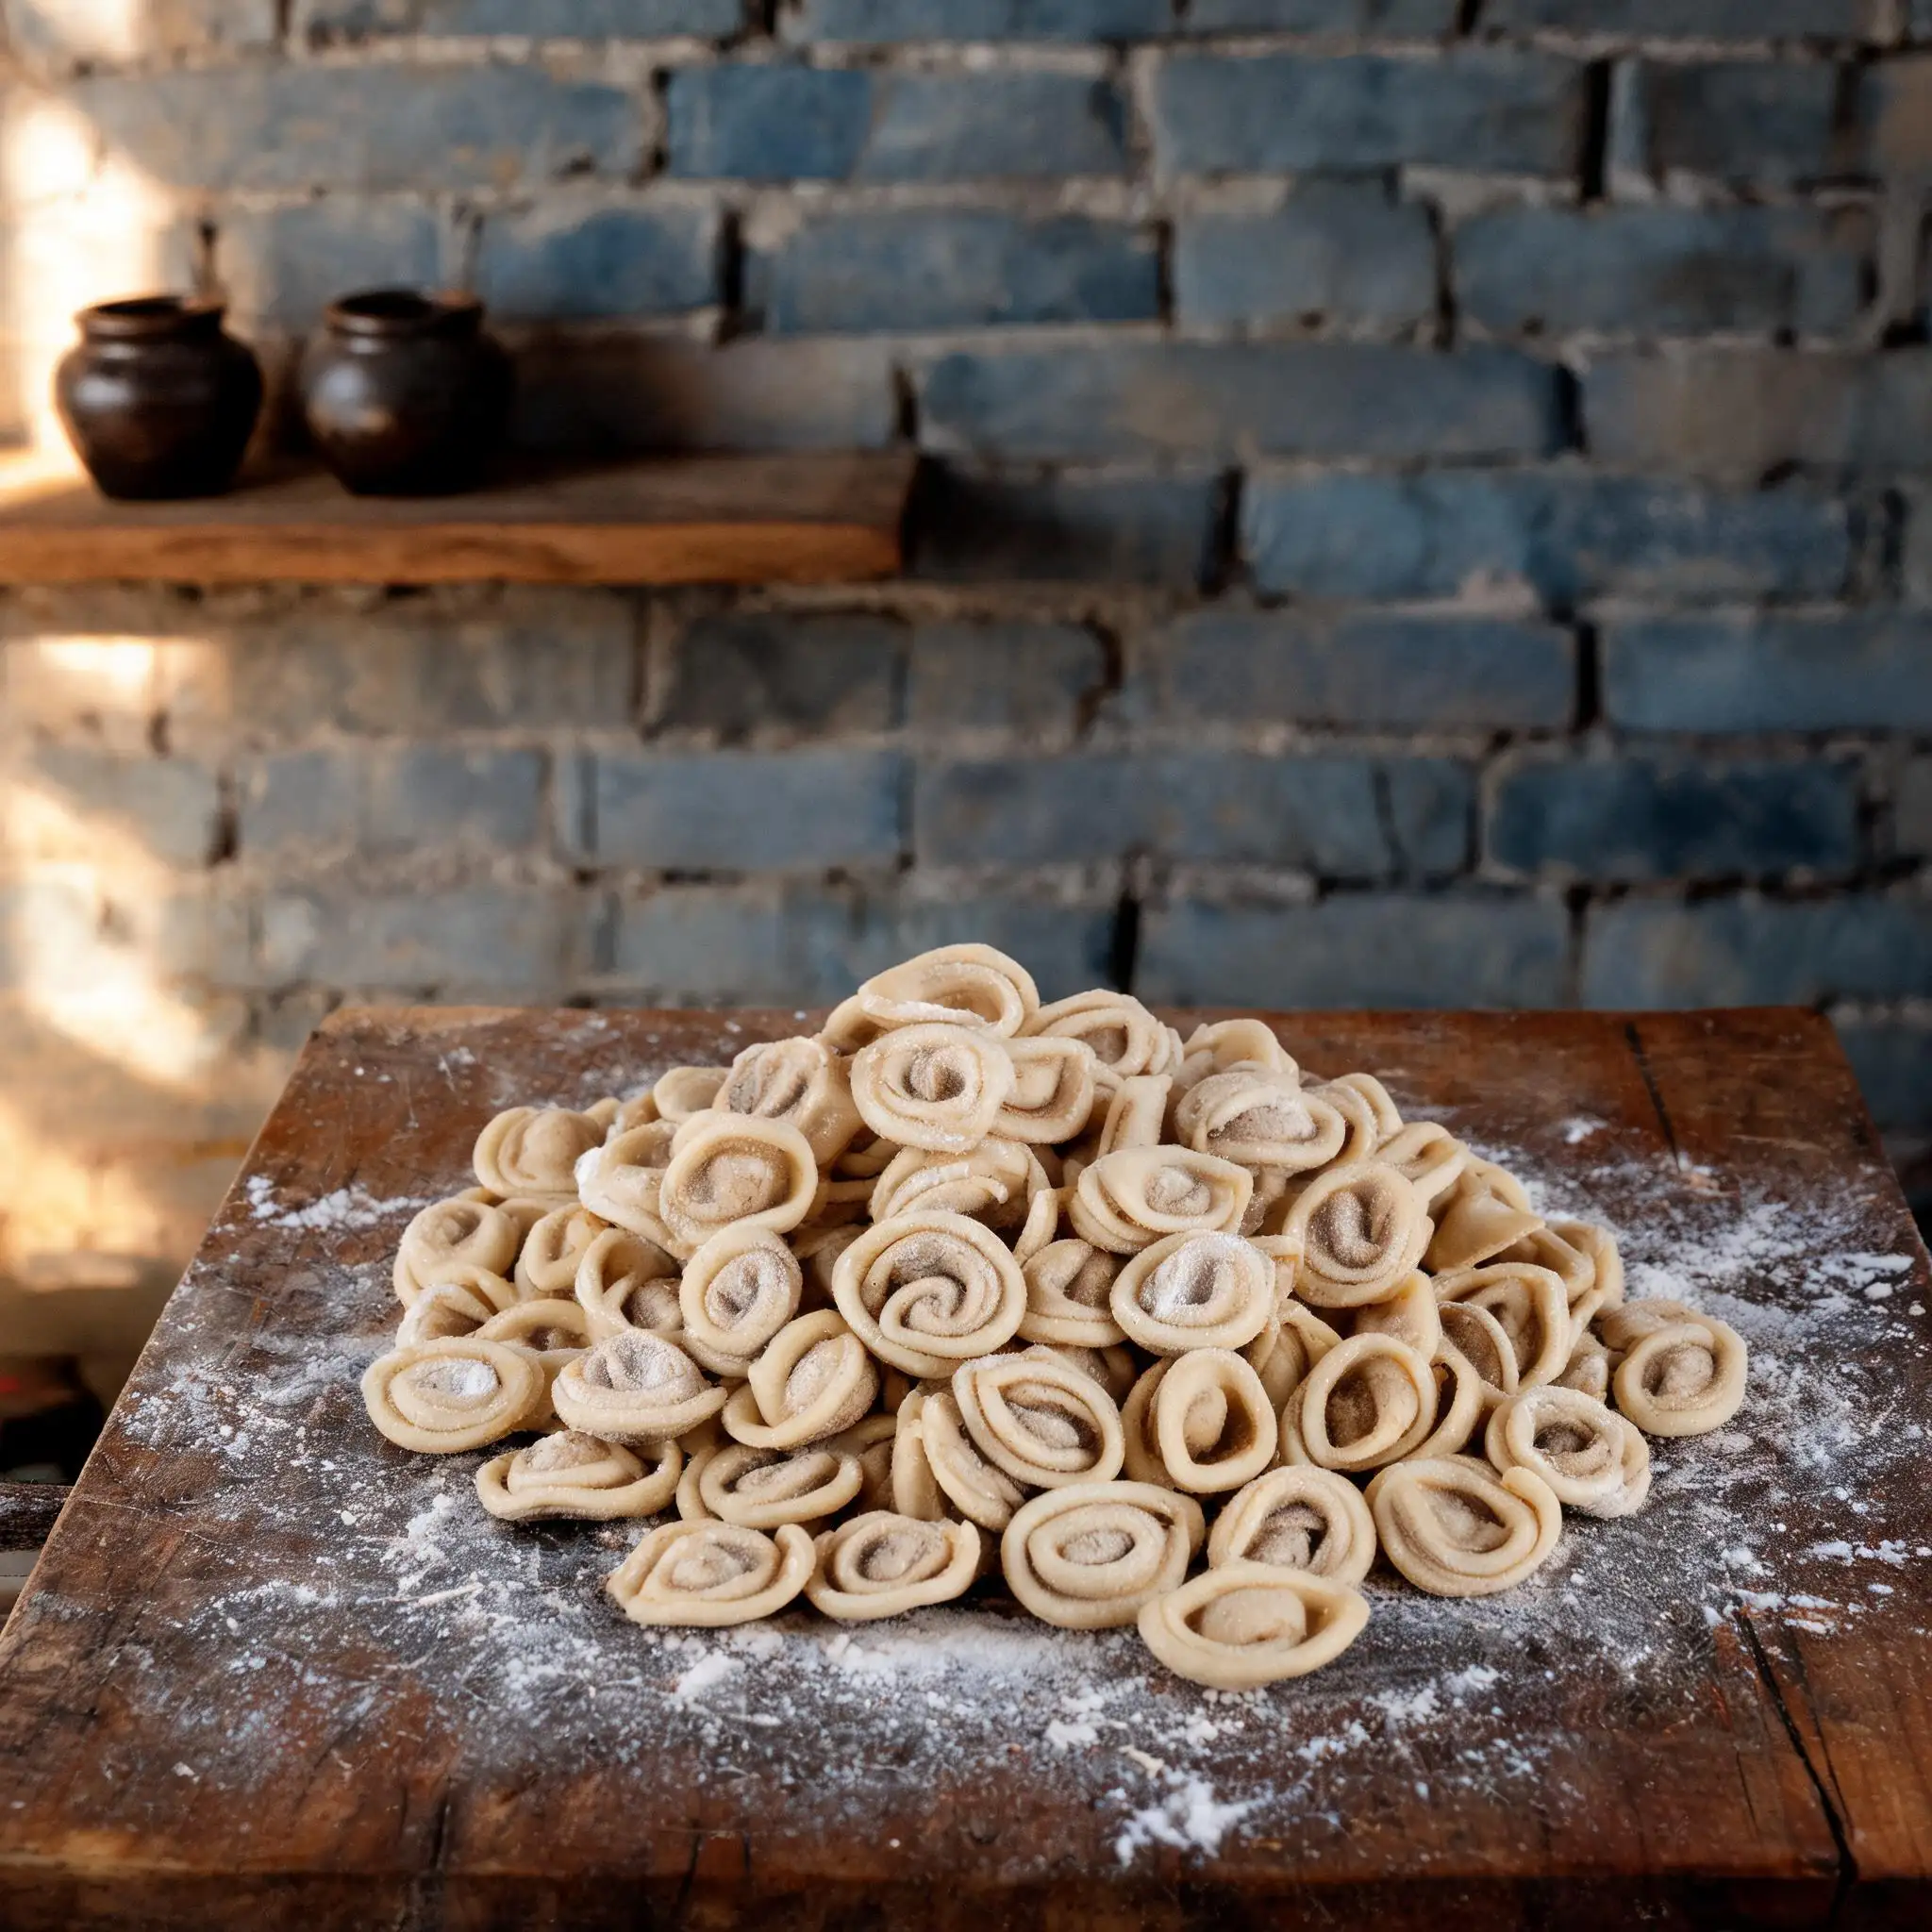
Once shaped, scatter the cat ears on the board with a light dusting of flour so they don't stick together. At this stage they look pale cream-white, small shells with edges turned up. If you look at them from the side you can see the concave center and the ridged back.
**This batch can be cooked immediately or dried fully and stored.** Dried cat ears keep for weeks and cook the same way — just add 1–2 minutes to the boiling time.
---
## Step 6 · The Boil
### Boiling water, not simmering.
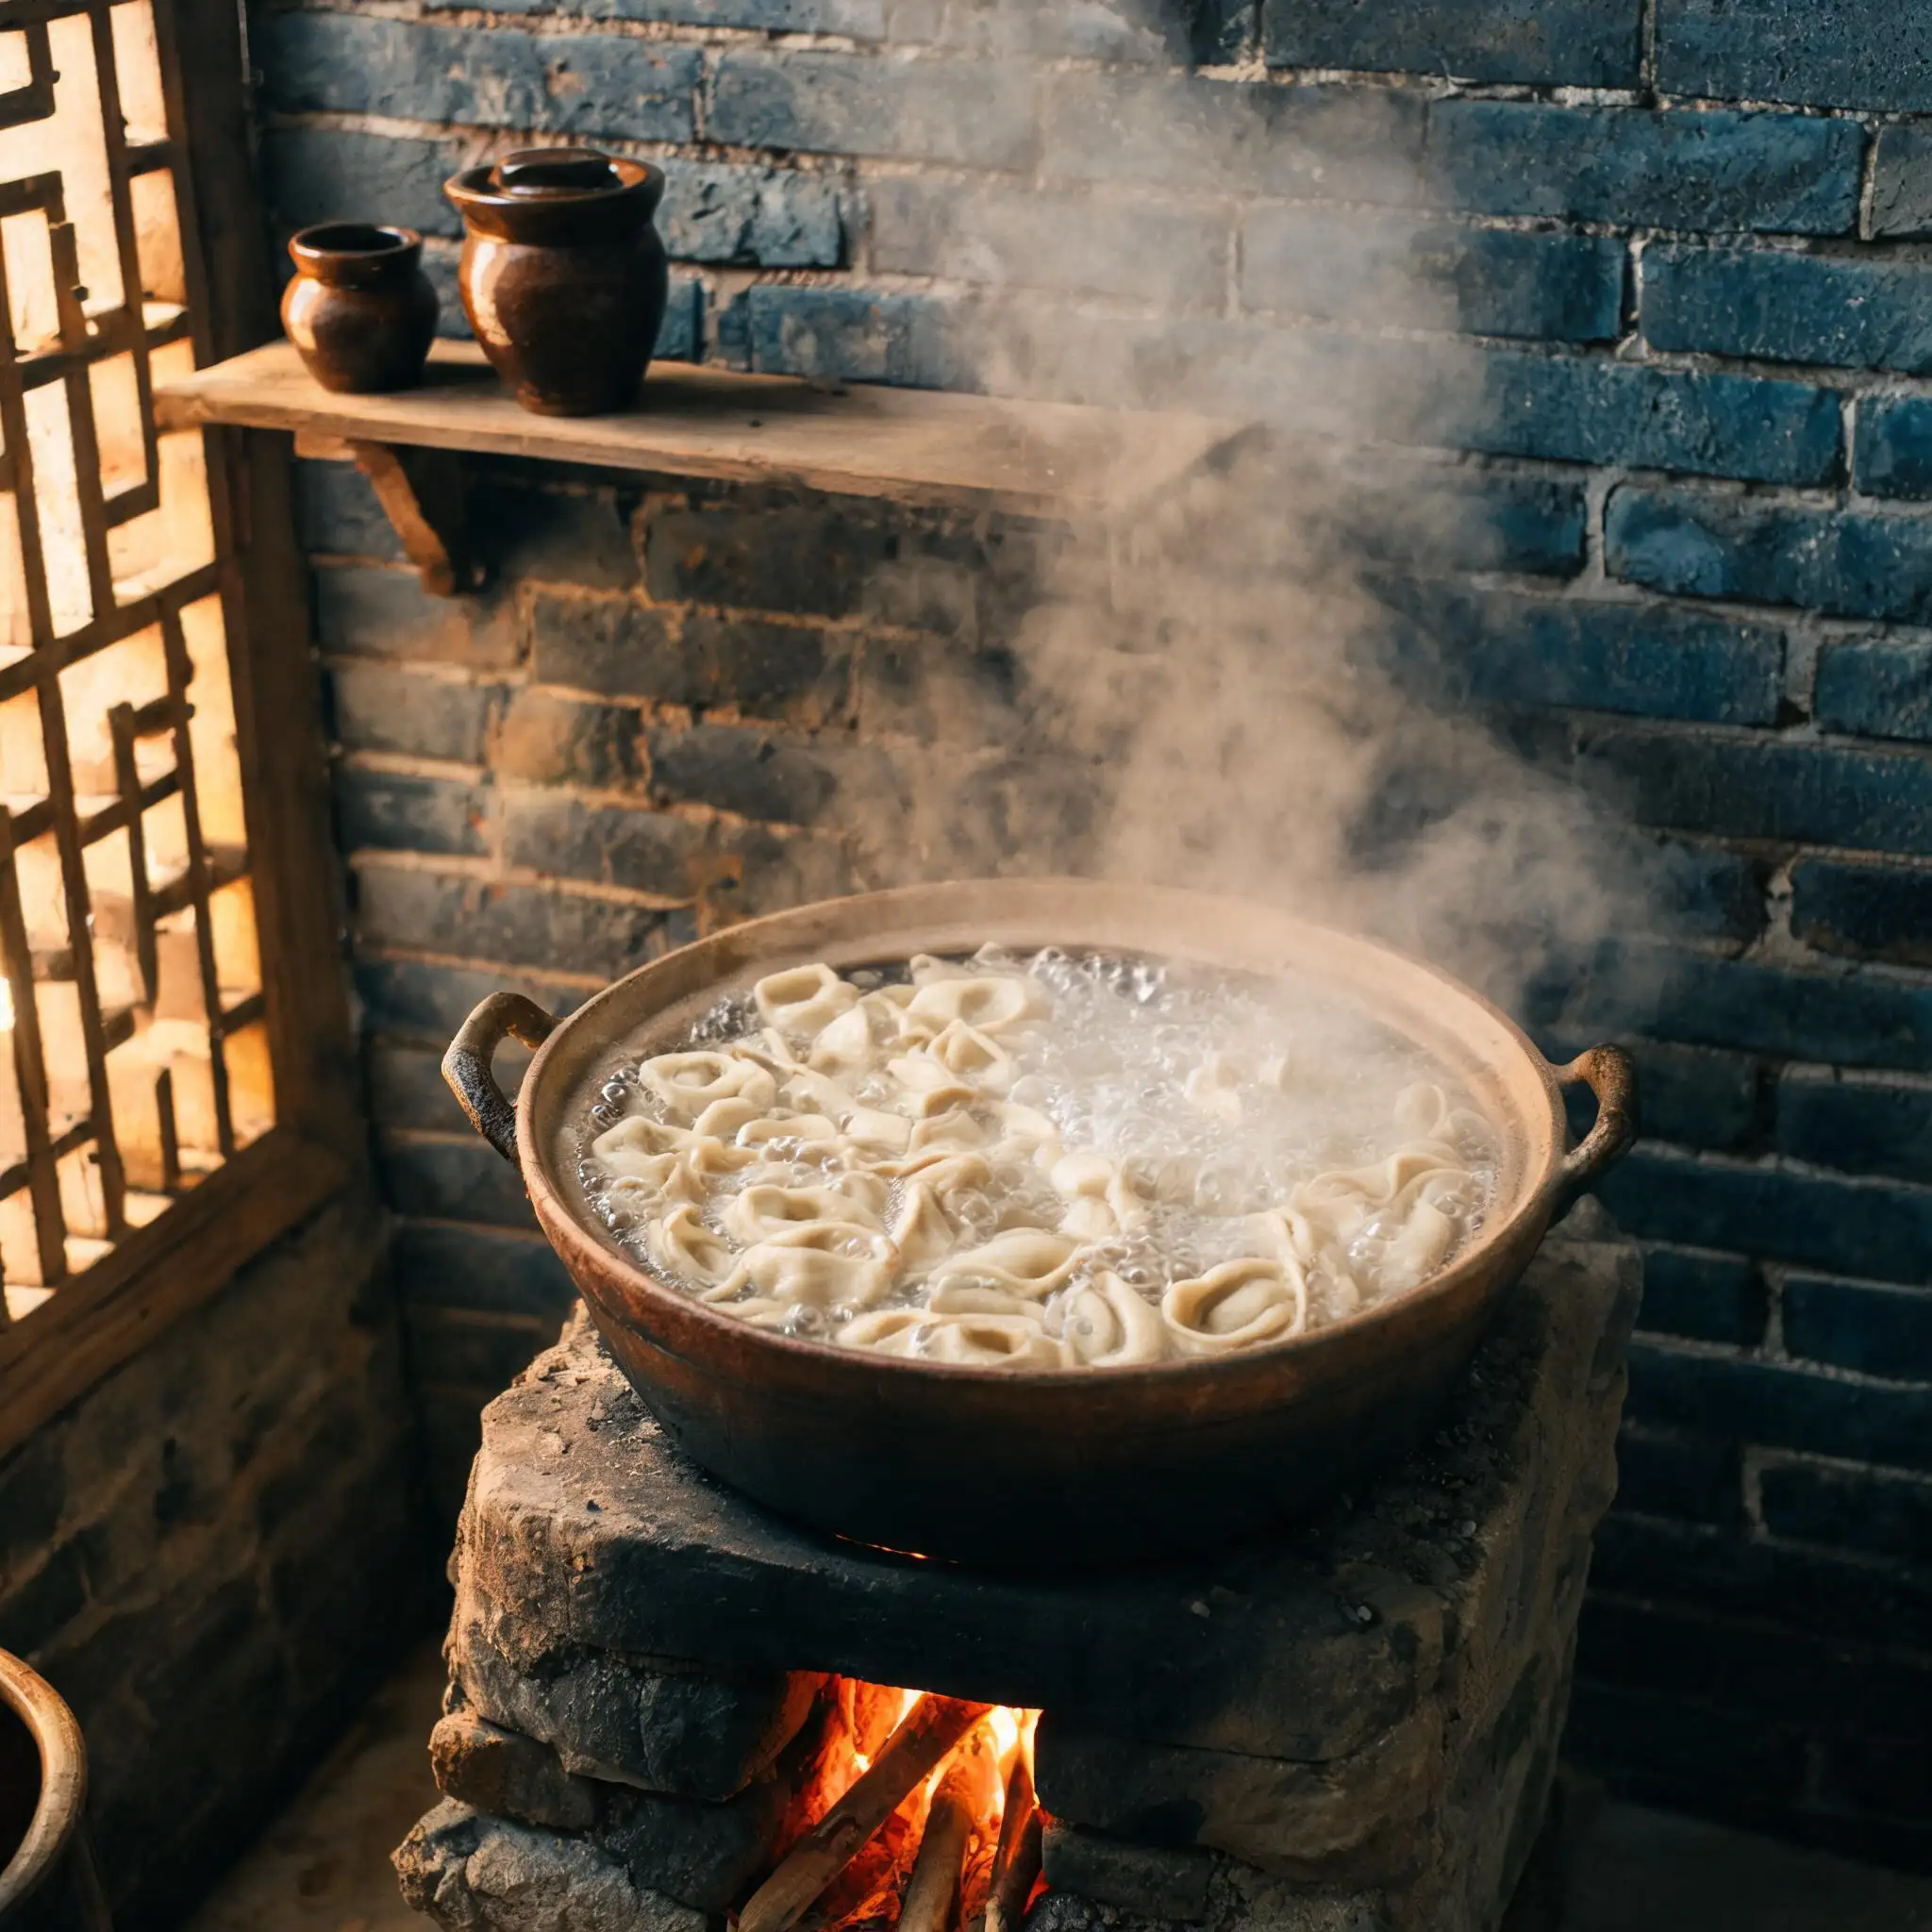
Bring a pot of well-salted water to a full rolling boil. Add the cat ears in batches — don't crowd them or the temperature drops and they turn sticky. They'll sink to the bottom first, then float back up after 2 minutes. Cook for another minute after they float.
**Fresh ones take 3 minutes total; dried ones take 4–5.** Either way, pull one out and press it — it should give slightly but still have a gentle chew.
---
## Step 7 · The Soup Bowl
### Clear broth, simple finish.
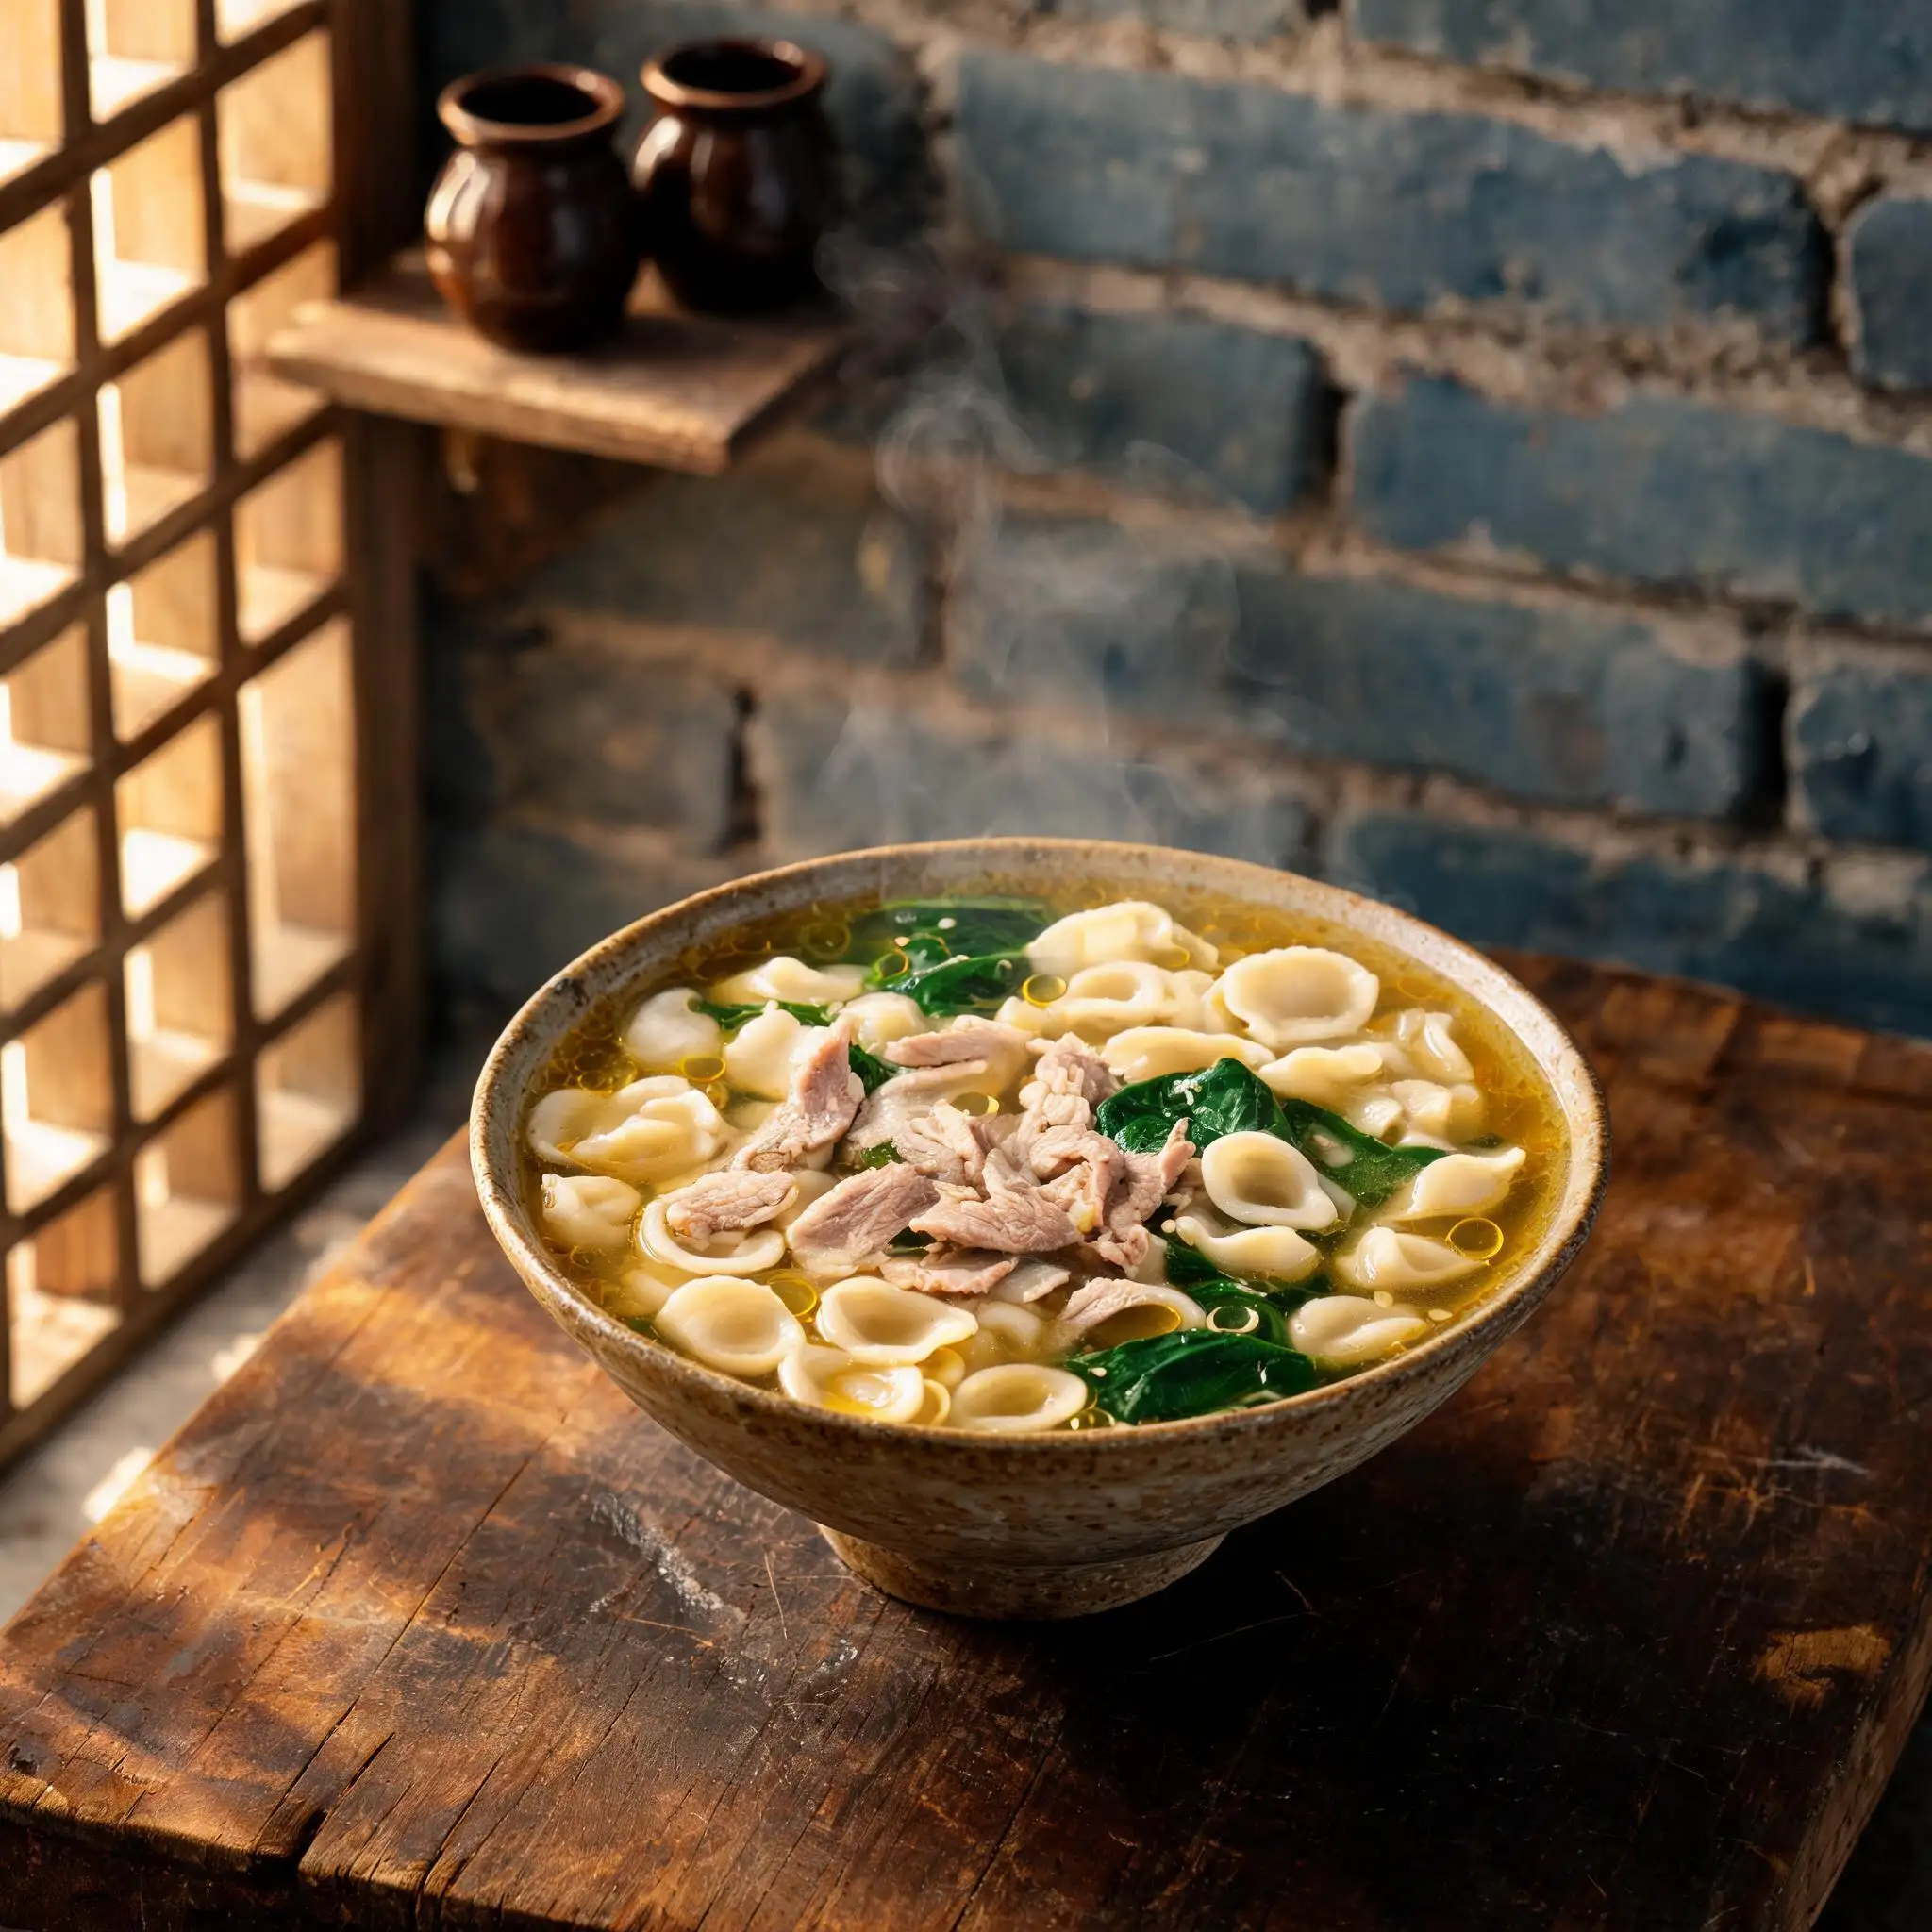
Heat the pork bone broth in a clay pot until it comes to a gentle simmer. Add the sliced pork and spinach and let them cook through — the pork takes about 2 minutes, the spinach wilts almost immediately. Ladle the cooked cat ears into a rough ceramic bowl, pour the broth over the top.
**Finish with a small drizzle of sesame oil — just enough to leave thin golden rings on the surface.** Don't stir it in. The oil sits on top and you get it in different concentrations through each spoonful.
---
## Step 8 · The Wok
### High heat, fast hands.
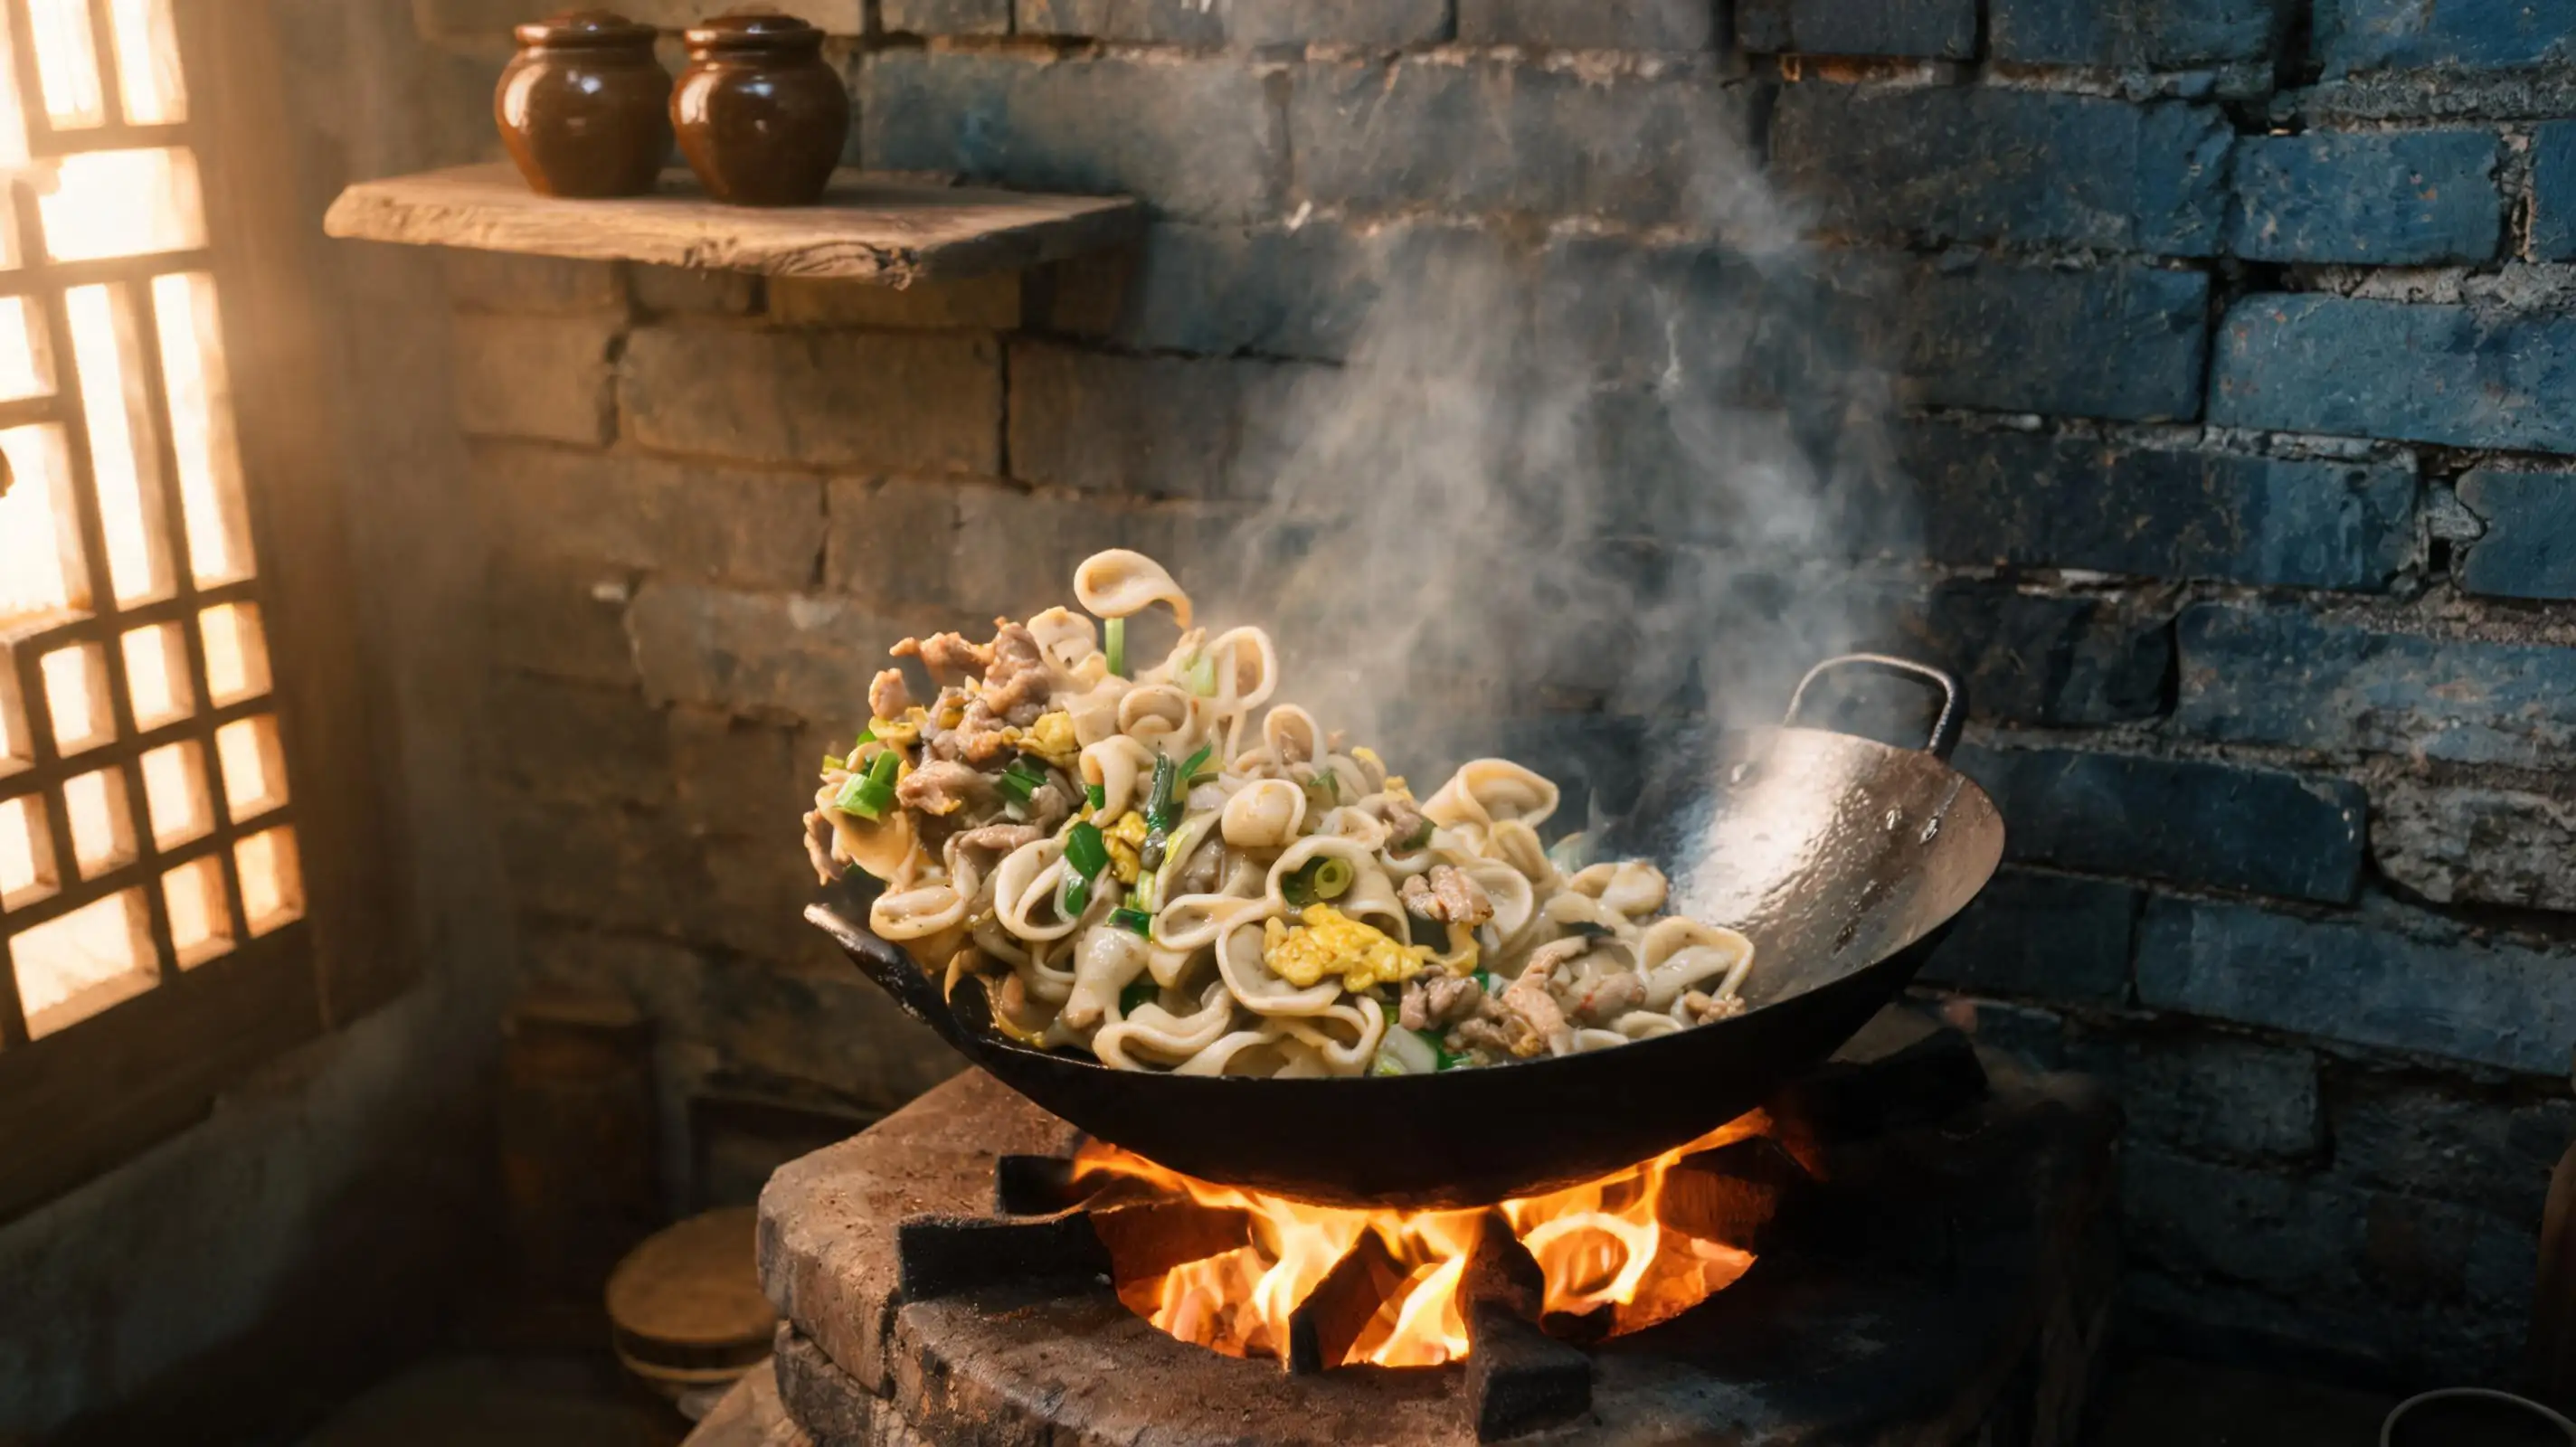
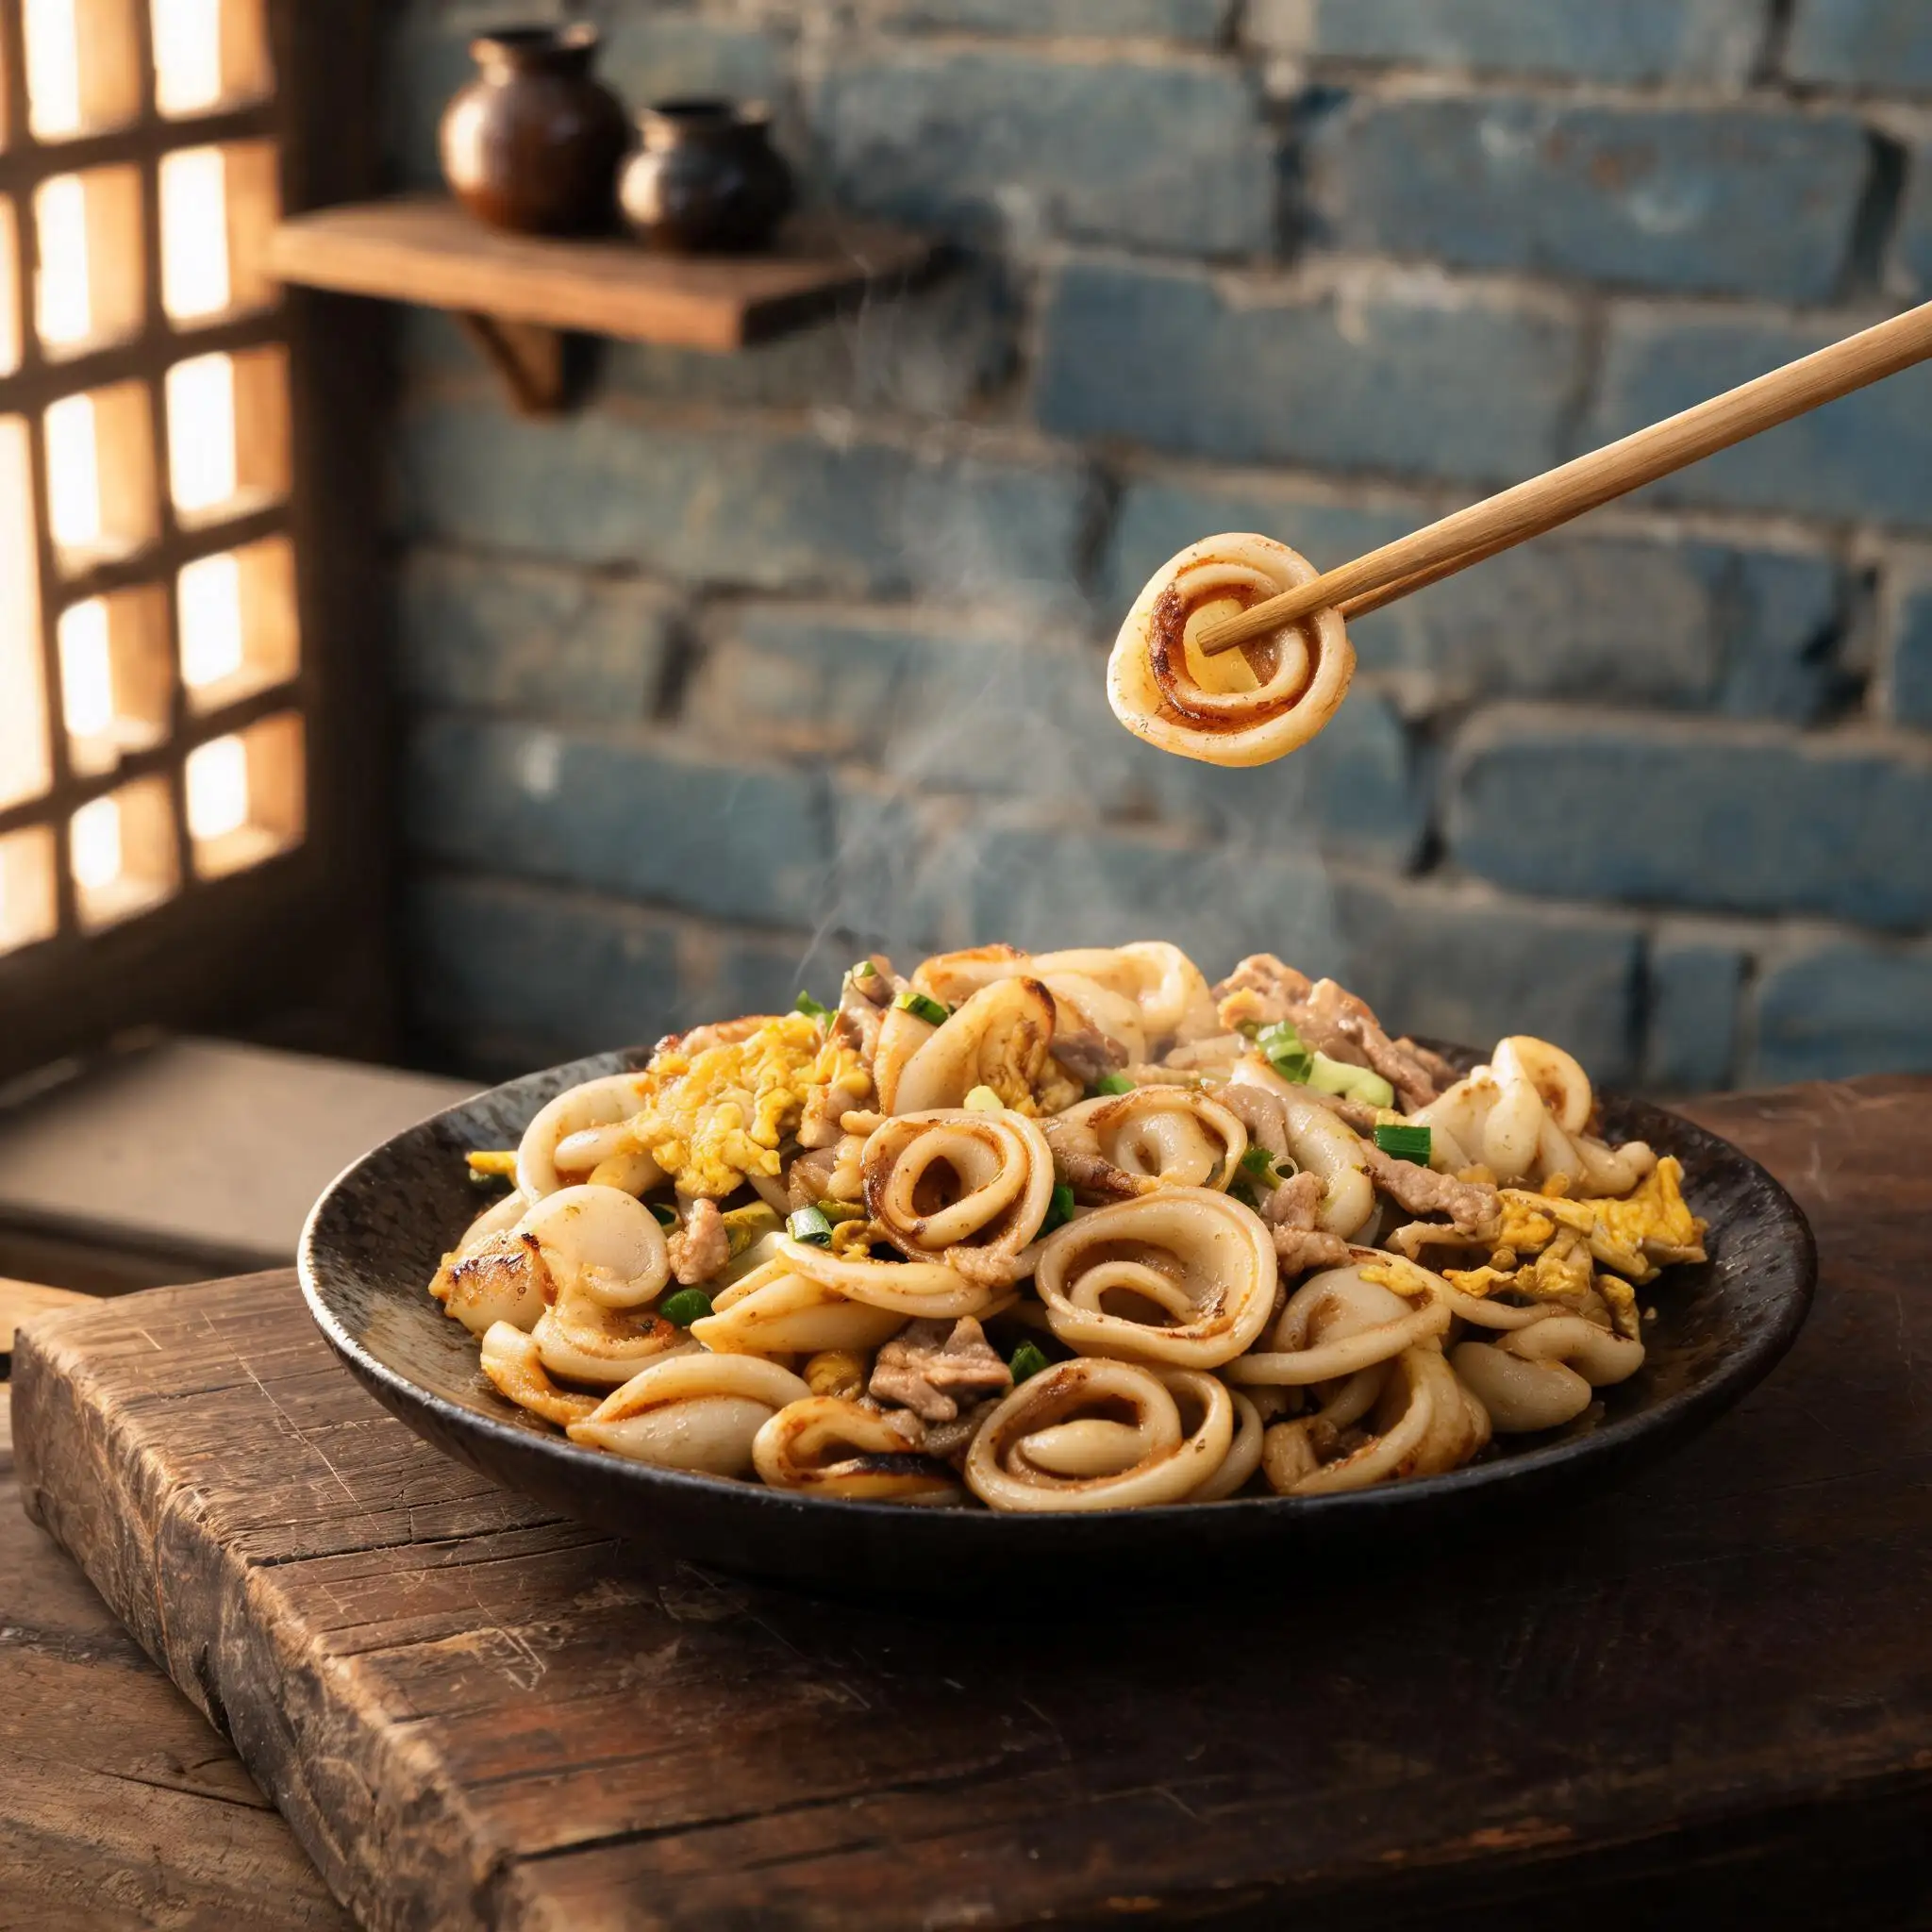
Get a dry iron wok smoking hot before you add any oil. Swirl in the oil, add the shredded pork, stir until just cooked through. Push the pork to the sides, crack in the eggs and scramble them in the center until they're just set — still wet-looking, not dry. Add the cooked cat ears and toss everything together hard.
**The cat ears need direct contact with the hot wok surface to pick up any color.** Don't stir constantly — let them sit for 10–15 seconds at a time so the bottom browns slightly.
Add soy sauce along the edge of the wok (not directly onto the food), toss once more with the green onion, and plate immediately.
> ⚠️ If the wok isn't hot enough when you start, the cat ears will steam instead of fry and you lose all the texture contrast.
---
## Step 9 · The Plate
### One dough, two answers.
The soup version is quiet — warm broth, soft ears floating just below the surface, faint sesame on top. The stir-fry version is the opposite: edges with a little char, egg clinging to the curves, green onion smell hitting you before the plate lands on the table.
Same dough. Same shape. The cat ear is just a vehicle — where you send it is up to you.
## Cat Ear Pasta — Two Ways to Eat One Dough
> You press the dough with your thumb, give it a little push forward, and it curls up into a small shell
> Takes about three seconds per piece. Nobody told you it would be this satisfying
> Same dough, two directions — one into broth, one into the wok
---
**Serves** 3–4 · **Active time** 50 min · **Total time** 1 hr
## Ingredients
**Main**
| Item | Amount |
|------|--------|
| All-purpose flour | 300 g |
| Warm water | ~150 ml |
| Fine salt | 1 tsp |
**Soup version toppings**
| Item | Amount |
|------|--------|
| Pork shoulder, thinly sliced | 100 g |
| Fresh spinach | 80 g |
| Clear pork bone broth | 600 ml |
| Toasted sesame oil | 1 tsp |
| Salt | to taste |
**Stir-fry version**
| Item | Amount |
|------|--------|
| Pork loin, shredded | 100 g |
| Eggs | 2 |
| Green onion, sliced | 2 stalks |
| Light soy sauce | 1.5 tbsp |
| Neutral oil | 2 tbsp |
| White pepper | pinch |
---
## Step 1 · The Lineup
### Three ingredients. That's all.
Flour, water, salt. Put the salt into the flour first and mix dry, then add warm water a little at a time. You don't want it too soft — this dough needs to hold its shape when you push it across the board. Aim for something smoother than bread dough, firmer than dumpling dough.
**The water temperature matters: around 40°C keeps the dough cooperative and easy to shape later.**
---
## Step 2 · The Knead
### Press until it stops fighting back.
Knead for at least 10 minutes. In the beginning the dough tears and resists; halfway through it starts to come together; by the end it should feel smooth and slightly elastic under your palm. This is the part people rush, and you can always tell in the final texture.
**Cover with a damp cloth and rest for 30 minutes.** The gluten needs time to relax or the dough will snap back when you roll it.
> ⚠️ Don't skip the rest. Dough that hasn't rested is stiffer to work and the cat ears won't curl as cleanly.
---
## Step 3 · The Cut
### Small cubes, consistent size.
Roll the rested dough into a thick log, then cut into small cubes — about 1 cm on each side, close to a dice. The size determines how the ears turn out: too big and they go thick and clunky, too small and they fall apart when you press them.
**Work in batches. Keep the uncut dough covered so it doesn't dry out at the edges.**
---
## Step 4 · The Shape
### One thumb, one push, one curl.
Place a cube on a ridged wooden board or bamboo mat. Press your thumb into the center and push forward in one motion — the dough flattens, the edges lift, and it rolls off the board as a small concave shell about 1 cm across. The grooves from the board leave ridges on the back, which is exactly what you want: they hold onto sauce and broth.
**The motion is press-and-push, not just press.** If you only push down, you get a flat disc. The forward momentum is what creates the curl. After a few dozen pieces your thumb starts to find its own rhythm — you'll know you've got it when the ears come off the board looking consistent without you having to think about it.
---
## Step 5 · The Ears
### Let them sit and dry slightly before cooking.
Once shaped, scatter the cat ears on the board with a light dusting of flour so they don't stick together. At this stage they look pale cream-white, small shells with edges turned up. If you look at them from the side you can see the concave center and the ridged back.
**This batch can be cooked immediately or dried fully and stored.** Dried cat ears keep for weeks and cook the same way — just add 1–2 minutes to the boiling time.
---
## Step 6 · The Boil
### Boiling water, not simmering.
Bring a pot of well-salted water to a full rolling boil. Add the cat ears in batches — don't crowd them or the temperature drops and they turn sticky. They'll sink to the bottom first, then float back up after 2 minutes. Cook for another minute after they float.
**Fresh ones take 3 minutes total; dried ones take 4–5.** Either way, pull one out and press it — it should give slightly but still have a gentle chew.
---
## Step 7 · The Soup Bowl
### Clear broth, simple finish.
Heat the pork bone broth in a clay pot until it comes to a gentle simmer. Add the sliced pork and spinach and let them cook through — the pork takes about 2 minutes, the spinach wilts almost immediately. Ladle the cooked cat ears into a rough ceramic bowl, pour the broth over the top.
**Finish with a small drizzle of sesame oil — just enough to leave thin golden rings on the surface.** Don't stir it in. The oil sits on top and you get it in different concentrations through each spoonful.
---
## Step 8 · The Wok
### High heat, fast hands.
Get a dry iron wok smoking hot before you add any oil. Swirl in the oil, add the shredded pork, stir until just cooked through. Push the pork to the sides, crack in the eggs and scramble them in the center until they're just set — still wet-looking, not dry. Add the cooked cat ears and toss everything together hard.
**The cat ears need direct contact with the hot wok surface to pick up any color.** Don't stir constantly — let them sit for 10–15 seconds at a time so the bottom browns slightly.
Add soy sauce along the edge of the wok (not directly onto the food), toss once more with the green onion, and plate immediately.
> ⚠️ If the wok isn't hot enough when you start, the cat ears will steam instead of fry and you lose all the texture contrast.
---
## Step 9 · The Plate
### One dough, two answers.
The soup version is quiet — warm broth, soft ears floating just below the surface, faint sesame on top. The stir-fry version is the opposite: edges with a little char, egg clinging to the curves, green onion smell hitting you before the plate lands on the table.
Same dough. Same shape. The cat ear is just a vehicle — where you send it is up to you.