·5/14/2026
from
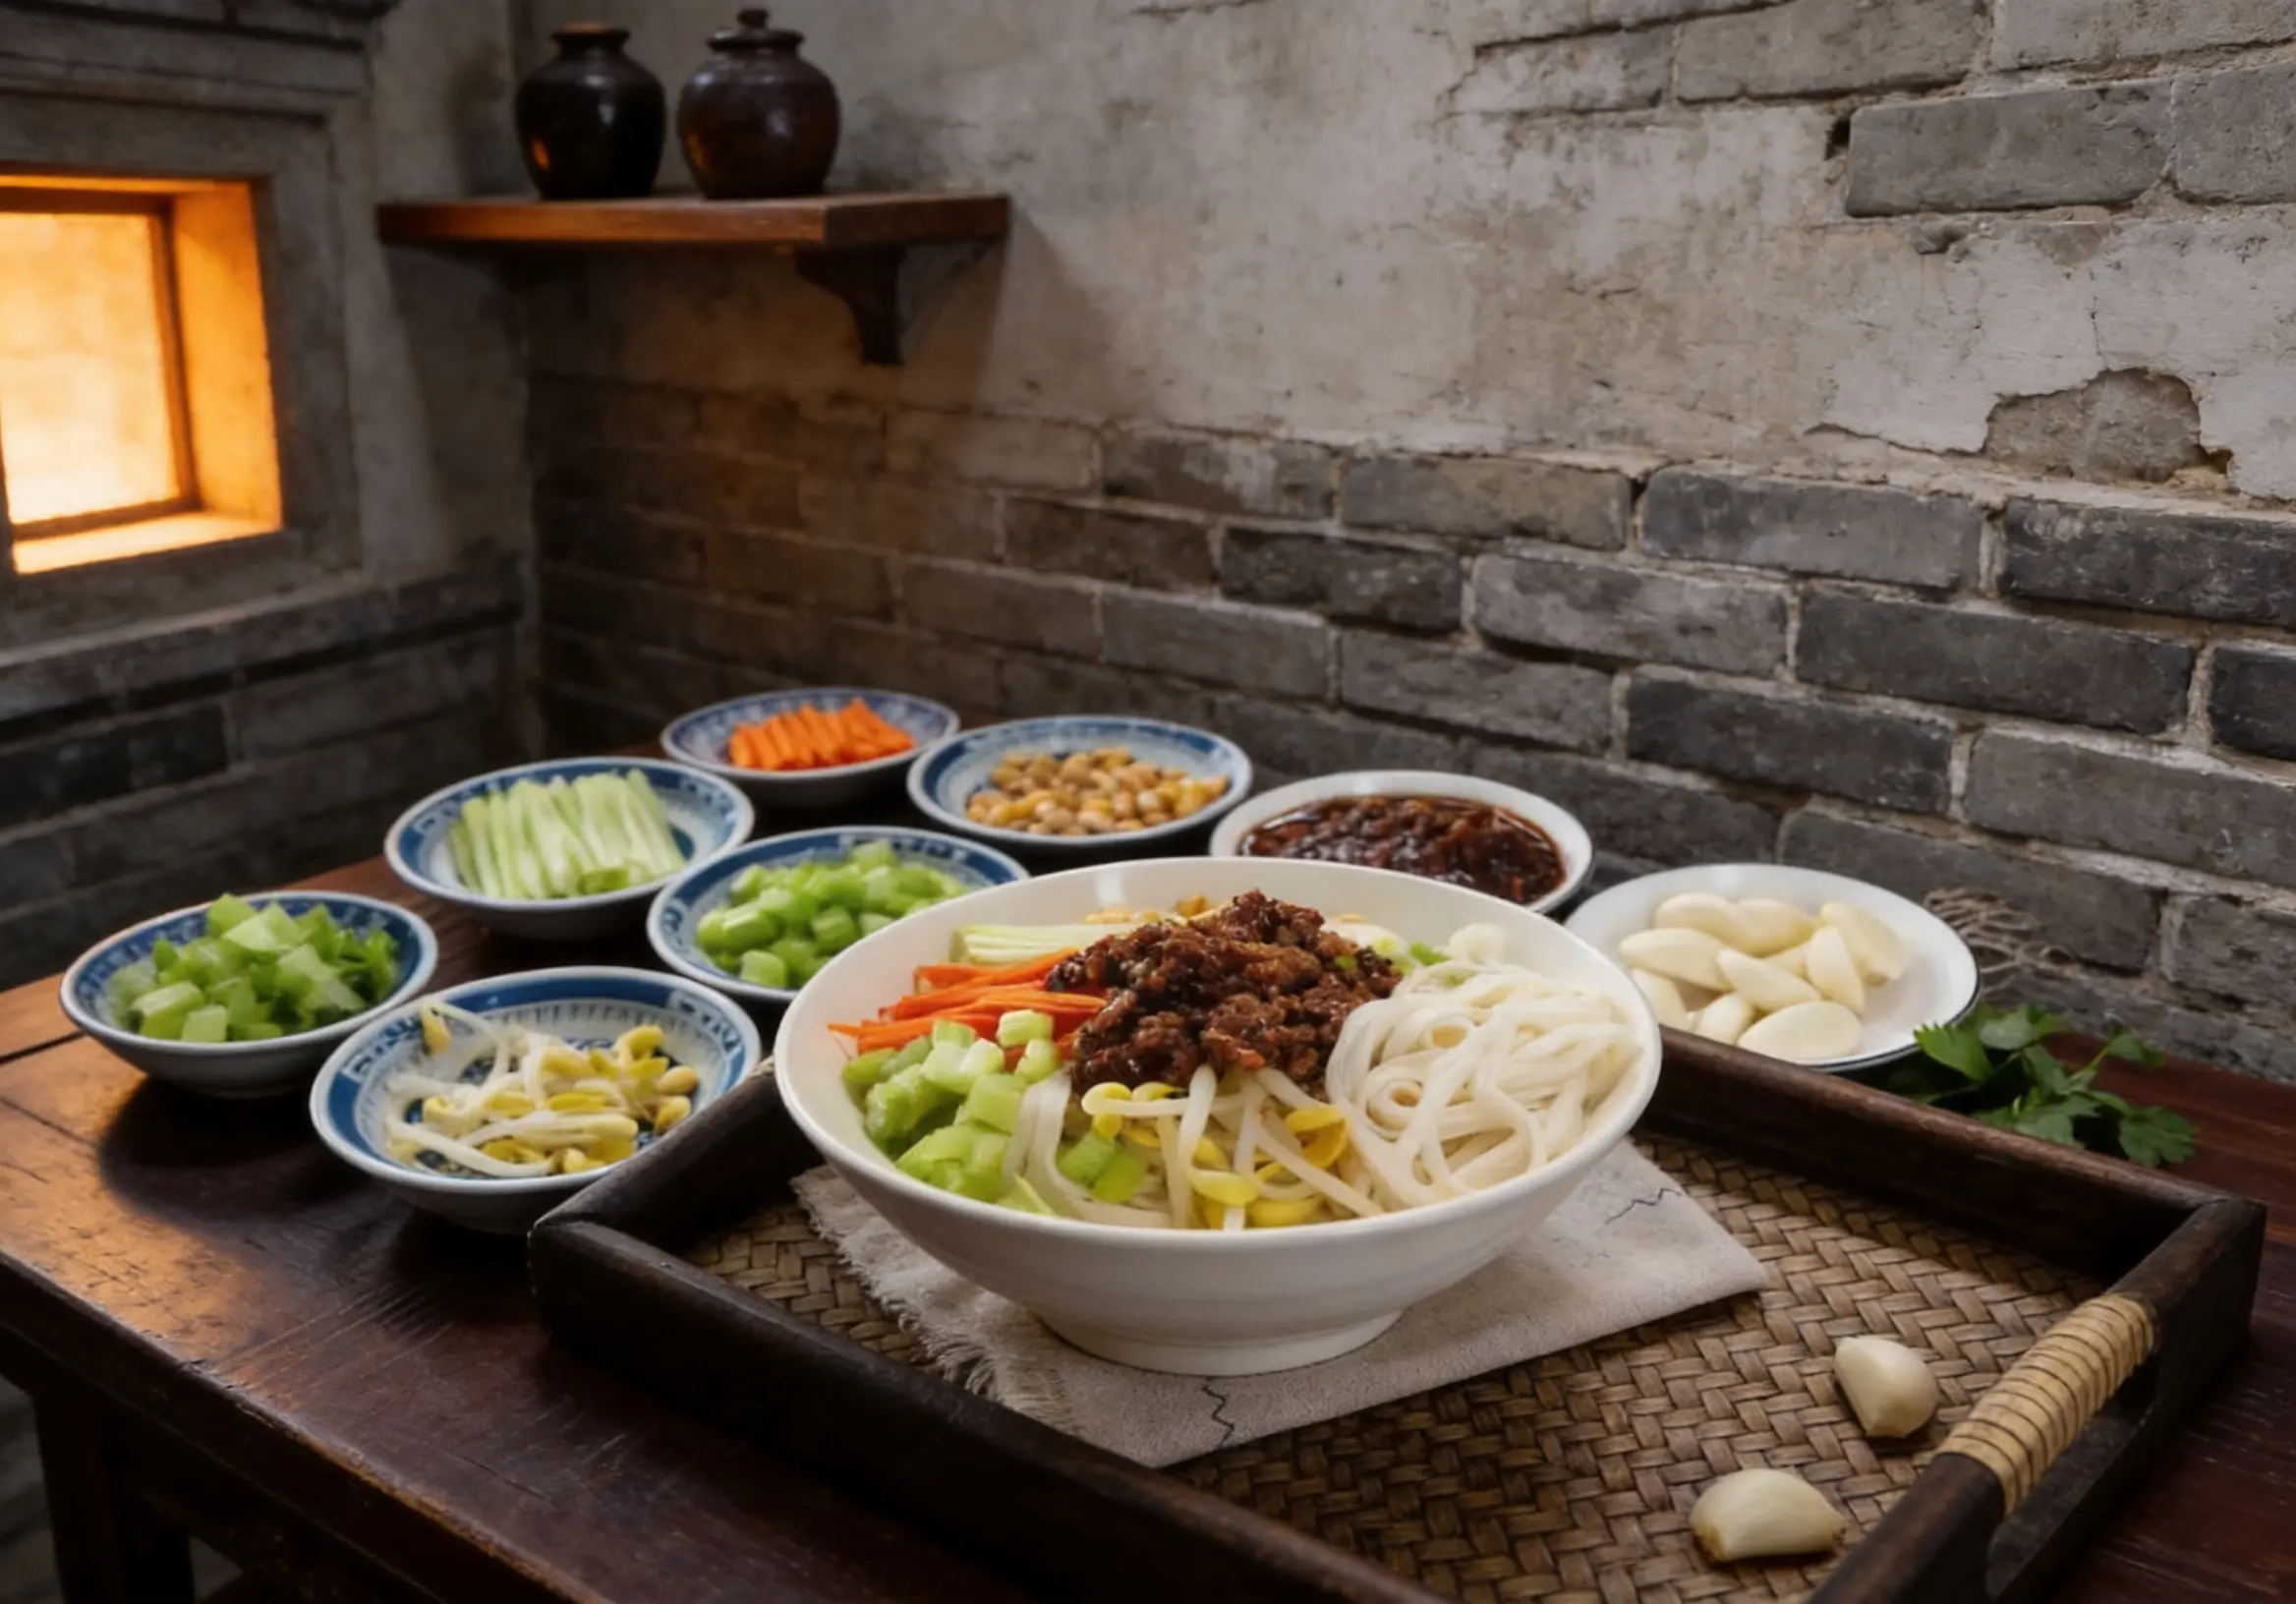
## Ingredients
**Main**
| Item | Amount |
|------|--------|
| Pork belly | 300 g, cut into 1.5 cm cubes |
| Fresh hand-rolled wheat noodles | 400 g |
**Sauce**
| Item | Amount |
|------|--------|
| Dry yellow soybean paste (干黄酱) | 150 g |
| Sweet flour paste (甜面酱) | 50 g |
| Water | 120 ml |
| Neutral cooking oil | 1 tbsp |
**Condiments (菜码)**
| Item | Amount |
|------|--------|
| Cucumber | 1 medium, julienned |
| Mung bean sprouts | 100 g |
| Radish | 80 g, thin rounds |
| Edamame | 80 g, shelled and cooked |
| Celery | 60 g, thinly sliced |
| Whole garlic cloves | 4–5, served as-is |
> Yield: 2 large bowls · Best eaten immediately · Leftover sauce keeps refrigerated for 5 days
---
## Step 1 · The Lineup
### Everything out before the fire goes on
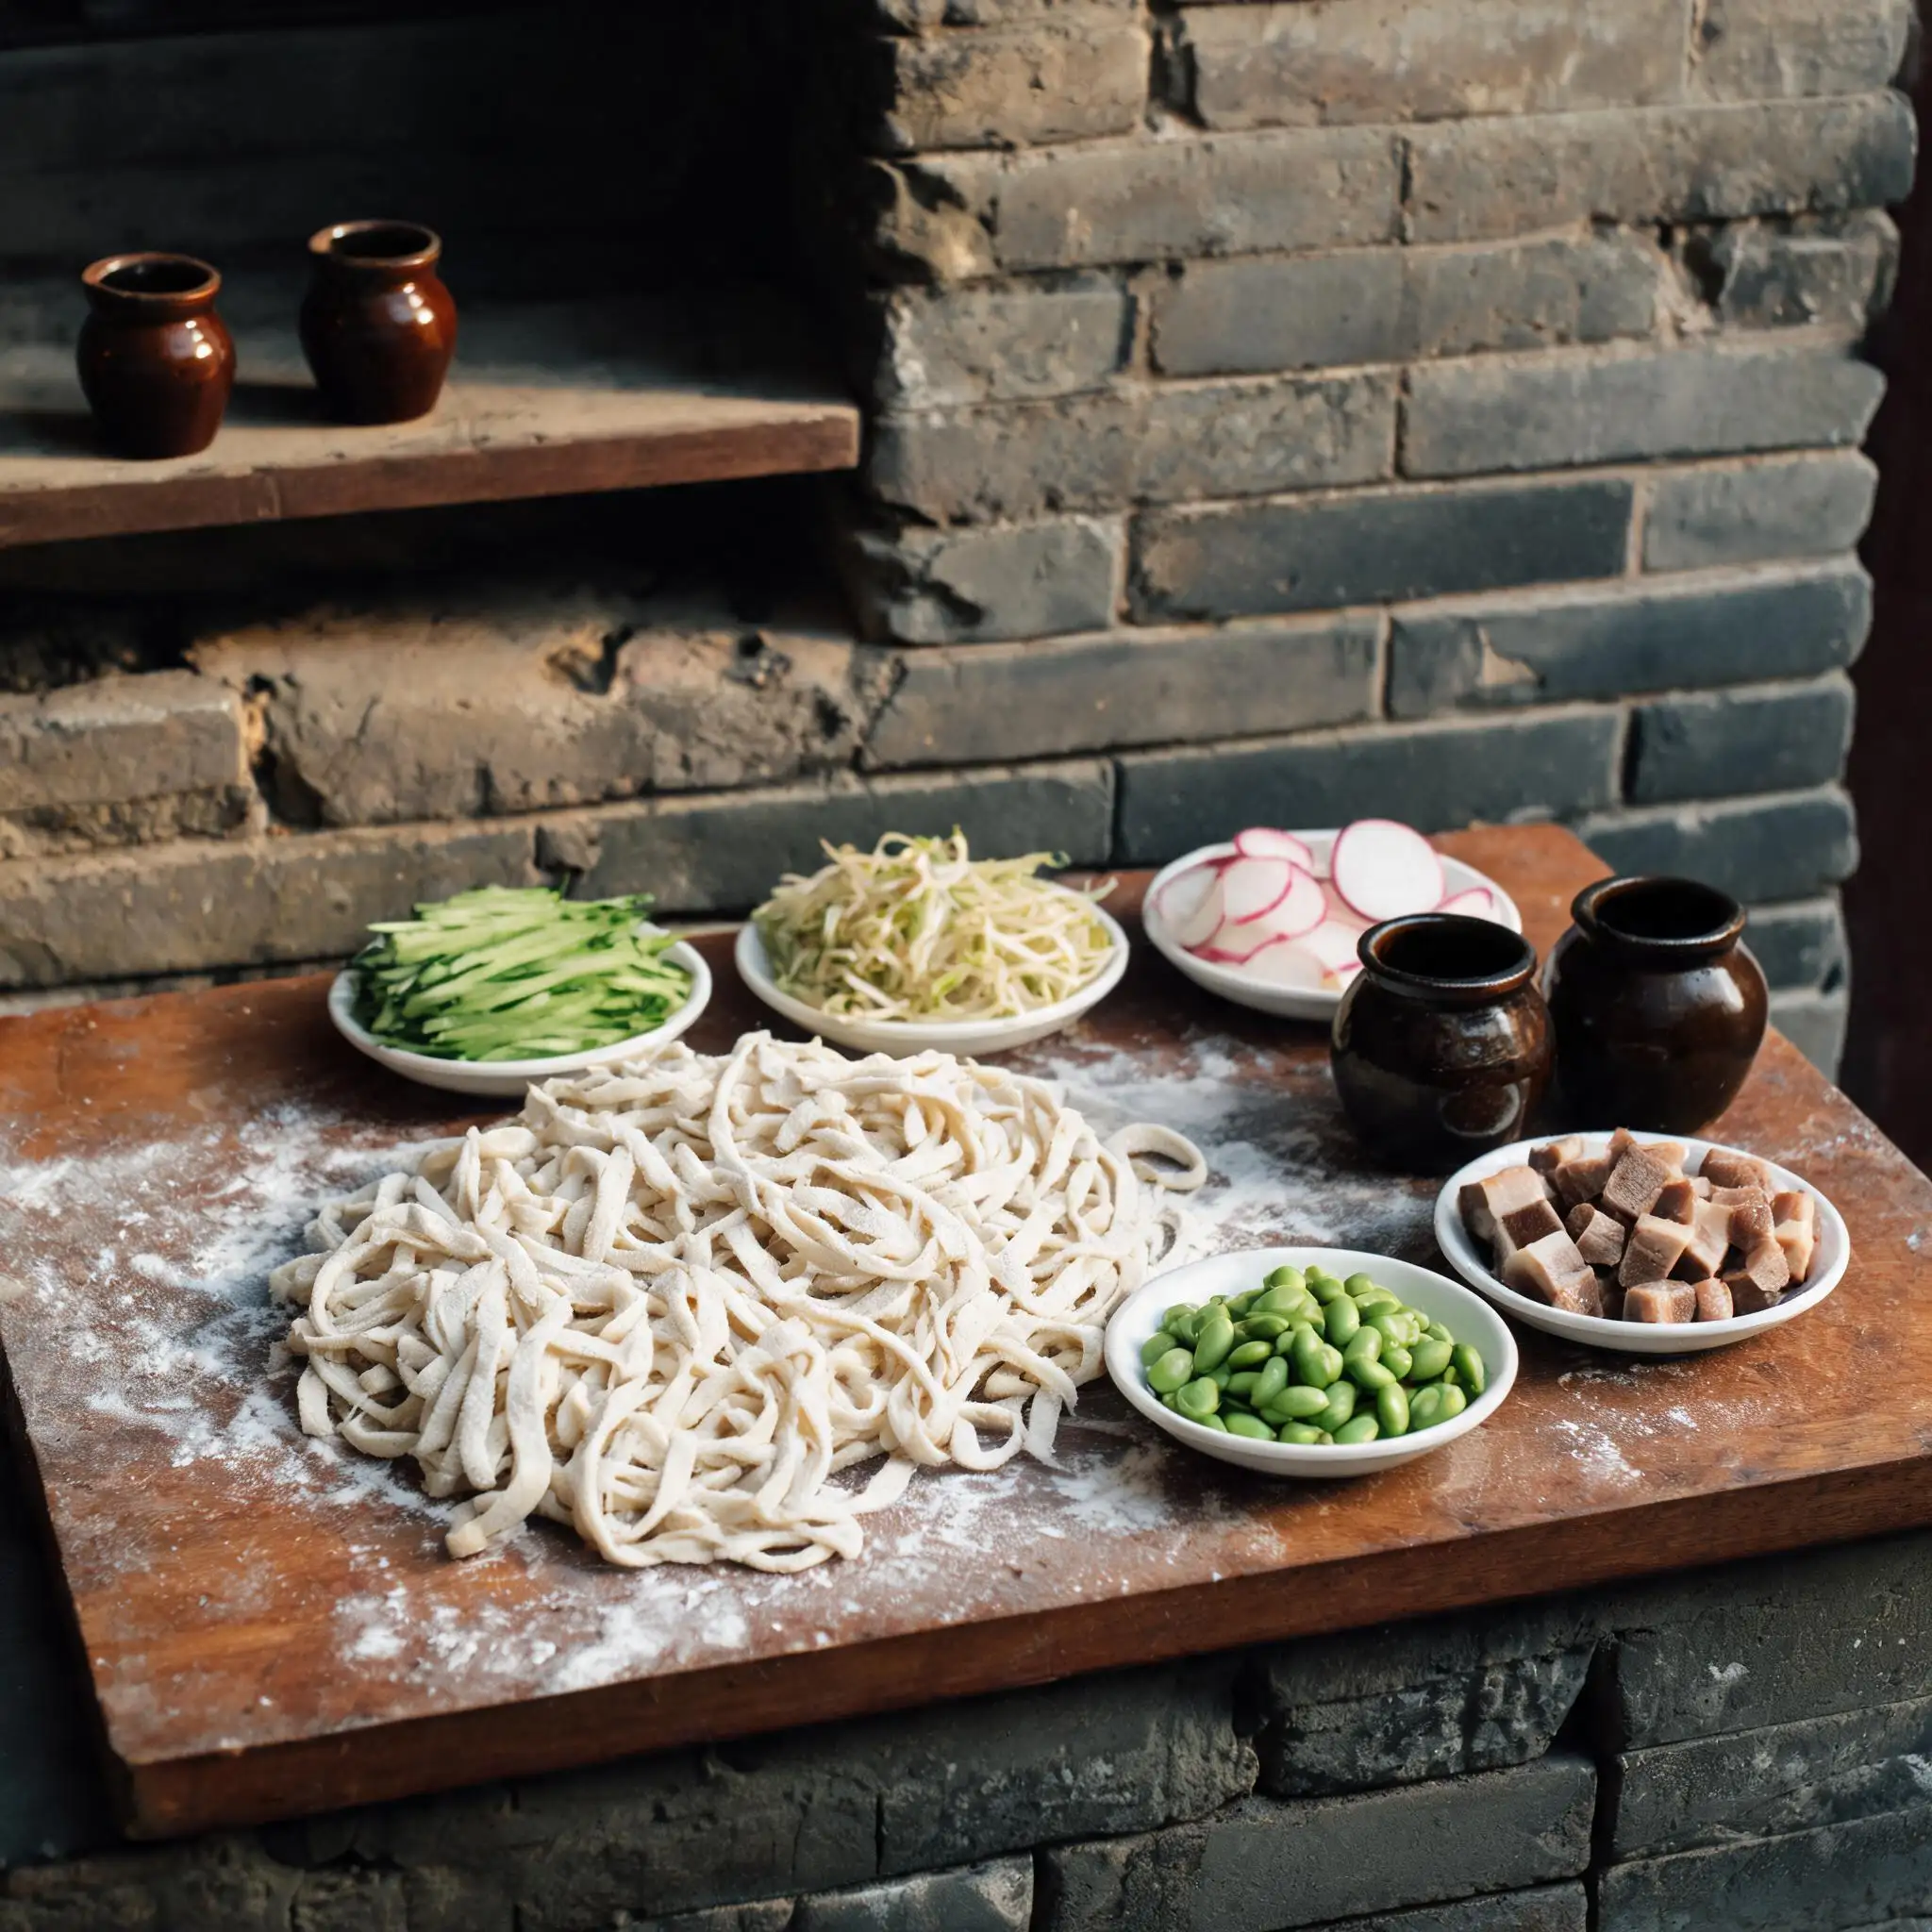
Cube the pork belly — **1.5 cm, dice-shaped, fat and lean together in every piece.** Not strips, not large chunks. Small enough that after slow cooking the edges dissolve into the sauce while the centers still hold.
Mix the two pastes before anything hits the wok. Dry yellow soybean paste is the main sauce — fermented, dense, salty. Sweet flour paste rounds off the sharp edge. **Ratio: 3:1 by weight, yellow to sweet.** Stir in 120 ml of water until the mixture loosens and pours slowly off a spoon. A thick undiluted paste hitting a hot wok scorches in under a minute — this step prevents that.
---
## Step 2 · The Render
### Cold wok, no oil, pork belly goes in first
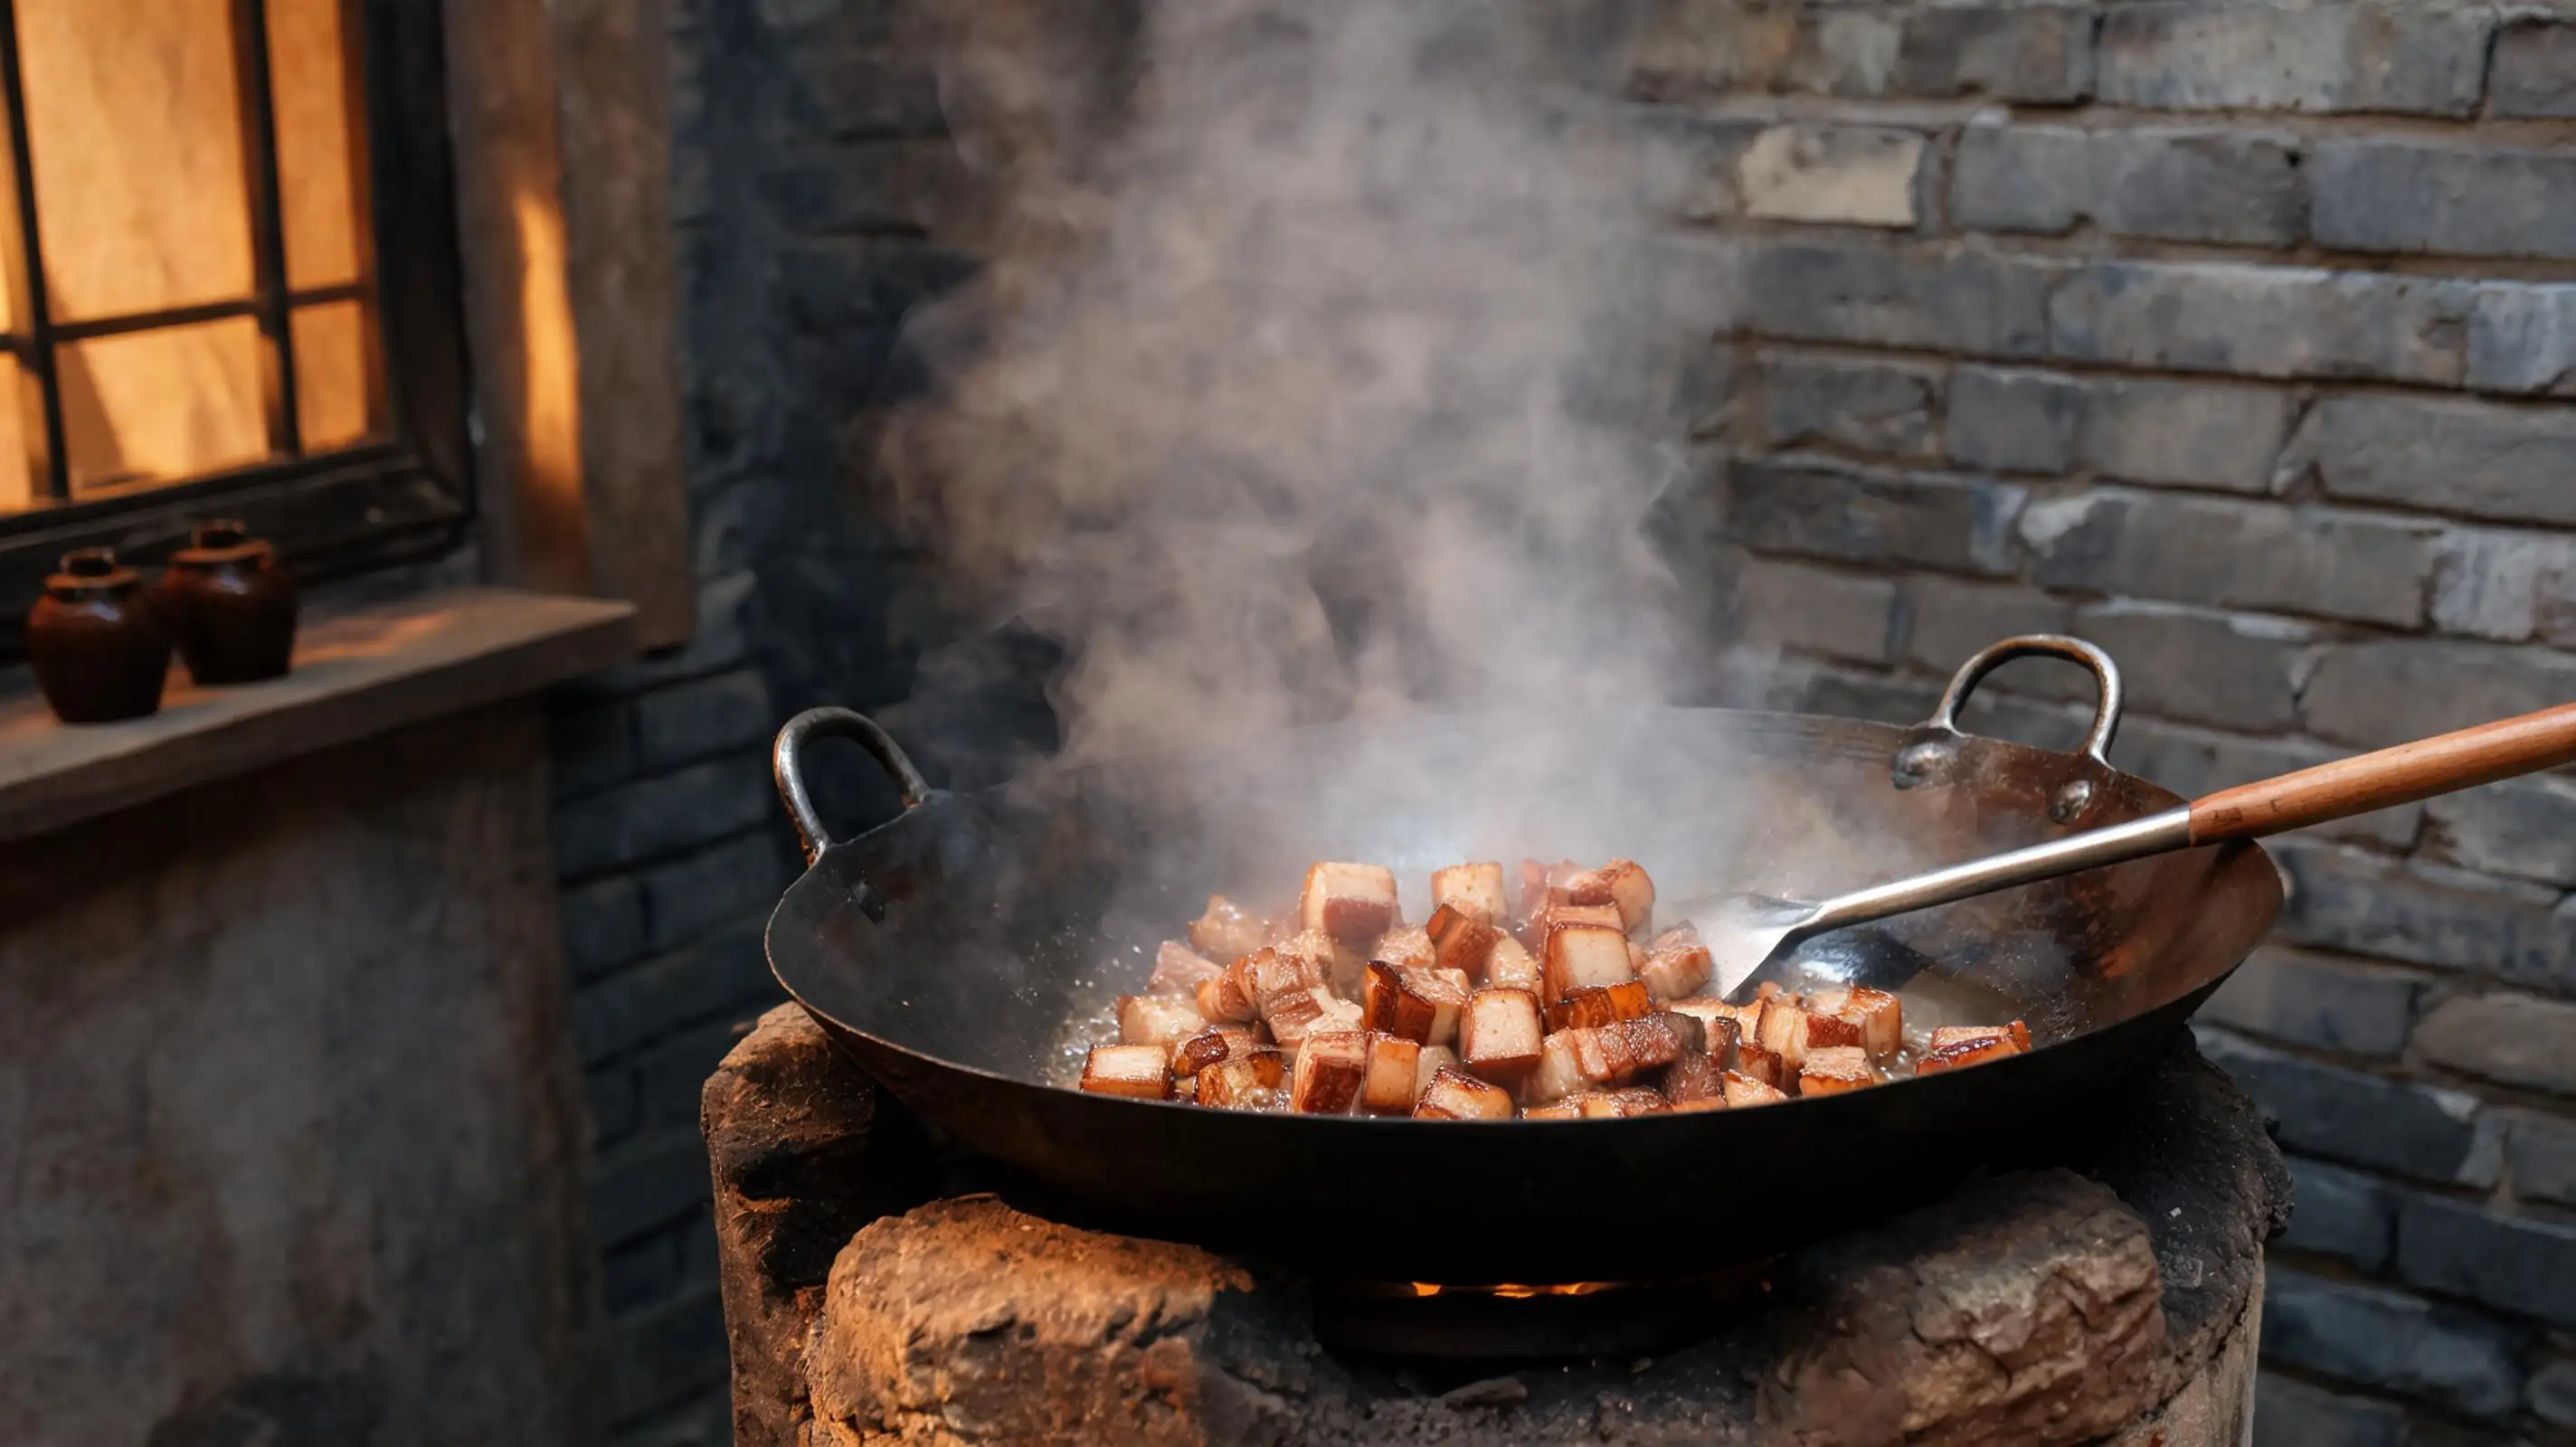
Put the pork cubes into a dry cold wok. Medium heat. Don't add oil, don't wait for the wok to preheat.
Fat starts rendering out within two minutes. **Keep the pieces moving and let the heat pull the fat out slowly** — 8 to 10 minutes until the cubes are golden on all sides and sitting in their own rendered fat. High heat makes the exterior crust before the interior fat releases, and you end up with tough chewy pieces that never fully integrate into the sauce.
When the meat is golden, push everything to one side of the wok.
*The kitchen already smells like something serious. That's just the fat starting to do its job.*
---
## Step 3 · The Paste
### Sauce straight into the hot fat
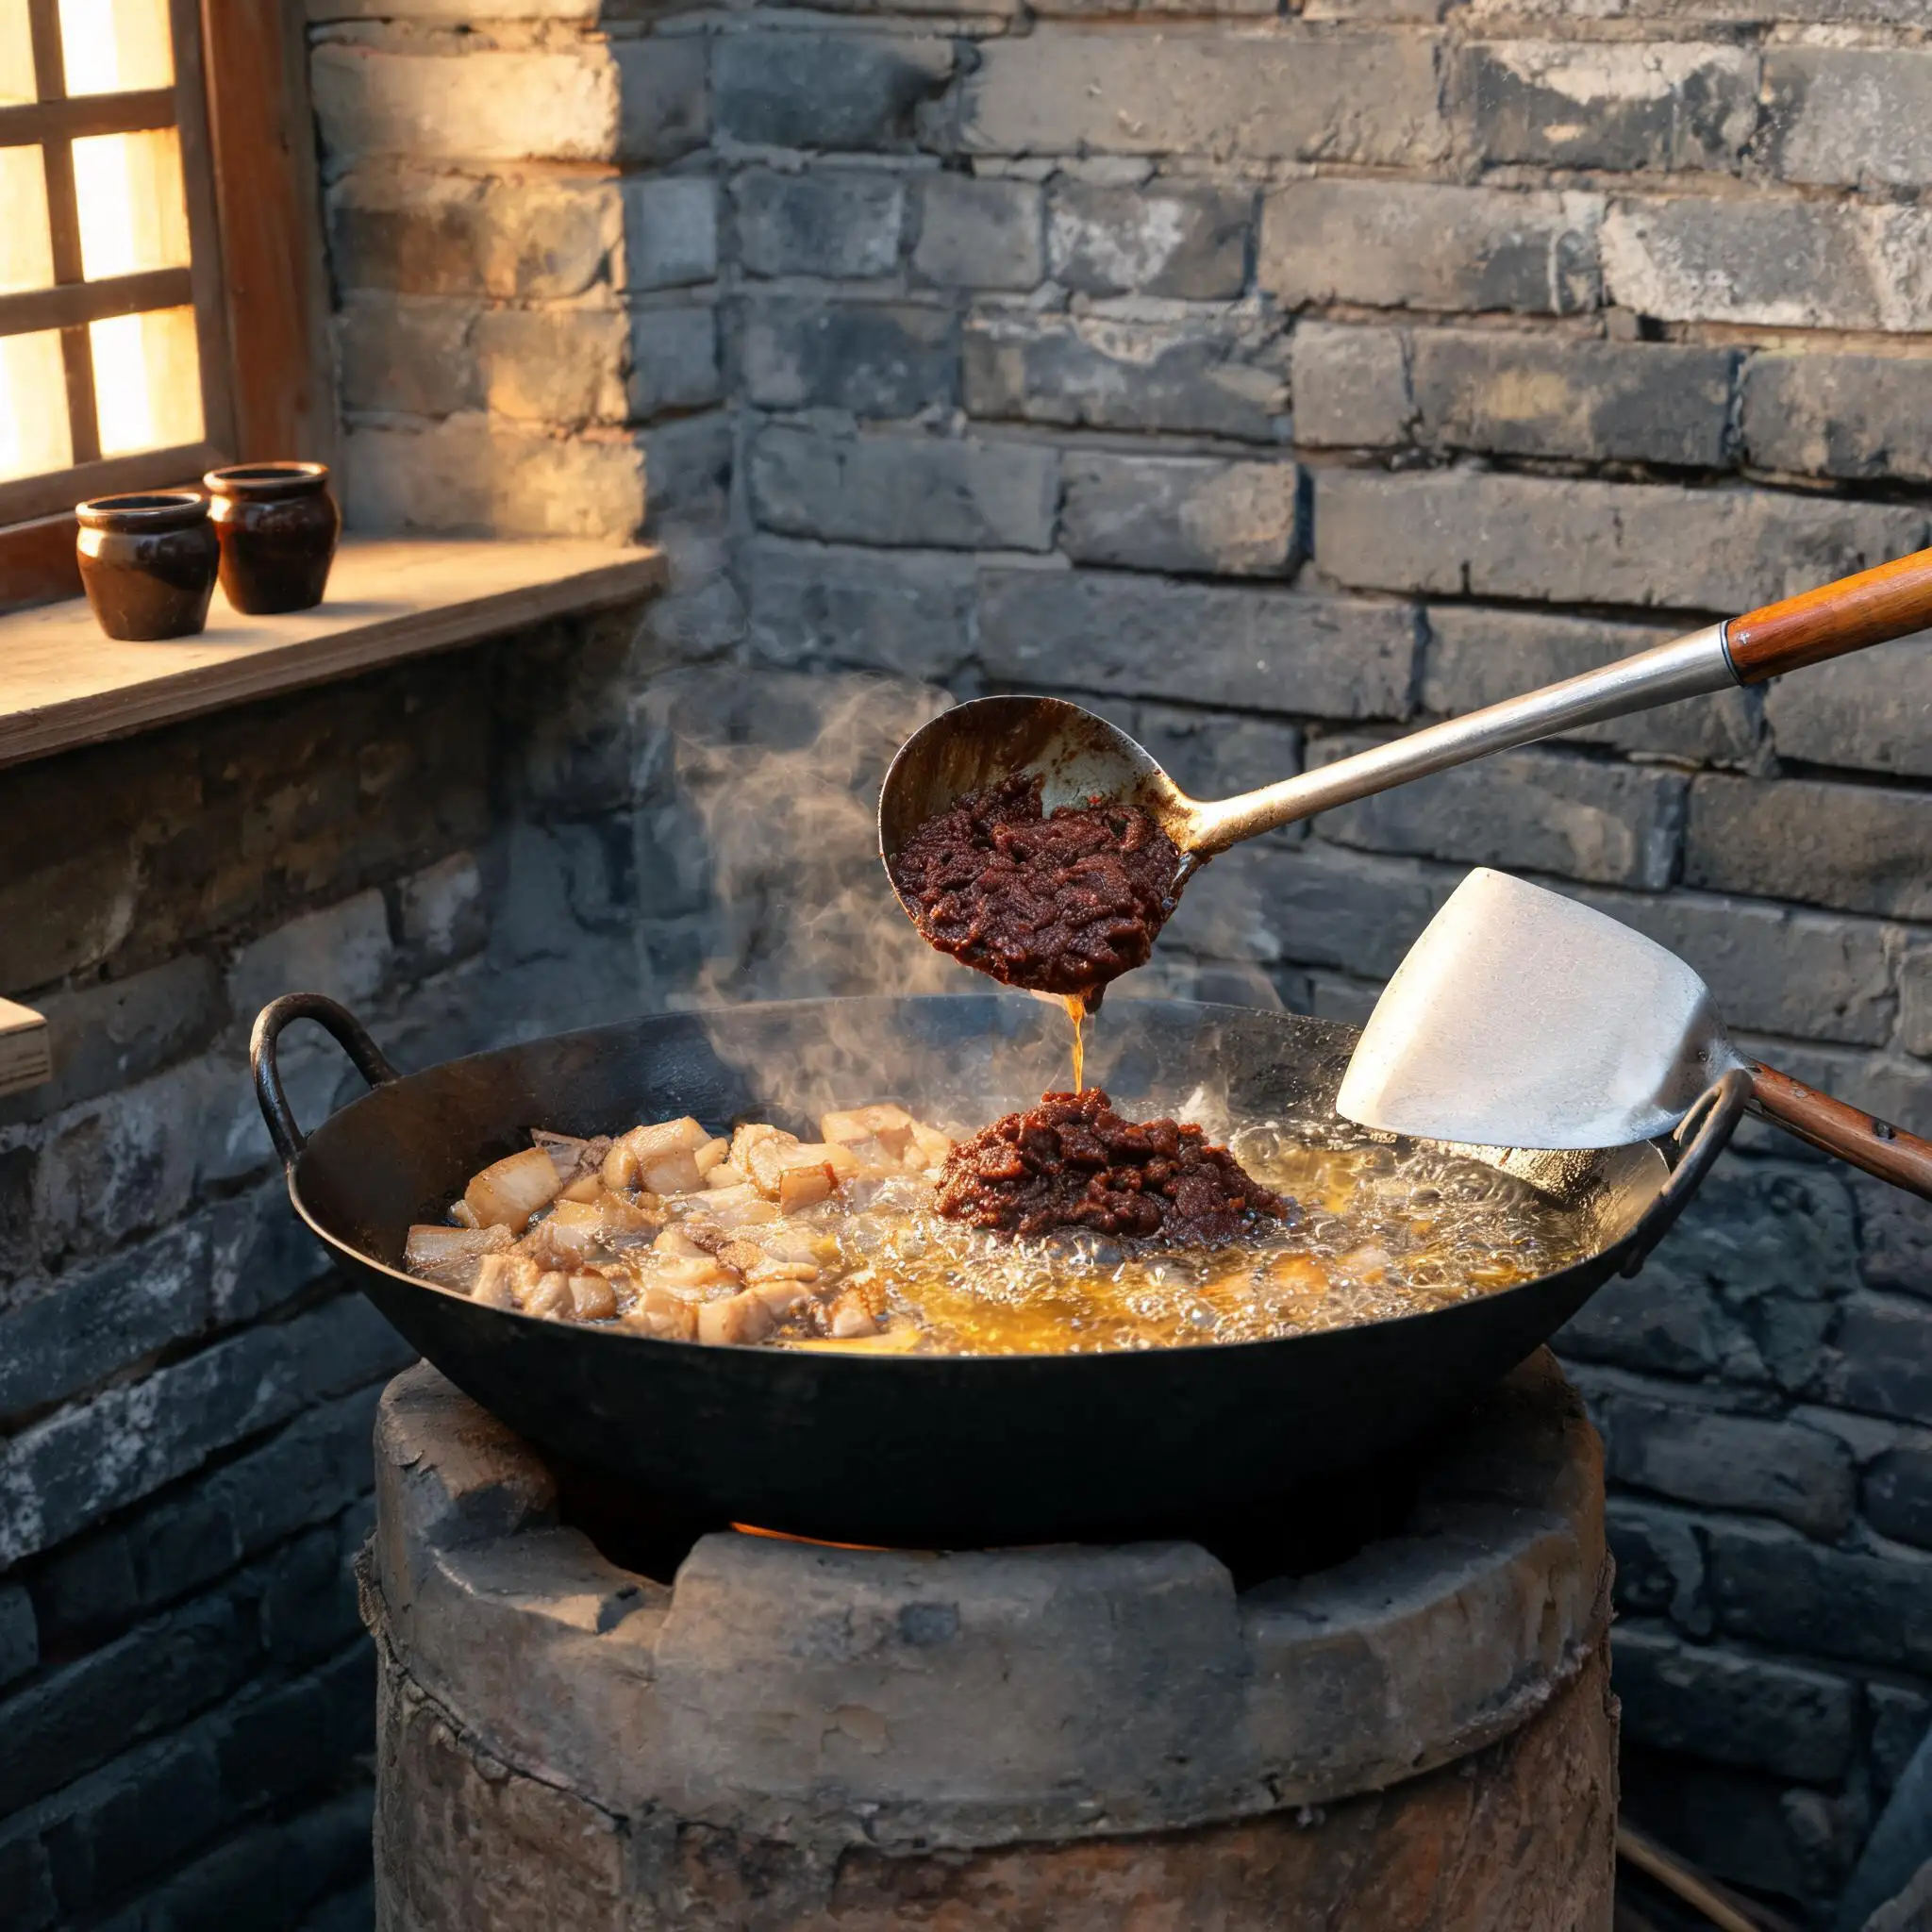
Add 1 tablespoon of oil to the cleared side if the rendered fat looks sparse. Pour the pre-mixed paste in.
It splatters immediately. Keep the spatula moving. **Press the paste flat against the wok surface and drag it — that direct contact kills the raw fermented edge** that comes straight out of the jar. This is 炒酱, and it can't be skipped. After about 1 minute, fold the pork back into the paste. Color shifts from muddy grey-brown to a deeper reddish-brown, and fat begins separating faintly at the edges.
> ⚠️ If the paste sticks and smells like it's scorching, heat is too high. Drop to low immediately and add a small splash of water. Burned soybean paste can't be fixed.
---
## Step 4 · The Simmer
### Forty minutes on the lowest heat you have
Add the remaining water, stir everything together, and turn the heat to the absolute minimum.
**This is the step most people shorten, and it shows.** High heat with less time leaves a sharp, fermented edge in the sauce. Low heat with full time rounds everything out — fat integrates, harshness cooks away, the sauce becomes itself. Stir every 5–6 minutes so the bottom doesn't catch.
| Elapsed | What you're looking for |
|---------|------------------------|
| 10 min | Sauce bubbling slowly, color deepening |
| 20 min | Thickening, fat pooling at wok edges |
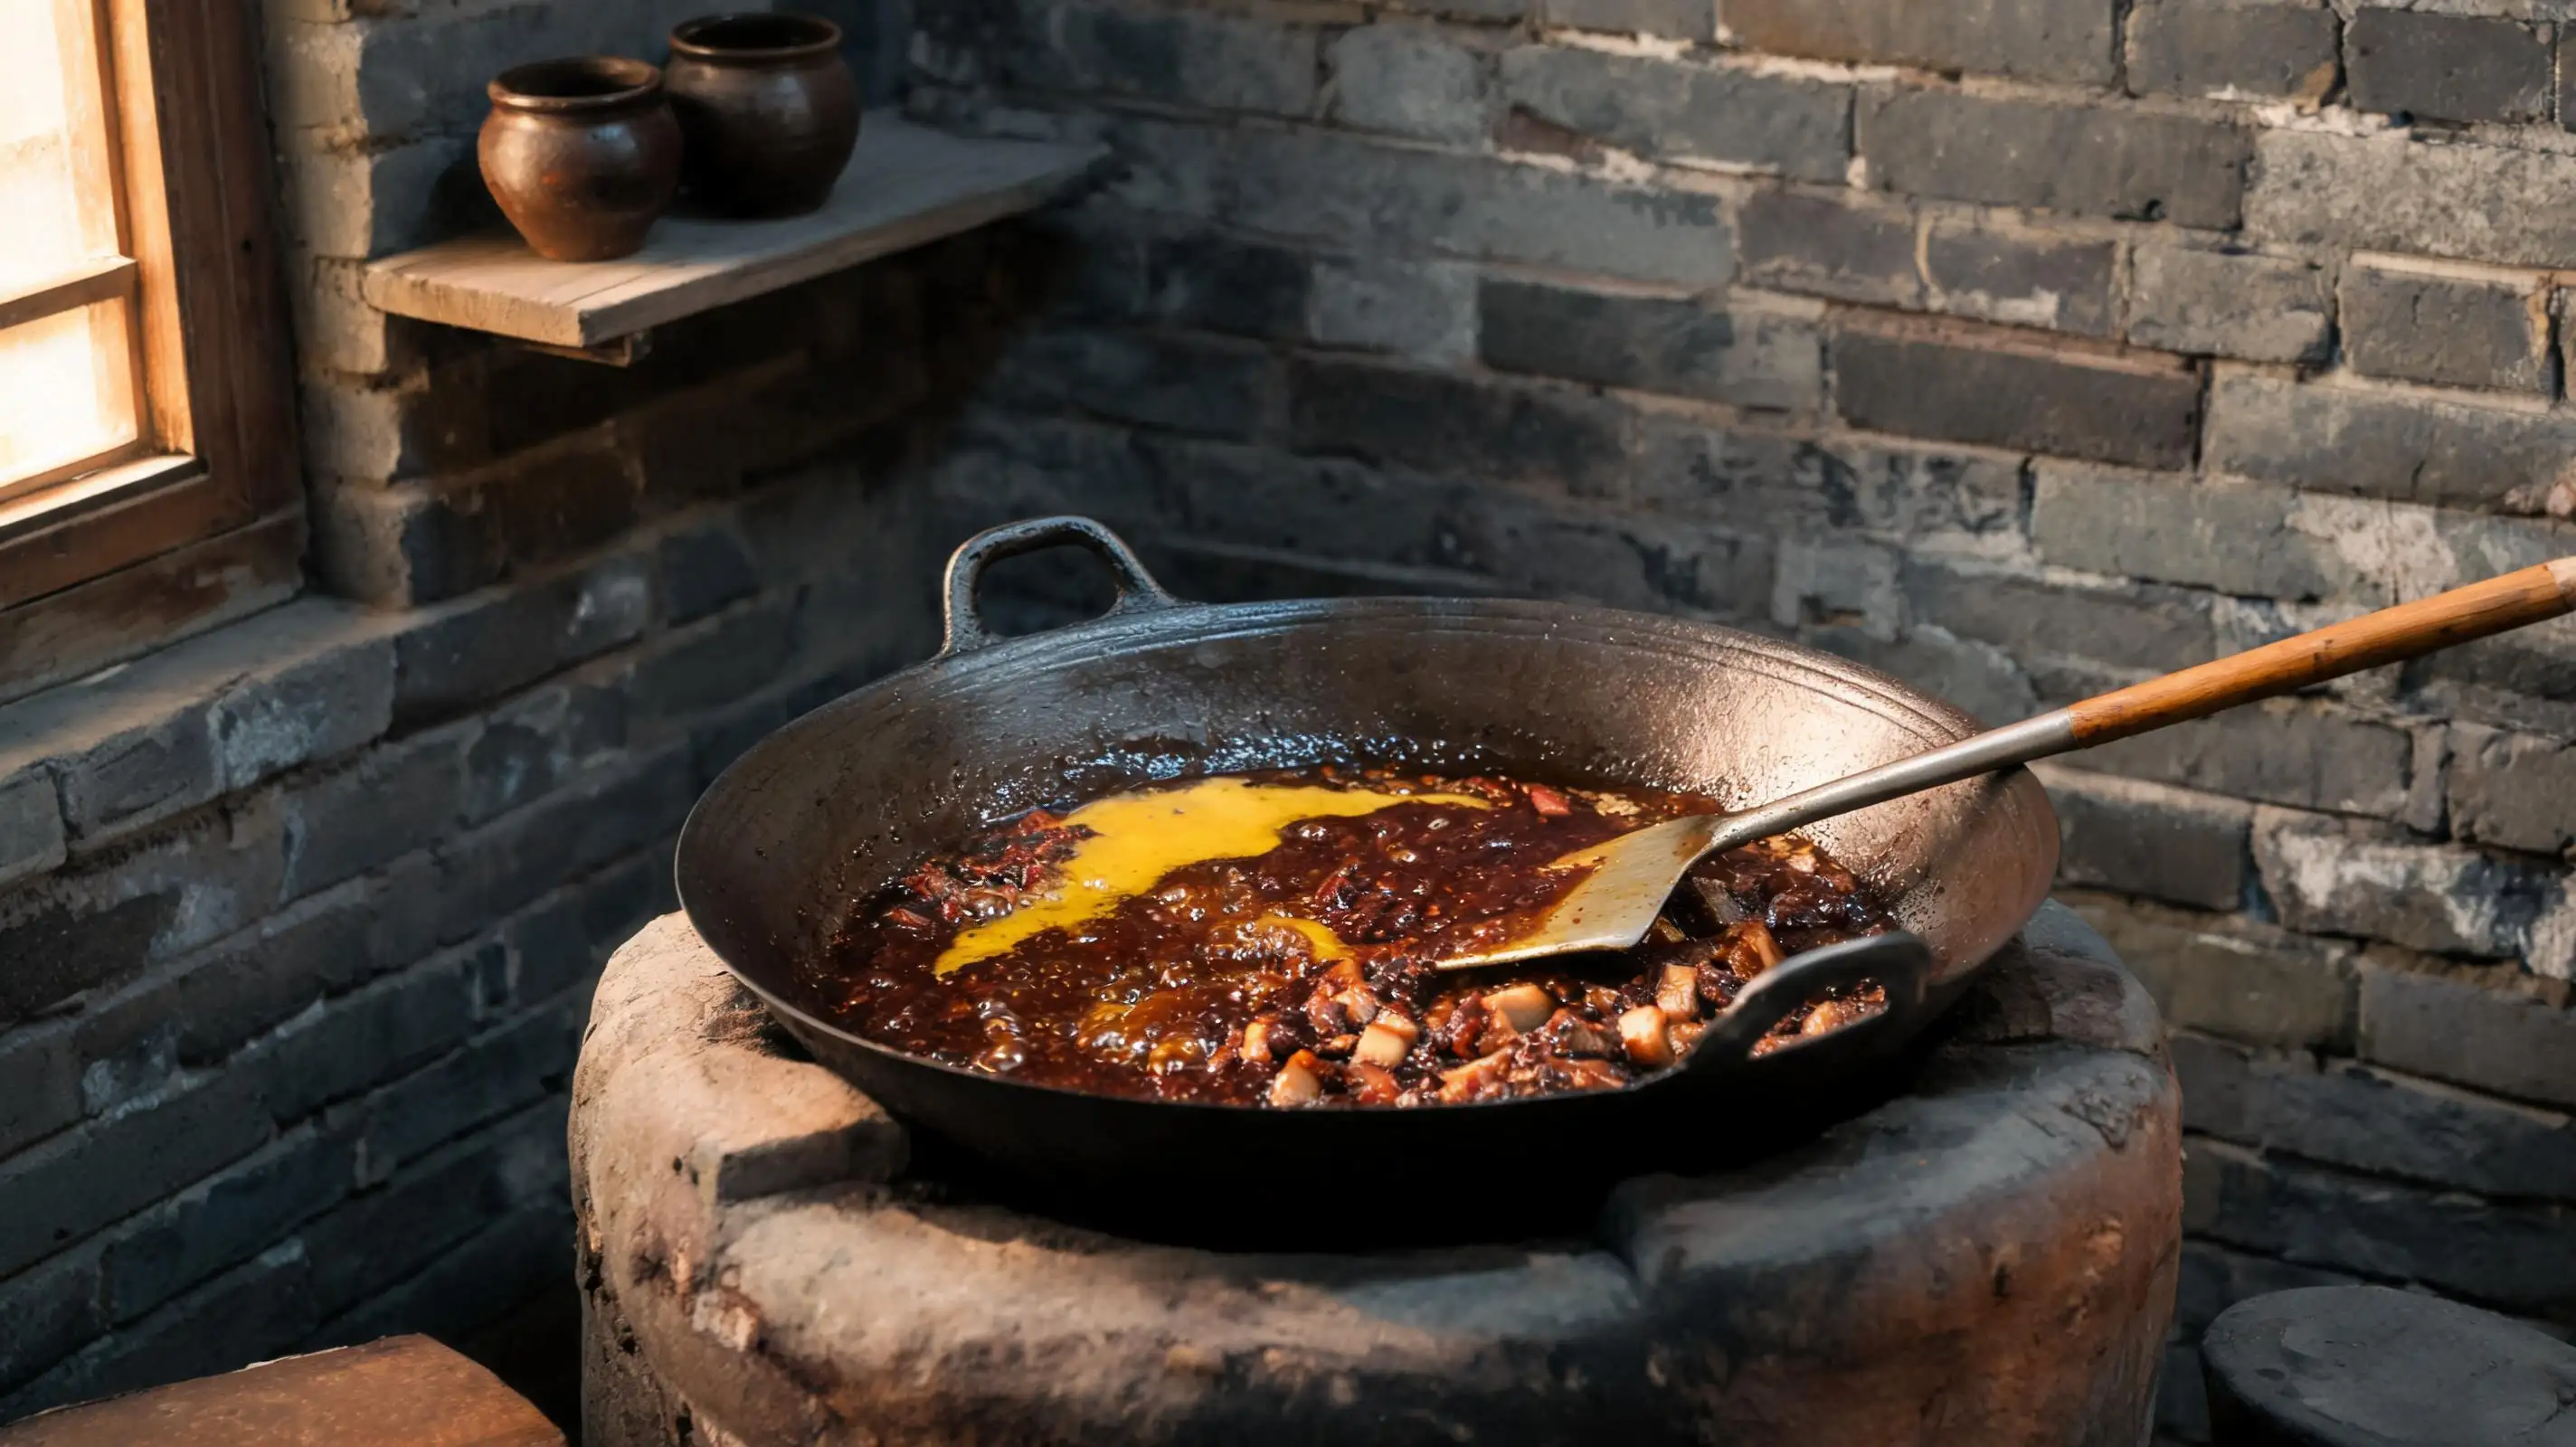
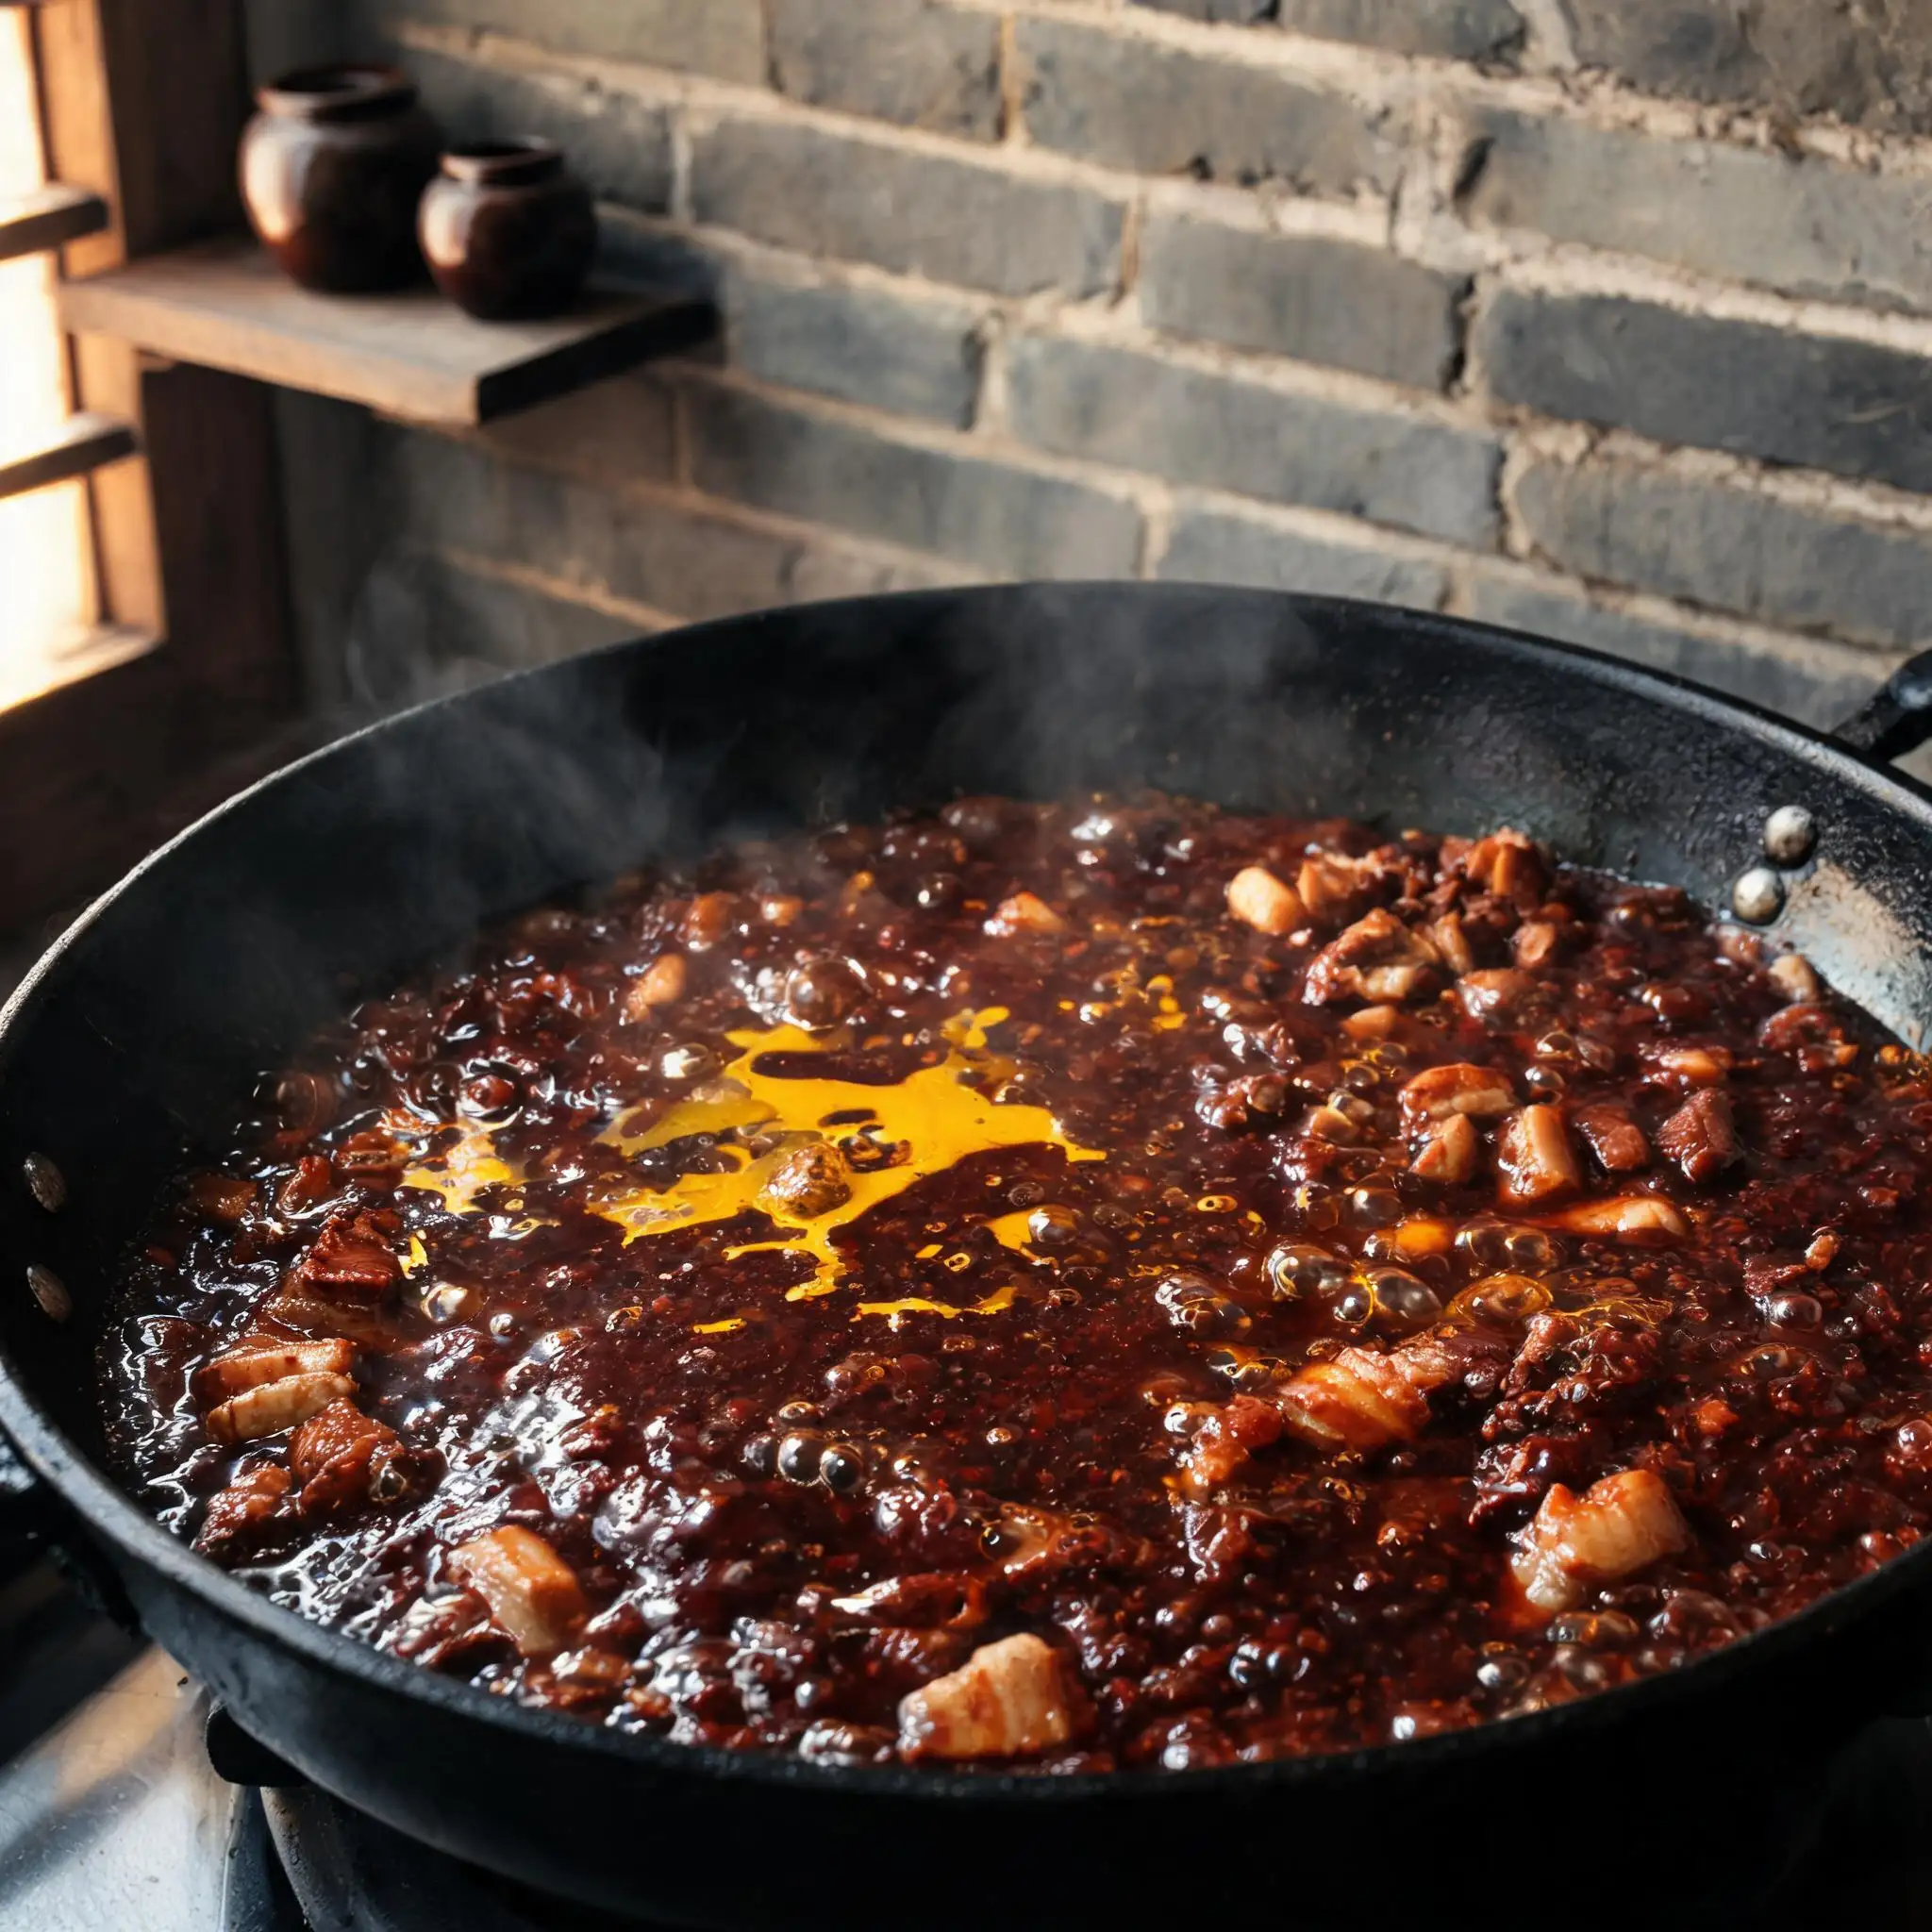
| 30 min | Clear amber oil floating on top of dark paste |
| 40 min | Pull from heat |
Done when you tilt the wok and see clear fat on top, paste underneath holding shape before slowly relaxing. Still watery — 5 more minutes.
---
## Step 5 · The Sauce
### What finished 炸酱 looks like
Clear amber fat on top. Deep brown paste underneath with chunks of pork that have started to fall apart at the edges while the centers still hold. That's the visual confirmation.
**Taste it: intensely savory, salty, slightly sweet, rich from the fat.** If there's a harsh uncooked bitterness at the back, 10 more minutes on low heat fixes it. Don't adjust the salt level — the sauce is calibrated to be eaten with plain noodles and cold vegetables, not tasted alone.
*Put the lid on. Zhajiang improves as it sits and the temperature evens out.*
---
## Step 6 · The Boil
### Full rolling boil, salted, no shortcuts on water volume
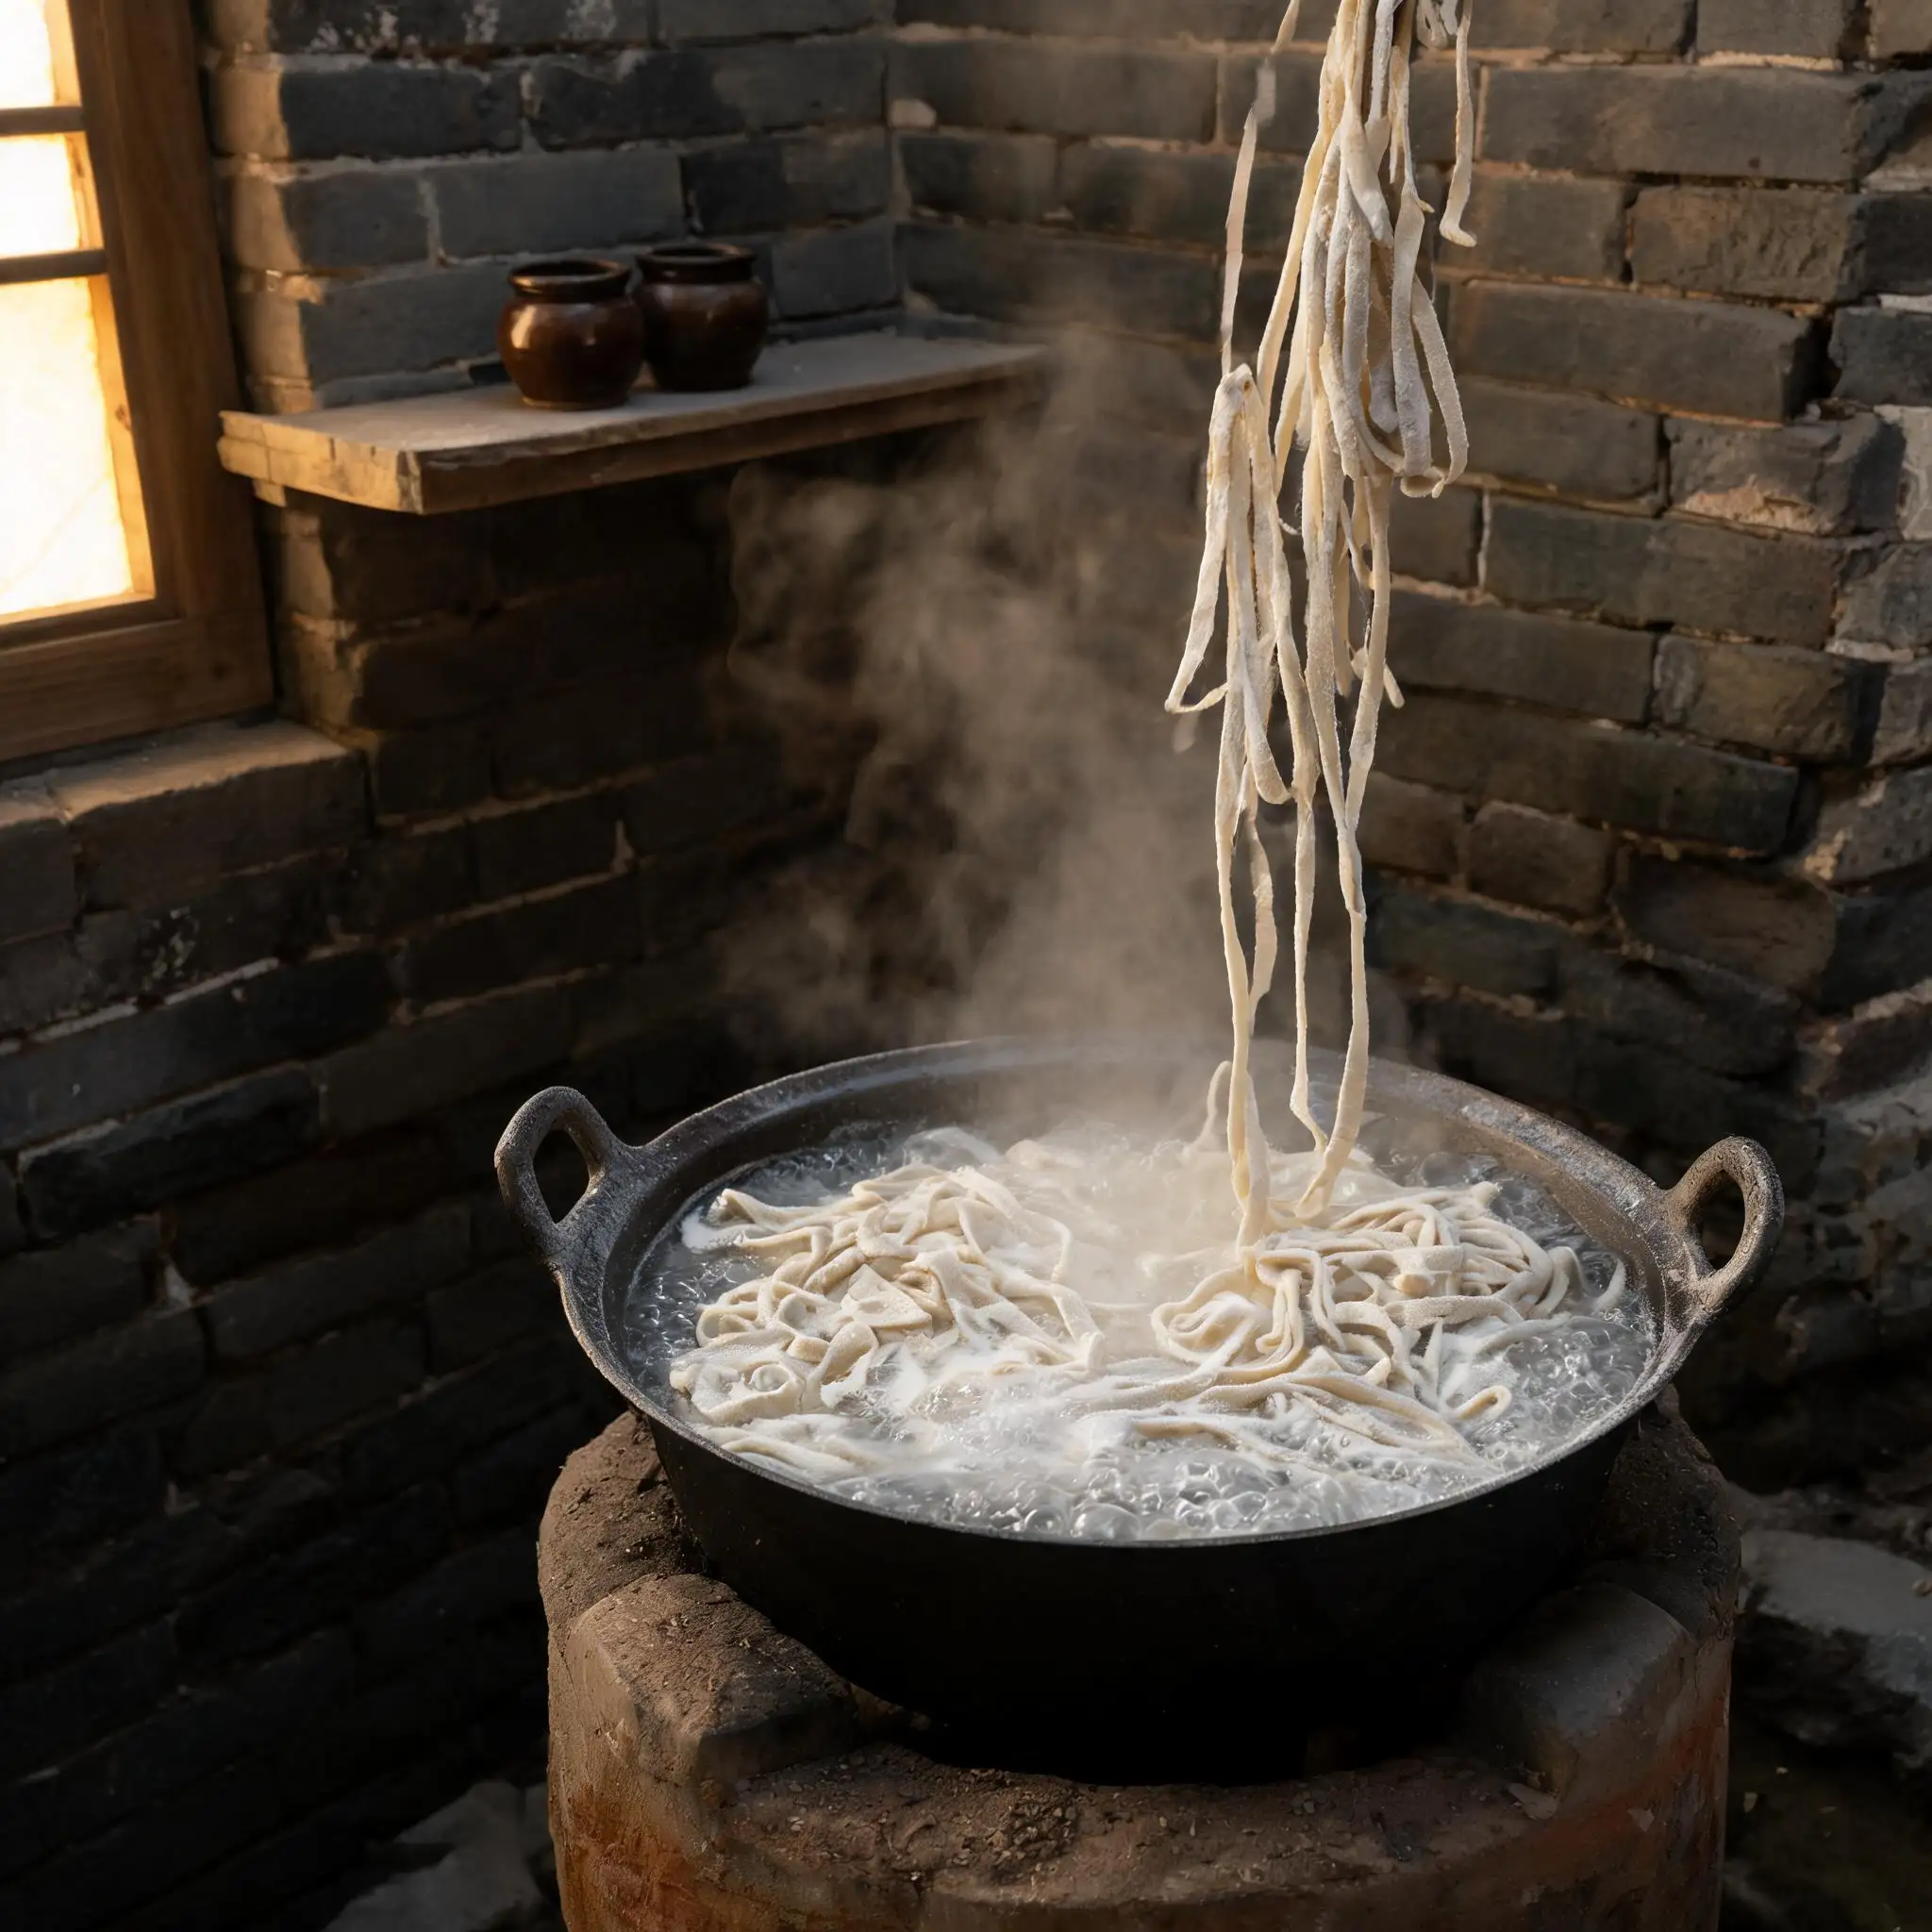
Bring a large pot of well-salted water to a hard rolling boil before the noodles go in. Hand-rolled noodles cook unevenly by nature — some sections thicker, some thinner. **You can't go by time alone. Pull one noodle at the 3-minute mark and bite through the thickest part** — firm, giving cleanly, no starchy crunch in the center.
Total time is typically 4–6 minutes, but it varies every batch. Scoop noodles into bowls with a spider strainer. Don't rinse.
> ⚠️ Cold water rinse strips the surface starch. The sauce will slide off instead of coating. Skip it even if noodles are sticking slightly — they loosen the moment sauce touches them.
---
## Step 7 · The Condiments
### One vegetable, one dish. Nothing pre-mixed.
Cucumber: **julienned thin, kept cold.** The temperature contrast between cold cucumber and hot noodles isn't a nice detail — it's built into how the dish works.
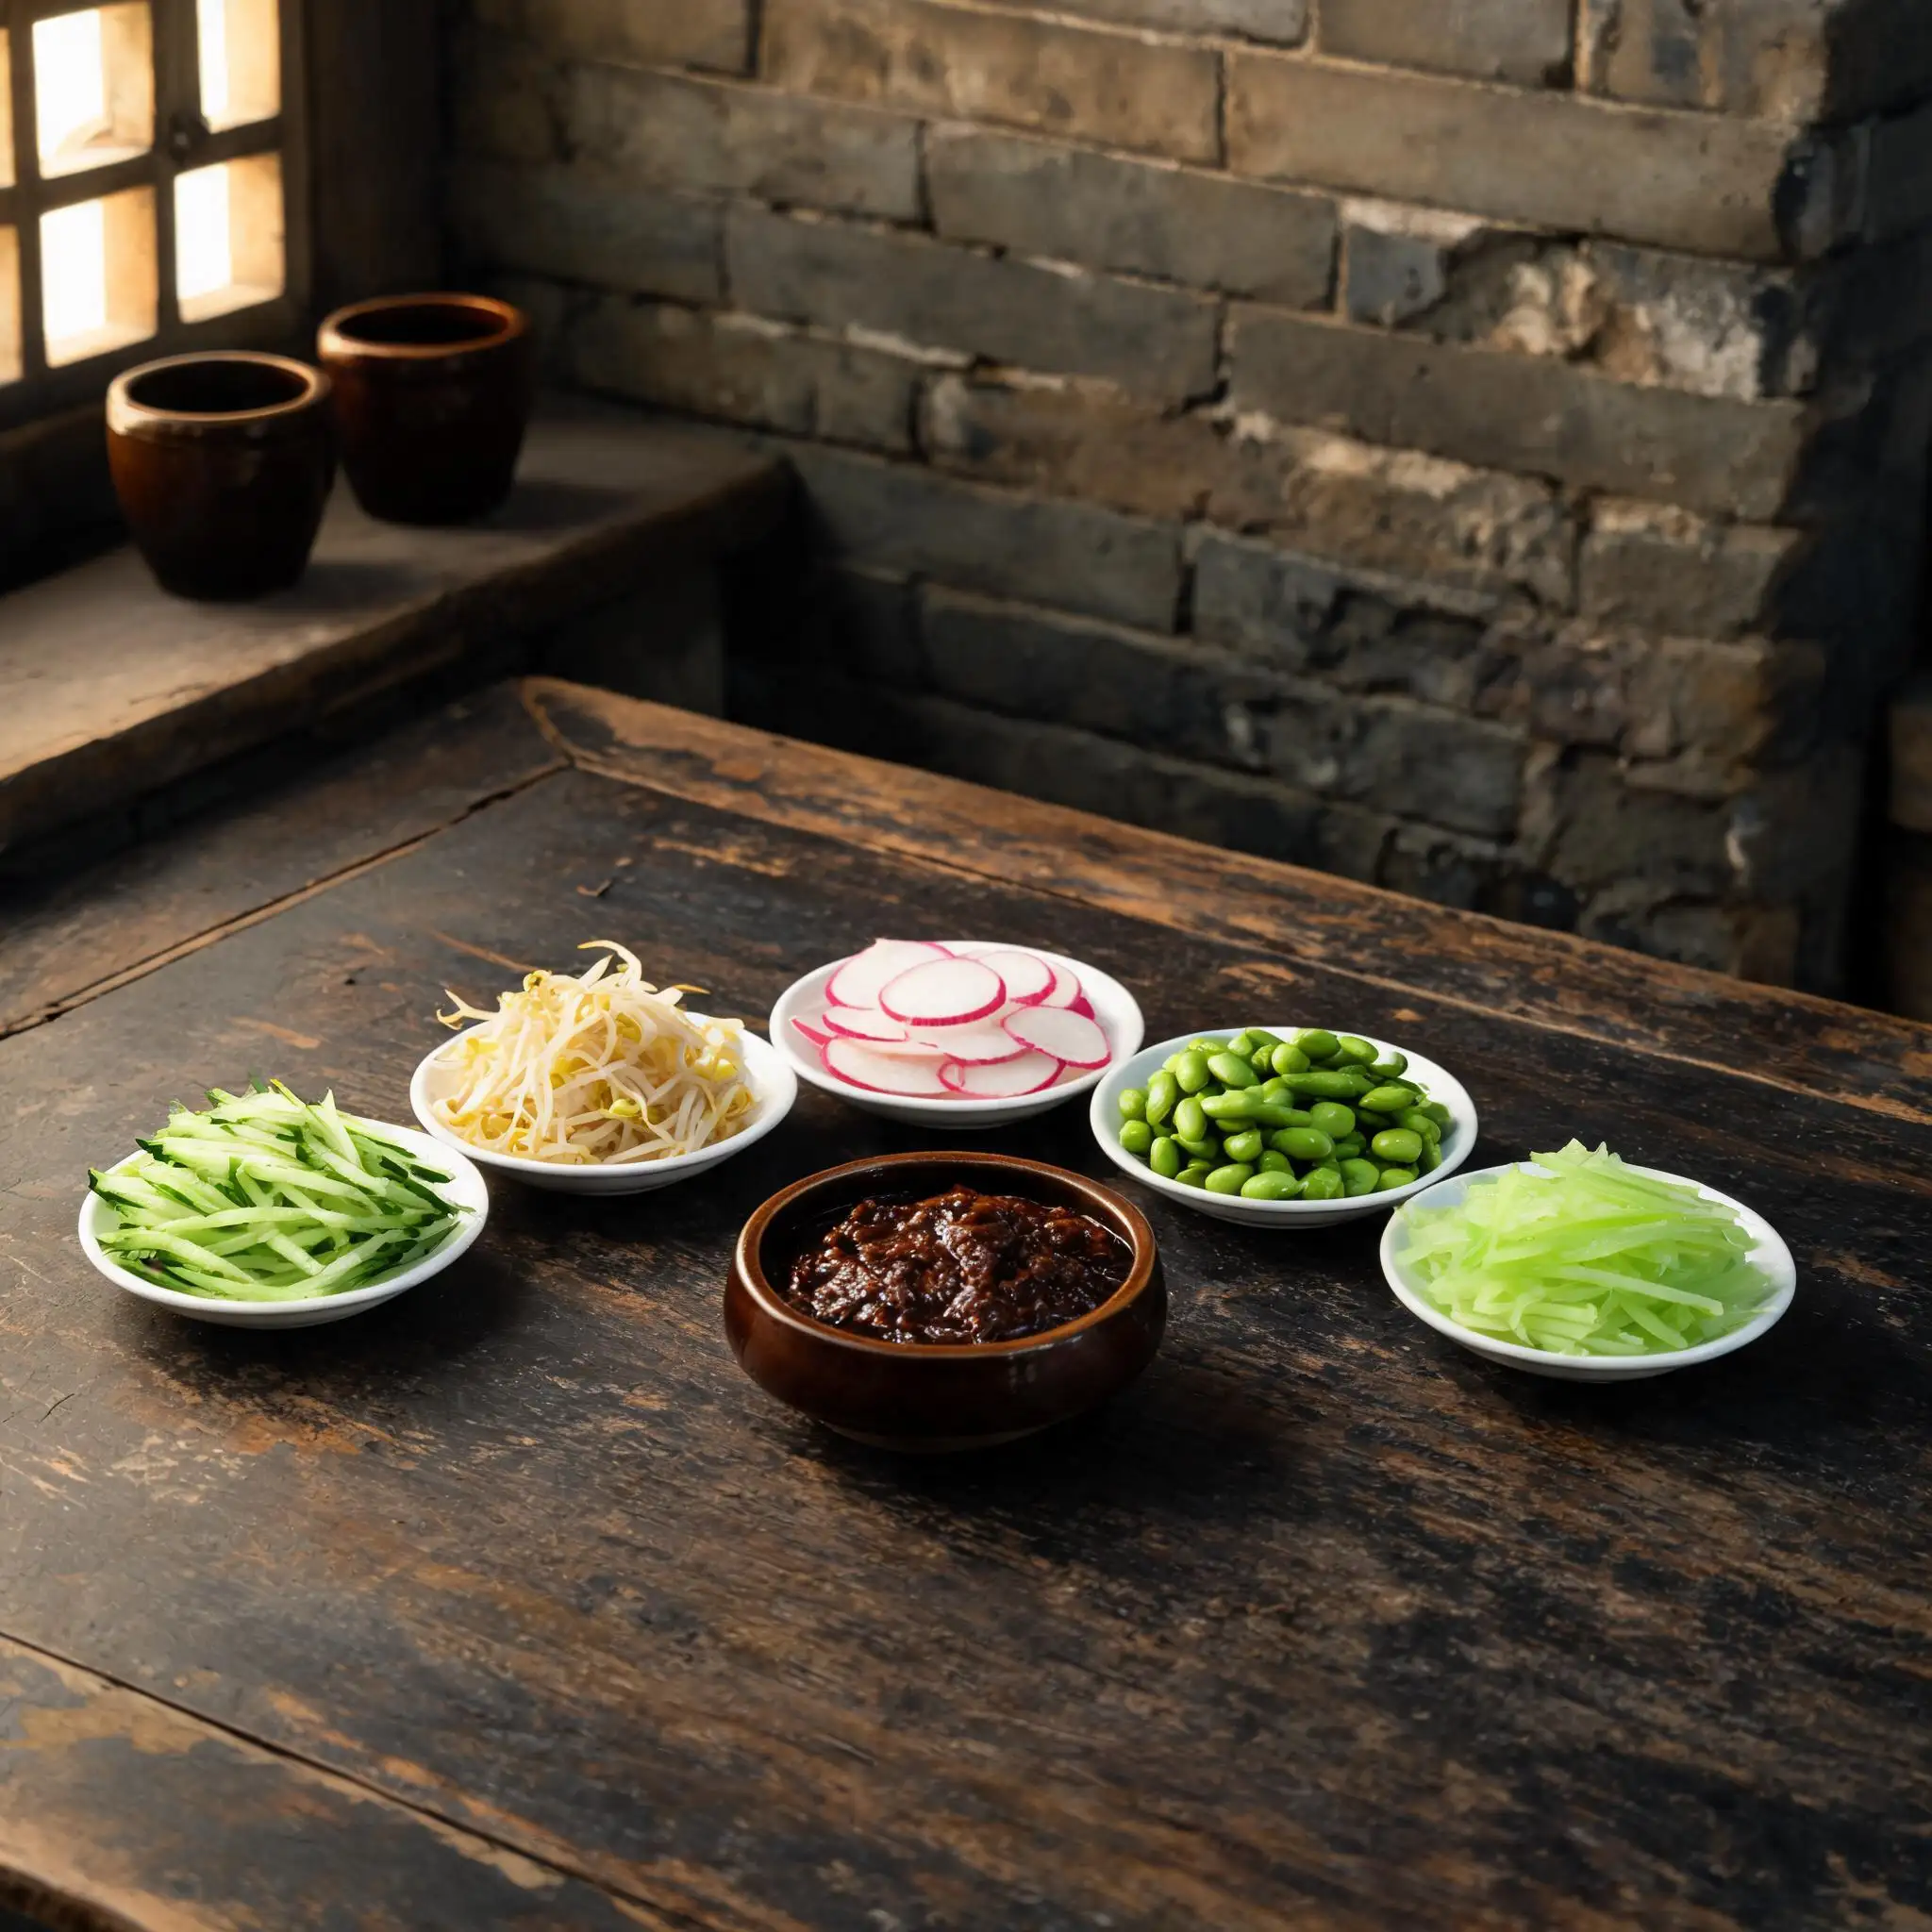
Bean sprouts: 45 seconds blanched, drained, still crunchy. Radish: thin rounds, plain. Edamame: shelled, cooked, plain. Celery: thin slices, raw or 30-second blanch, either works.
**Every vegetable gets its own separate small dish.** No one is plating this — they're setting up options. Each person at the table picks what they want, in what proportion, in what order.
Put whole garlic cloves on the table. Not chopped, not crushed. **Whole. Eaten between bites.** The raw sharpness cuts through the sauce fat in a way nothing else in this dish does.
---
## Step 8 · The Noodles
### A bowl of plain noodles. Nothing on them.
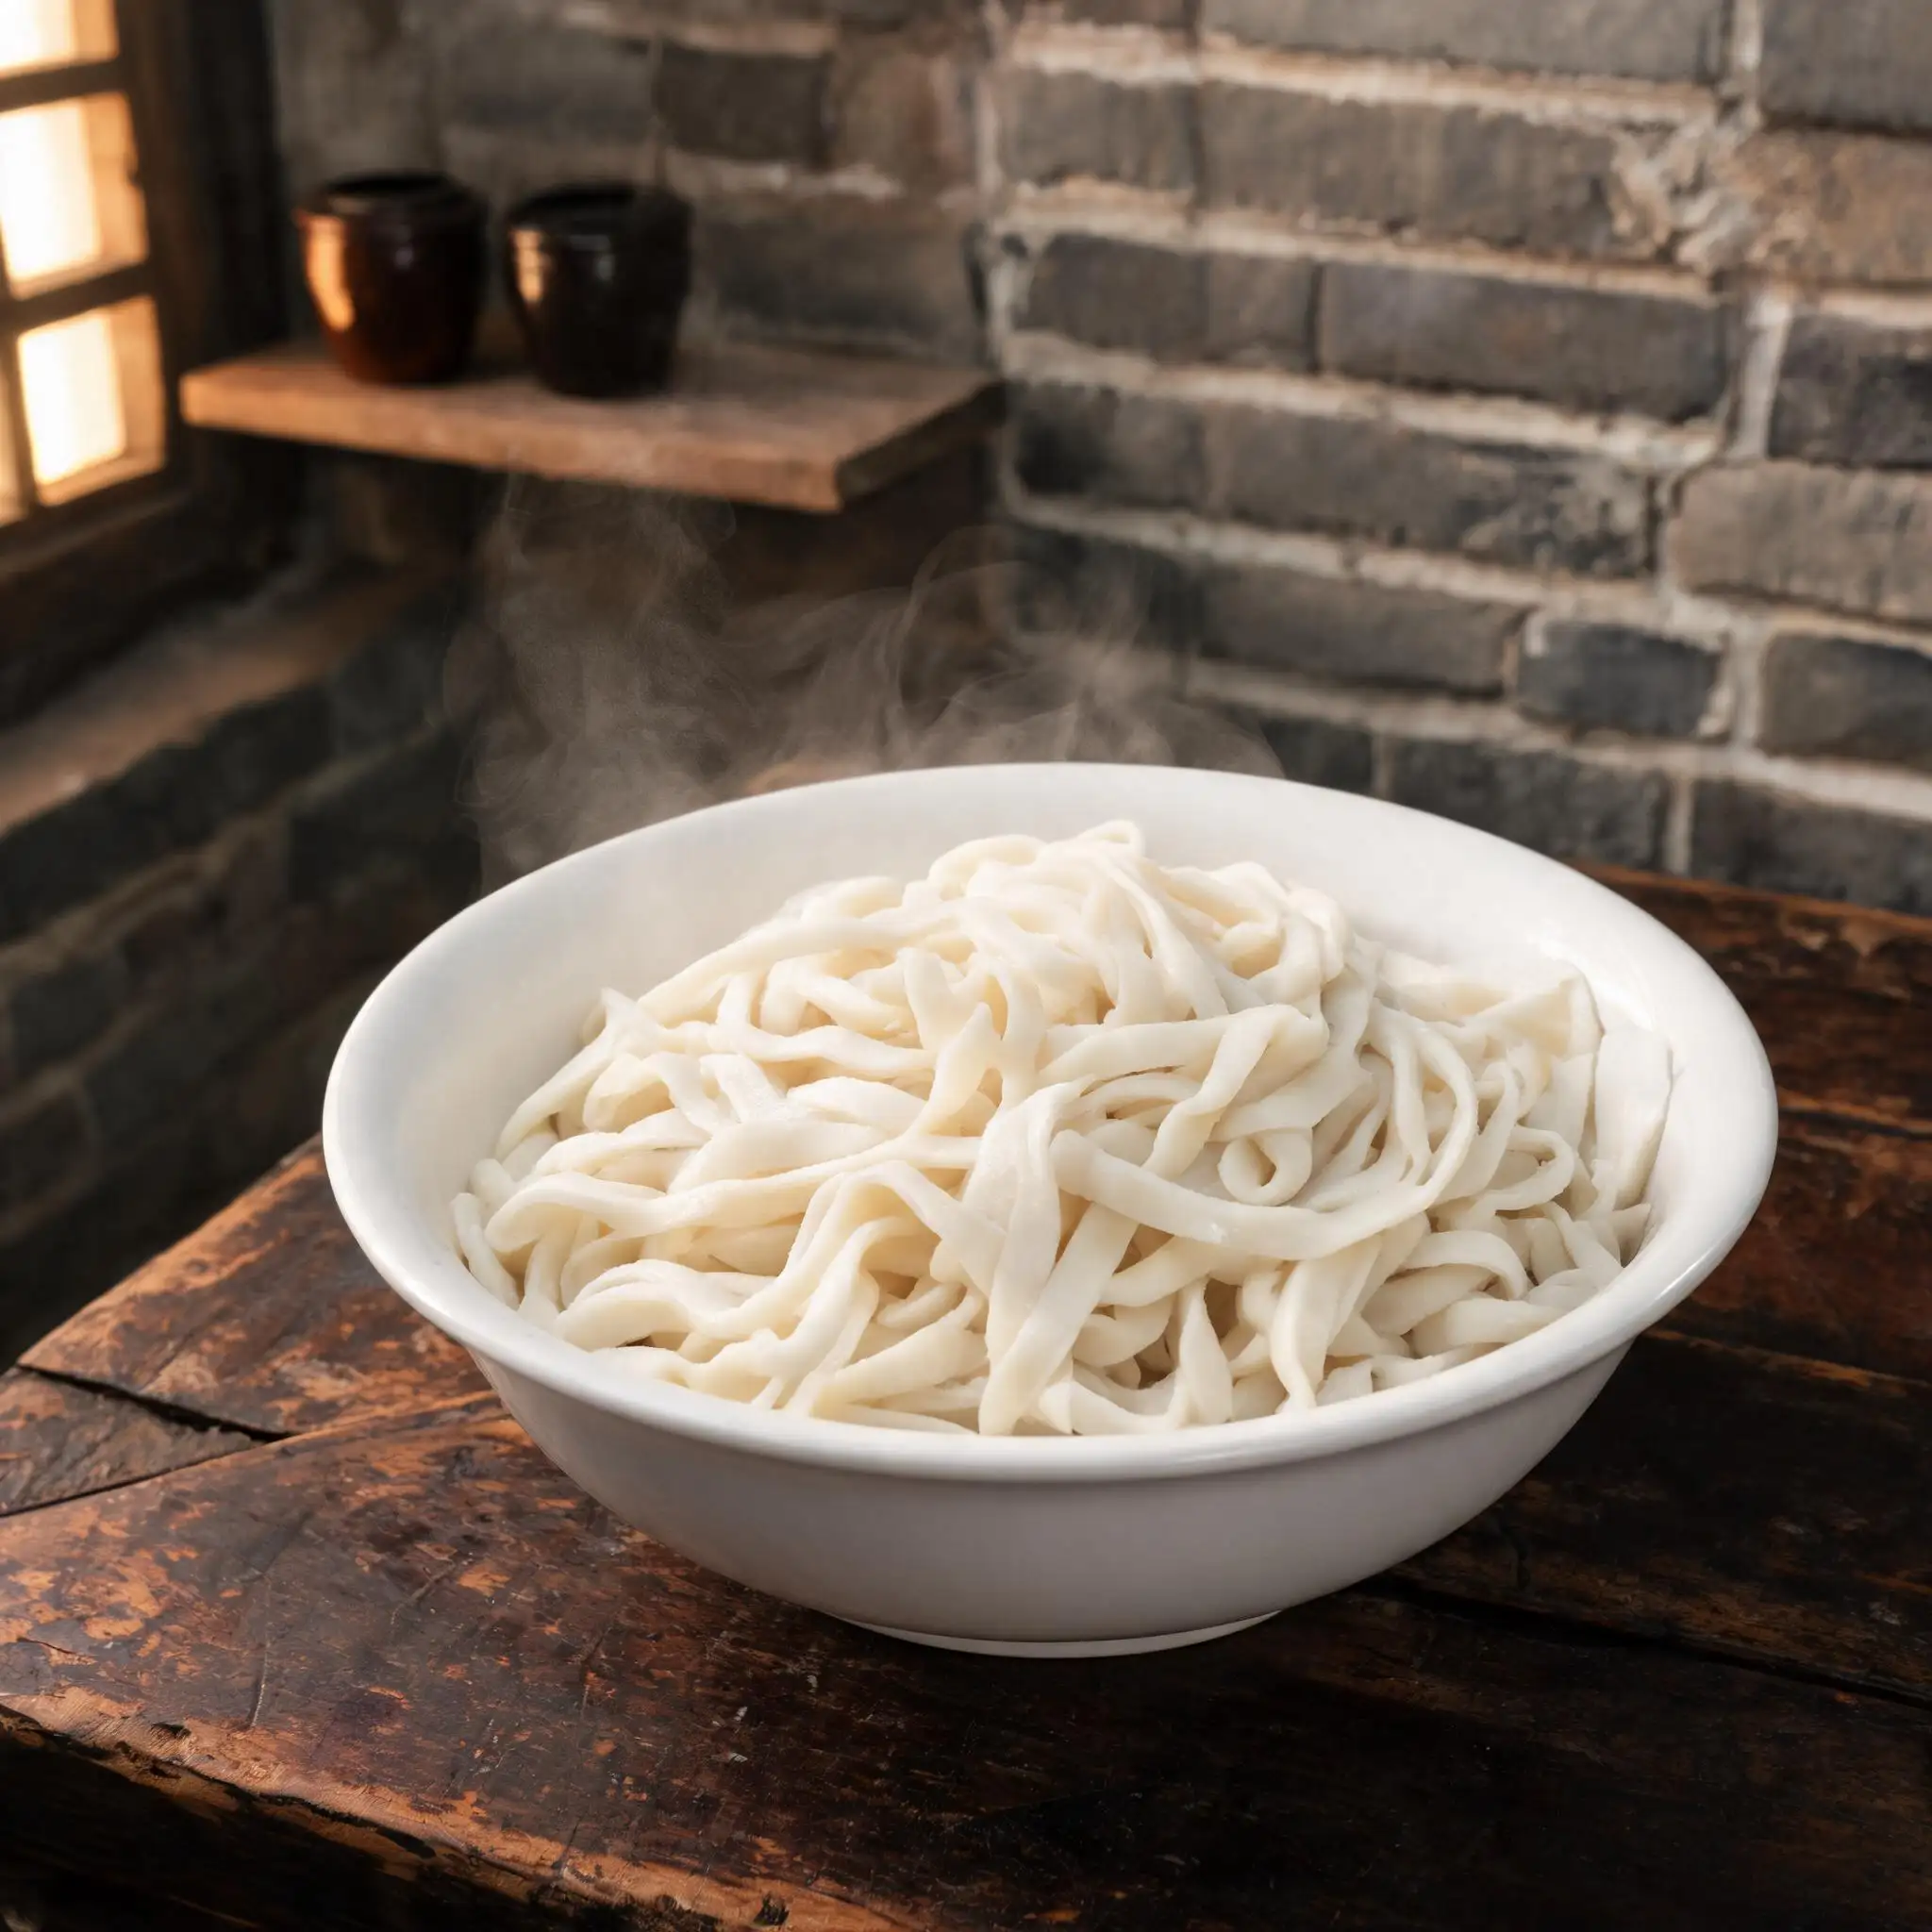
Large white bowl. Noodles piled in, still steaming. That's the entire step.
No sauce, no vegetables, no garnish. The bowl comes to the table like this. **The sauce is in its own bowl. The condiments are on their own dishes. Assembly happens at the table, not in the kitchen.** The noodles will stick slightly to each other — they'll loosen the moment anything touches them.
---
## Step 9 · The Spread
### Set the table. Let people eat.
Noodle bowl in the center on a bamboo tray. Zhajiang in its own bowl alongside, still warm, amber oil on top. Each condiment dish arranged around it. Whole garlic cloves scattered across the table.
**Spoon the sauce yourself — two or three generous spoonfuls.** Add the vegetables you want. Fold everything together with chopsticks until every section of noodle is coated. Grab a garlic clove after the first bite.
There's no fixed ratio. You adjust as you eat. More sauce, more cucumber, more garlic. No two bowls end up the same, and that's the point.
**Main**
| Item | Amount |
|------|--------|
| Pork belly | 300 g, cut into 1.5 cm cubes |
| Fresh hand-rolled wheat noodles | 400 g |
**Sauce**
| Item | Amount |
|------|--------|
| Dry yellow soybean paste (干黄酱) | 150 g |
| Sweet flour paste (甜面酱) | 50 g |
| Water | 120 ml |
| Neutral cooking oil | 1 tbsp |
**Condiments (菜码)**
| Item | Amount |
|------|--------|
| Cucumber | 1 medium, julienned |
| Mung bean sprouts | 100 g |
| Radish | 80 g, thin rounds |
| Edamame | 80 g, shelled and cooked |
| Celery | 60 g, thinly sliced |
| Whole garlic cloves | 4–5, served as-is |
> Yield: 2 large bowls · Best eaten immediately · Leftover sauce keeps refrigerated for 5 days
---
## Step 1 · The Lineup
### Everything out before the fire goes on
Cube the pork belly — **1.5 cm, dice-shaped, fat and lean together in every piece.** Not strips, not large chunks. Small enough that after slow cooking the edges dissolve into the sauce while the centers still hold.
Mix the two pastes before anything hits the wok. Dry yellow soybean paste is the main sauce — fermented, dense, salty. Sweet flour paste rounds off the sharp edge. **Ratio: 3:1 by weight, yellow to sweet.** Stir in 120 ml of water until the mixture loosens and pours slowly off a spoon. A thick undiluted paste hitting a hot wok scorches in under a minute — this step prevents that.
---
## Step 2 · The Render
### Cold wok, no oil, pork belly goes in first
Put the pork cubes into a dry cold wok. Medium heat. Don't add oil, don't wait for the wok to preheat.
Fat starts rendering out within two minutes. **Keep the pieces moving and let the heat pull the fat out slowly** — 8 to 10 minutes until the cubes are golden on all sides and sitting in their own rendered fat. High heat makes the exterior crust before the interior fat releases, and you end up with tough chewy pieces that never fully integrate into the sauce.
When the meat is golden, push everything to one side of the wok.
*The kitchen already smells like something serious. That's just the fat starting to do its job.*
---
## Step 3 · The Paste
### Sauce straight into the hot fat
Add 1 tablespoon of oil to the cleared side if the rendered fat looks sparse. Pour the pre-mixed paste in.
It splatters immediately. Keep the spatula moving. **Press the paste flat against the wok surface and drag it — that direct contact kills the raw fermented edge** that comes straight out of the jar. This is 炒酱, and it can't be skipped. After about 1 minute, fold the pork back into the paste. Color shifts from muddy grey-brown to a deeper reddish-brown, and fat begins separating faintly at the edges.
> ⚠️ If the paste sticks and smells like it's scorching, heat is too high. Drop to low immediately and add a small splash of water. Burned soybean paste can't be fixed.
---
## Step 4 · The Simmer
### Forty minutes on the lowest heat you have
Add the remaining water, stir everything together, and turn the heat to the absolute minimum.
**This is the step most people shorten, and it shows.** High heat with less time leaves a sharp, fermented edge in the sauce. Low heat with full time rounds everything out — fat integrates, harshness cooks away, the sauce becomes itself. Stir every 5–6 minutes so the bottom doesn't catch.
| Elapsed | What you're looking for |
|---------|------------------------|
| 10 min | Sauce bubbling slowly, color deepening |
| 20 min | Thickening, fat pooling at wok edges |
| 30 min | Clear amber oil floating on top of dark paste |
| 40 min | Pull from heat |
Done when you tilt the wok and see clear fat on top, paste underneath holding shape before slowly relaxing. Still watery — 5 more minutes.
---
## Step 5 · The Sauce
### What finished 炸酱 looks like
Clear amber fat on top. Deep brown paste underneath with chunks of pork that have started to fall apart at the edges while the centers still hold. That's the visual confirmation.
**Taste it: intensely savory, salty, slightly sweet, rich from the fat.** If there's a harsh uncooked bitterness at the back, 10 more minutes on low heat fixes it. Don't adjust the salt level — the sauce is calibrated to be eaten with plain noodles and cold vegetables, not tasted alone.
*Put the lid on. Zhajiang improves as it sits and the temperature evens out.*
---
## Step 6 · The Boil
### Full rolling boil, salted, no shortcuts on water volume
Bring a large pot of well-salted water to a hard rolling boil before the noodles go in. Hand-rolled noodles cook unevenly by nature — some sections thicker, some thinner. **You can't go by time alone. Pull one noodle at the 3-minute mark and bite through the thickest part** — firm, giving cleanly, no starchy crunch in the center.
Total time is typically 4–6 minutes, but it varies every batch. Scoop noodles into bowls with a spider strainer. Don't rinse.
> ⚠️ Cold water rinse strips the surface starch. The sauce will slide off instead of coating. Skip it even if noodles are sticking slightly — they loosen the moment sauce touches them.
---
## Step 7 · The Condiments
### One vegetable, one dish. Nothing pre-mixed.
Cucumber: **julienned thin, kept cold.** The temperature contrast between cold cucumber and hot noodles isn't a nice detail — it's built into how the dish works.
Bean sprouts: 45 seconds blanched, drained, still crunchy. Radish: thin rounds, plain. Edamame: shelled, cooked, plain. Celery: thin slices, raw or 30-second blanch, either works.
**Every vegetable gets its own separate small dish.** No one is plating this — they're setting up options. Each person at the table picks what they want, in what proportion, in what order.
Put whole garlic cloves on the table. Not chopped, not crushed. **Whole. Eaten between bites.** The raw sharpness cuts through the sauce fat in a way nothing else in this dish does.
---
## Step 8 · The Noodles
### A bowl of plain noodles. Nothing on them.
Large white bowl. Noodles piled in, still steaming. That's the entire step.
No sauce, no vegetables, no garnish. The bowl comes to the table like this. **The sauce is in its own bowl. The condiments are on their own dishes. Assembly happens at the table, not in the kitchen.** The noodles will stick slightly to each other — they'll loosen the moment anything touches them.
---
## Step 9 · The Spread
### Set the table. Let people eat.
Noodle bowl in the center on a bamboo tray. Zhajiang in its own bowl alongside, still warm, amber oil on top. Each condiment dish arranged around it. Whole garlic cloves scattered across the table.
**Spoon the sauce yourself — two or three generous spoonfuls.** Add the vegetables you want. Fold everything together with chopsticks until every section of noodle is coated. Grab a garlic clove after the first bite.
There's no fixed ratio. You adjust as you eat. More sauce, more cucumber, more garlic. No two bowls end up the same, and that's the point.