·5/14/2026
from
RÒU LÓNG
# · RÒU LÓNG ·
## Steamed Pork Roll — Leavened Dough, Minced Pork & Scallion
> You spend two hours making it and it's gone in ten minutes
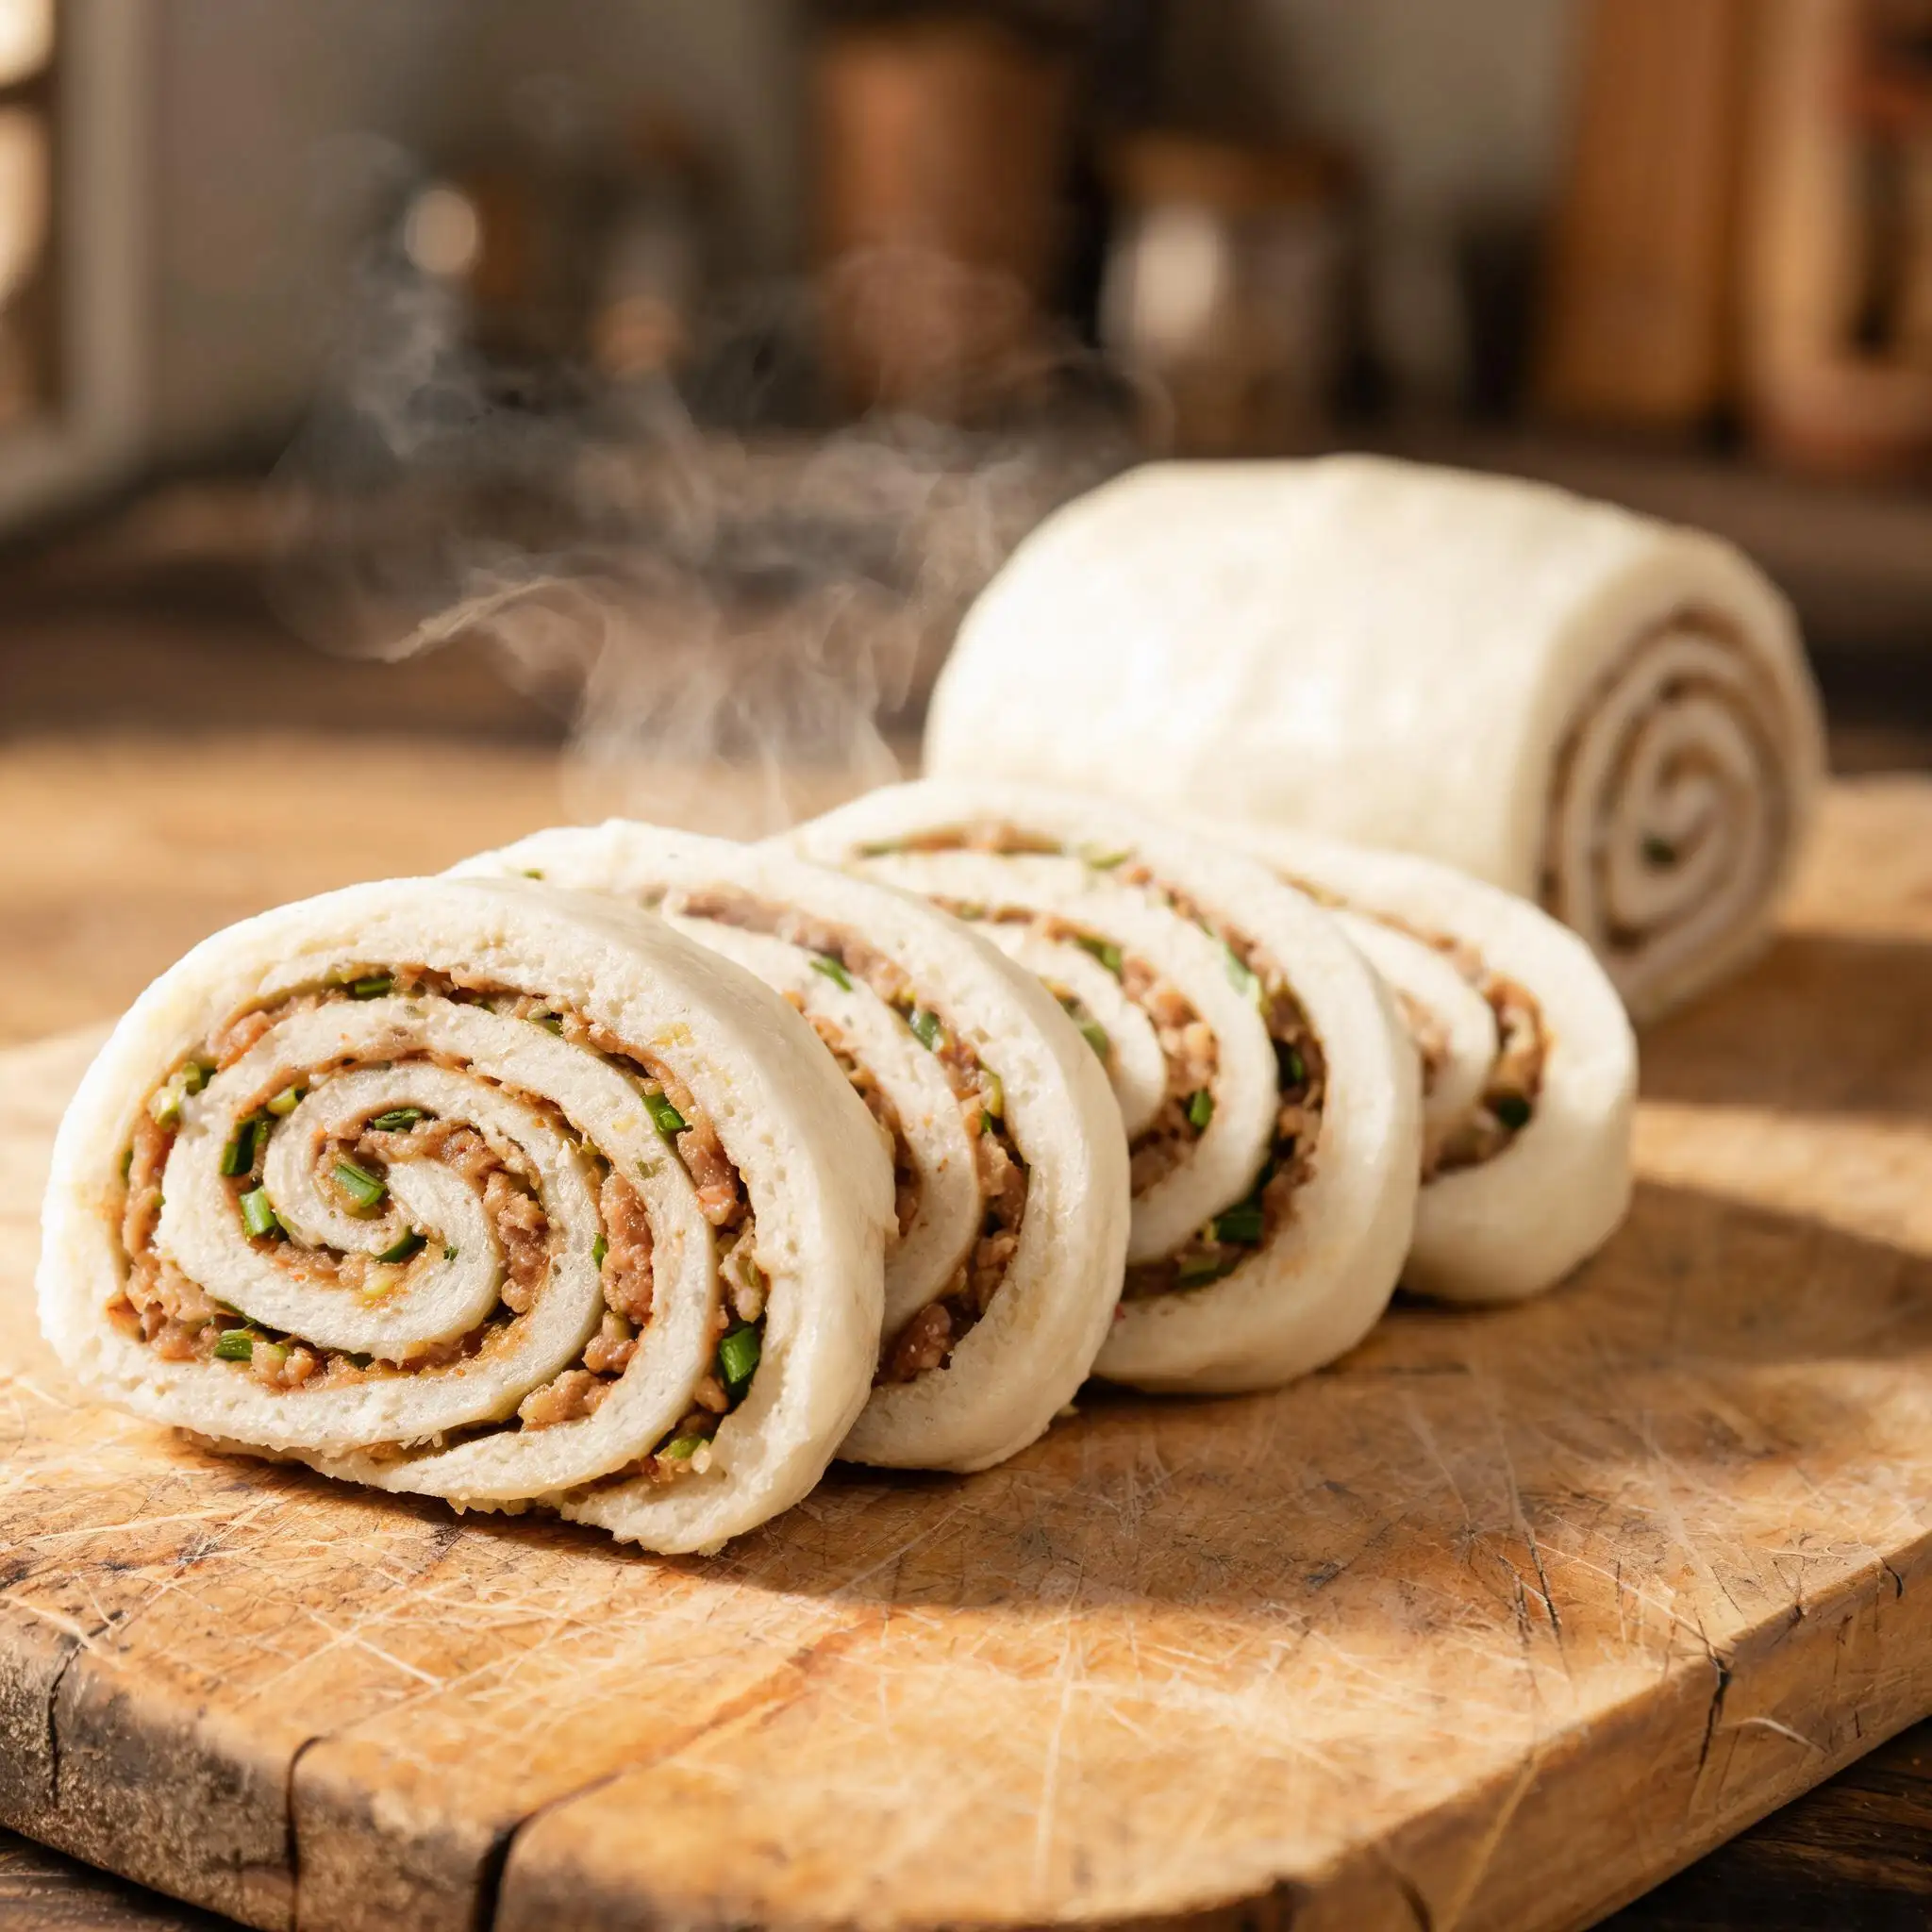
> The spiral cross-section is the thing — every slice shows you exactly what's inside
> No sauce needed, no sides, just the roll
---
**Serves** 3–4 · **Active time** 45 min · **Total time** 2 hr 30 min
**Dough**
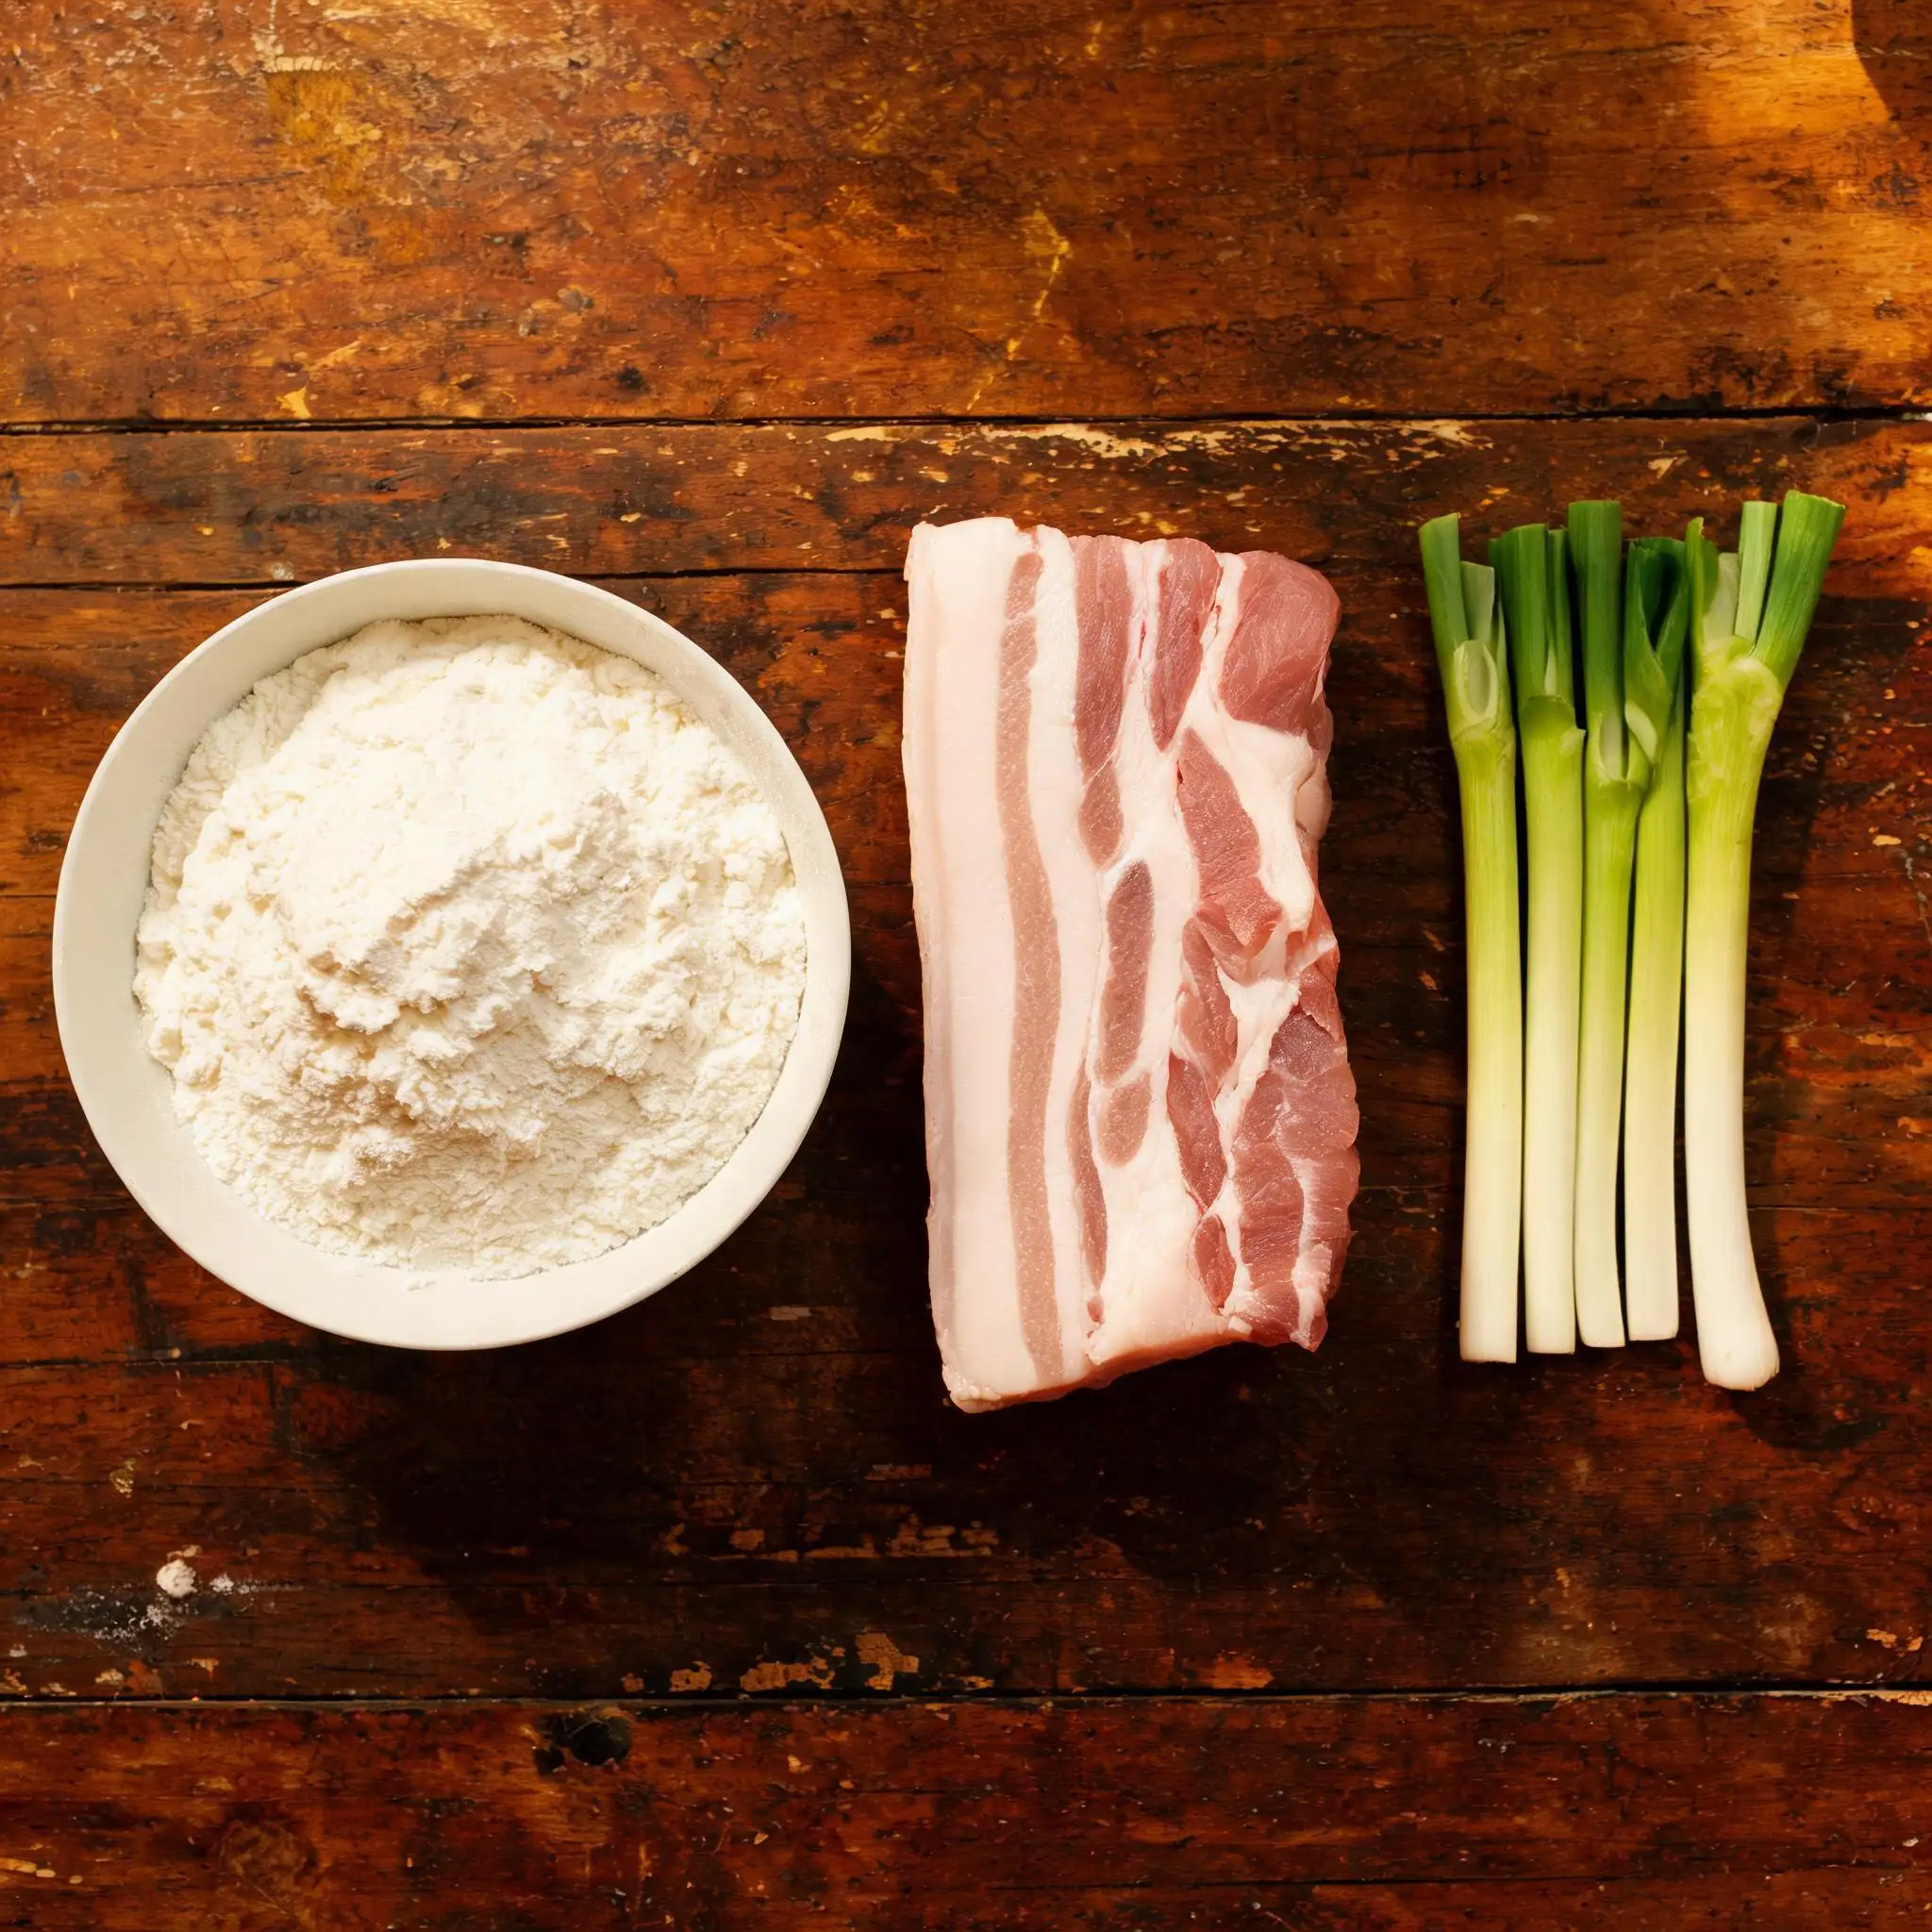
- 500 g all-purpose flour
- 5 g active dry yeast
- 10 g sugar
- 260 ml warm water, around 38°C
**Filling**
- 400 g pork belly, 30% fat / 70% lean, hand-chopped into coarse mince
- 2 stalks scallion, finely chopped
**Seasoning**
- 2 tbsp sweet bean paste (甜面酱)
- 1 tsp dark soy sauce
- ½ tsp salt
- ¼ tsp white pepper
- 1 tsp sesame oil
---
## Step 1 · The Dough
### Mix, knead, wait for it to pull together
Dissolve yeast and sugar in the warm water — around 38°C, warm on your wrist. Let it sit 5 minutes until foamy. Pour into the flour, stir with chopsticks until shaggy, then knead by hand for 8–10 minutes. **Done when the surface is smooth and no longer tacky** — a stretched piece shouldn't tear immediately.
Sticky after 5 minutes? Add flour a tablespoon at a time. Too stiff? Wet your hands. Press a finger in — the dent should slowly spring back halfway. Cover and set aside somewhere warm.
---
## Step 2 · The First Rise
### An hour of doing nothing — harder than it sounds
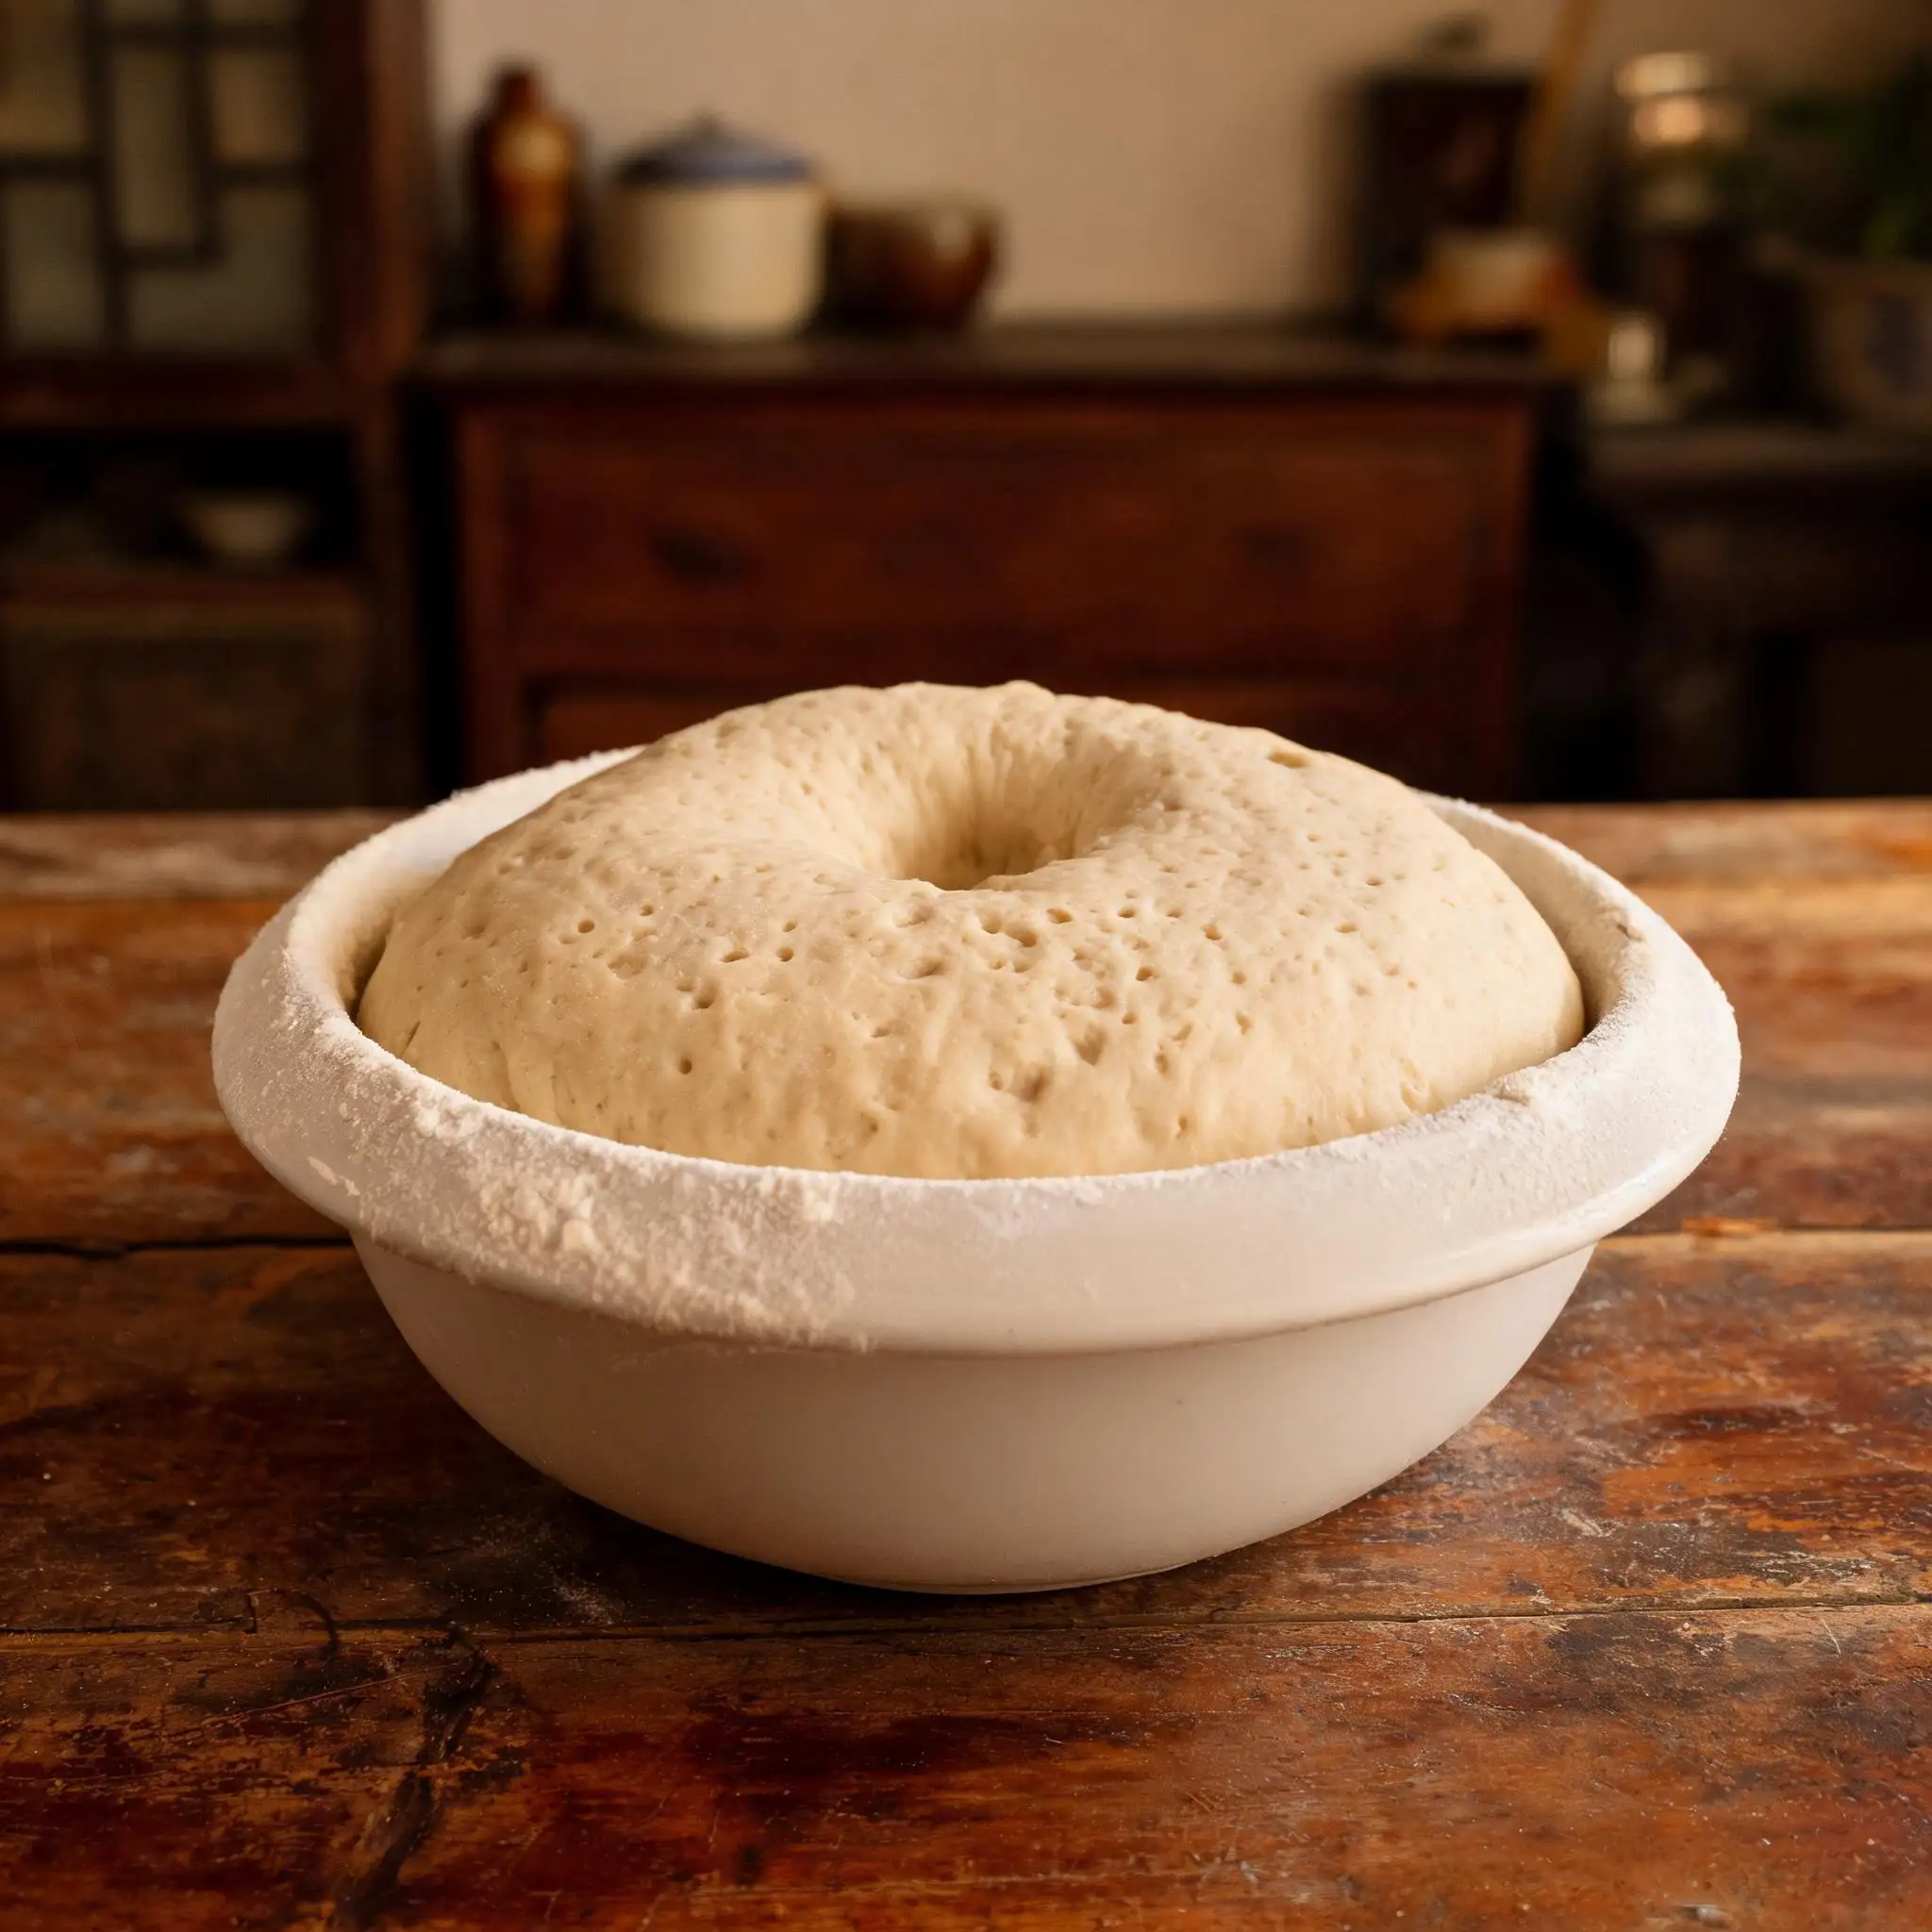
The dough needs to roughly double in size. How long depends entirely on your kitchen temperature.
| Room temperature | Approximate rise time |
|-----------------|----------------------|
| 20°C | 90 min |
| 25°C | 60 min |
| 30°C | 40 min |
If your kitchen is cold, put the covered bowl in the oven with only the light on. No heat — the bulb alone is enough to raise the temperature a few degrees.
**Don't poke it every 10 minutes.** Leave it alone until it's clearly grown. Press two fingers in 2 cm deep — holes that stay without springing back means it's ready.
> ⚠️ Under-proofed dough makes a dense, gummy roll. If you're unsure, give it 15 more minutes.
---
## Step 3 · The Filling
### Hand-chopped pork — this part matters more than it seems
Buy pork belly with visible fat striping. **The 30% fat ratio is not optional** — lean pork alone dries out completely over 25 minutes of steaming. You need fat to carry the moisture.
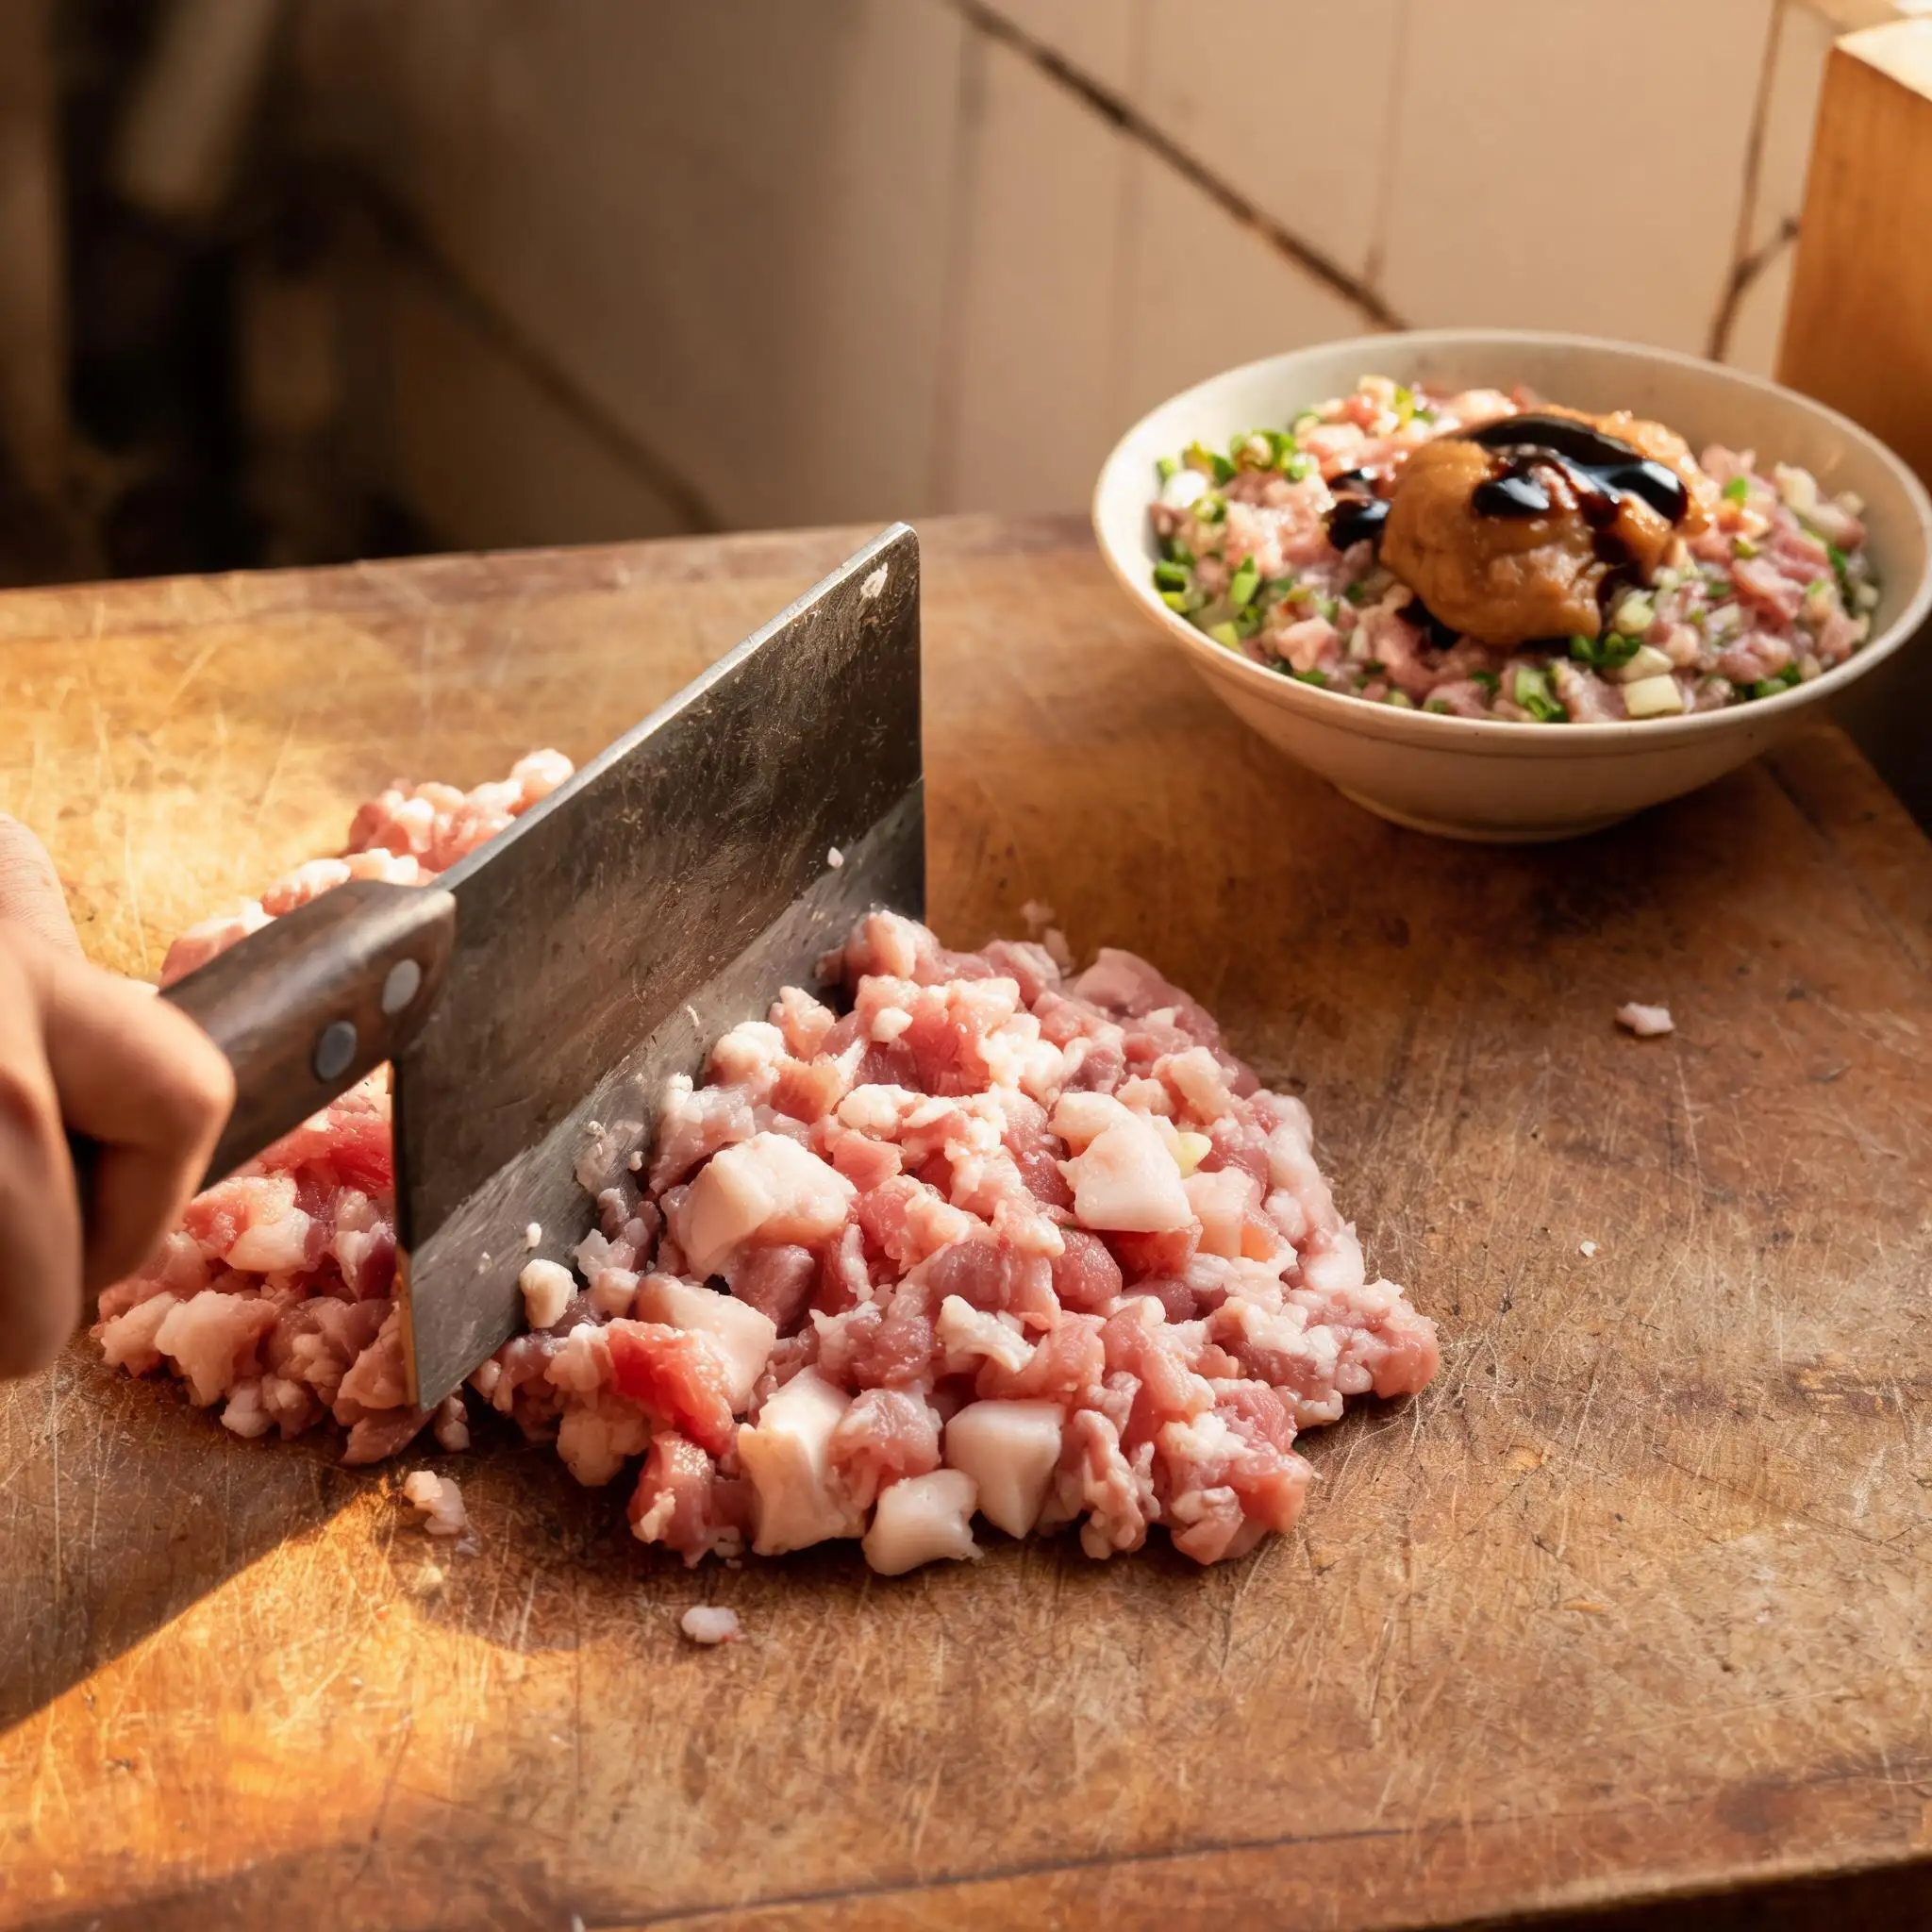
Chop it yourself with a heavy cleaver. Slice the meat into thin strips first, then stack them and chop crosswise. Turn the board 90 degrees and go through it again. Spend 5–6 minutes until you get a **coarse, irregular mince** — bigger chunks mixed with smaller ones, nothing close to a smooth paste. That uneven texture is the difference between filling that has a bite and filling that's just a gray smear.
Add scallion, sweet bean paste, dark soy sauce, salt, white pepper, and sesame oil. Mix by hand, **always in one direction**, until it pulls together and feels slightly springy.
**Sweet bean paste carries most of the flavor** — salty and slightly fermented-sweet in a way soy sauce alone can't do. Don't swap it.
---
## Step 4 · The Roll-out
### Punch it down, then roll it wide and flat
When the dough has doubled, punch it down firmly in the center. It'll deflate with a soft exhale. Knead briefly for 2 minutes to work out any remaining air bubbles — you'll feel them popping under your palms.
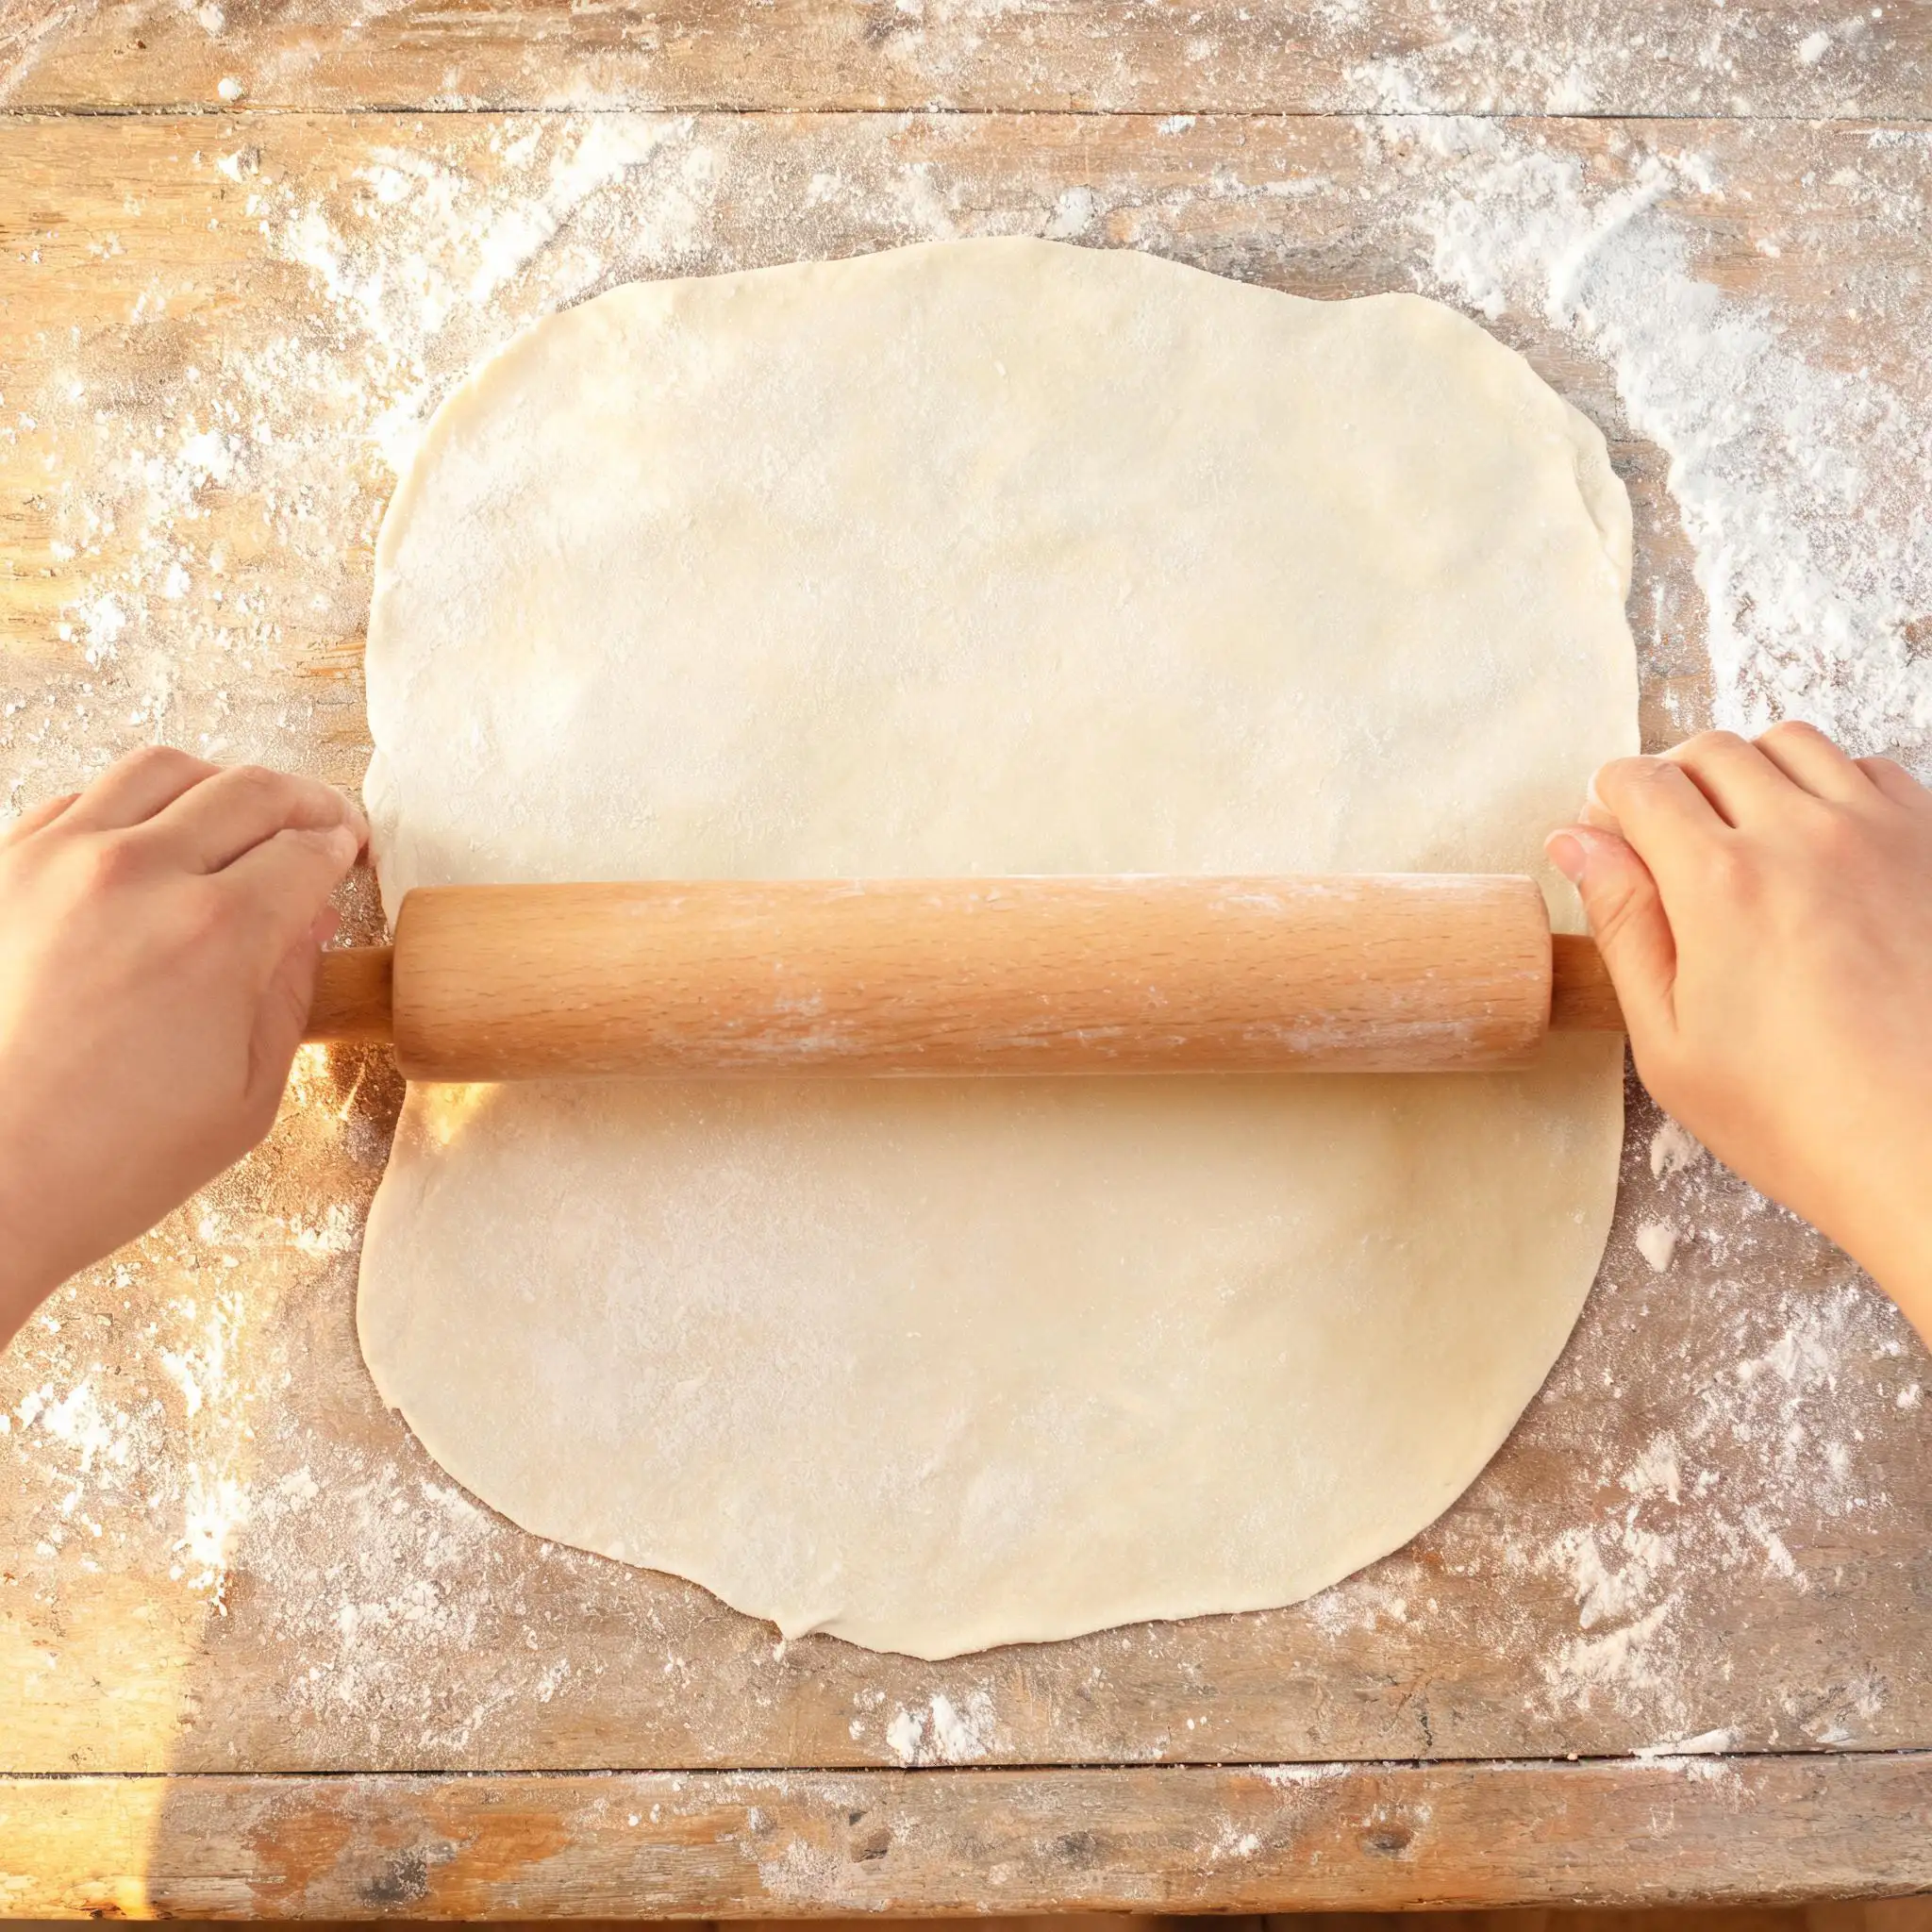
Dust the surface with flour. Roll the dough into a large rectangle — **roughly 40 × 30 cm, about 4–5 mm thick**. Roll from center outward, rotate a quarter turn, roll again. Keep it moving so it doesn't stick.
- *Uneven edges are fine* — this is handmade and it shows
- **Consistent thickness matters more than shape** — thin patches tear when the filling goes on
- Flour as needed under the sheet, but don't overdo it or the seam won't hold
> ⚠️ If the dough keeps shrinking back when you roll it, cover it with a cloth and let it rest for 5 minutes. The gluten is too tight — it needs to relax before it'll stay flat.
---
## Step 5 · The Spread & Roll
### Layer the filling, then roll it tight and slow
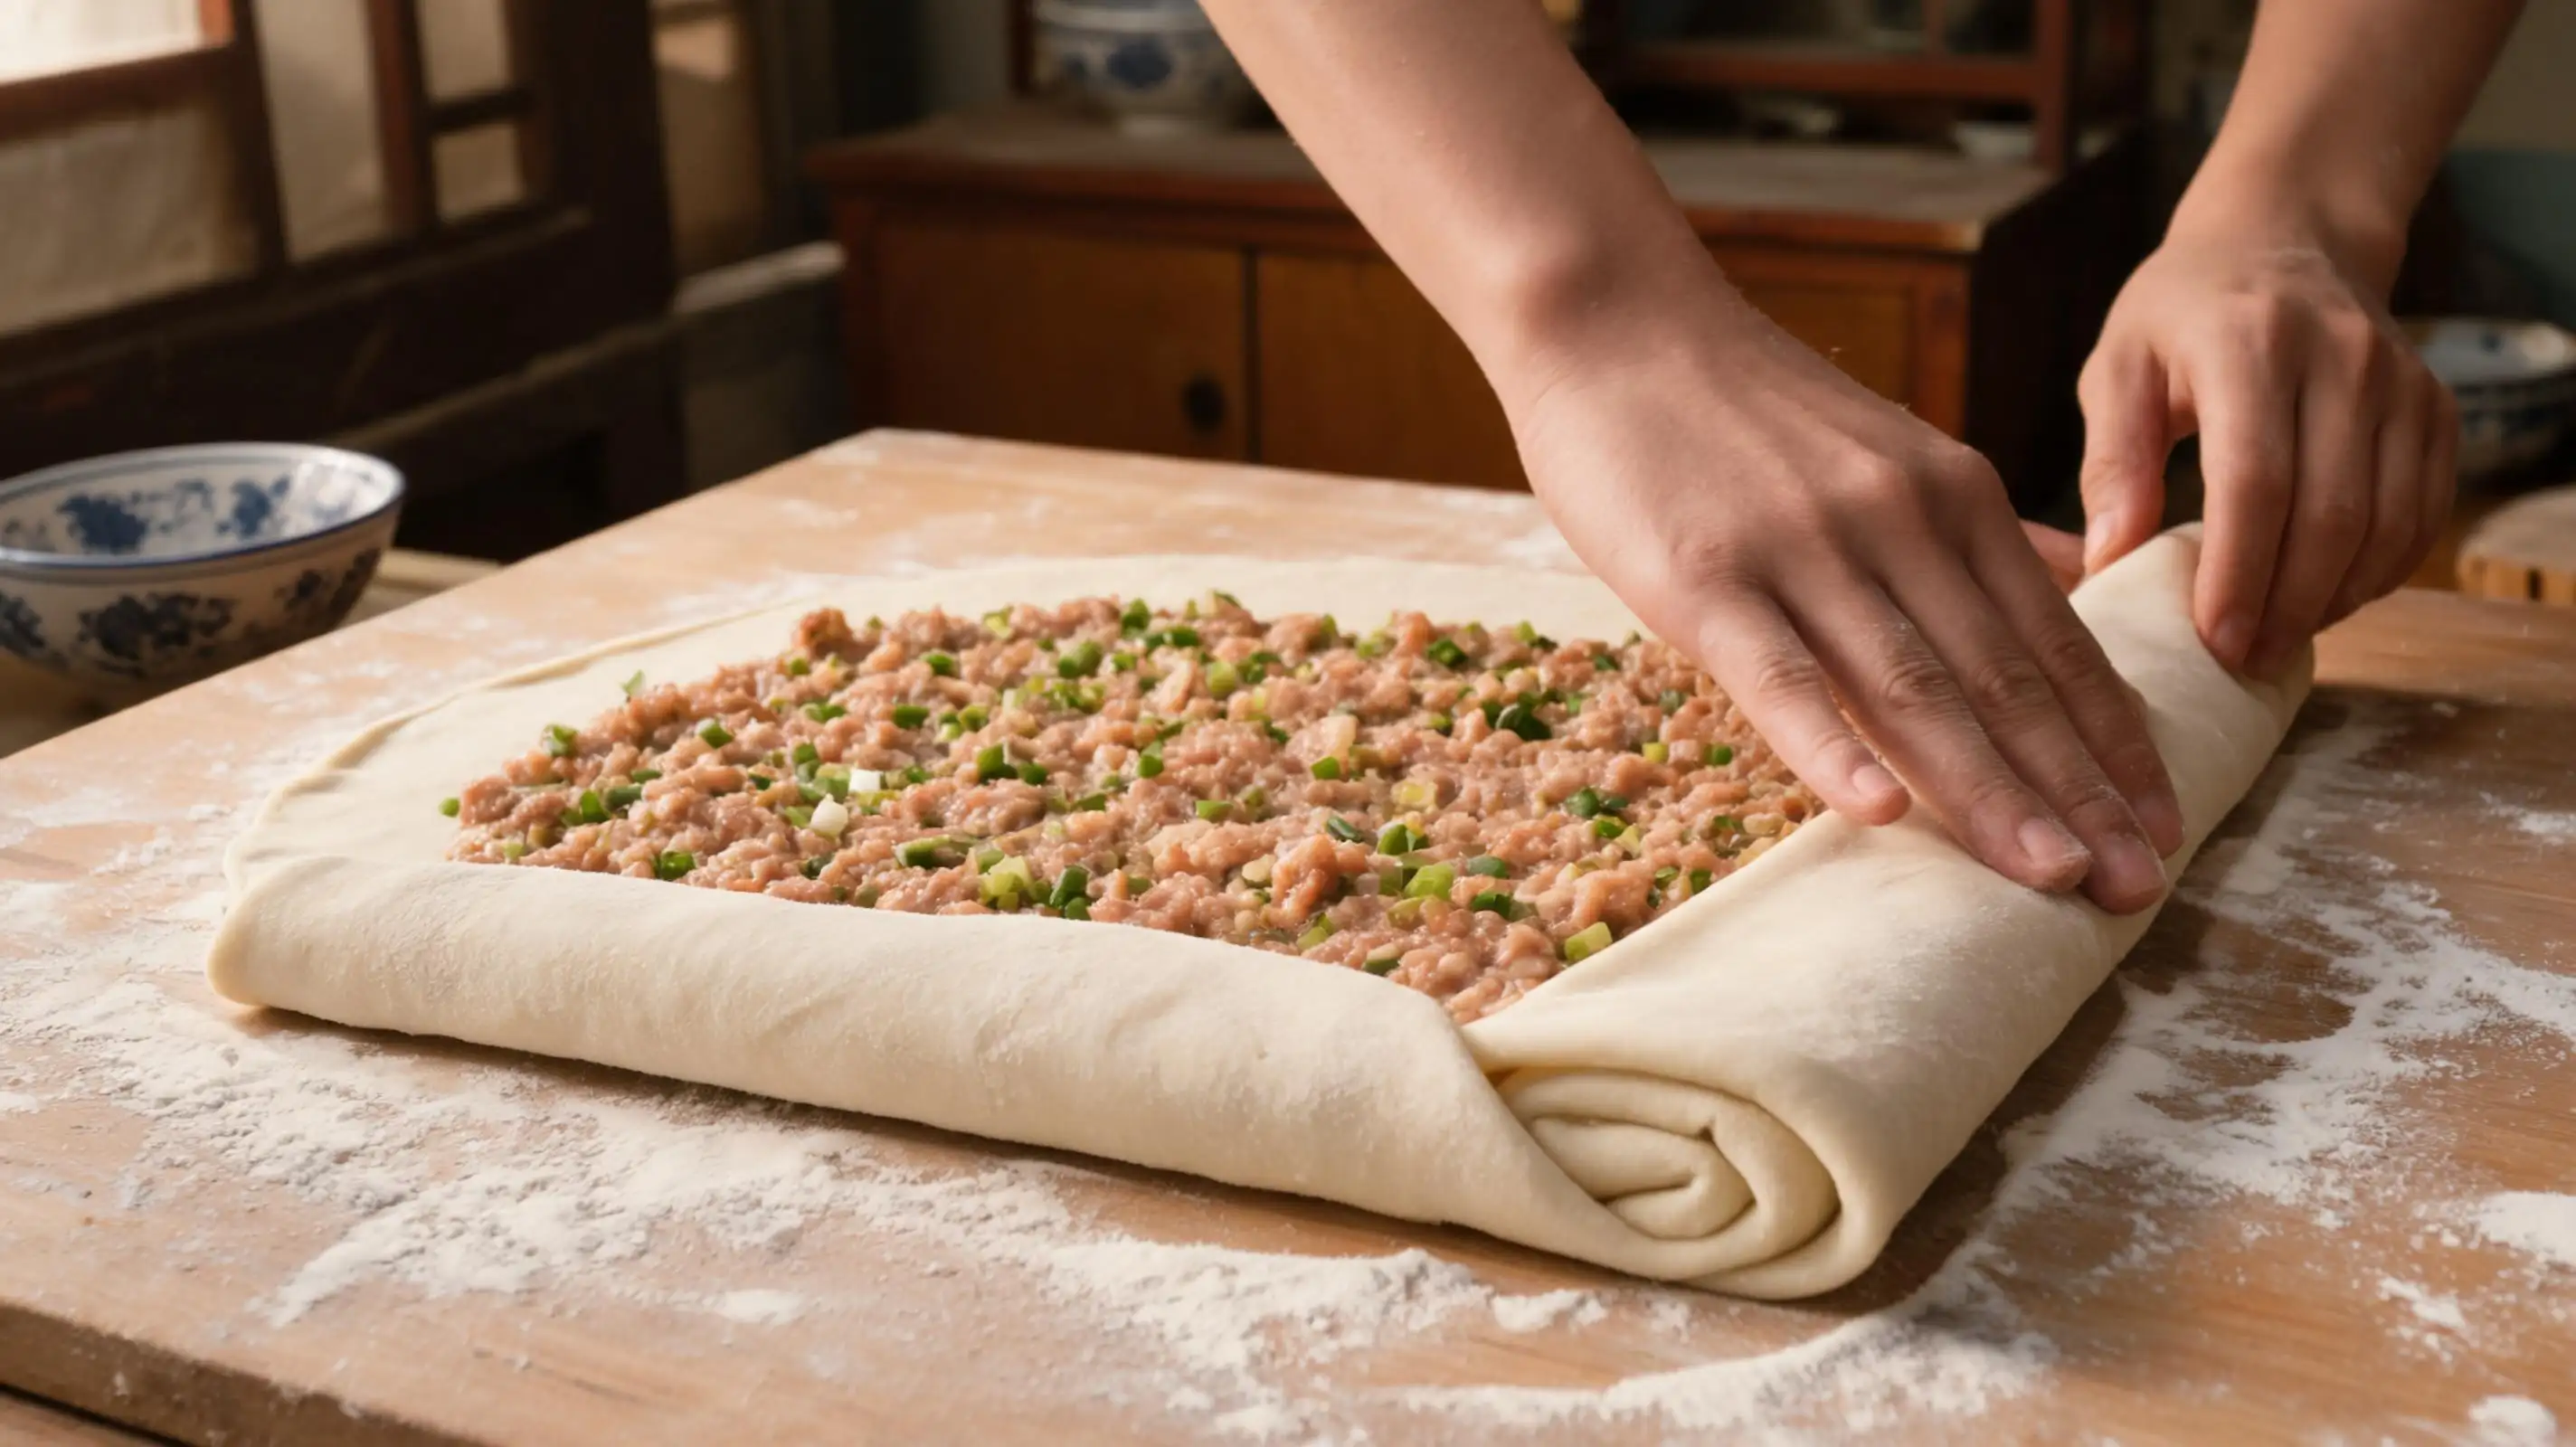
Spread the filling across the dough surface, leaving a **2 cm bare strip at the far edge**. Keep it roughly even — thicker patches in the middle mean the roll won't hold its shape when cut.
Start rolling from the near edge toward you. **Slow and deliberate**, pressing lightly as you go to push out any trapped air. Keep the log as compact as you can — a loose roll means the layers separate and the spiral falls apart on the cutting board.
Once you've rolled to the bare edge, press it firmly against the log to seal the seam. Pinch along the full length with your fingers.
- **Seam side goes face-down** when you place it in the steamer
- *The ends will look uneven* — trim a centimeter off each end if you want clean slices
- If the filling bulges out from the ends, push it back in gently
---
## Step 6 · The Second Rise
### 20 minutes of resting before any heat
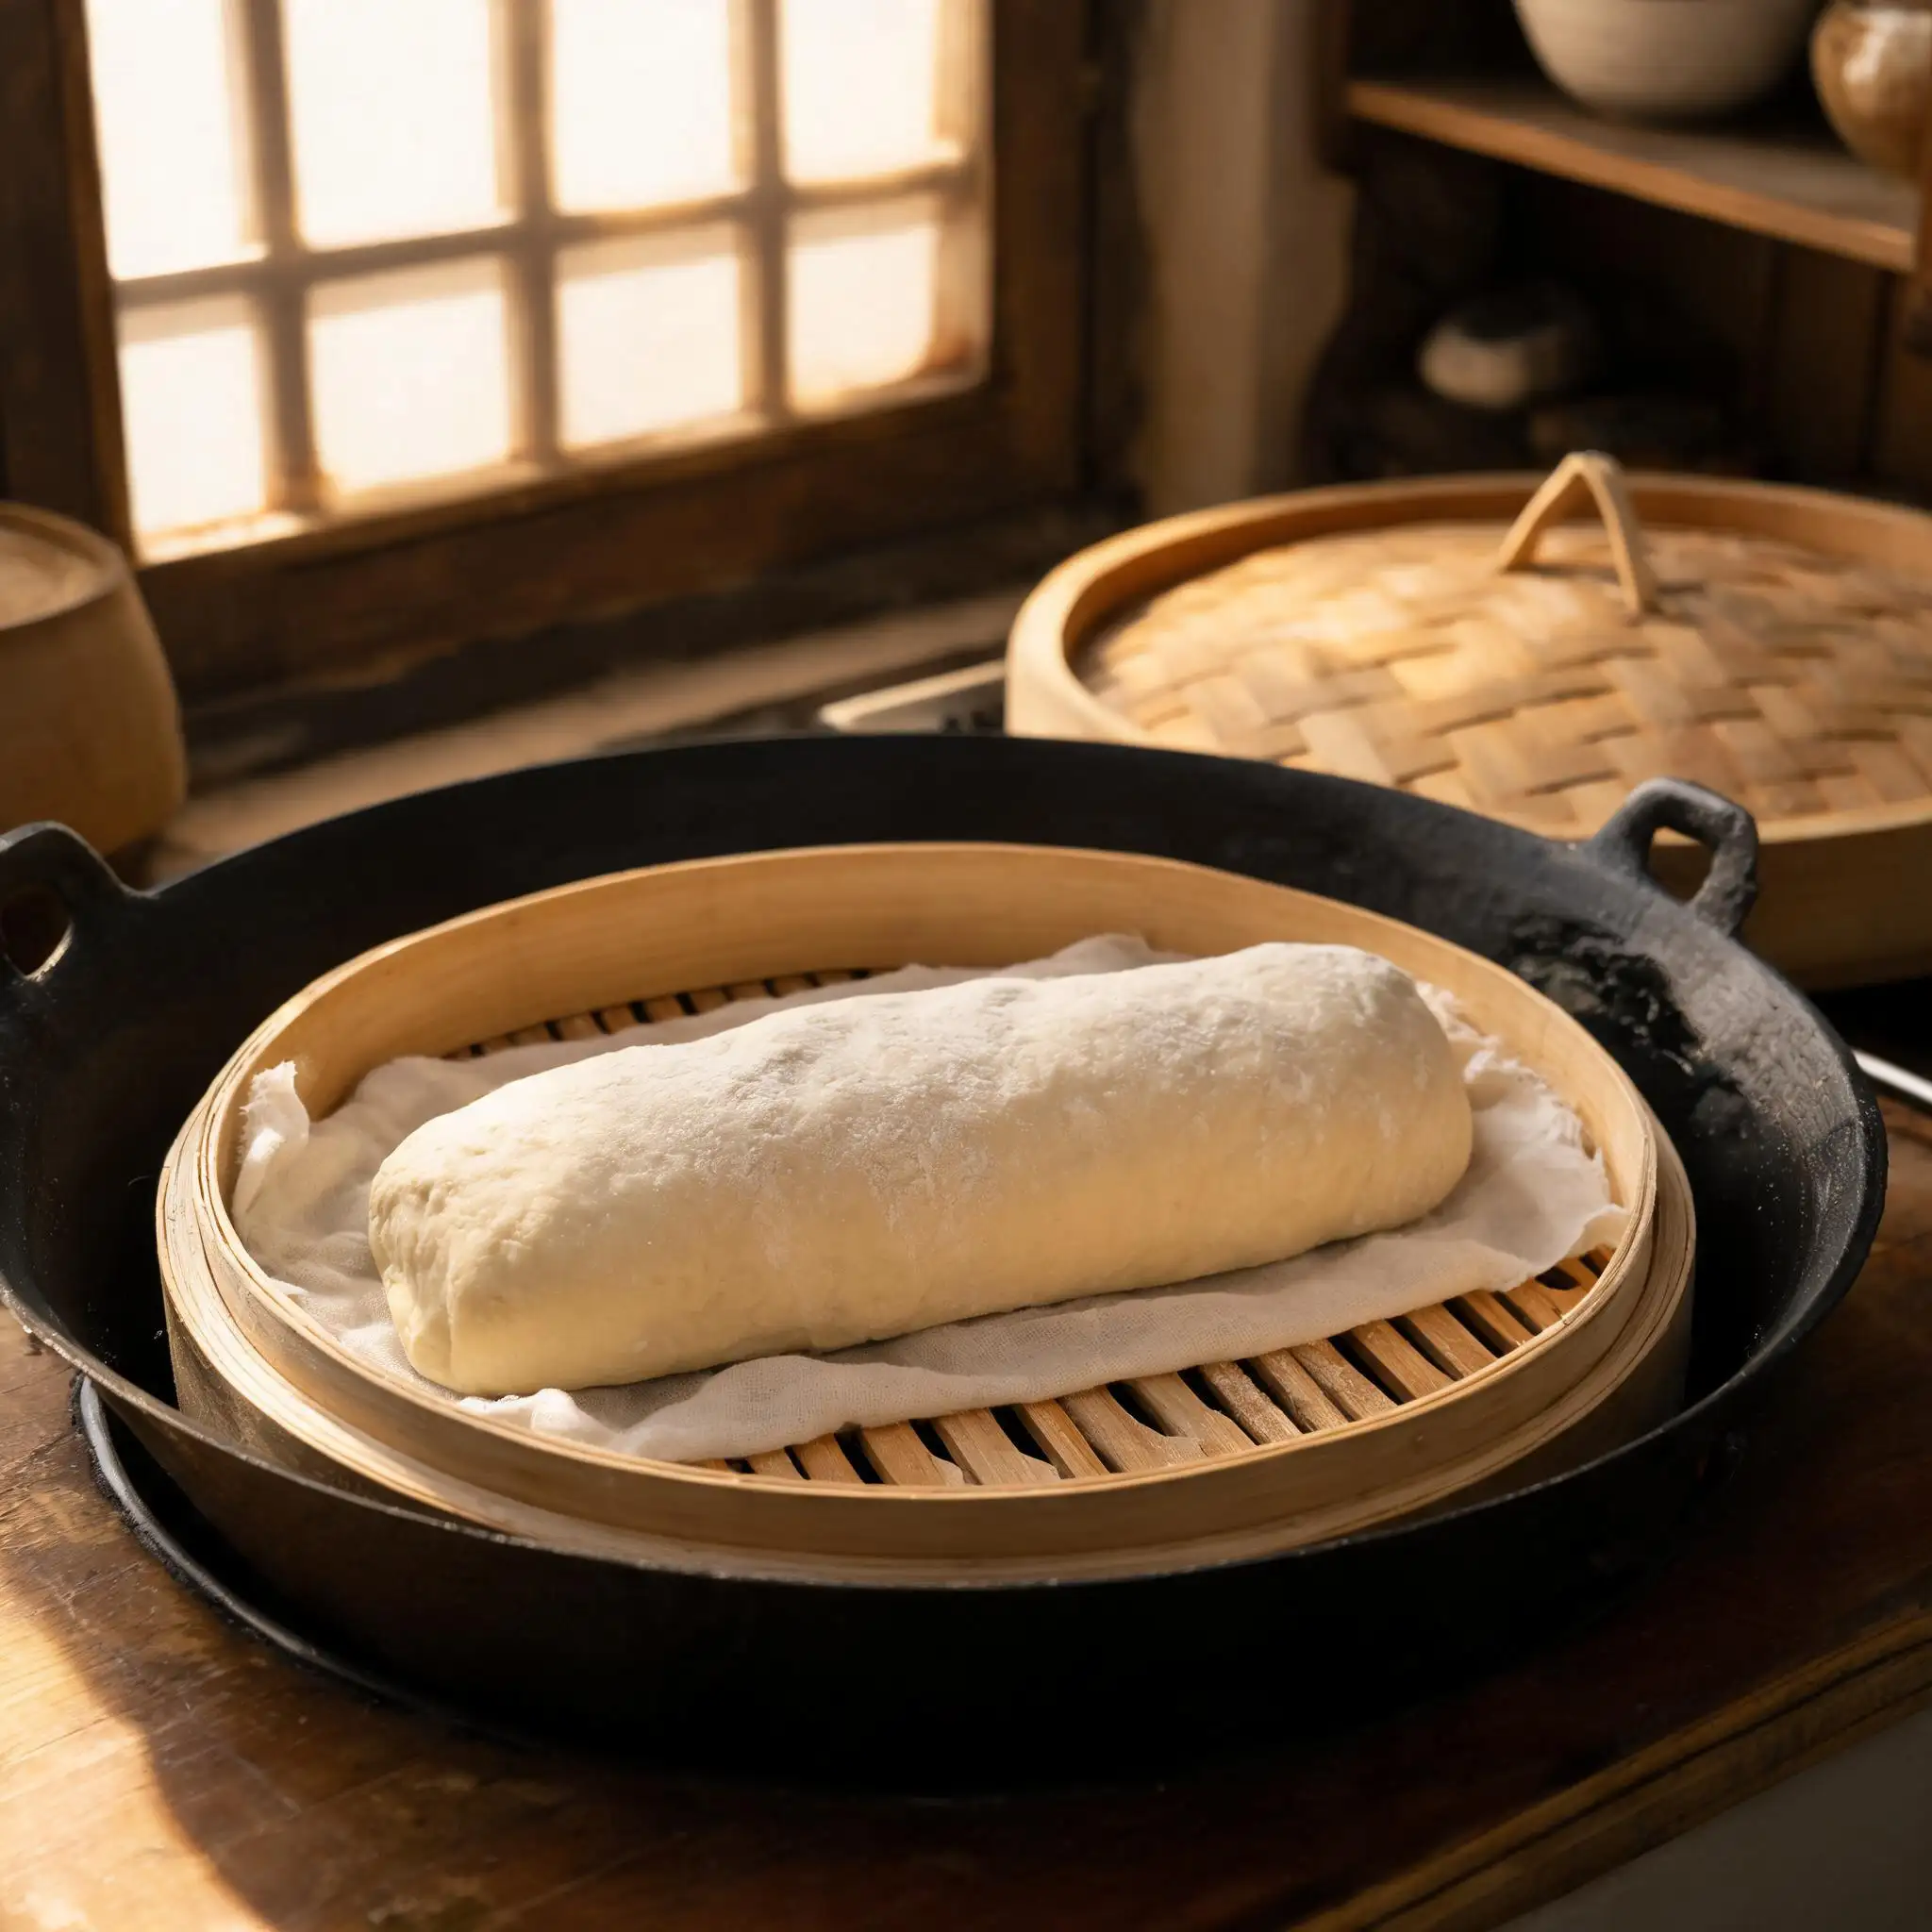
Place the roll seam-side down on a damp cloth-lined bamboo steamer tray. **Don't start the water yet.** Cover the steamer and let the roll rest for 20–30 minutes.
Rolling compresses the dough and stresses the gluten. The roll needs time to relax and puff up slightly before steam hits it. After resting it should look noticeably softer and slightly larger. Still looks tight? Give it 10 more minutes.
> ⚠️ Skip this rest and the outside sets before the inside opens up — dense center, uneven texture. Twenty minutes is not much to ask.
---
## Step 7 · The Steam
### Full boil first, then 25 minutes without lifting the lid
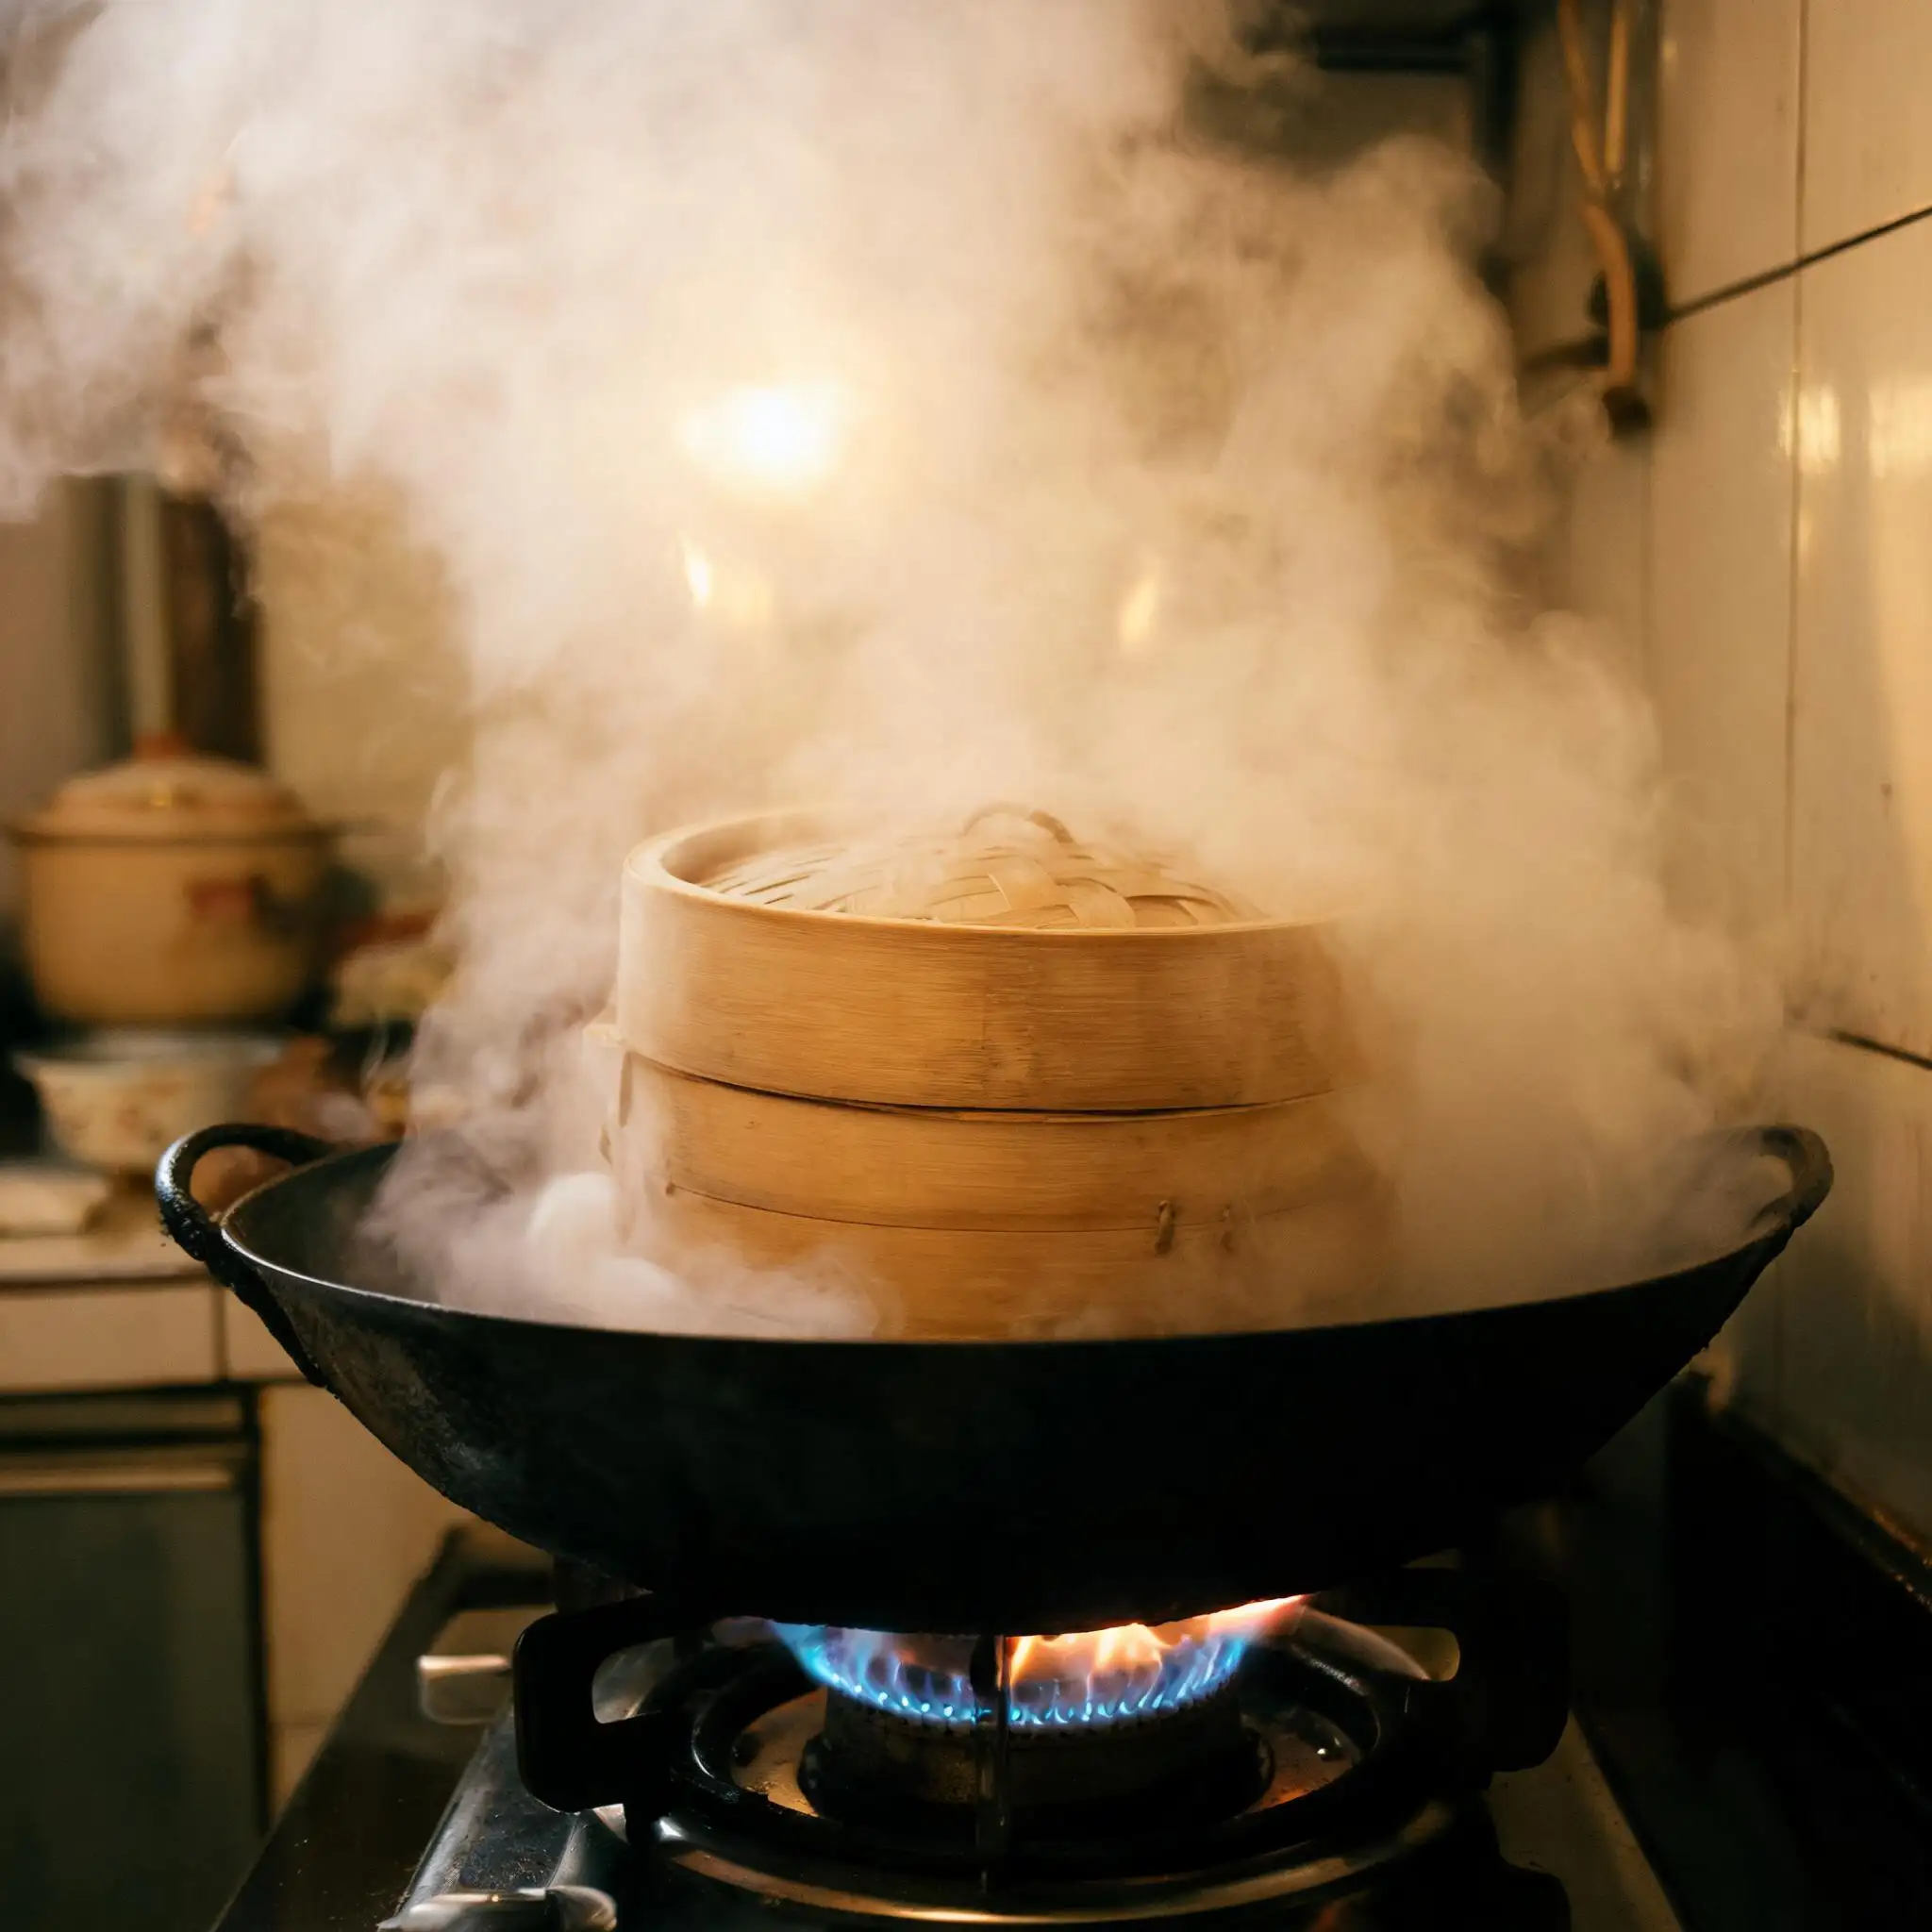
Add enough water to the wok to last at least 30 minutes of boiling. Bring it to a **full rolling boil** before the steamer goes in. Starting from cold water cooks the dough unevenly — the bottom of the roll gets a head start while the rest is still sitting in rising steam.
Cover and steam on **high heat for 25 minutes**.
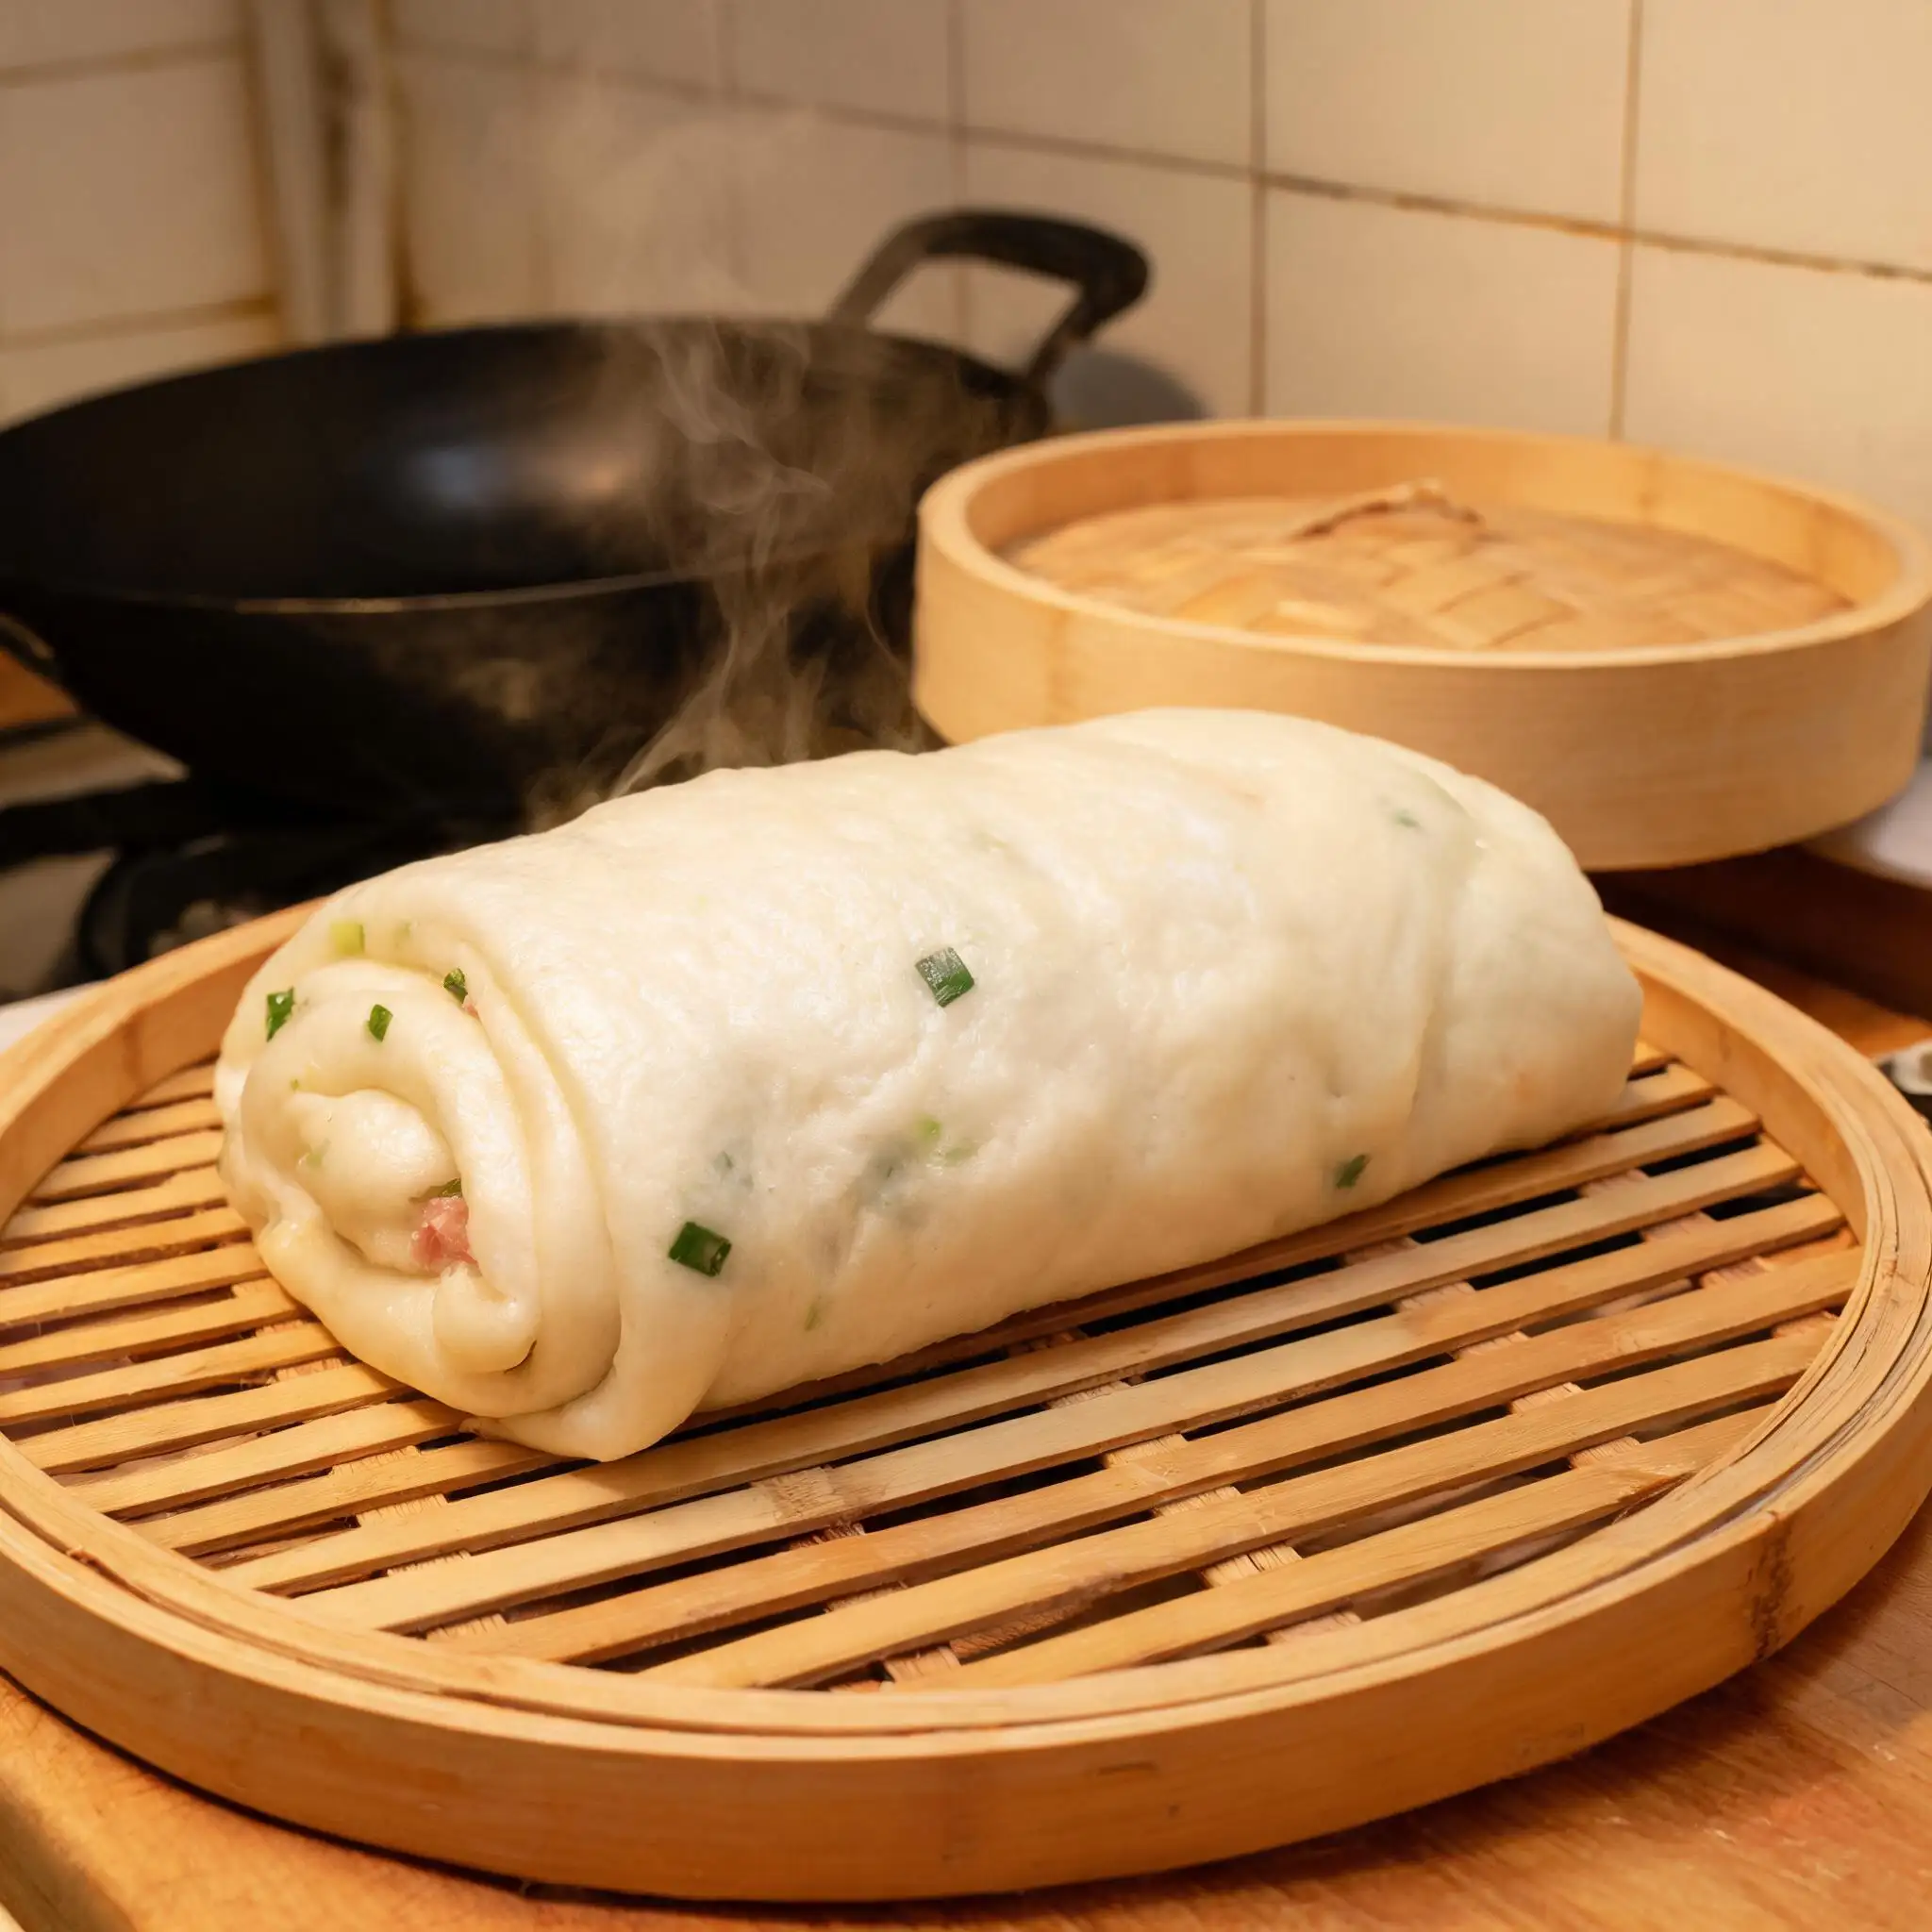
Turn off heat and **wait 5 more minutes before opening the lid** — opening early drops pressure too fast and the dough surface pulls back. When you lift it, tilt the lid away so condensation drips outward, not onto the roll.
---
## Step 8 · The Cut
### Slice while it's still hot, serve immediately
Move the roll to a cutting board. Let it sit for 1–2 minutes — enough to handle without burning your fingers.
Slice into rounds **3–4 cm thick** with a sharp knife, one clean downward cut per slice. **Don't drag the knife sideways** — that's what collapses the spiral. If your knife isn't sharp enough, use a serrated bread knife with a light back-and-forth motion instead of pressing straight down.
The cut surface should show clean spiral layers — white dough wound around pink-brown filling, scallion green visible throughout.
Serve immediately. Best in the first 10–15 minutes — soft, airy, slightly springy. Leftovers steam for 5 minutes and come back almost exactly as they were.
*You made the dough, you made the filling, you rolled it yourself — the spiral earned.*
## Steamed Pork Roll — Leavened Dough, Minced Pork & Scallion
> You spend two hours making it and it's gone in ten minutes
> The spiral cross-section is the thing — every slice shows you exactly what's inside
> No sauce needed, no sides, just the roll
---
**Serves** 3–4 · **Active time** 45 min · **Total time** 2 hr 30 min
**Dough**
- 500 g all-purpose flour
- 5 g active dry yeast
- 10 g sugar
- 260 ml warm water, around 38°C
**Filling**
- 400 g pork belly, 30% fat / 70% lean, hand-chopped into coarse mince
- 2 stalks scallion, finely chopped
**Seasoning**
- 2 tbsp sweet bean paste (甜面酱)
- 1 tsp dark soy sauce
- ½ tsp salt
- ¼ tsp white pepper
- 1 tsp sesame oil
---
## Step 1 · The Dough
### Mix, knead, wait for it to pull together
Dissolve yeast and sugar in the warm water — around 38°C, warm on your wrist. Let it sit 5 minutes until foamy. Pour into the flour, stir with chopsticks until shaggy, then knead by hand for 8–10 minutes. **Done when the surface is smooth and no longer tacky** — a stretched piece shouldn't tear immediately.
Sticky after 5 minutes? Add flour a tablespoon at a time. Too stiff? Wet your hands. Press a finger in — the dent should slowly spring back halfway. Cover and set aside somewhere warm.
---
## Step 2 · The First Rise
### An hour of doing nothing — harder than it sounds
The dough needs to roughly double in size. How long depends entirely on your kitchen temperature.
| Room temperature | Approximate rise time |
|-----------------|----------------------|
| 20°C | 90 min |
| 25°C | 60 min |
| 30°C | 40 min |
If your kitchen is cold, put the covered bowl in the oven with only the light on. No heat — the bulb alone is enough to raise the temperature a few degrees.
**Don't poke it every 10 minutes.** Leave it alone until it's clearly grown. Press two fingers in 2 cm deep — holes that stay without springing back means it's ready.
> ⚠️ Under-proofed dough makes a dense, gummy roll. If you're unsure, give it 15 more minutes.
---
## Step 3 · The Filling
### Hand-chopped pork — this part matters more than it seems
Buy pork belly with visible fat striping. **The 30% fat ratio is not optional** — lean pork alone dries out completely over 25 minutes of steaming. You need fat to carry the moisture.
Chop it yourself with a heavy cleaver. Slice the meat into thin strips first, then stack them and chop crosswise. Turn the board 90 degrees and go through it again. Spend 5–6 minutes until you get a **coarse, irregular mince** — bigger chunks mixed with smaller ones, nothing close to a smooth paste. That uneven texture is the difference between filling that has a bite and filling that's just a gray smear.
Add scallion, sweet bean paste, dark soy sauce, salt, white pepper, and sesame oil. Mix by hand, **always in one direction**, until it pulls together and feels slightly springy.
**Sweet bean paste carries most of the flavor** — salty and slightly fermented-sweet in a way soy sauce alone can't do. Don't swap it.
---
## Step 4 · The Roll-out
### Punch it down, then roll it wide and flat
When the dough has doubled, punch it down firmly in the center. It'll deflate with a soft exhale. Knead briefly for 2 minutes to work out any remaining air bubbles — you'll feel them popping under your palms.
Dust the surface with flour. Roll the dough into a large rectangle — **roughly 40 × 30 cm, about 4–5 mm thick**. Roll from center outward, rotate a quarter turn, roll again. Keep it moving so it doesn't stick.
- *Uneven edges are fine* — this is handmade and it shows
- **Consistent thickness matters more than shape** — thin patches tear when the filling goes on
- Flour as needed under the sheet, but don't overdo it or the seam won't hold
> ⚠️ If the dough keeps shrinking back when you roll it, cover it with a cloth and let it rest for 5 minutes. The gluten is too tight — it needs to relax before it'll stay flat.
---
## Step 5 · The Spread & Roll
### Layer the filling, then roll it tight and slow
Spread the filling across the dough surface, leaving a **2 cm bare strip at the far edge**. Keep it roughly even — thicker patches in the middle mean the roll won't hold its shape when cut.
Start rolling from the near edge toward you. **Slow and deliberate**, pressing lightly as you go to push out any trapped air. Keep the log as compact as you can — a loose roll means the layers separate and the spiral falls apart on the cutting board.
Once you've rolled to the bare edge, press it firmly against the log to seal the seam. Pinch along the full length with your fingers.
- **Seam side goes face-down** when you place it in the steamer
- *The ends will look uneven* — trim a centimeter off each end if you want clean slices
- If the filling bulges out from the ends, push it back in gently
---
## Step 6 · The Second Rise
### 20 minutes of resting before any heat
Place the roll seam-side down on a damp cloth-lined bamboo steamer tray. **Don't start the water yet.** Cover the steamer and let the roll rest for 20–30 minutes.
Rolling compresses the dough and stresses the gluten. The roll needs time to relax and puff up slightly before steam hits it. After resting it should look noticeably softer and slightly larger. Still looks tight? Give it 10 more minutes.
> ⚠️ Skip this rest and the outside sets before the inside opens up — dense center, uneven texture. Twenty minutes is not much to ask.
---
## Step 7 · The Steam
### Full boil first, then 25 minutes without lifting the lid
Add enough water to the wok to last at least 30 minutes of boiling. Bring it to a **full rolling boil** before the steamer goes in. Starting from cold water cooks the dough unevenly — the bottom of the roll gets a head start while the rest is still sitting in rising steam.
Cover and steam on **high heat for 25 minutes**.
Turn off heat and **wait 5 more minutes before opening the lid** — opening early drops pressure too fast and the dough surface pulls back. When you lift it, tilt the lid away so condensation drips outward, not onto the roll.
---
## Step 8 · The Cut
### Slice while it's still hot, serve immediately
Move the roll to a cutting board. Let it sit for 1–2 minutes — enough to handle without burning your fingers.
Slice into rounds **3–4 cm thick** with a sharp knife, one clean downward cut per slice. **Don't drag the knife sideways** — that's what collapses the spiral. If your knife isn't sharp enough, use a serrated bread knife with a light back-and-forth motion instead of pressing straight down.
The cut surface should show clean spiral layers — white dough wound around pink-brown filling, scallion green visible throughout.
Serve immediately. Best in the first 10–15 minutes — soft, airy, slightly springy. Leftovers steam for 5 minutes and come back almost exactly as they were.
*You made the dough, you made the filling, you rolled it yourself — the spiral earned.*