·5/12/2026
from
PingYao-WǍNTUŌ
# · WǍNTUŌ ·
## Buckwheat Steamed Cake — Cold, Dense, and Better With Chili Oil
> Grey flour, cold water, a ceramic bowl. Nothing fancy until you add the red oil.
> The steam does all the work. Your job is the vinegar.
> Get good garlic. That part actually matters.
---
## Ingredients
| Item | Amount |
|------|--------|
| Buckwheat flour | 200g |
| Water, cold | 400ml |
| Salt | 1 tsp |
| Chili oil | 3 tbsp |
| Aged black vinegar | 2 tbsp |
| Garlic, minced | 4 cloves |
| Dried red chili | 2–3, for garnish |
> Yield: 4 servings · Best at room temperature · Keeps 2 days refrigerated
---
## 1 · The Lineup
### Buckwheat flour, water, salt — that's the whole cake
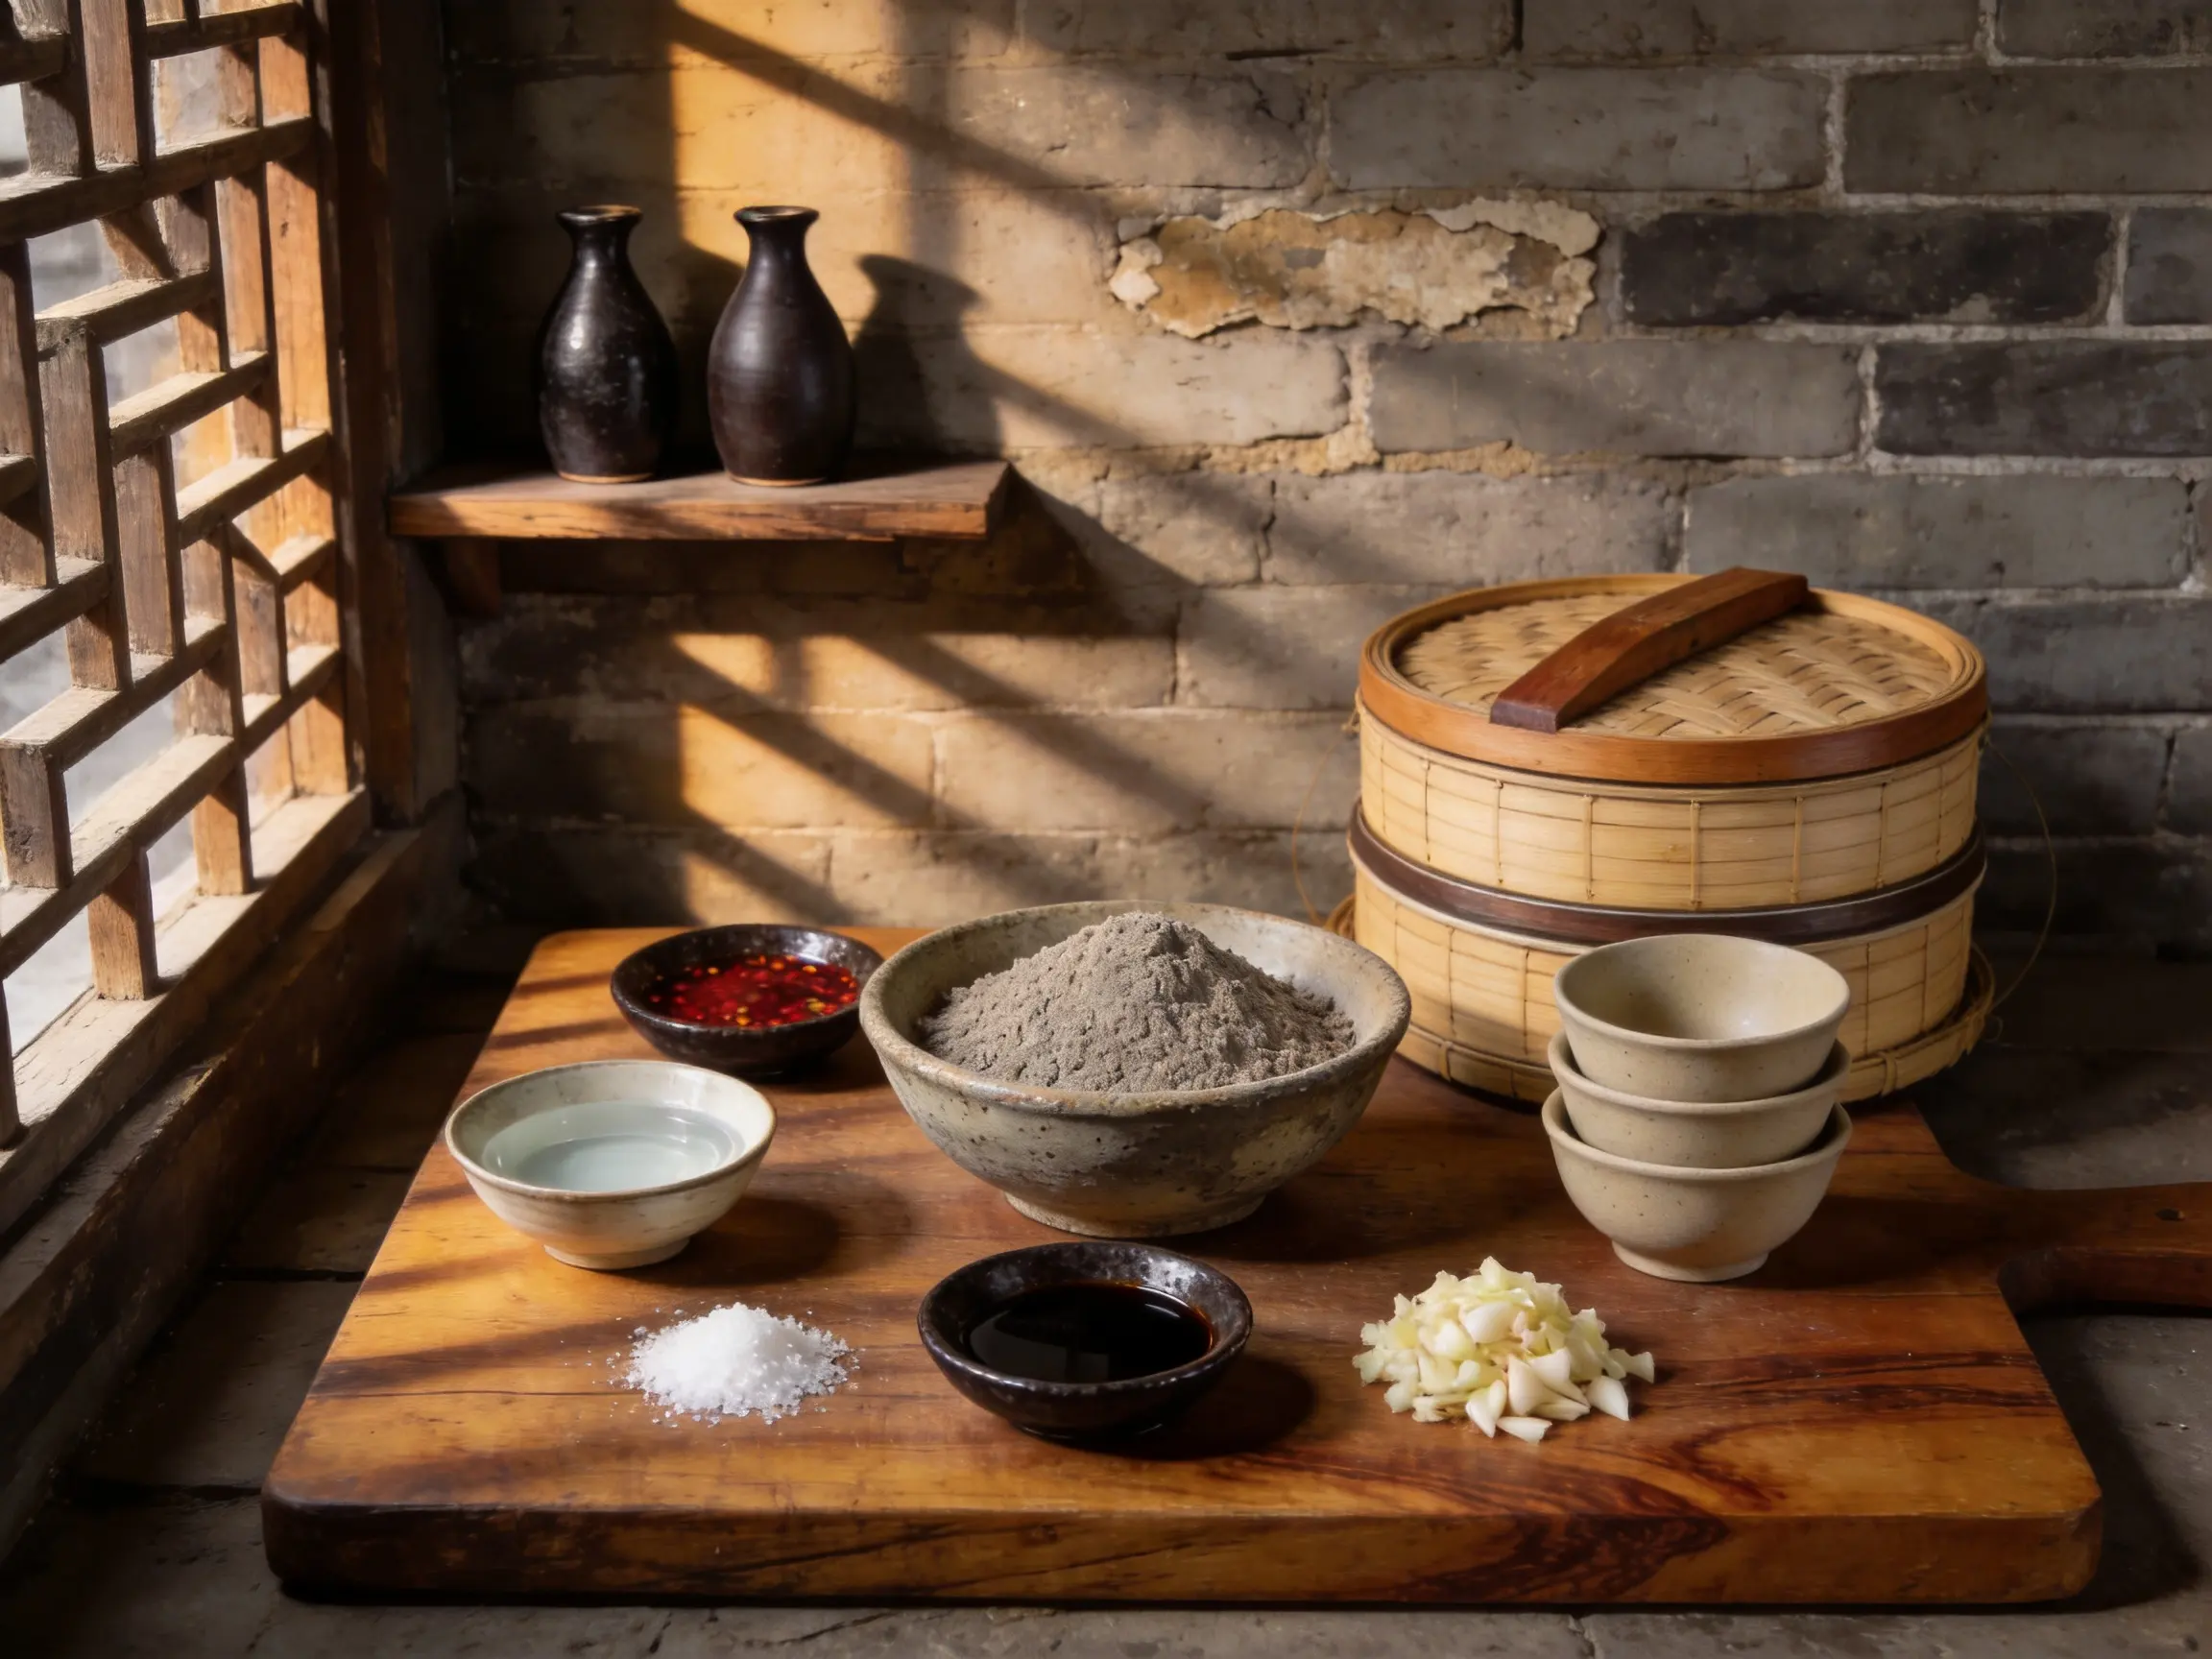
Everything on the board before you touch the water. The flour, a bowl for mixing, the ceramic molds lined up and ready. The chili oil, vinegar, and garlic come later — those are for after, and they're what make it worth eating.
**Use 100% buckwheat flour.** Mixed grain versions are softer and won't hold a clean slice. You want something the knife goes through without crumbling.
---
## 2 · The Batter
### Thin enough to pour, not thick enough to spread
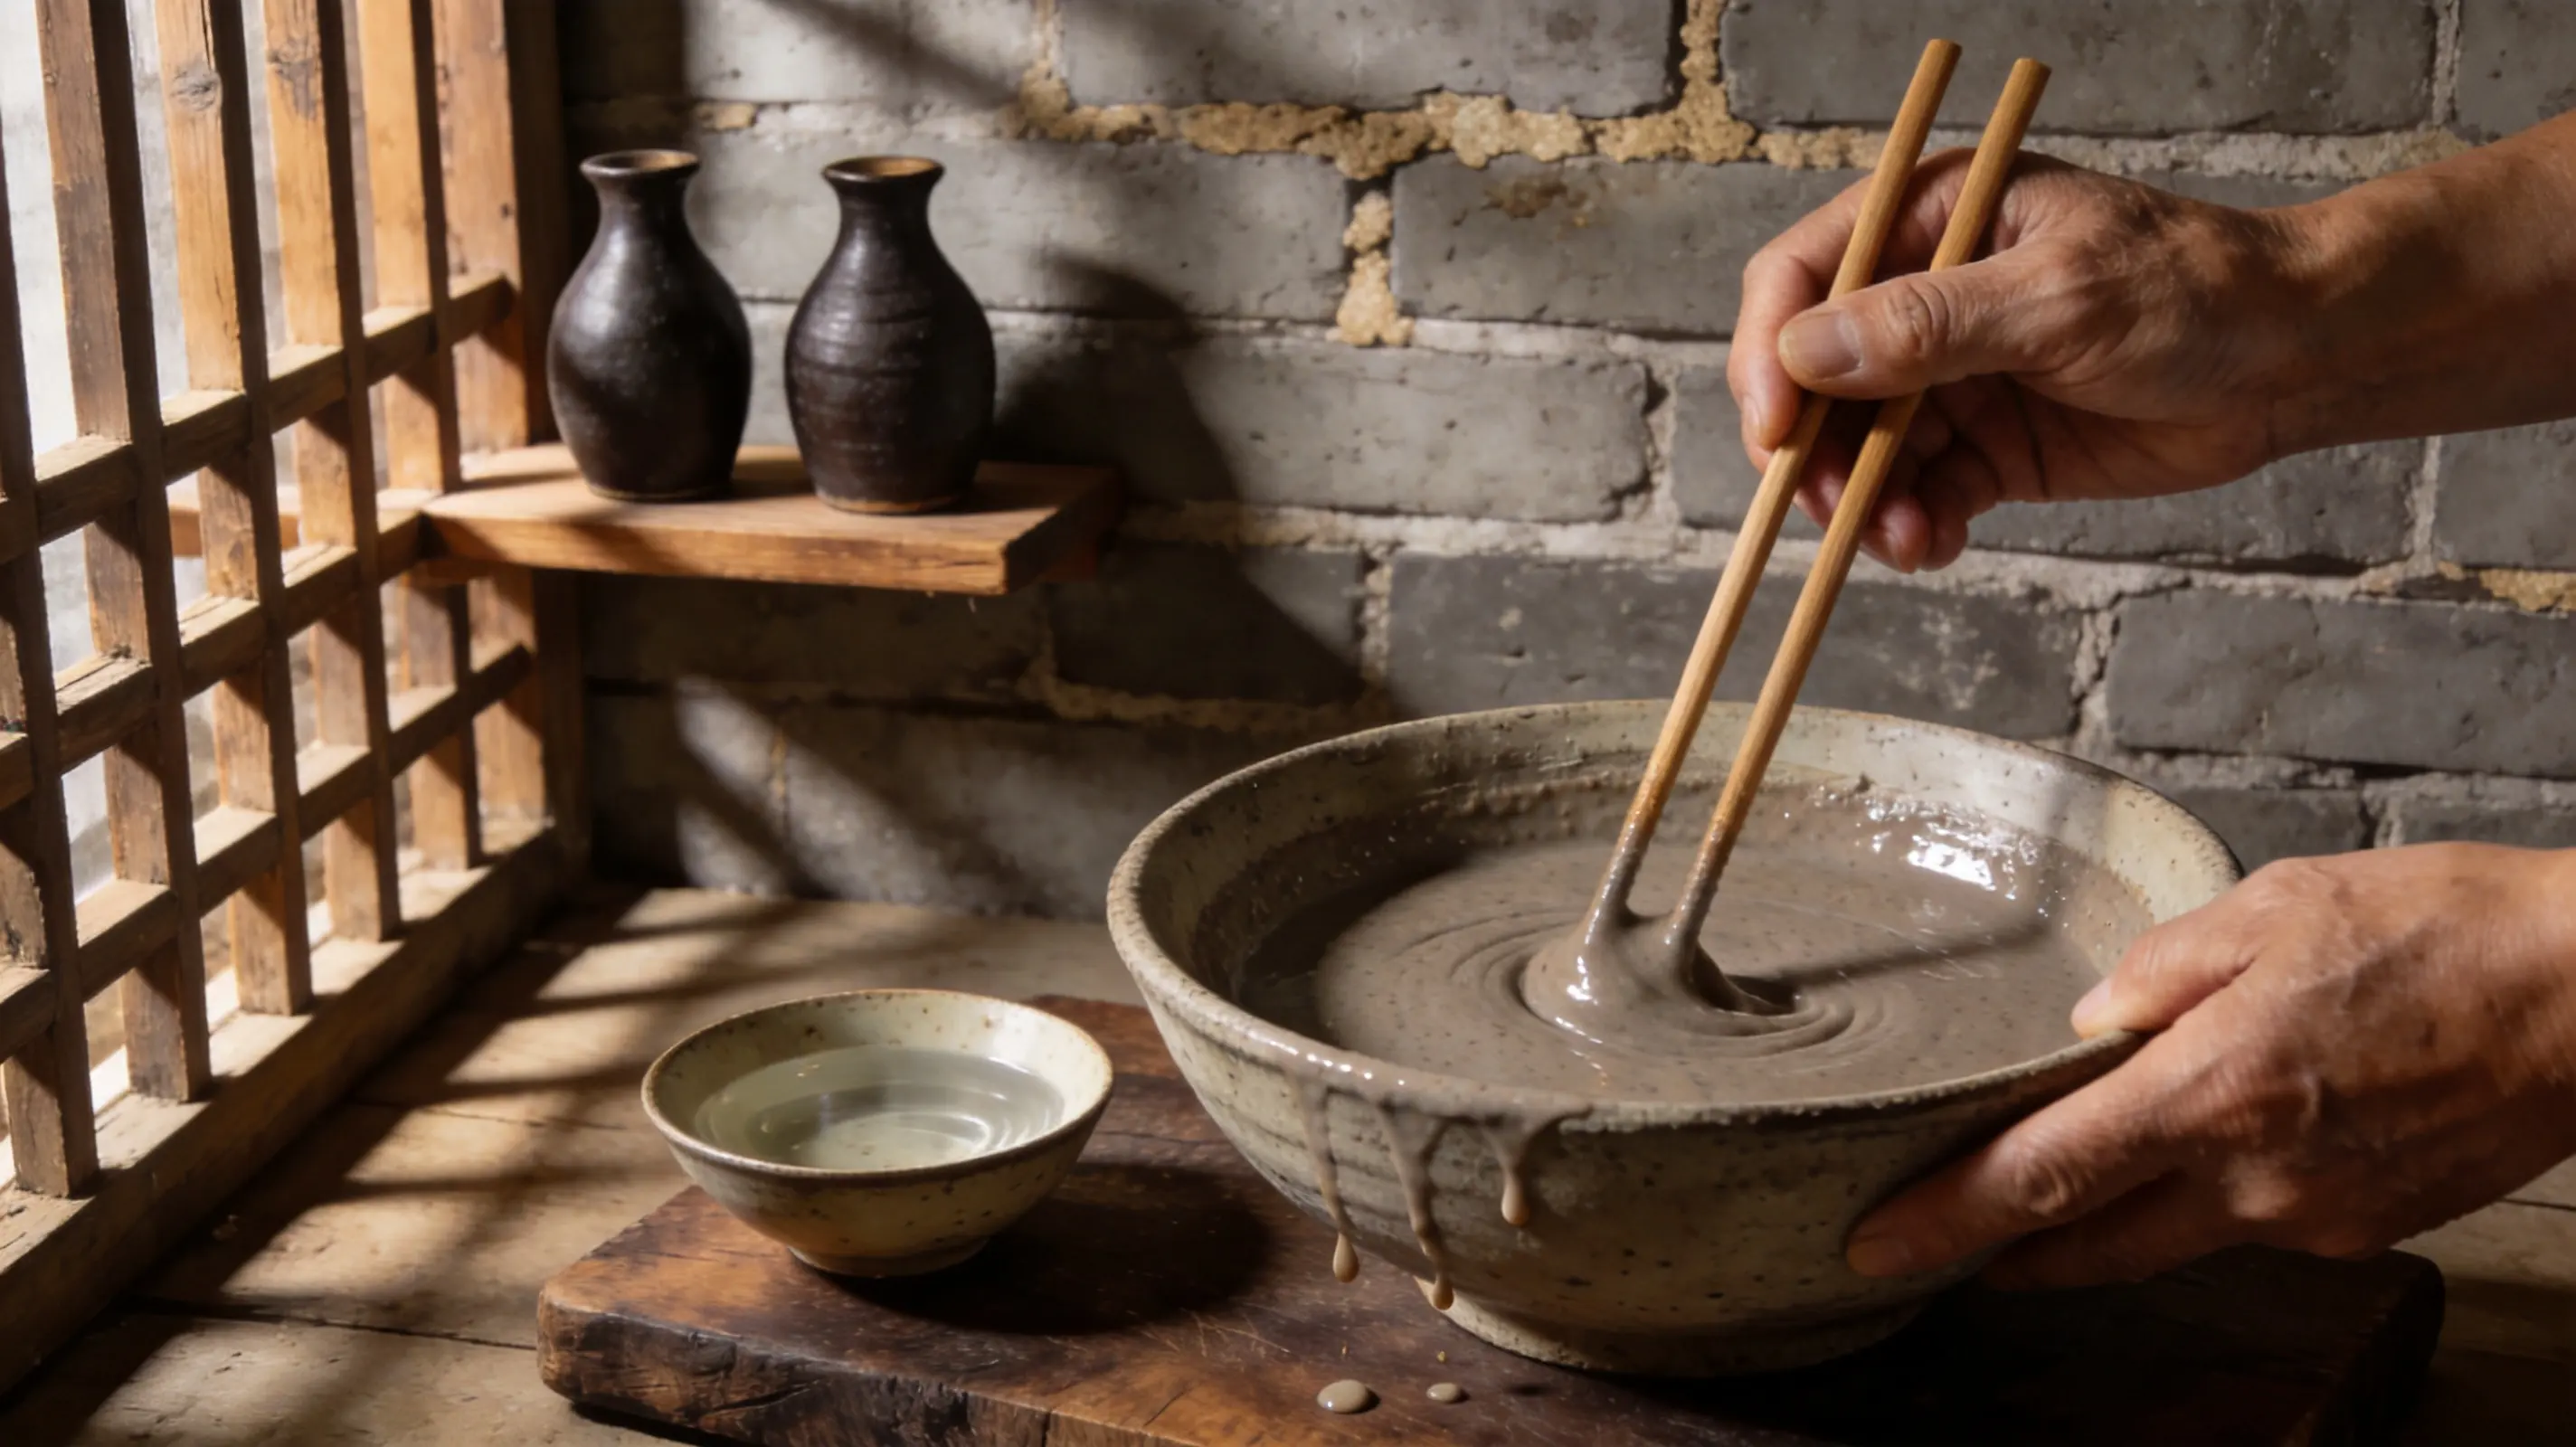
Add cold water to the flour slowly and stir as you go. **Target consistency: thinner than pancake batter.** It should run off a chopstick in a thin stream.
No eggs. No oil. The buckwheat sets entirely from starch and steam. If it clumps, add a splash more water and keep stirring.
---
## 3 · The Pour
### Three-quarters full, no more
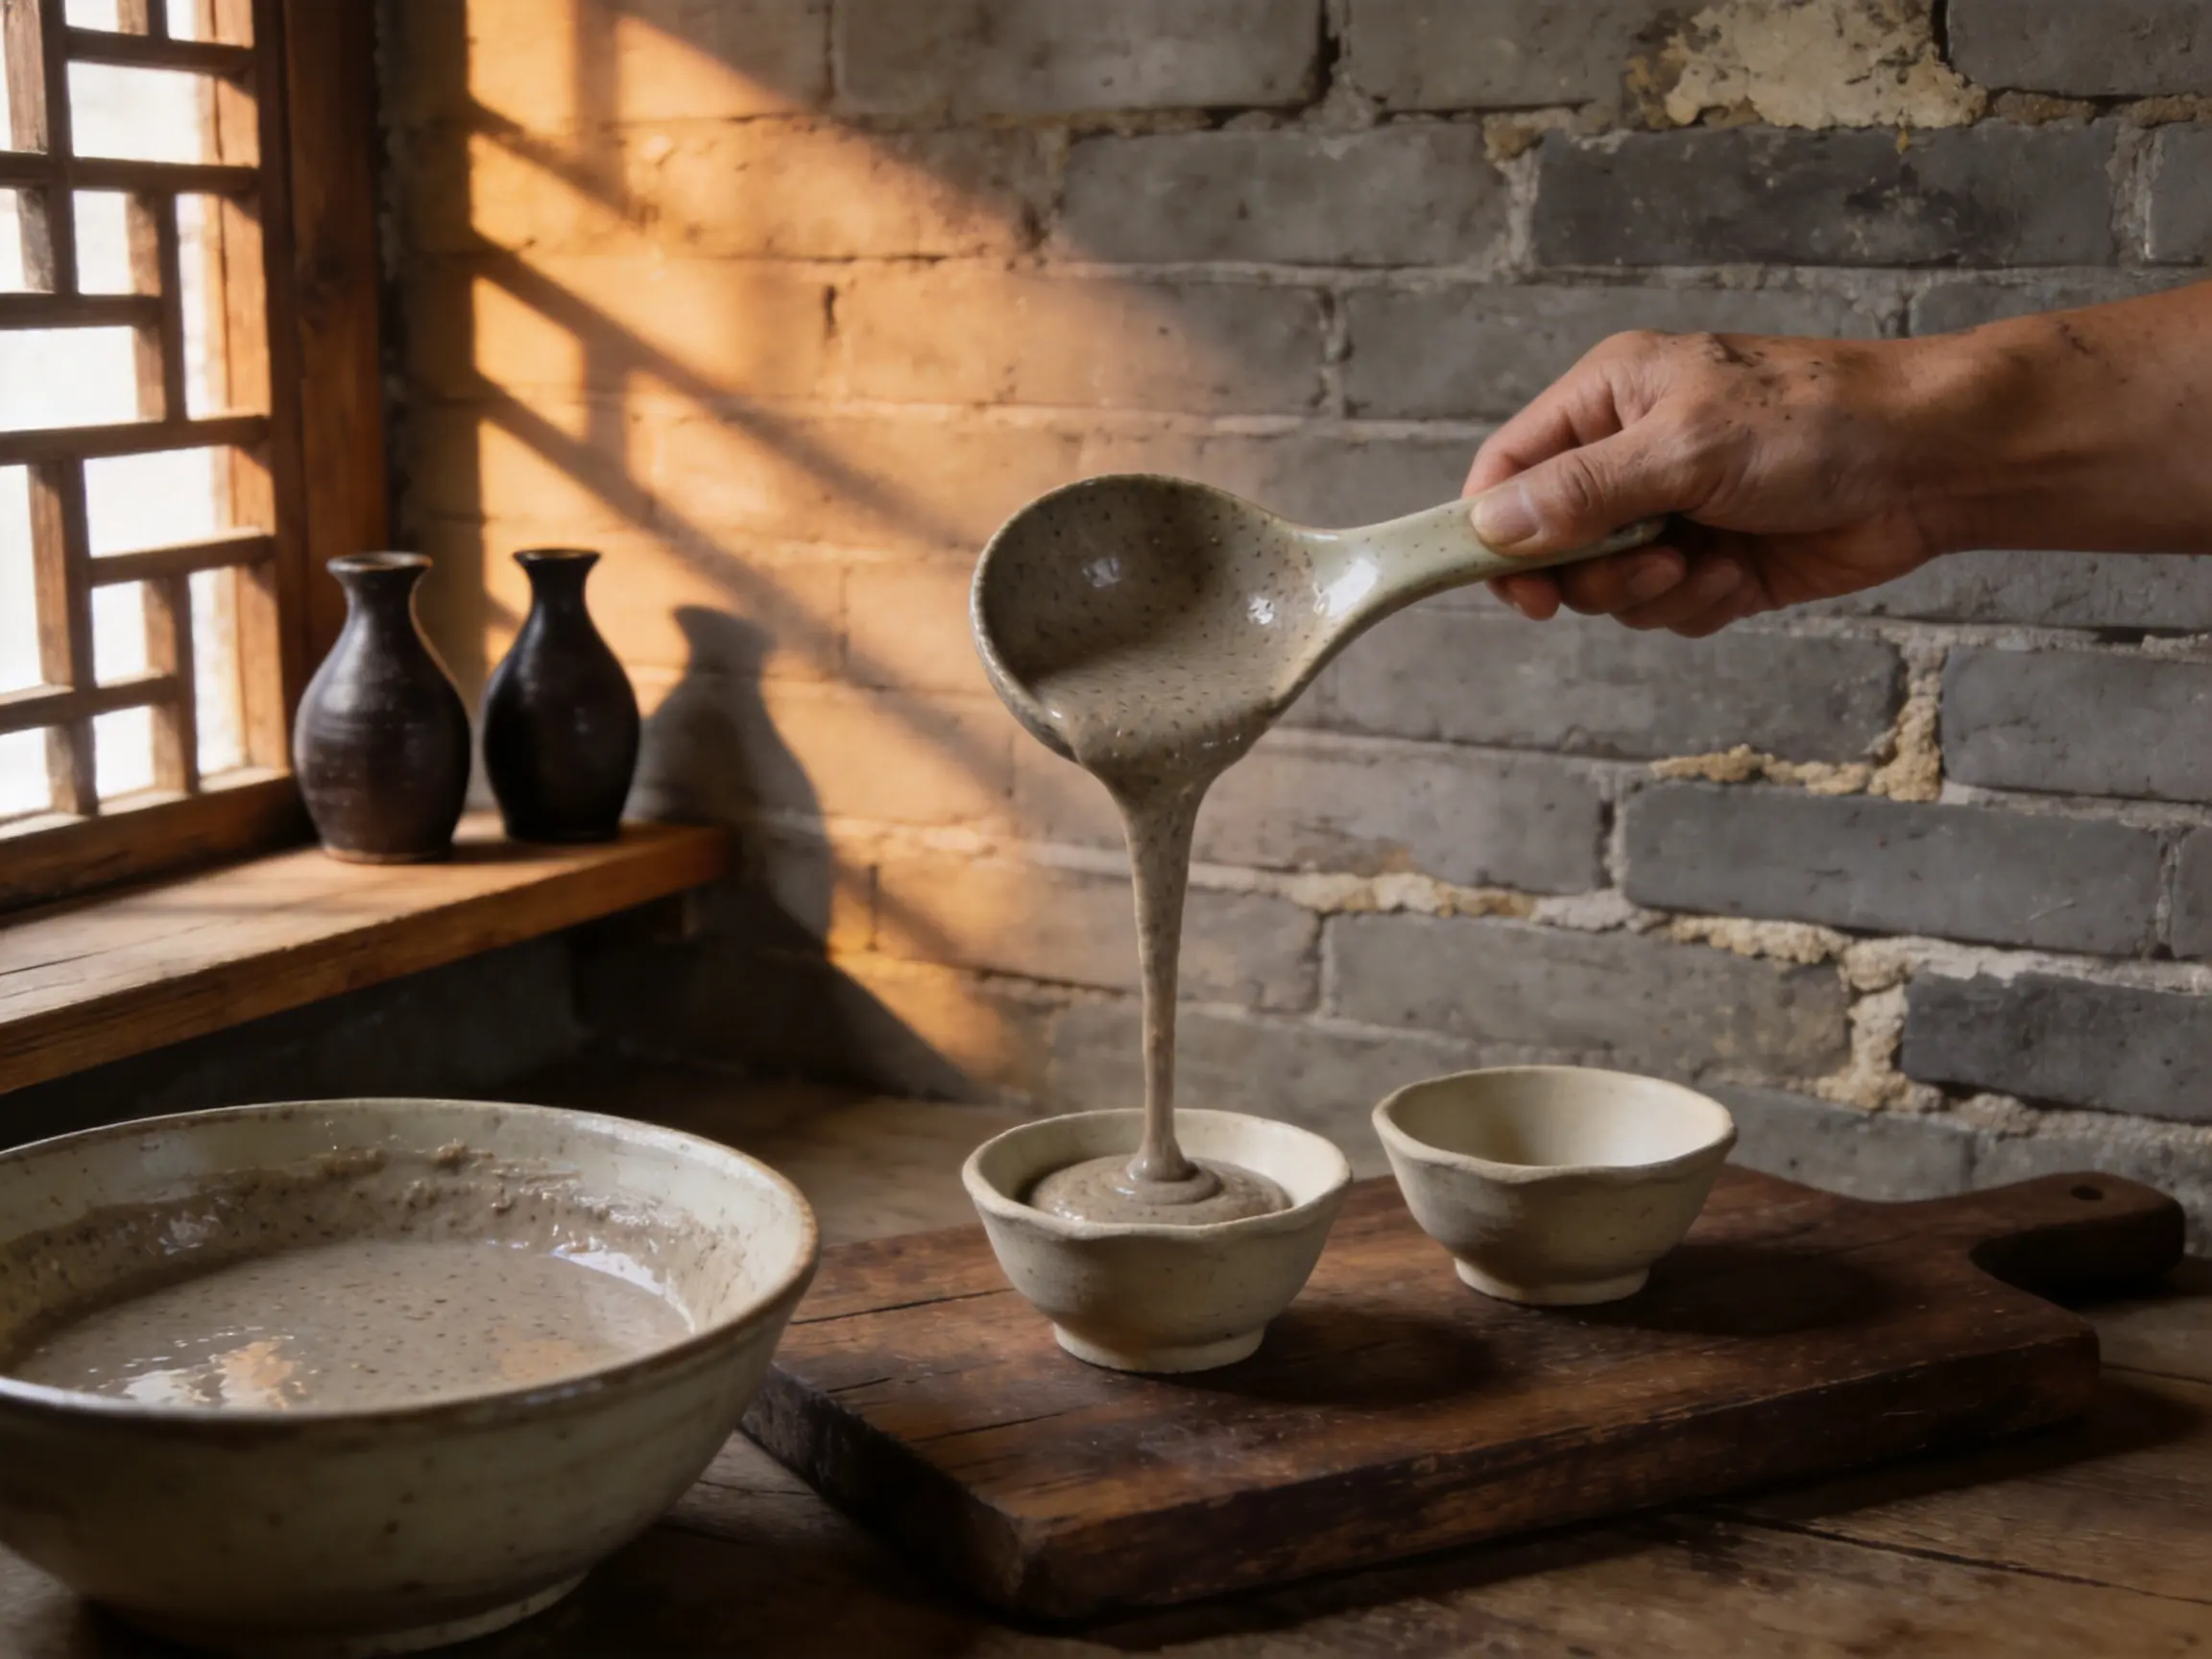
Ladle the batter into each ceramic bowl mold — about three-quarters full. The batter expands slightly as it steams, not dramatically, but enough to overflow if you're too generous.
**Wipe the rim clean before stacking.** Batter that drips down the outside turns tacky when cooked and makes unmolding harder than it needs to be.
---
## 4 · The Steam
### 25 minutes, lid on, don't open early
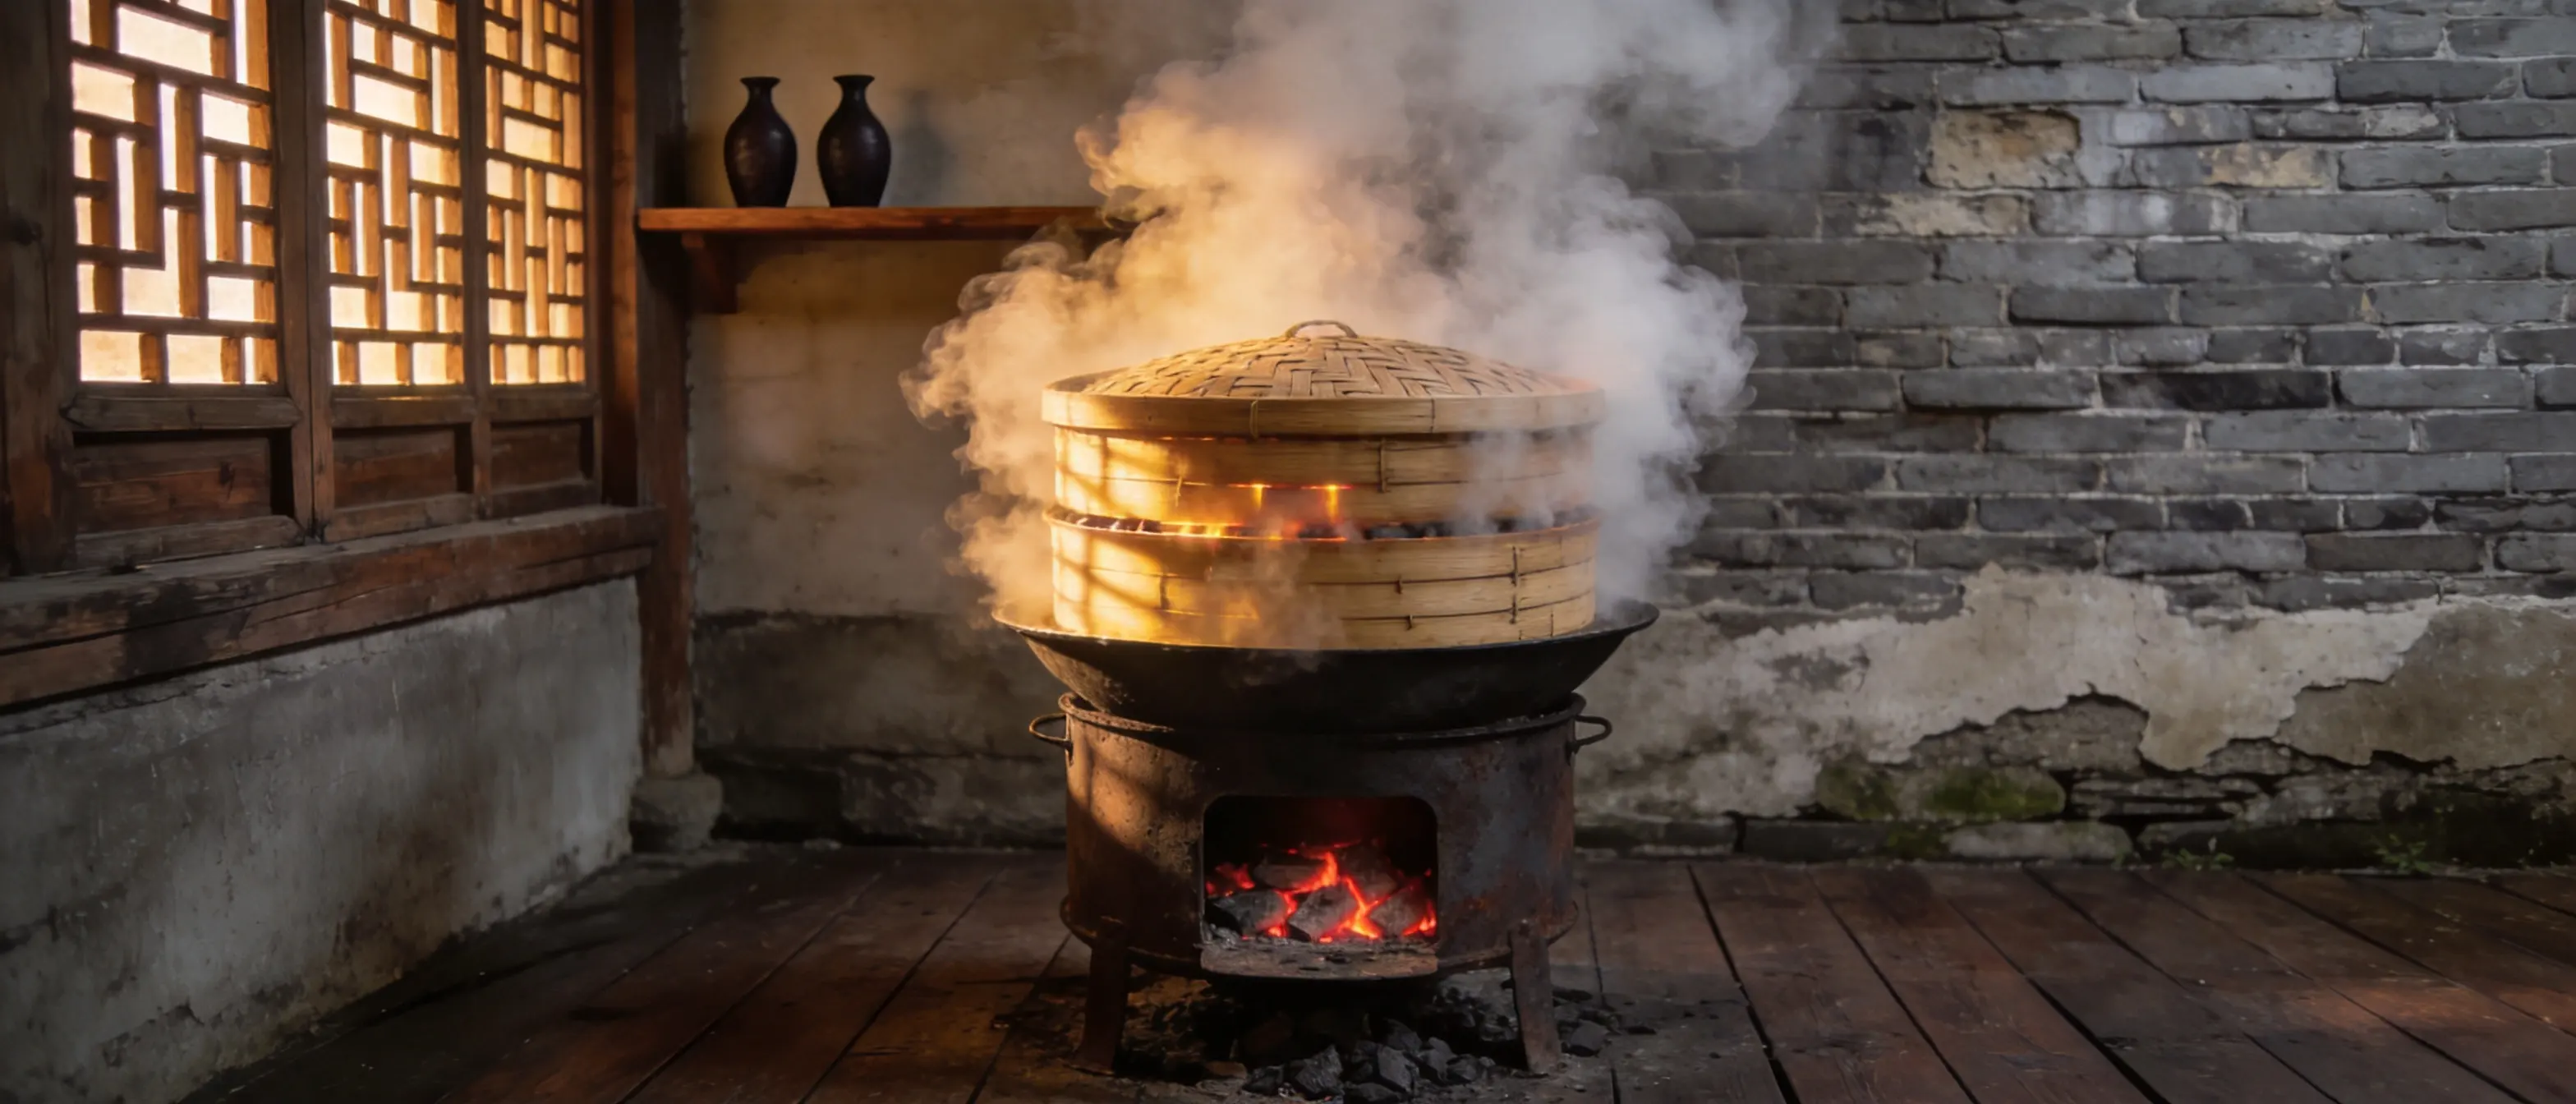
Full heat, bamboo steamer over boiling water, lid on. 25 minutes for small bowl molds. Don't lift the lid before 20 minutes — you'll lose the steam pressure and the center won't set.
**The cake is done when the center doesn't give.** Press lightly with a chopstick through the gap. Resistance means it's ready. Wobble means five more minutes.
Let it cool completely in the mold before unmolding. Hot buckwheat tears.
---
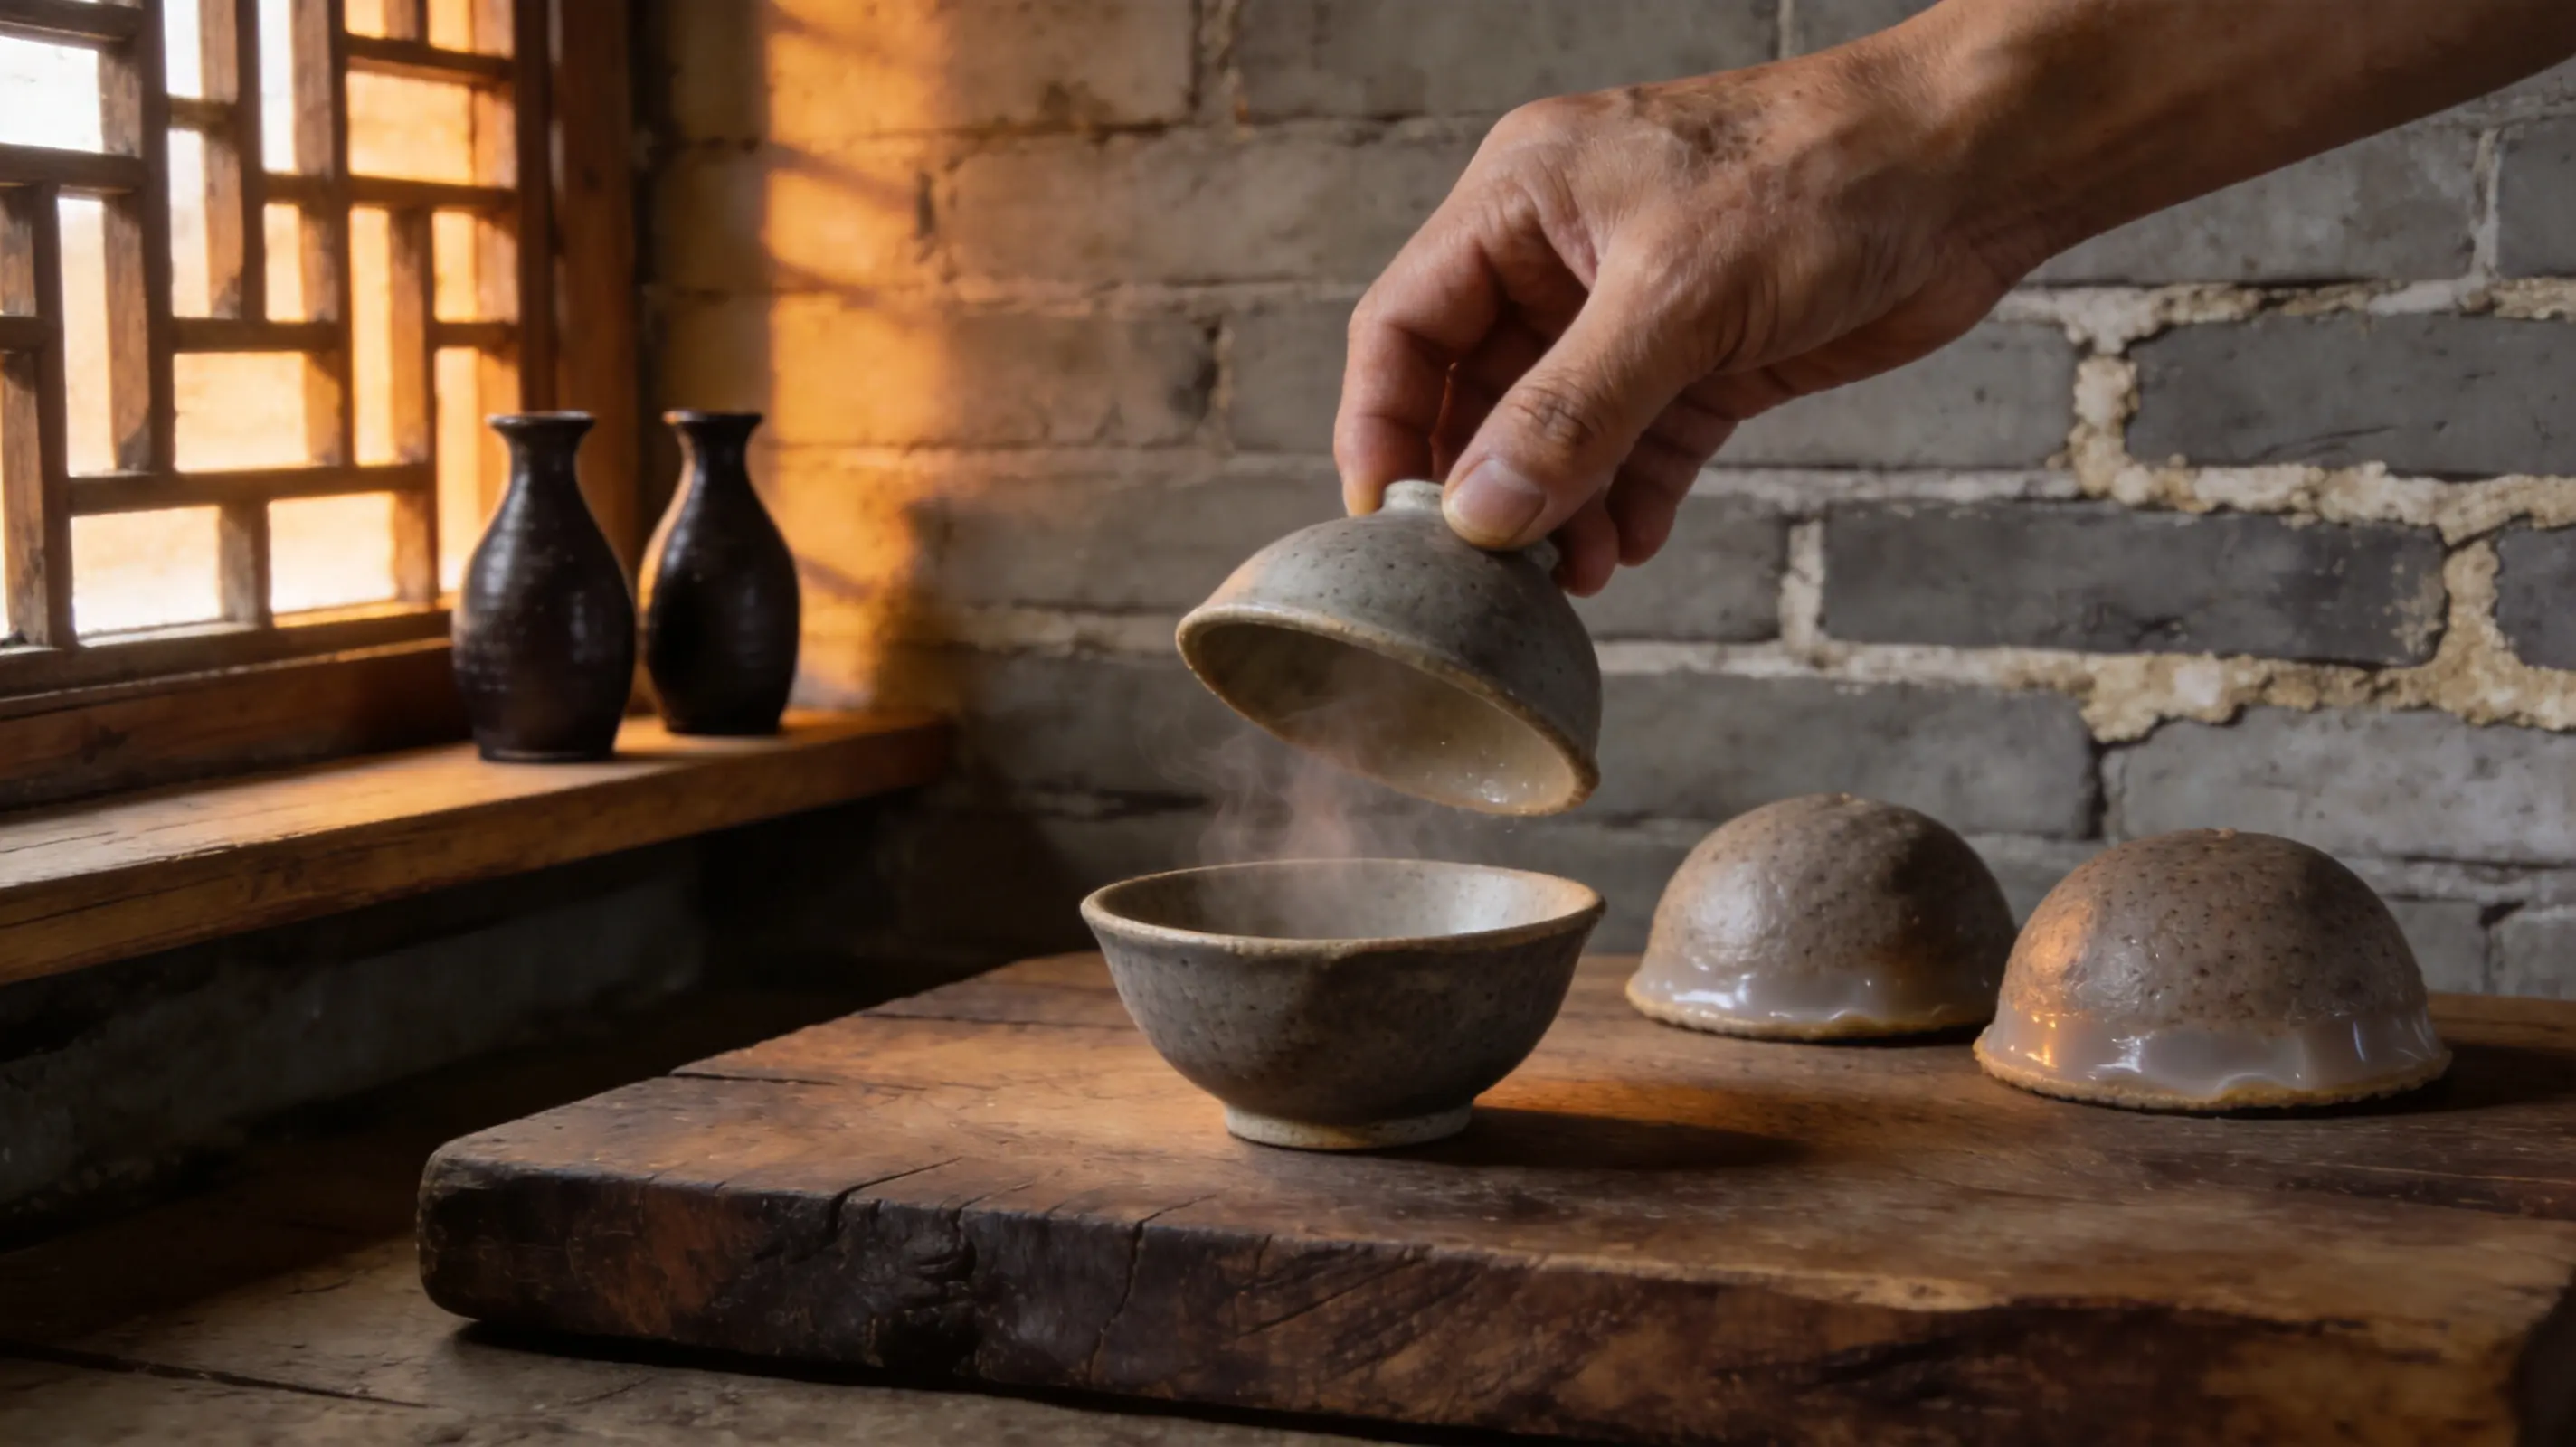
## 5 · The Unmold
### Tilt, tap, wait
Run a thin knife once around the edge. Flip the mold over the board and tap the bottom twice. It should slide out clean — grey-brown dome, smooth underside, still a little warm in the center.
If it sticks, you tried too early or the mold wasn't clean. **Next batch: a light wipe of oil on the inside of the mold before you pour.**
---
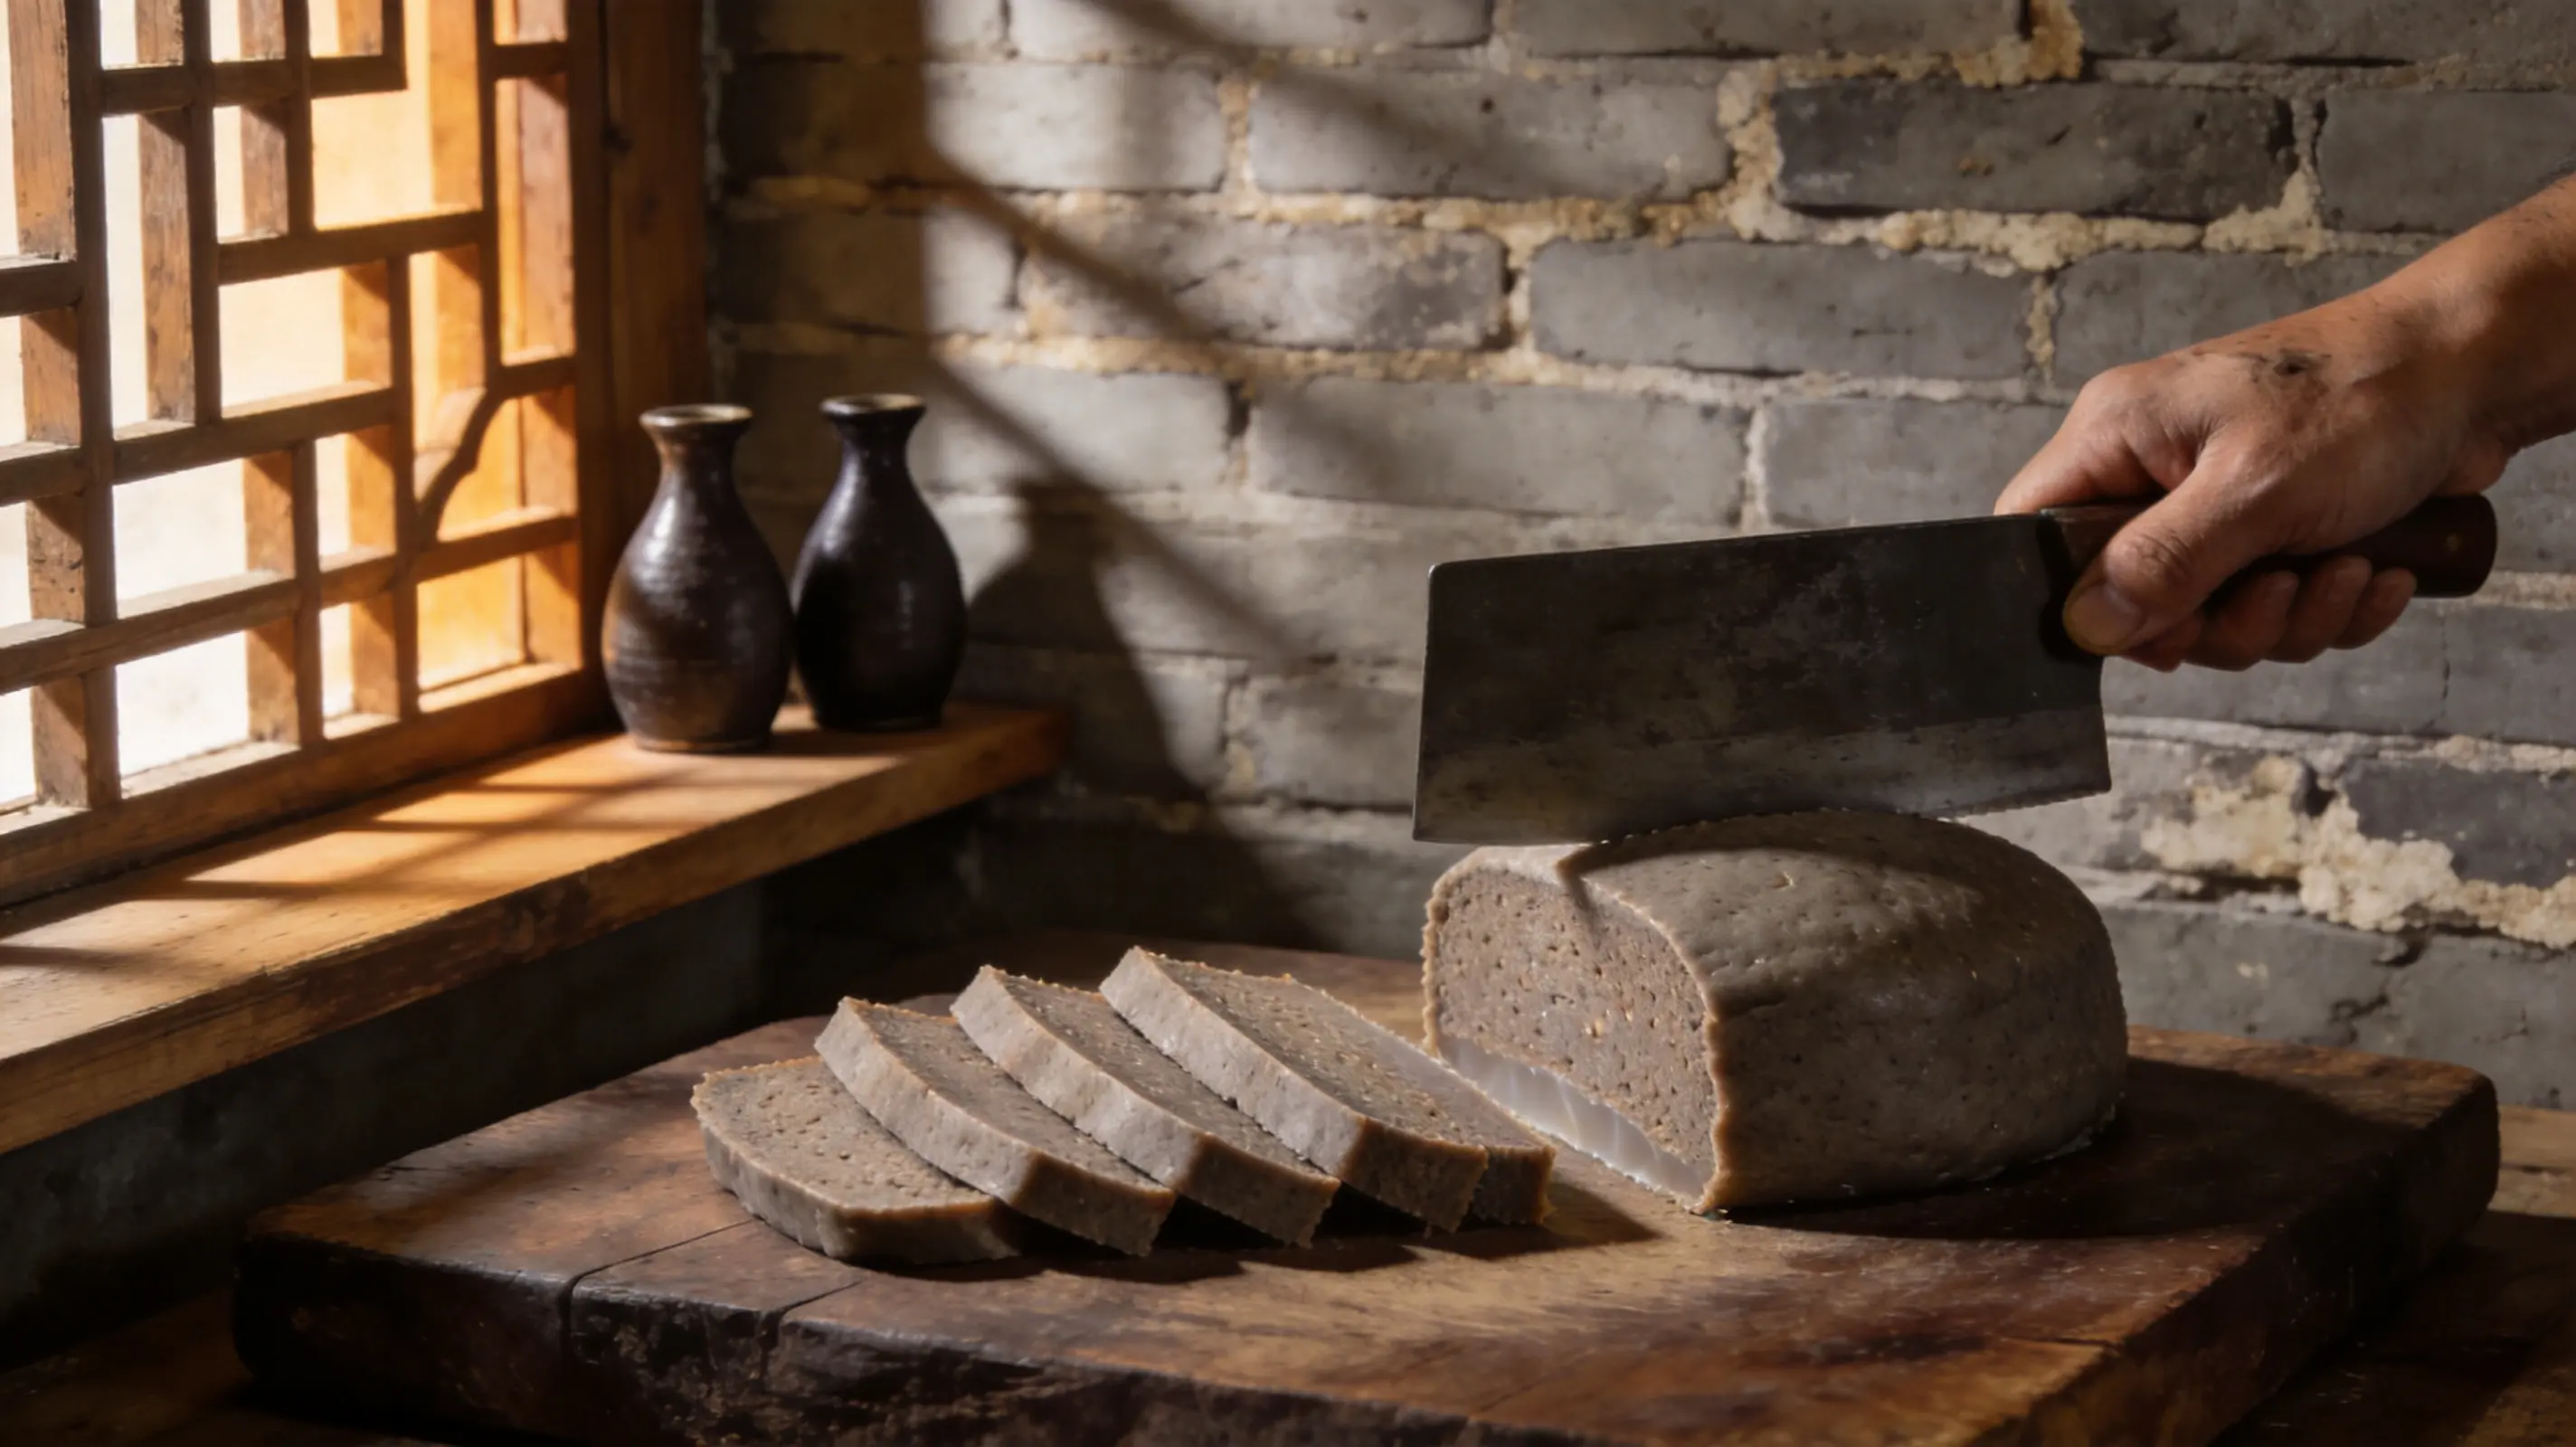
## 6 · The Slice
### One cake, 1cm strips, sharp knife
Set the dome flat-side down. One hand steadying it, knife going straight across — about 1cm wide each strip. Don't press hard. A sharp knife does this without force.
**The cut face should look slightly translucent, almost waxy.** That's the starch gelled properly. If it crumbles at the edge, the batter was too thin or it came off heat too early.
---
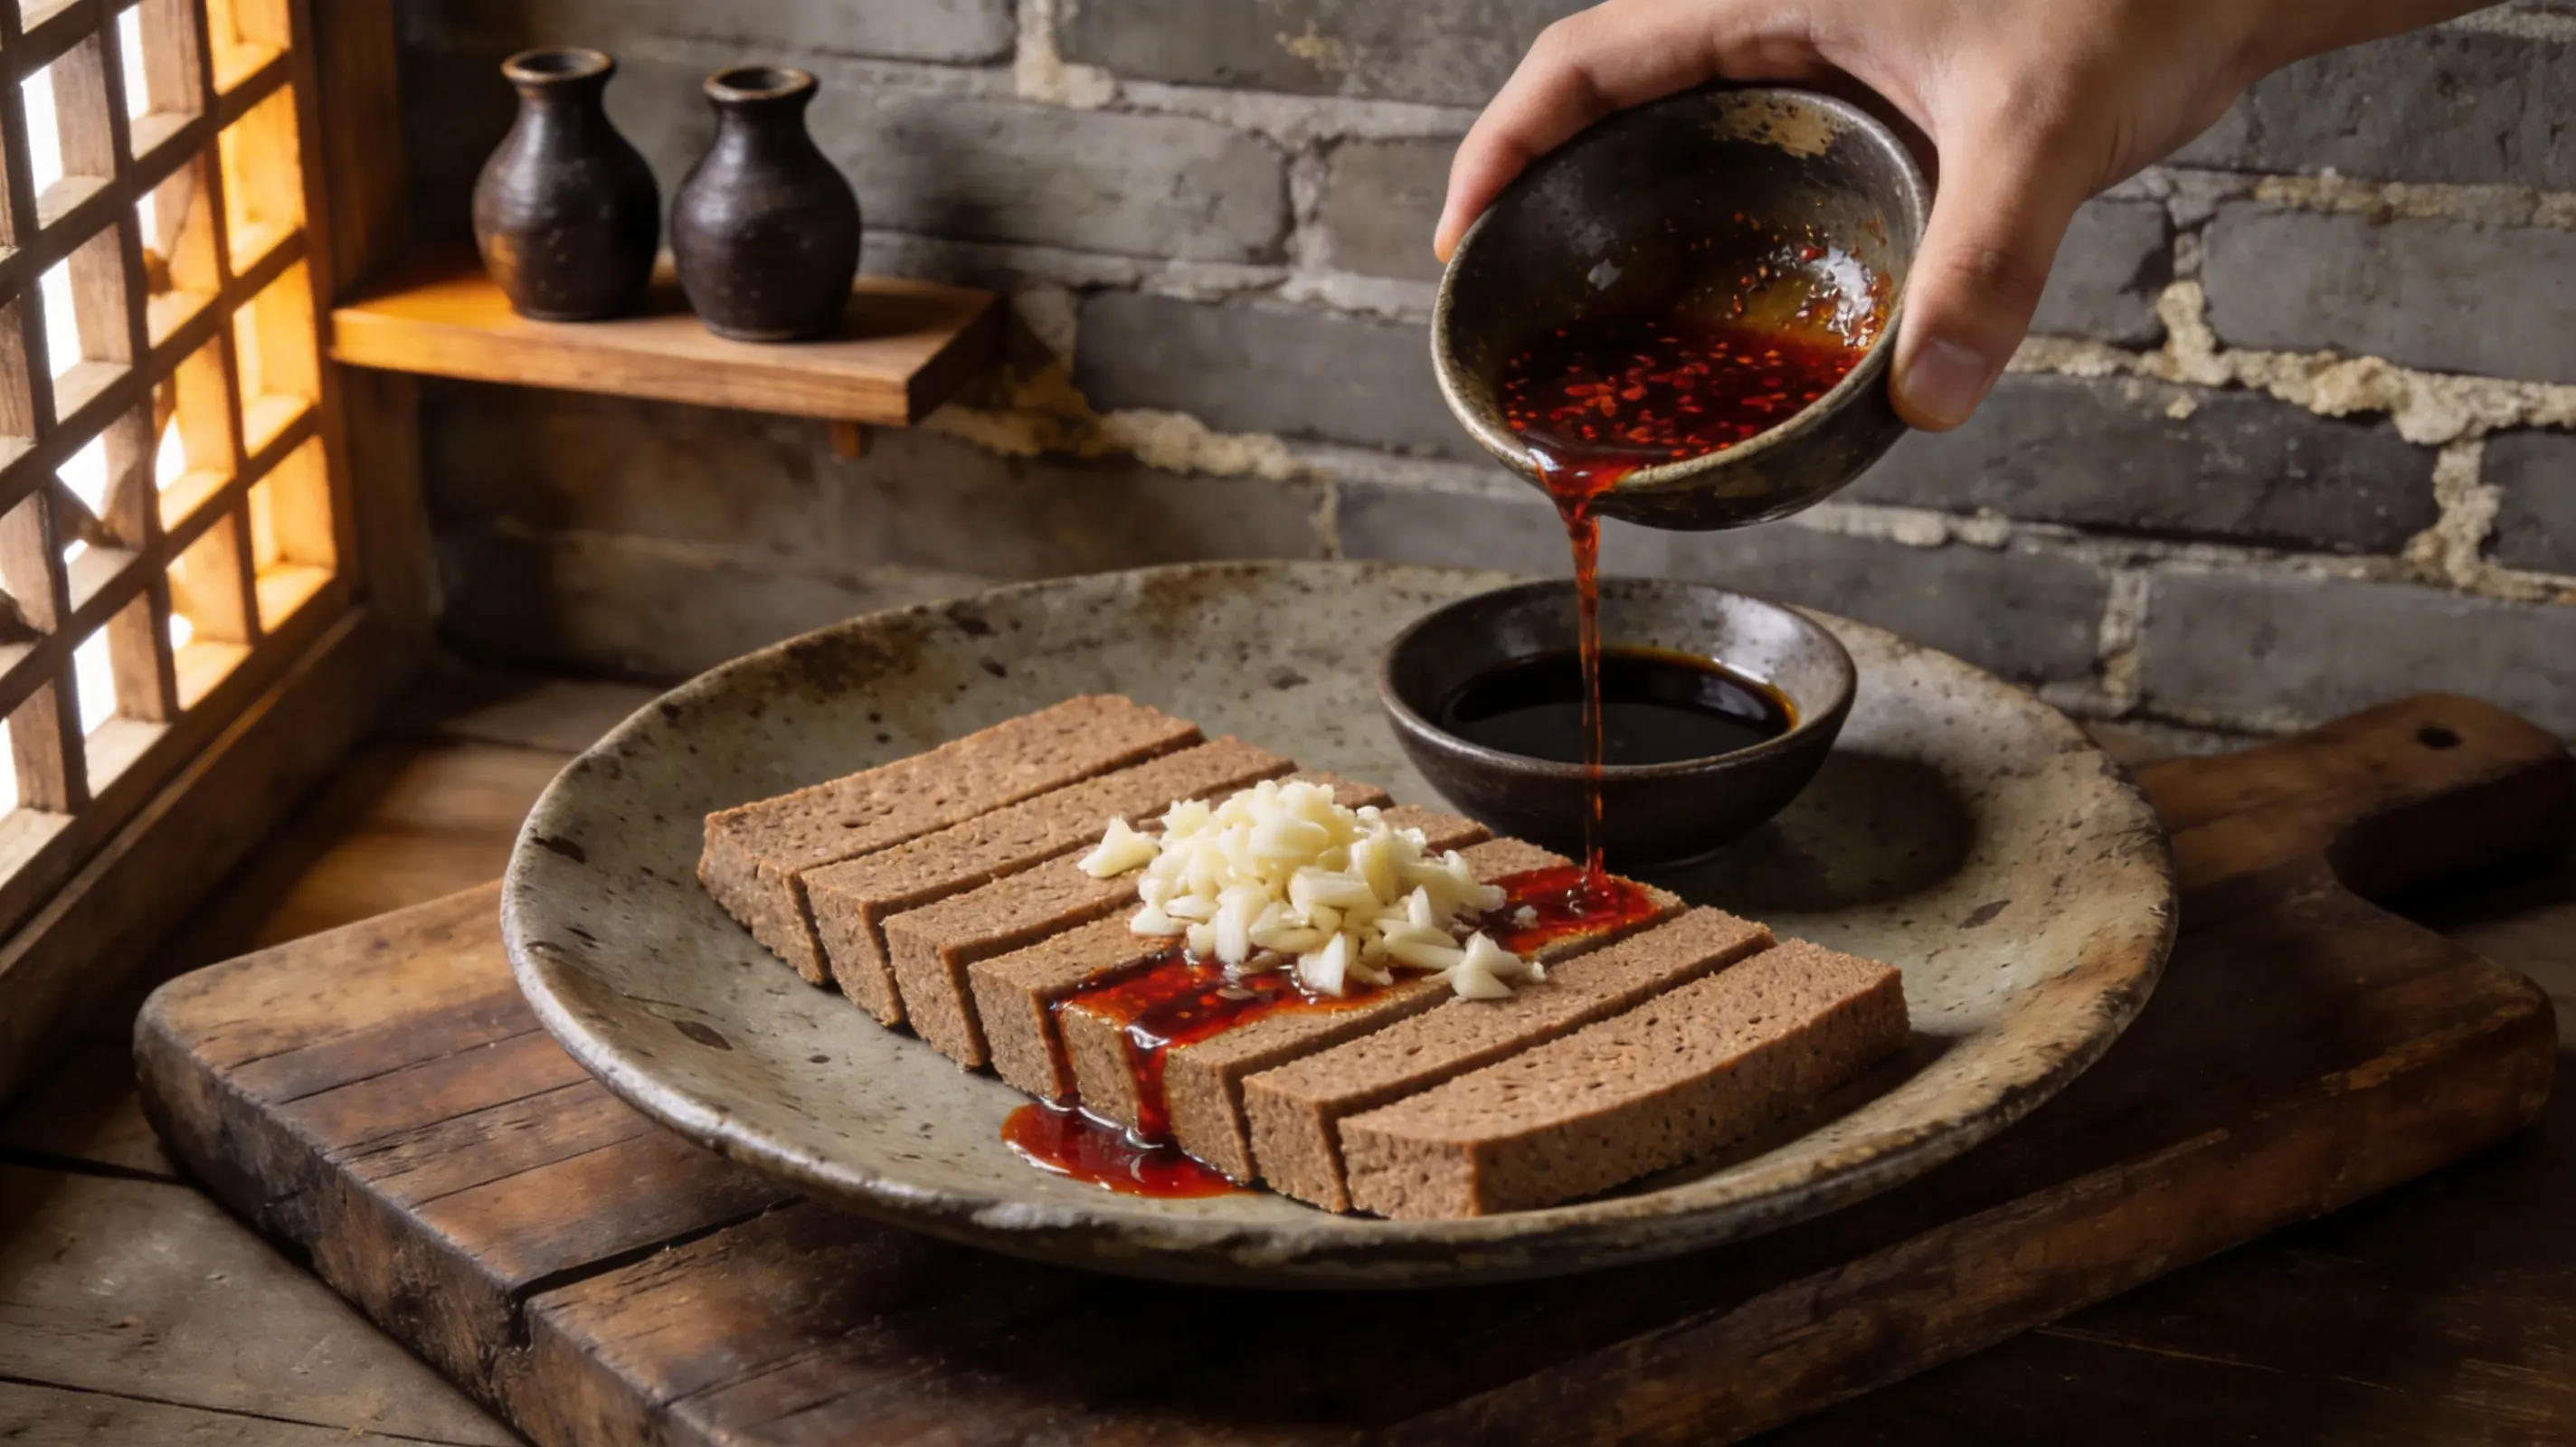
## 7 · The Season
### Oil first, vinegar second, garlic on top and leave it
Strips laid flat on the plate. Pour the chili oil across all of them — be generous, it settles between the strips and that's where most of the flavor ends up. Add the black vinegar, then drop the raw garlic on top.
**Don't mix it. Just pour and walk away for a minute.** The bottom strips soak through while the top ones stay firm. That contrast is the whole point.
> ⚠️ Aged black vinegar only. Rice vinegar makes it sweet and flat — wrong direction entirely.
---
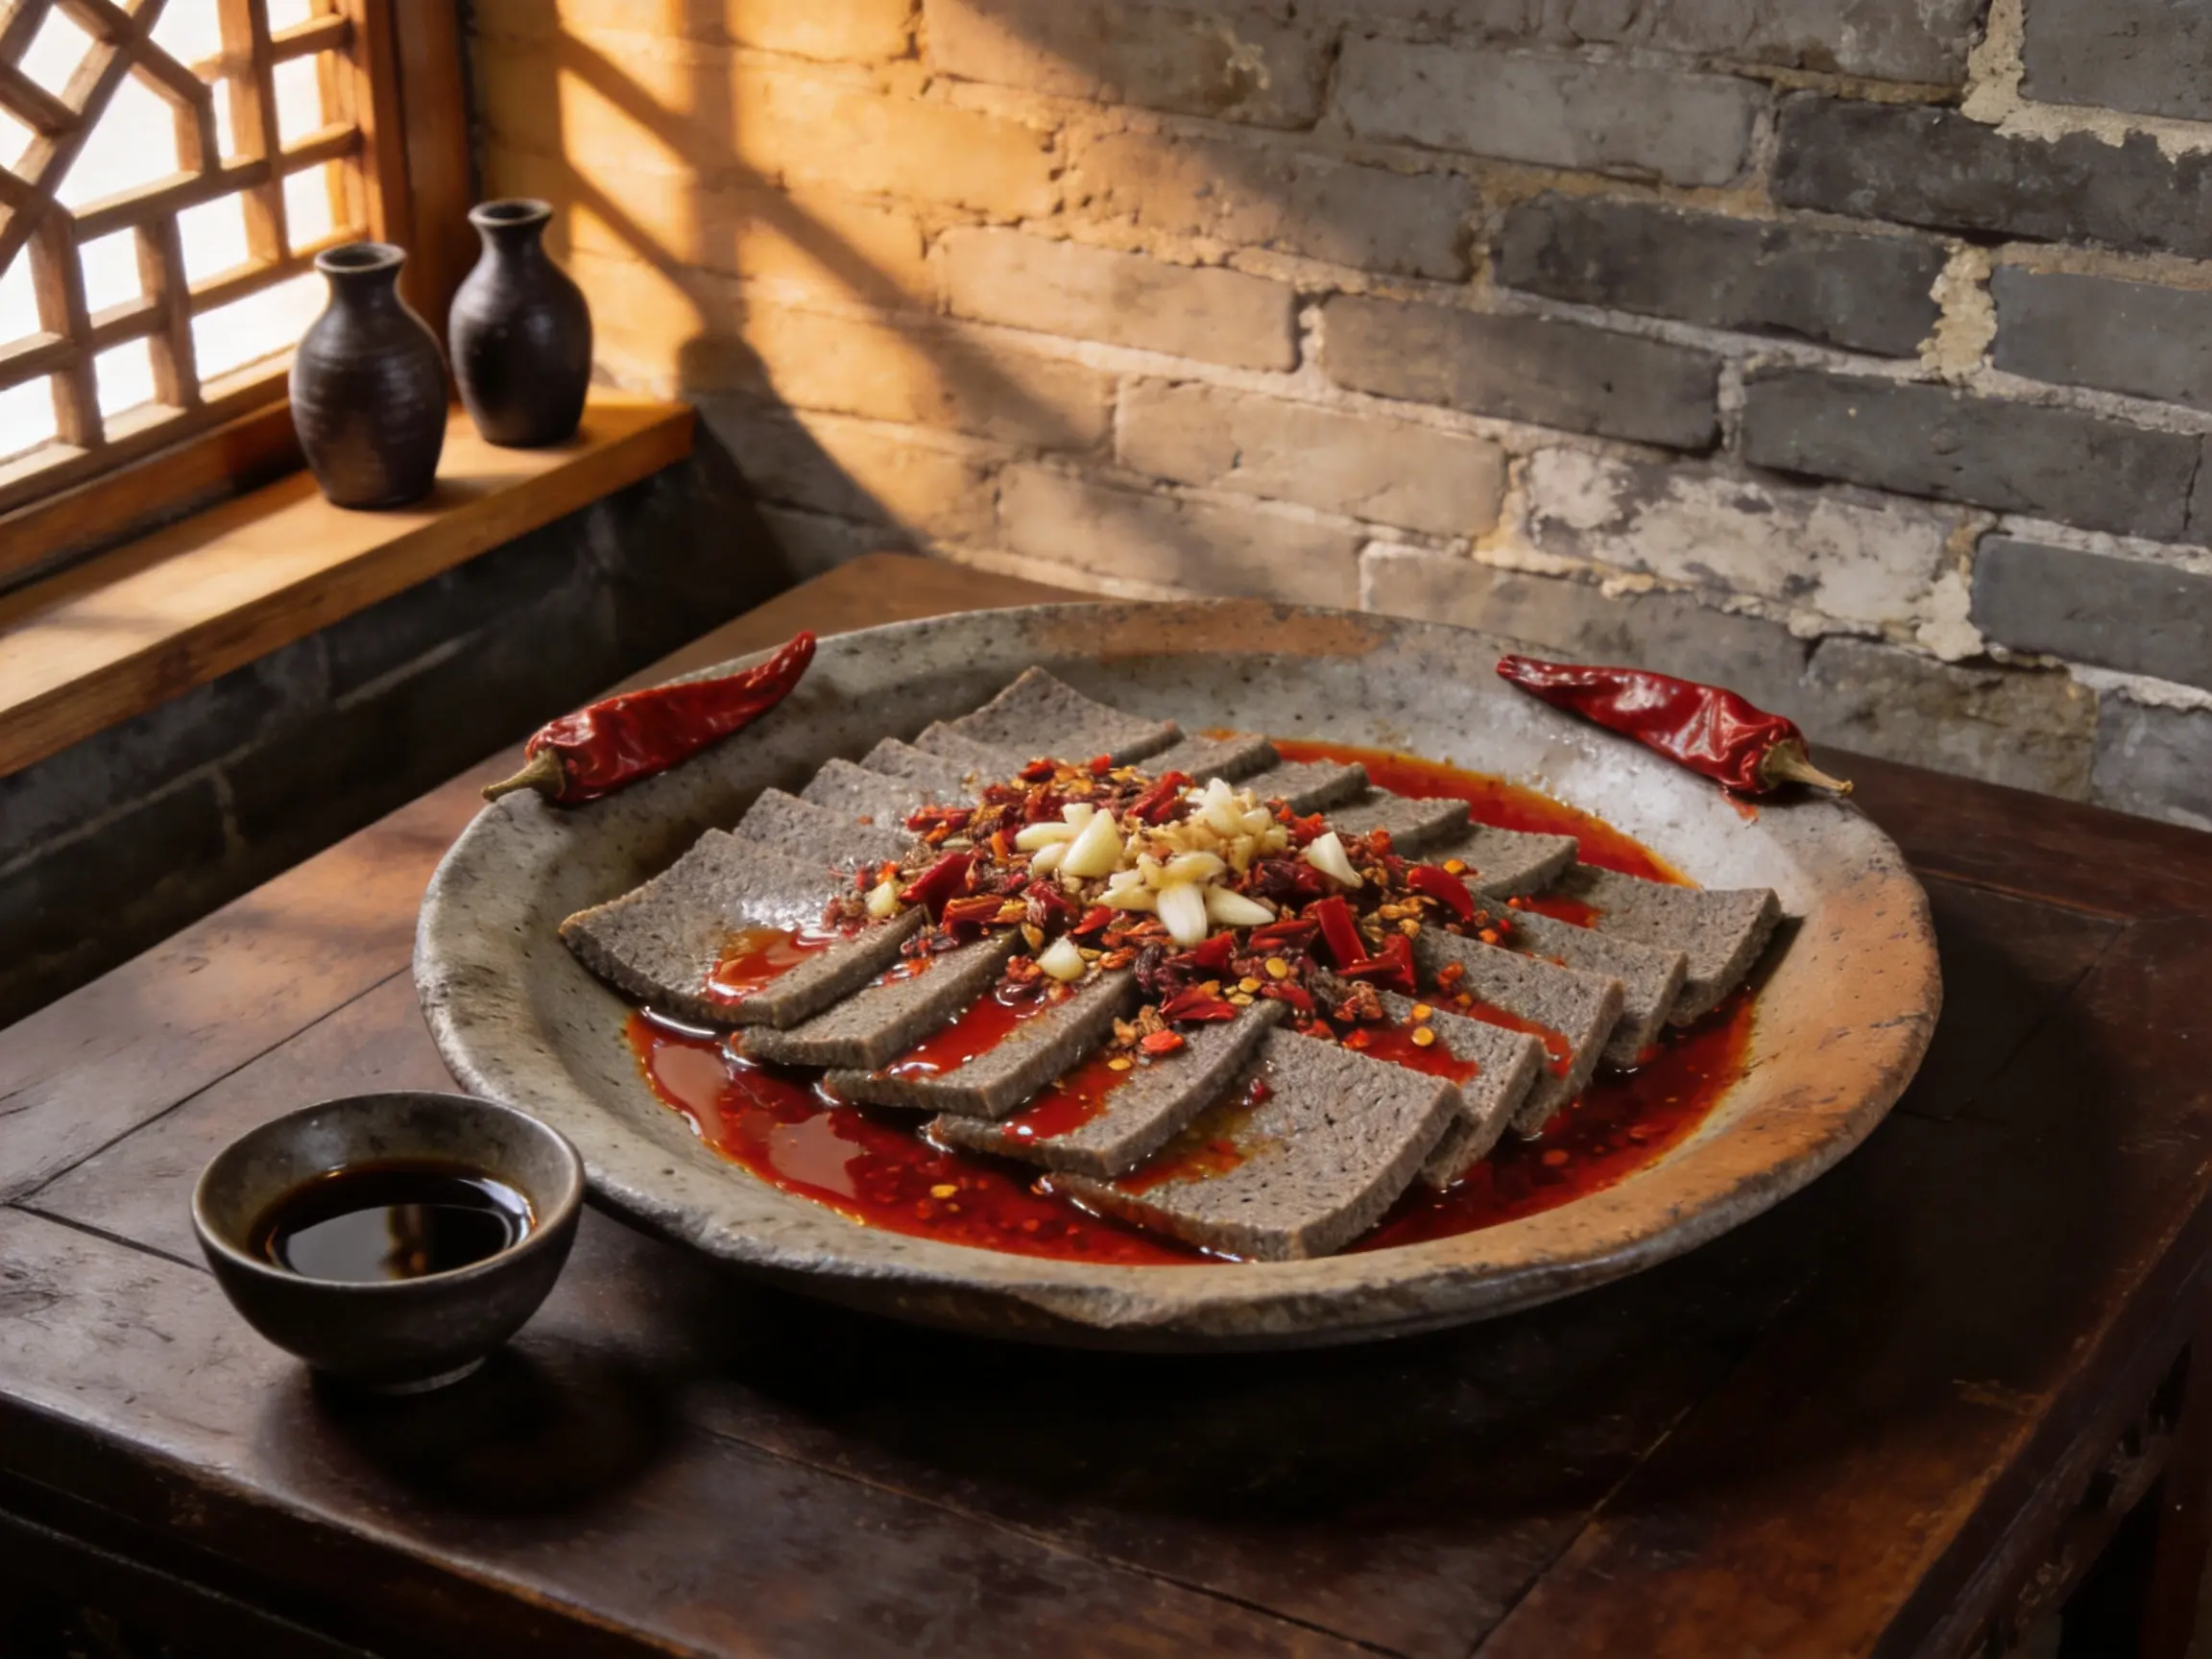
## 8 · The Plate
### Cold, still, chili oil pooling at the base
Room temperature or slightly chilled — that's when the texture is right. Dense, a little chewy, holding its shape under the oil. **If the plate looks dry, add more oil.** Two dried chilies on the edge. Done.
---
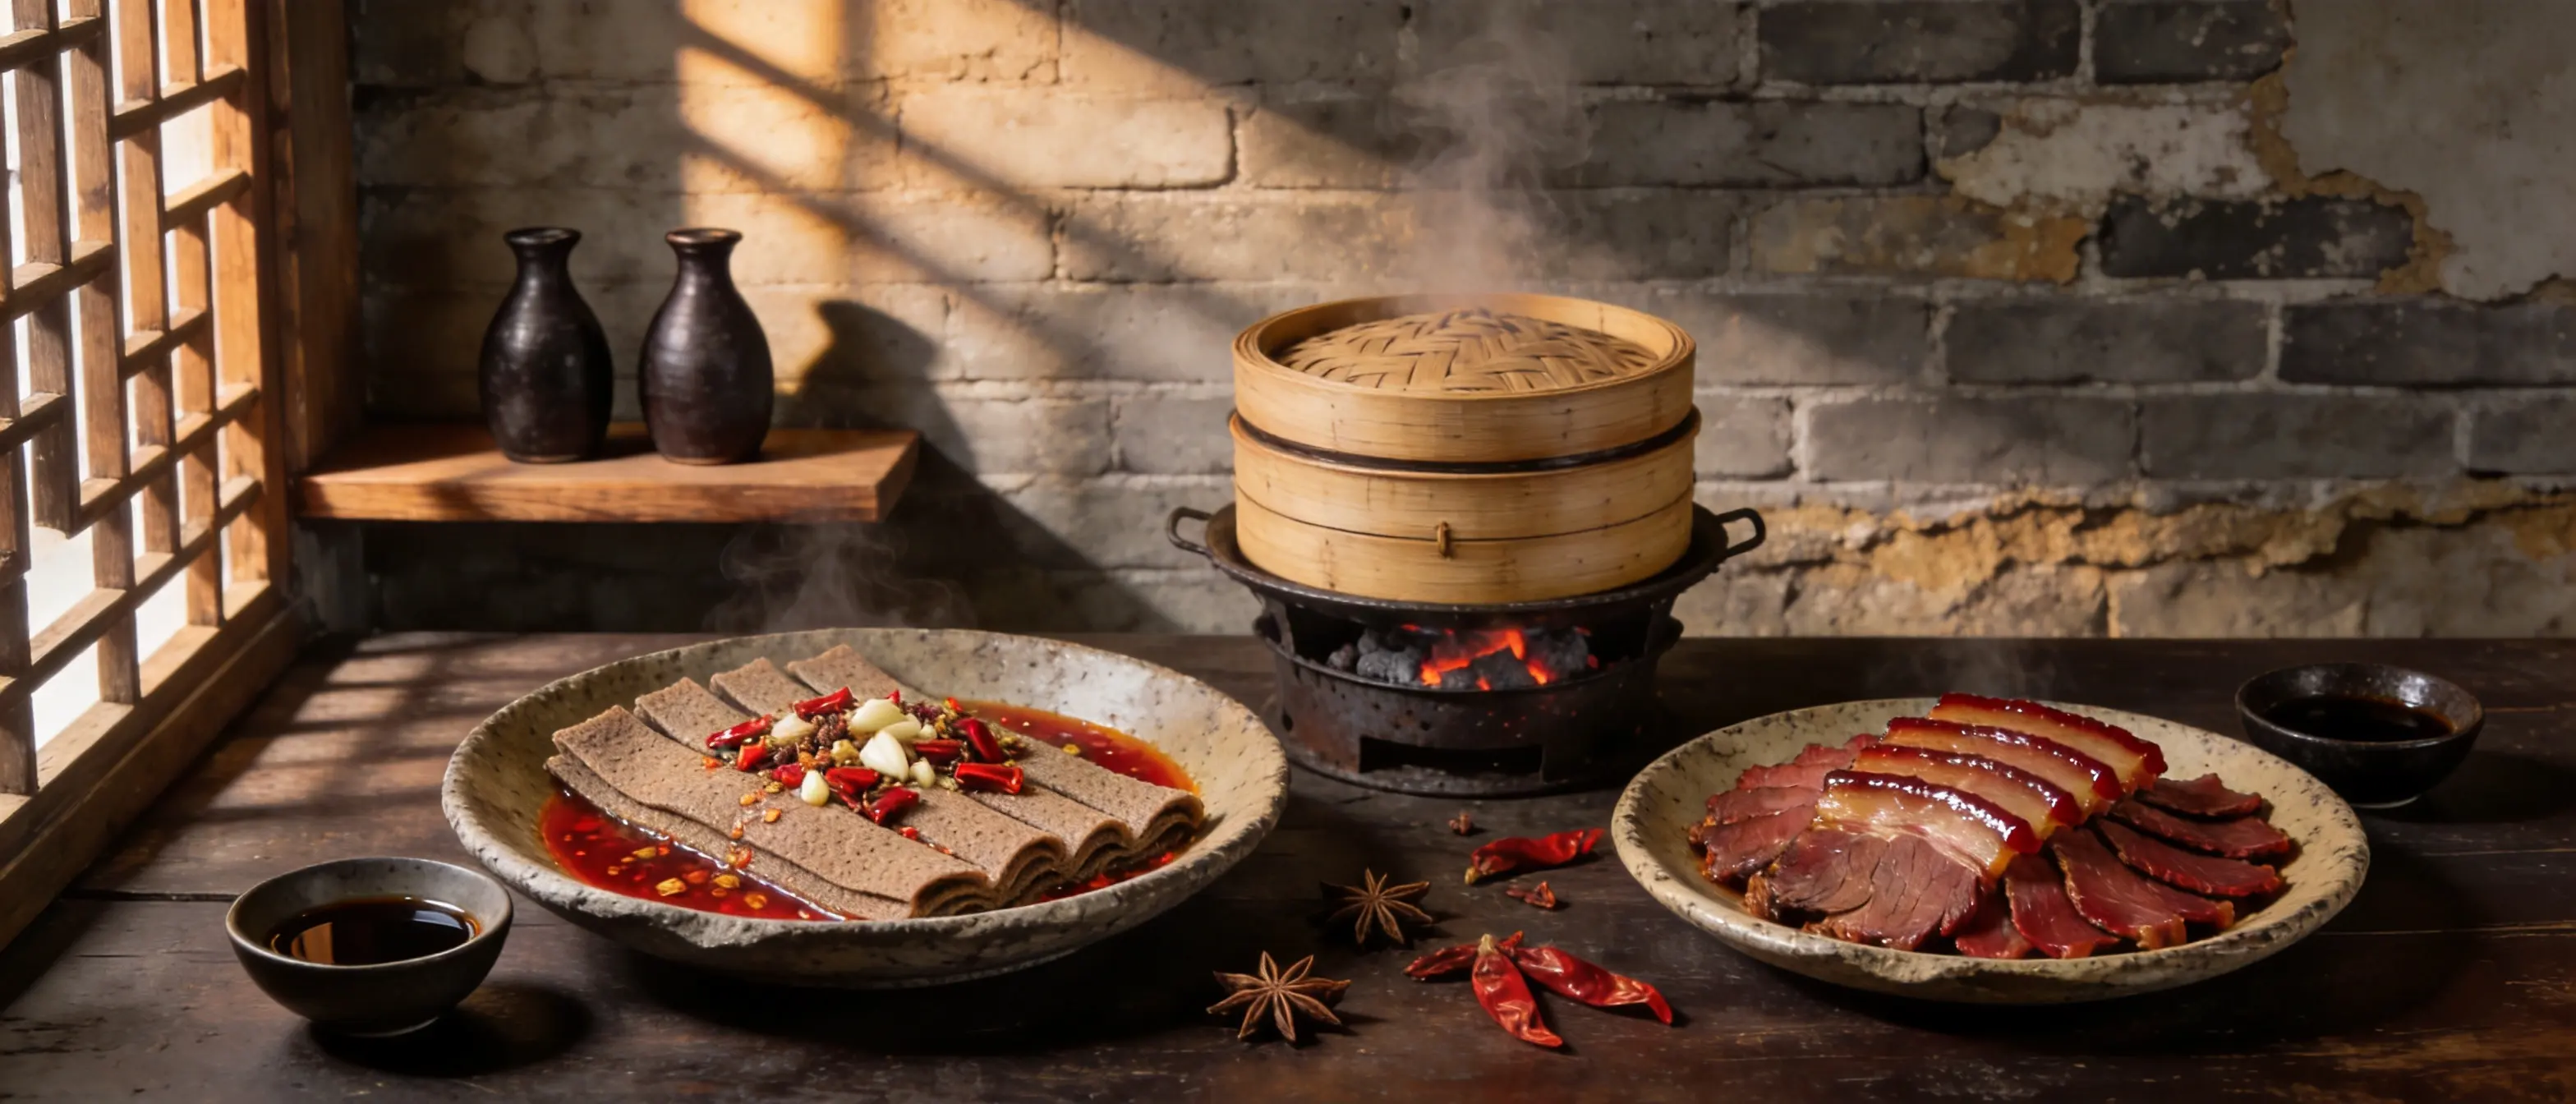
## 9 · The Feast
### It sits well next to braised beef. Or alone. Either works.
Grey cake, red oil, black vinegar. Braised beef on the other plate. Coal stove still going in the background. This is just how the table looks when both are ready at the same time — no planning involved.
## Buckwheat Steamed Cake — Cold, Dense, and Better With Chili Oil
> Grey flour, cold water, a ceramic bowl. Nothing fancy until you add the red oil.
> The steam does all the work. Your job is the vinegar.
> Get good garlic. That part actually matters.
---
## Ingredients
| Item | Amount |
|------|--------|
| Buckwheat flour | 200g |
| Water, cold | 400ml |
| Salt | 1 tsp |
| Chili oil | 3 tbsp |
| Aged black vinegar | 2 tbsp |
| Garlic, minced | 4 cloves |
| Dried red chili | 2–3, for garnish |
> Yield: 4 servings · Best at room temperature · Keeps 2 days refrigerated
---
## 1 · The Lineup
### Buckwheat flour, water, salt — that's the whole cake
Everything on the board before you touch the water. The flour, a bowl for mixing, the ceramic molds lined up and ready. The chili oil, vinegar, and garlic come later — those are for after, and they're what make it worth eating.
**Use 100% buckwheat flour.** Mixed grain versions are softer and won't hold a clean slice. You want something the knife goes through without crumbling.
---
## 2 · The Batter
### Thin enough to pour, not thick enough to spread
Add cold water to the flour slowly and stir as you go. **Target consistency: thinner than pancake batter.** It should run off a chopstick in a thin stream.
No eggs. No oil. The buckwheat sets entirely from starch and steam. If it clumps, add a splash more water and keep stirring.
---
## 3 · The Pour
### Three-quarters full, no more
Ladle the batter into each ceramic bowl mold — about three-quarters full. The batter expands slightly as it steams, not dramatically, but enough to overflow if you're too generous.
**Wipe the rim clean before stacking.** Batter that drips down the outside turns tacky when cooked and makes unmolding harder than it needs to be.
---
## 4 · The Steam
### 25 minutes, lid on, don't open early
Full heat, bamboo steamer over boiling water, lid on. 25 minutes for small bowl molds. Don't lift the lid before 20 minutes — you'll lose the steam pressure and the center won't set.
**The cake is done when the center doesn't give.** Press lightly with a chopstick through the gap. Resistance means it's ready. Wobble means five more minutes.
Let it cool completely in the mold before unmolding. Hot buckwheat tears.
---
## 5 · The Unmold
### Tilt, tap, wait
Run a thin knife once around the edge. Flip the mold over the board and tap the bottom twice. It should slide out clean — grey-brown dome, smooth underside, still a little warm in the center.
If it sticks, you tried too early or the mold wasn't clean. **Next batch: a light wipe of oil on the inside of the mold before you pour.**
---
## 6 · The Slice
### One cake, 1cm strips, sharp knife
Set the dome flat-side down. One hand steadying it, knife going straight across — about 1cm wide each strip. Don't press hard. A sharp knife does this without force.
**The cut face should look slightly translucent, almost waxy.** That's the starch gelled properly. If it crumbles at the edge, the batter was too thin or it came off heat too early.
---
## 7 · The Season
### Oil first, vinegar second, garlic on top and leave it
Strips laid flat on the plate. Pour the chili oil across all of them — be generous, it settles between the strips and that's where most of the flavor ends up. Add the black vinegar, then drop the raw garlic on top.
**Don't mix it. Just pour and walk away for a minute.** The bottom strips soak through while the top ones stay firm. That contrast is the whole point.
> ⚠️ Aged black vinegar only. Rice vinegar makes it sweet and flat — wrong direction entirely.
---
## 8 · The Plate
### Cold, still, chili oil pooling at the base
Room temperature or slightly chilled — that's when the texture is right. Dense, a little chewy, holding its shape under the oil. **If the plate looks dry, add more oil.** Two dried chilies on the edge. Done.
---
## 9 · The Feast
### It sits well next to braised beef. Or alone. Either works.
Grey cake, red oil, black vinegar. Braised beef on the other plate. Coal stove still going in the background. This is just how the table looks when both are ready at the same time — no planning involved.