·5/9/2026
from
🍳 Guobaorou · The Changchun Original
# Guobaorou · The Changchun Original
> Not the red one. Not the tomato version.
> **This is the real one.**
> Pale gold. Thick crust. One pass of vinegar and scallion.
> The way Changchun has been making it for decades.
---
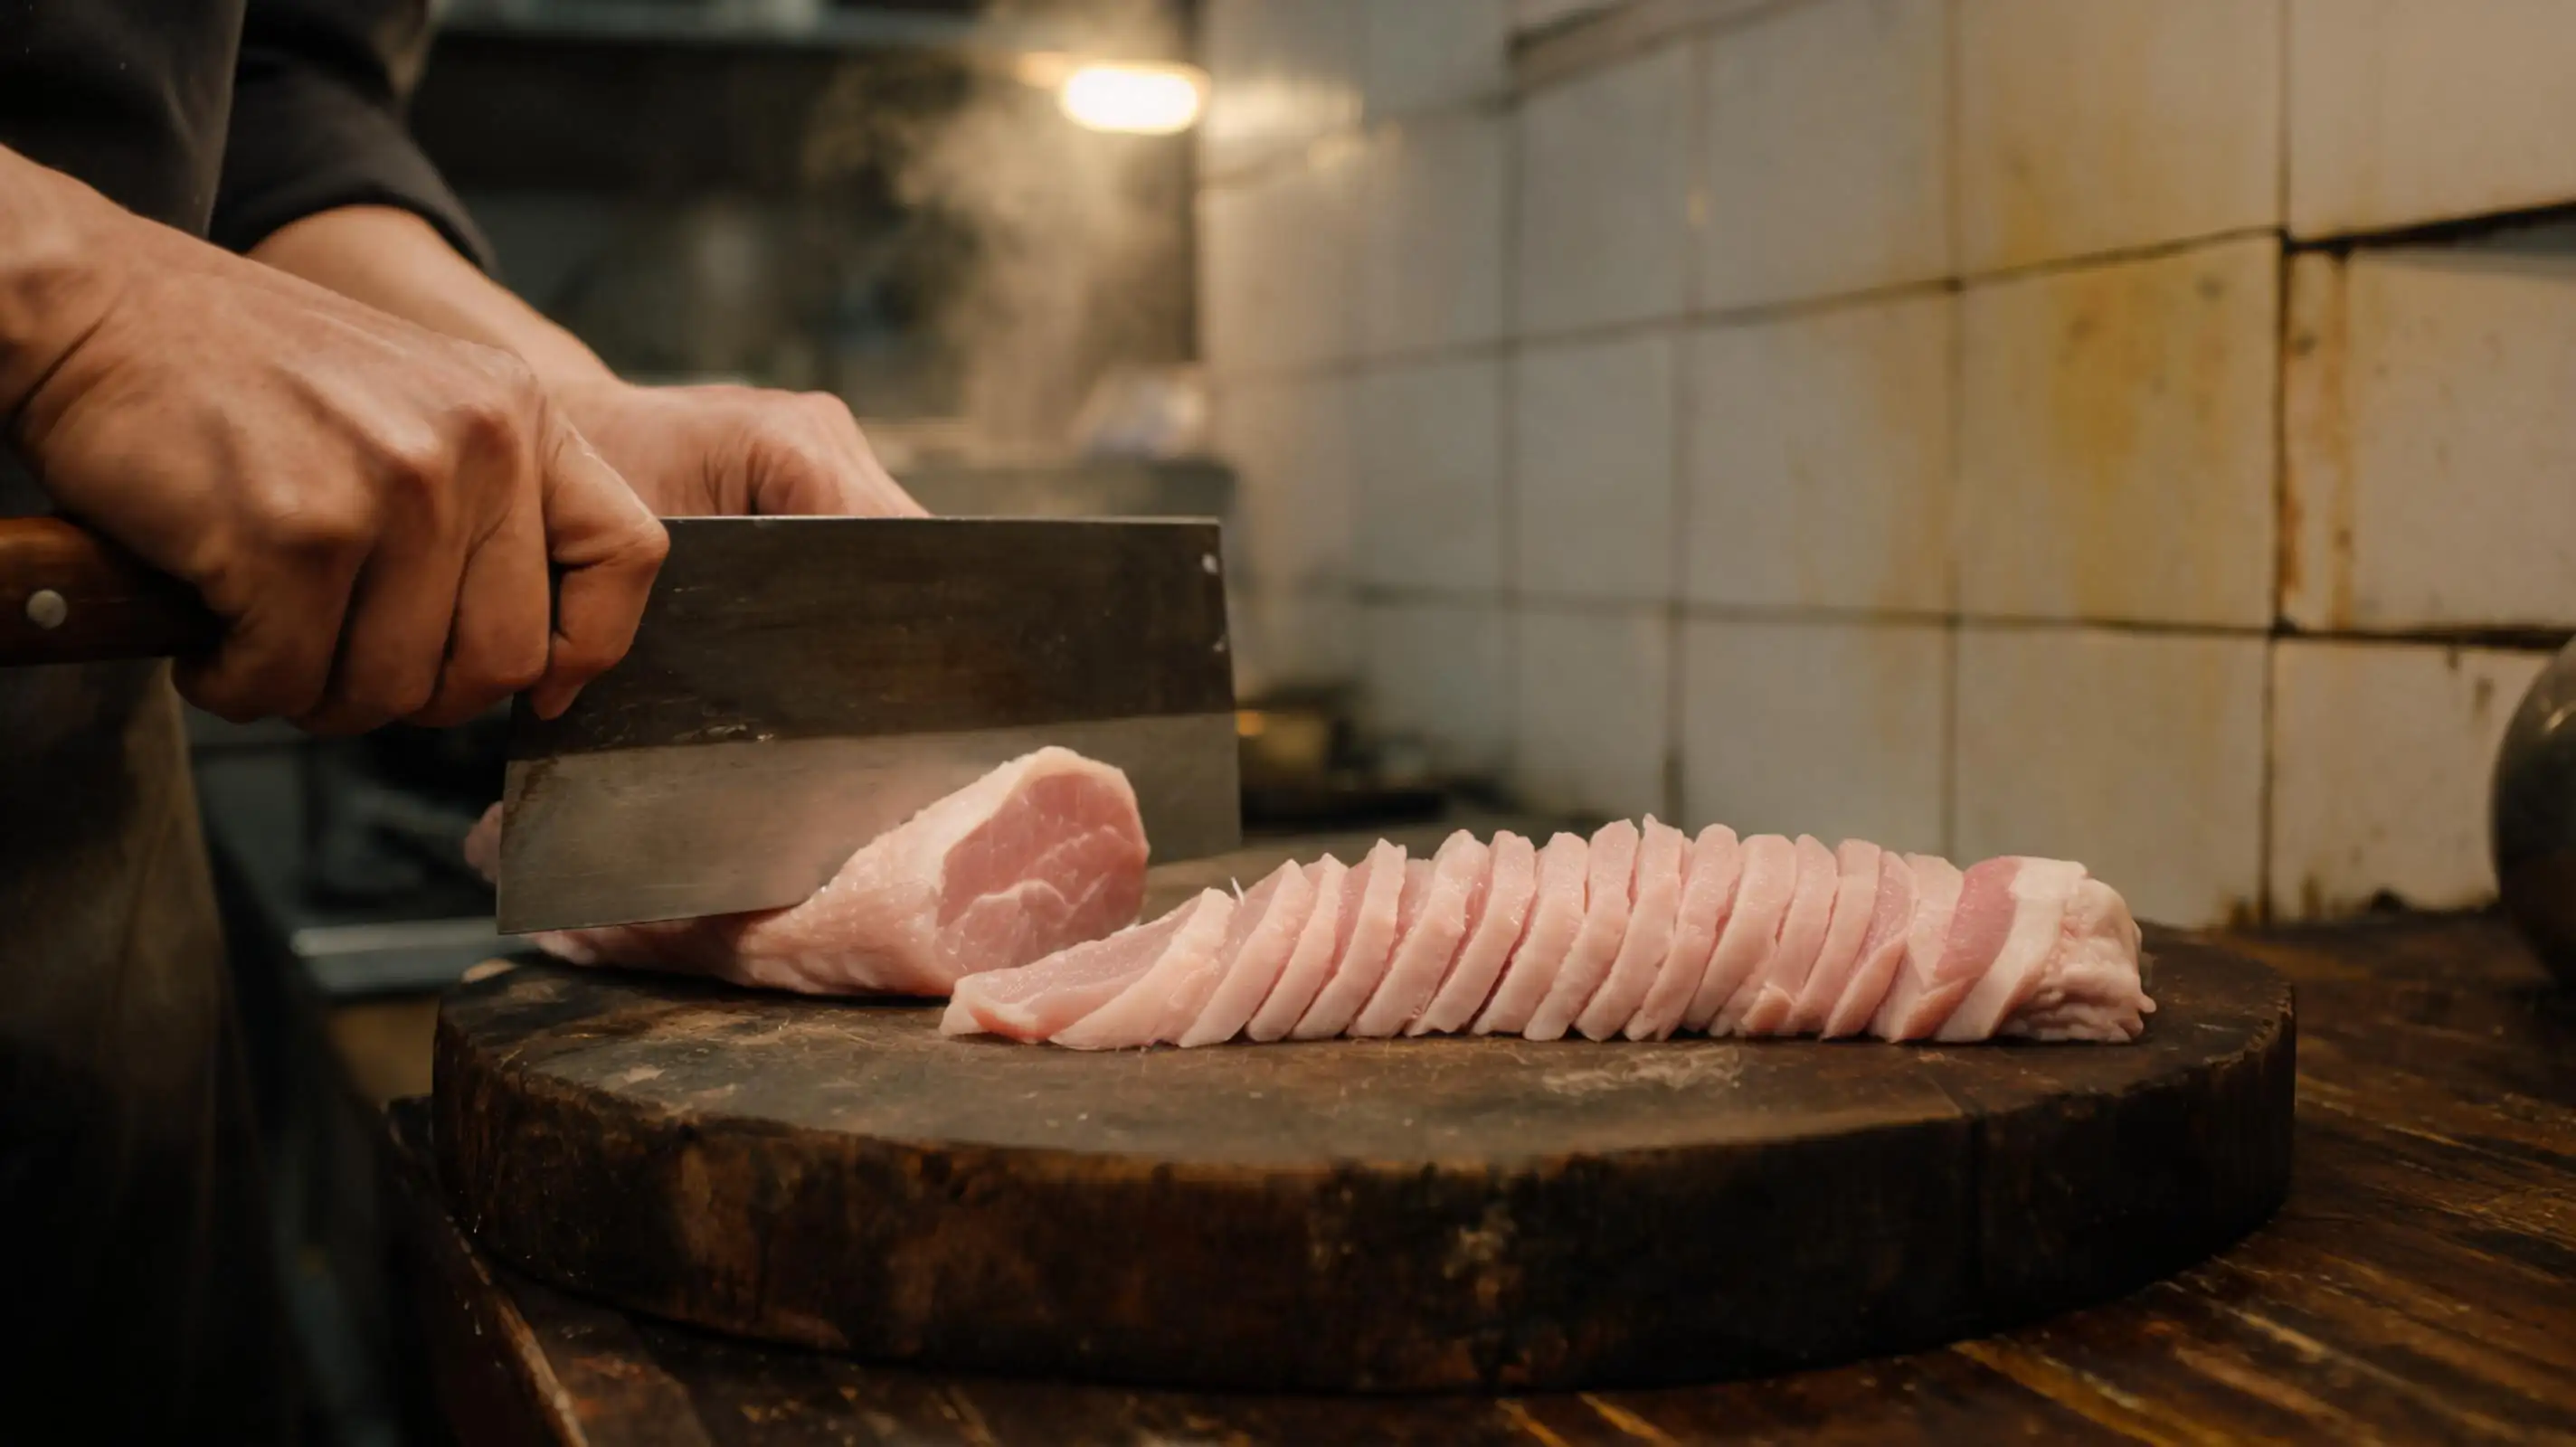
## 📸 1 · The Cut
**Only pork loin. Nothing else.**
Sliced thin and uniform — each piece no more than 5 mm thick,
cut straight across the grain with a single heavy stroke of the cleaver.
**Consistent thickness means consistent fry time.**
Too thick and the center stays raw. Too thin and the batter overwhelms the meat.
The board is old. The knife is heavy.
Every cut lands the same way.
---
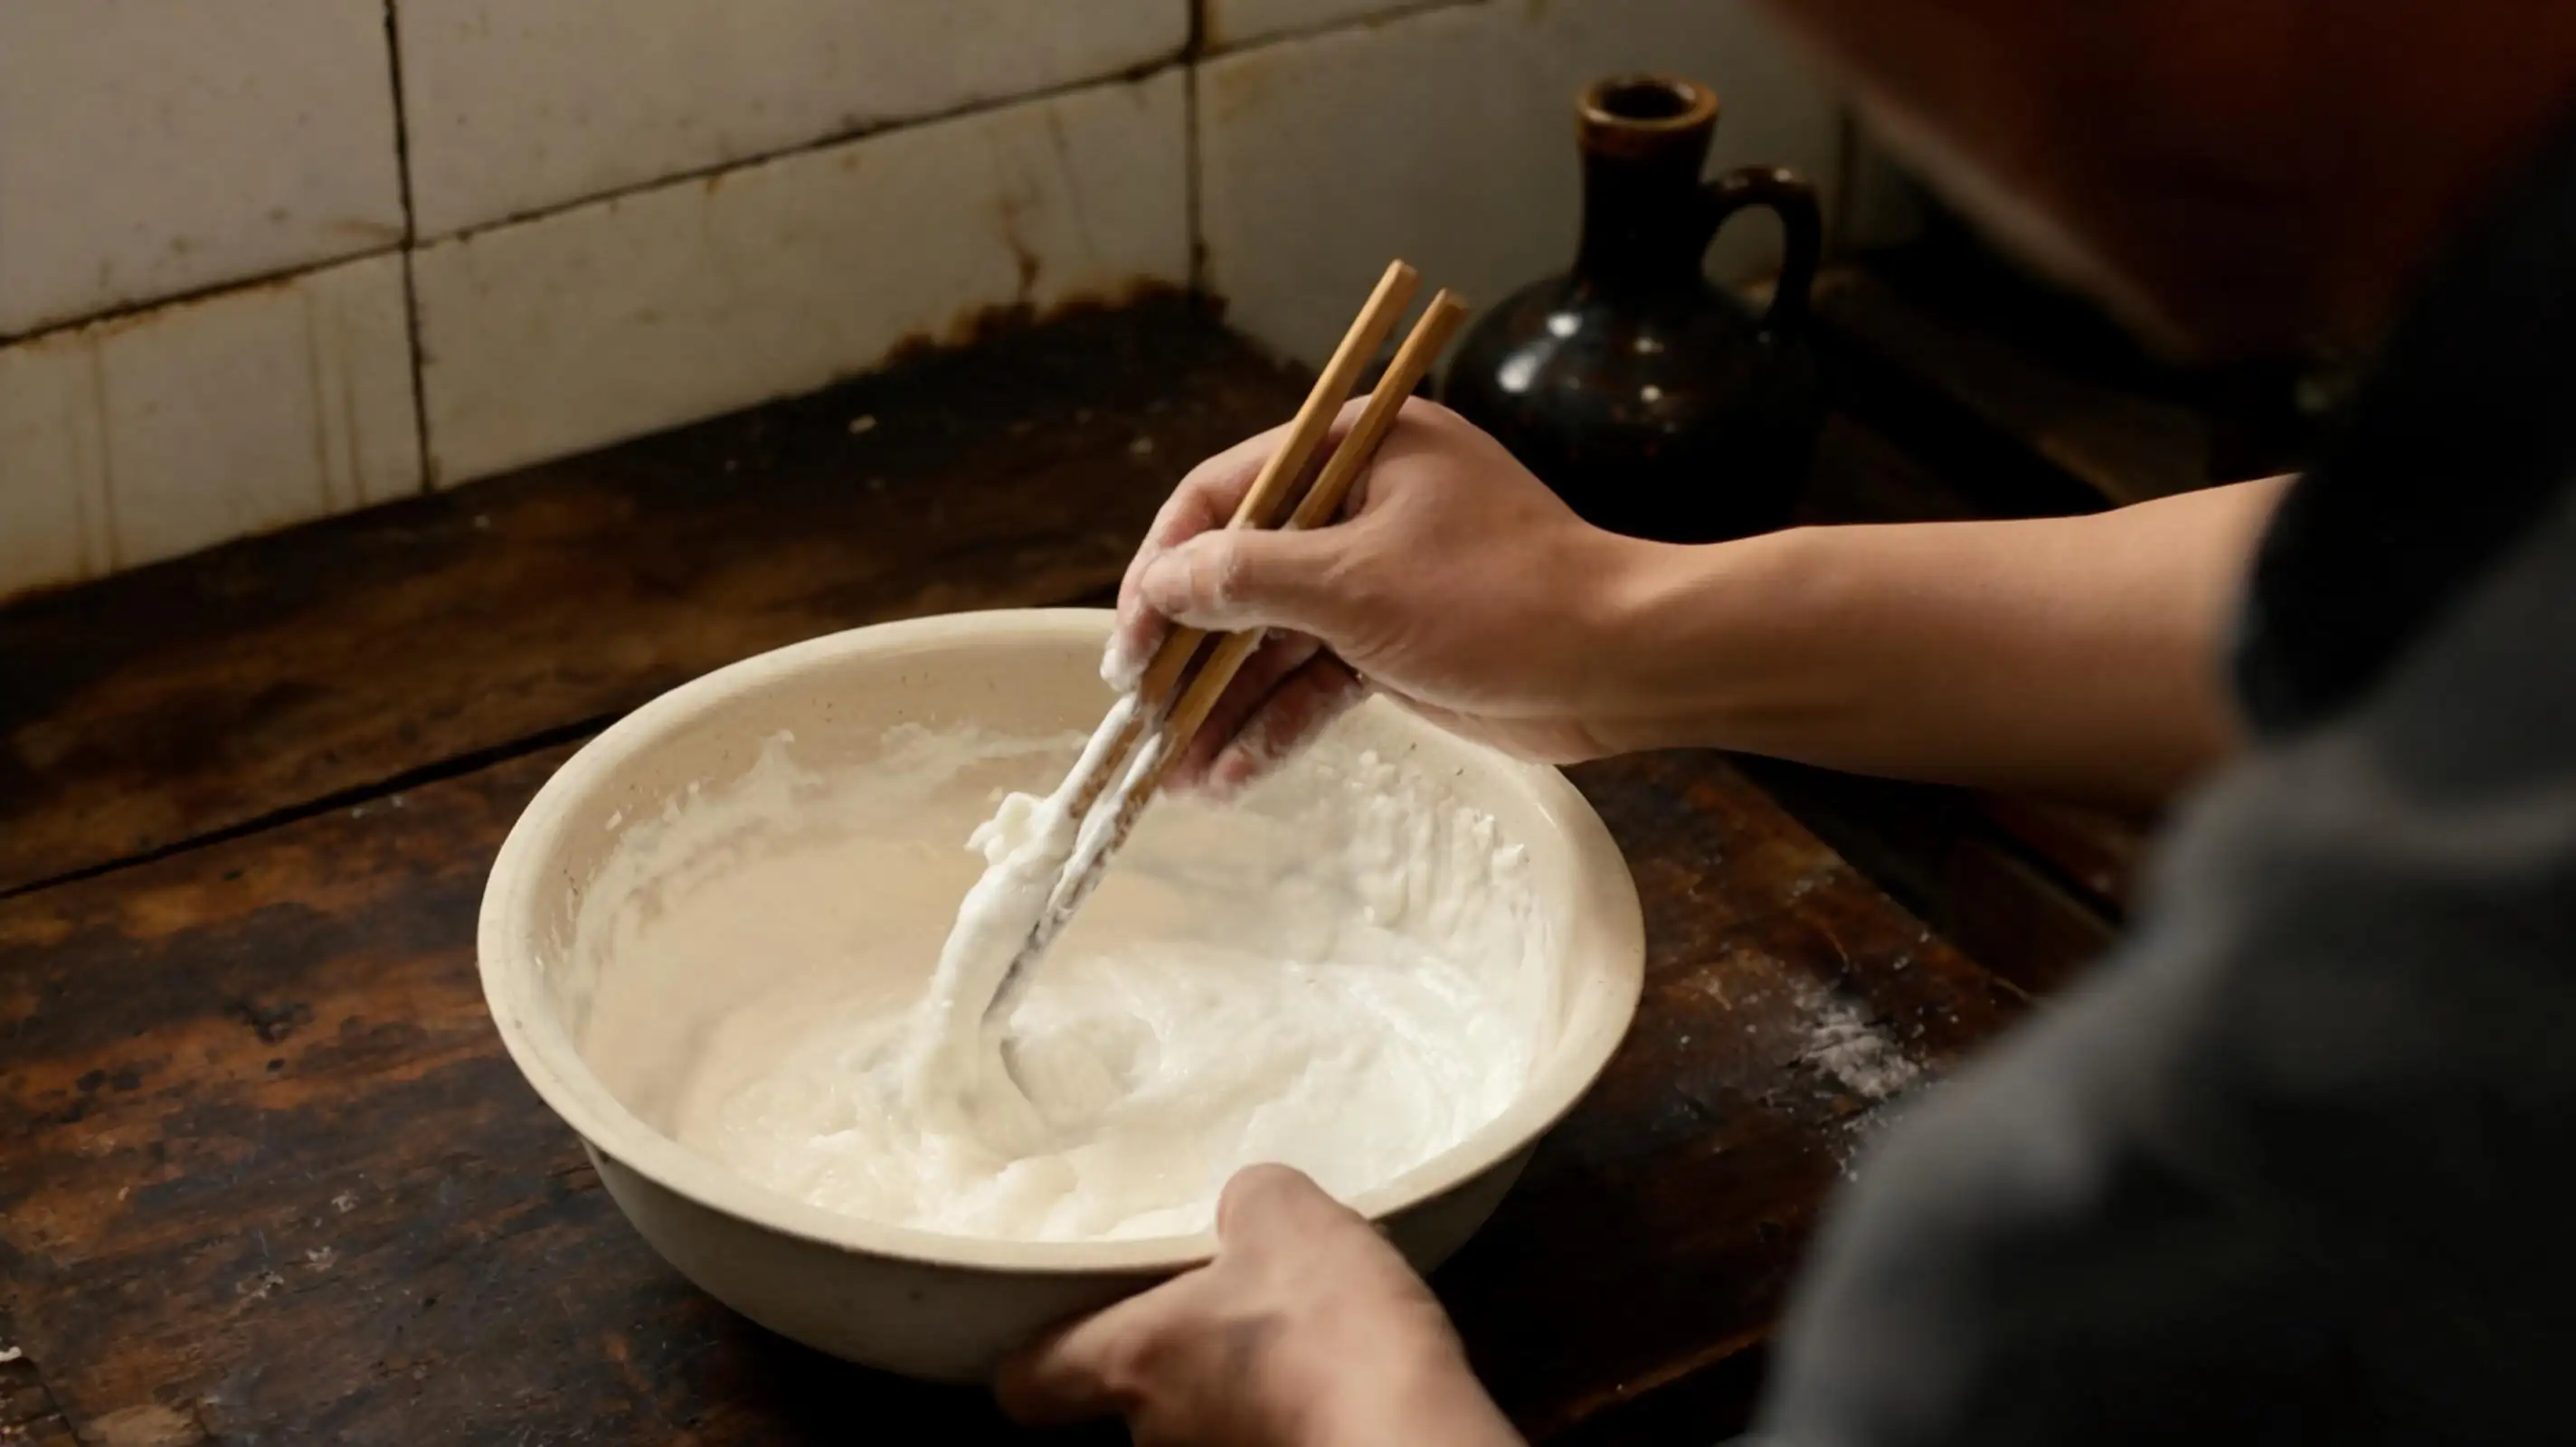
## 📸 2 · The Batter
**Potato starch. Cold water. That's it.**
Mix until the batter is thick — it should coat the back of a chopstick
and hold its shape when you lift it. Not runny. Not dry.
**Potato starch, not corn starch, not flour.**
It's what gives Changchun-style guobaorou its signature thick, blistered,
almost glass-like crust after the second fry.
No egg. No baking powder. No tricks.
The starch does everything if you mix it right.
---
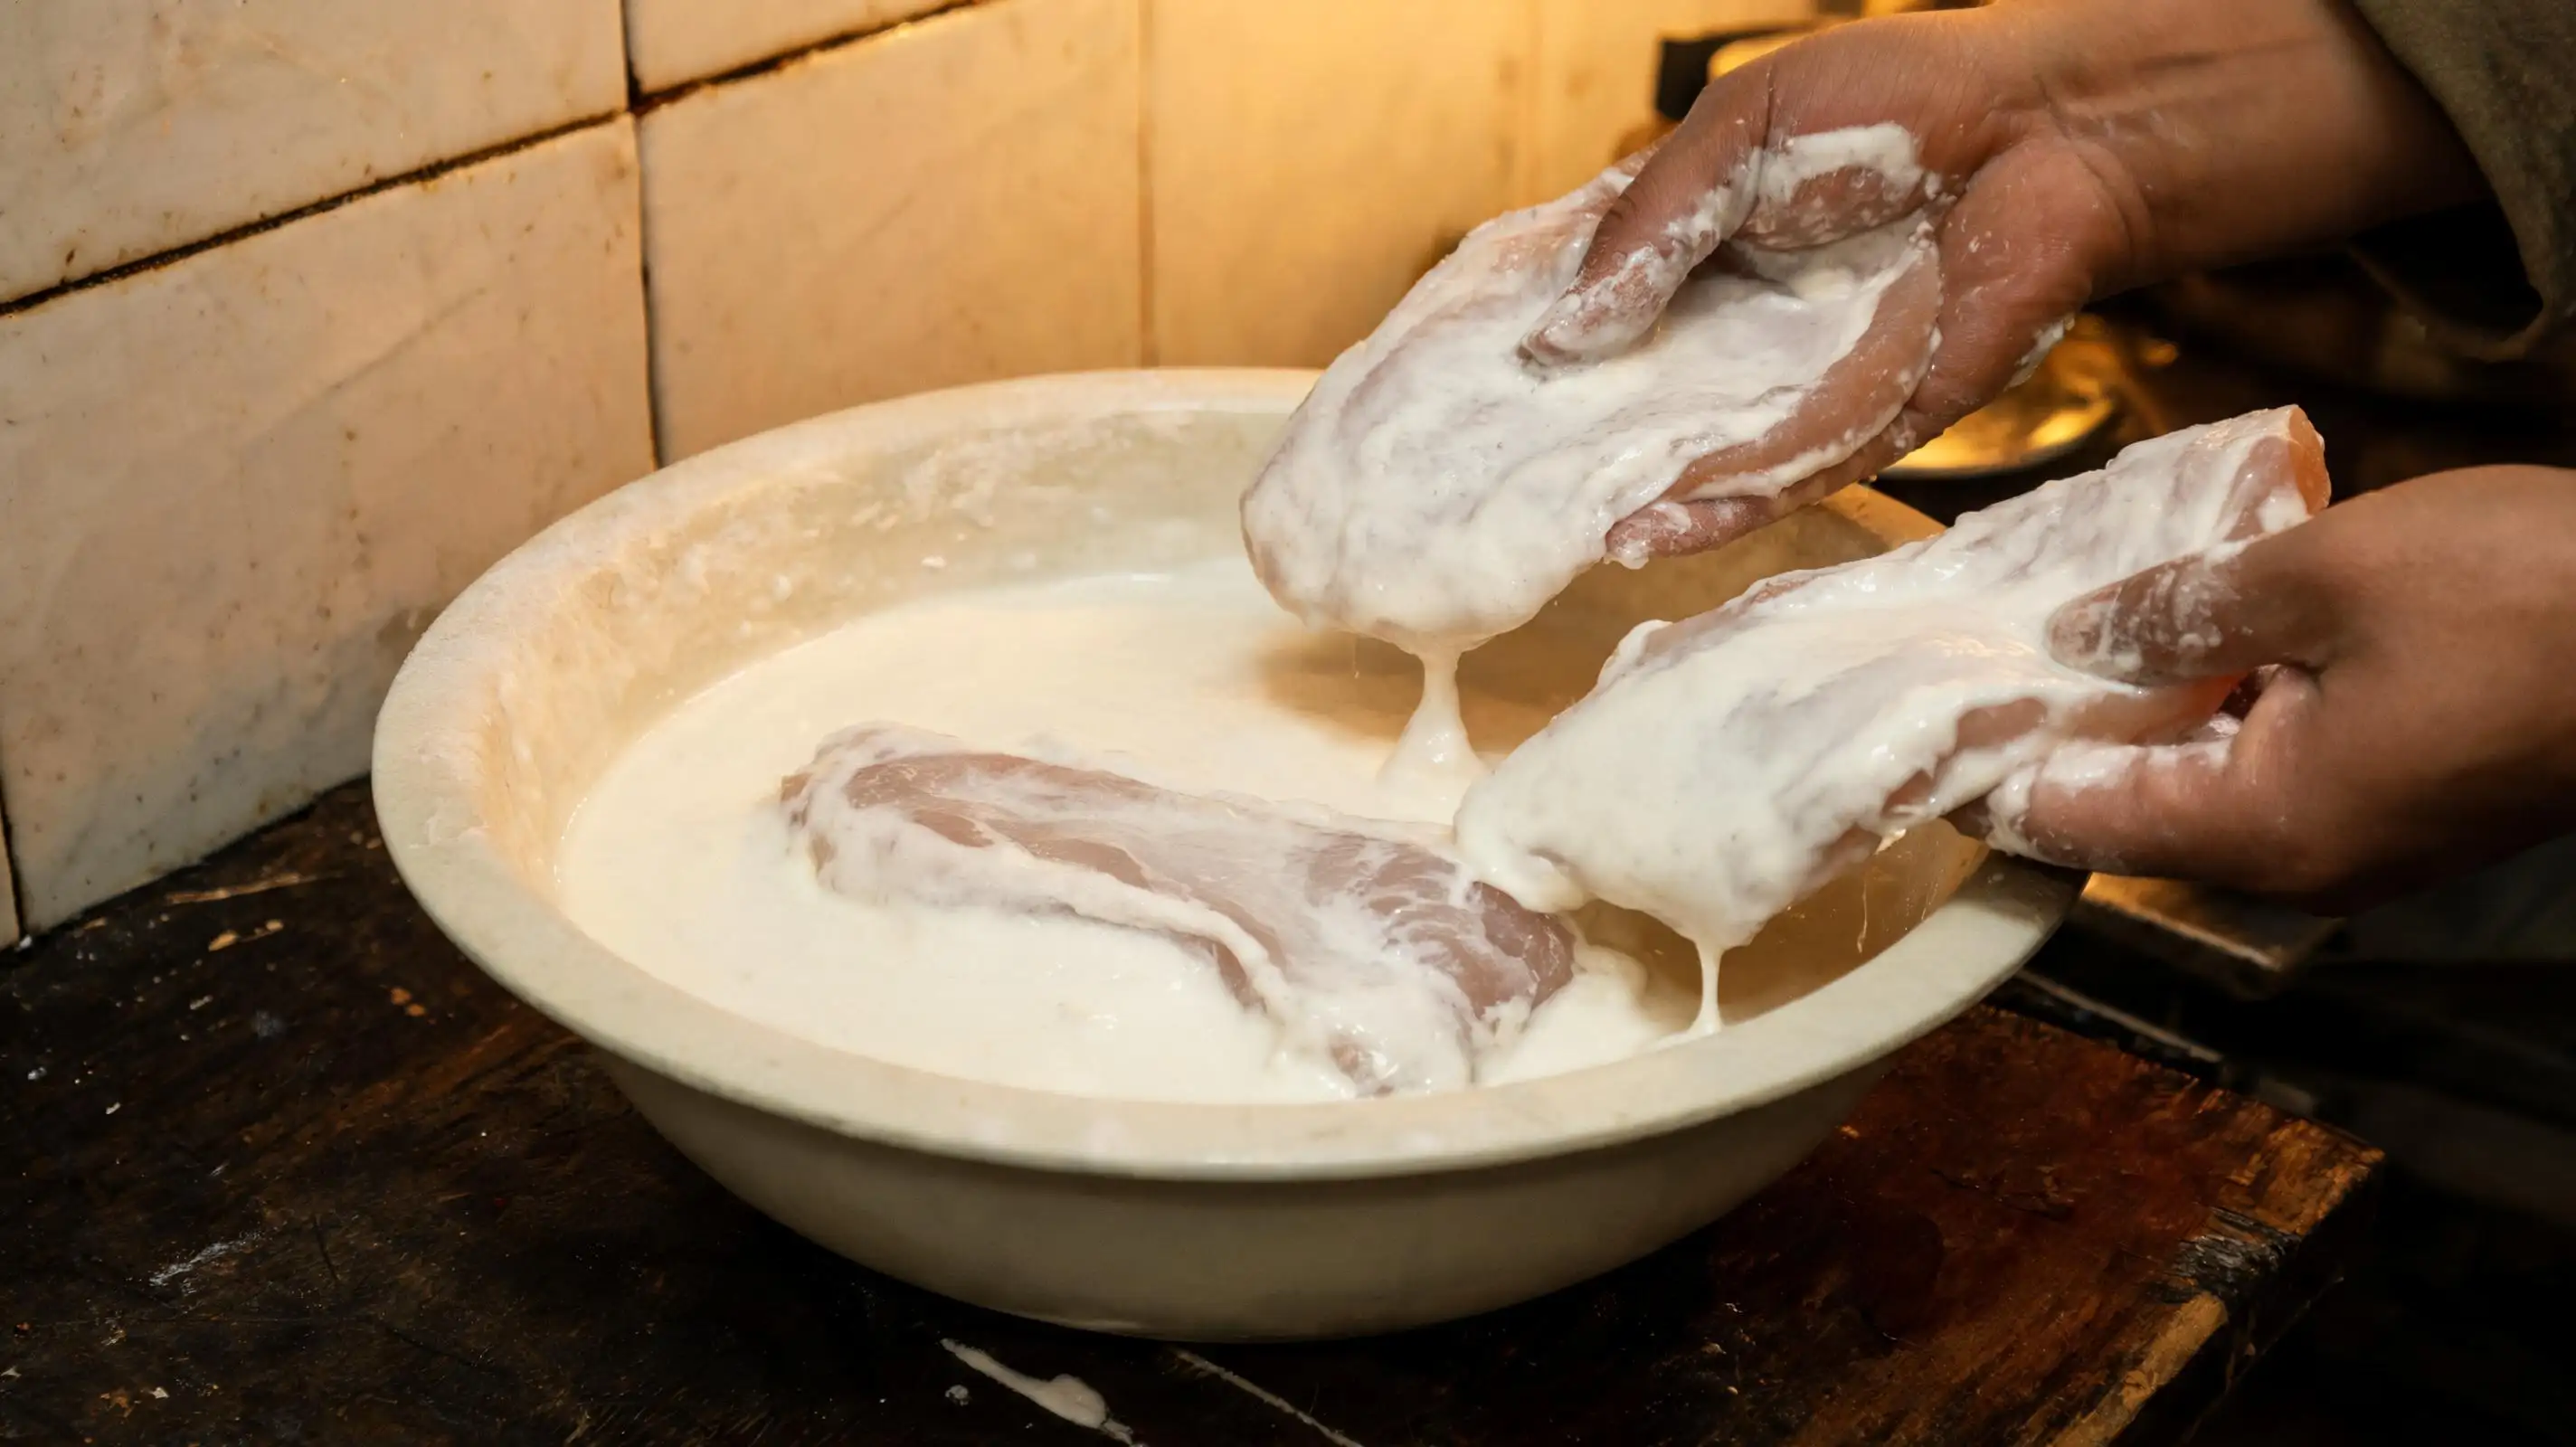
## 📸 3 · The Coat
**Press each piece in fully. Don't dip — press.**
Lower the pork slice into the batter and use your fingers to work it in,
ensuring every surface is covered. Lift it and let the excess drip back.
**The batter should cling, not drip.**
Too much batter and the crust will detach from the meat.
Too little and it won't blister properly in the oil.
You'll know you got it right when the piece holds its shape going into the wok.
---
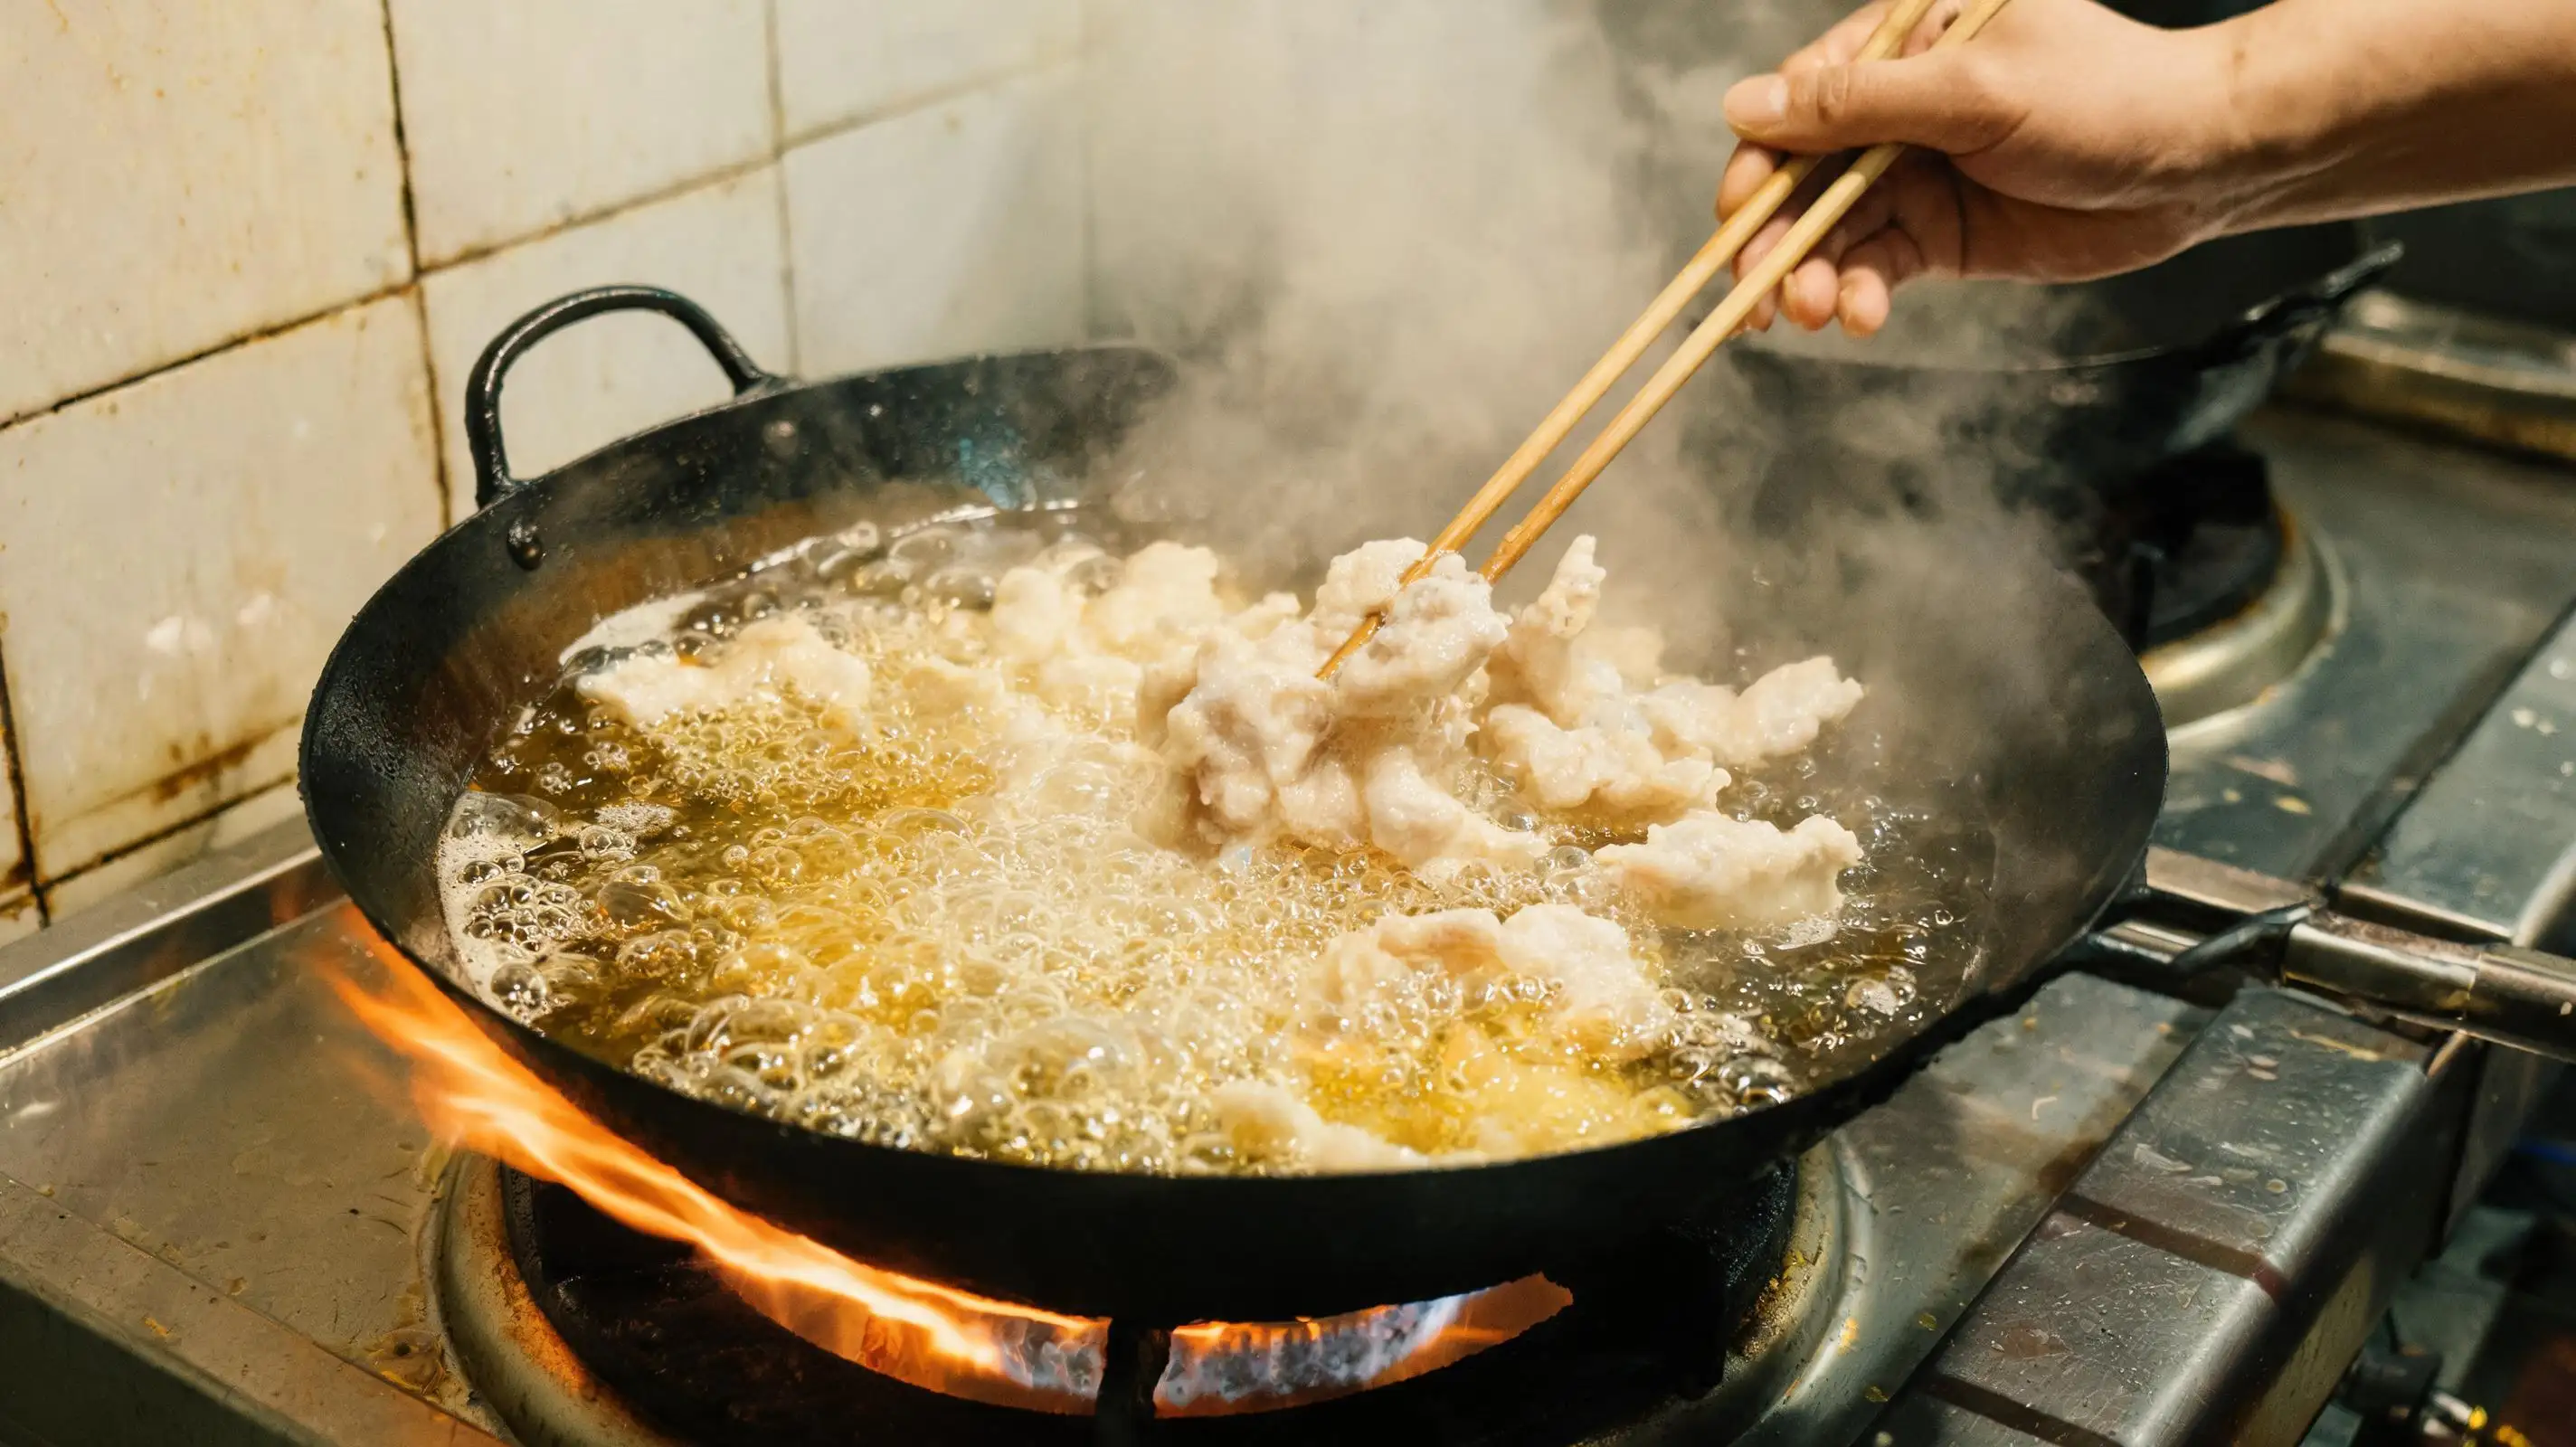
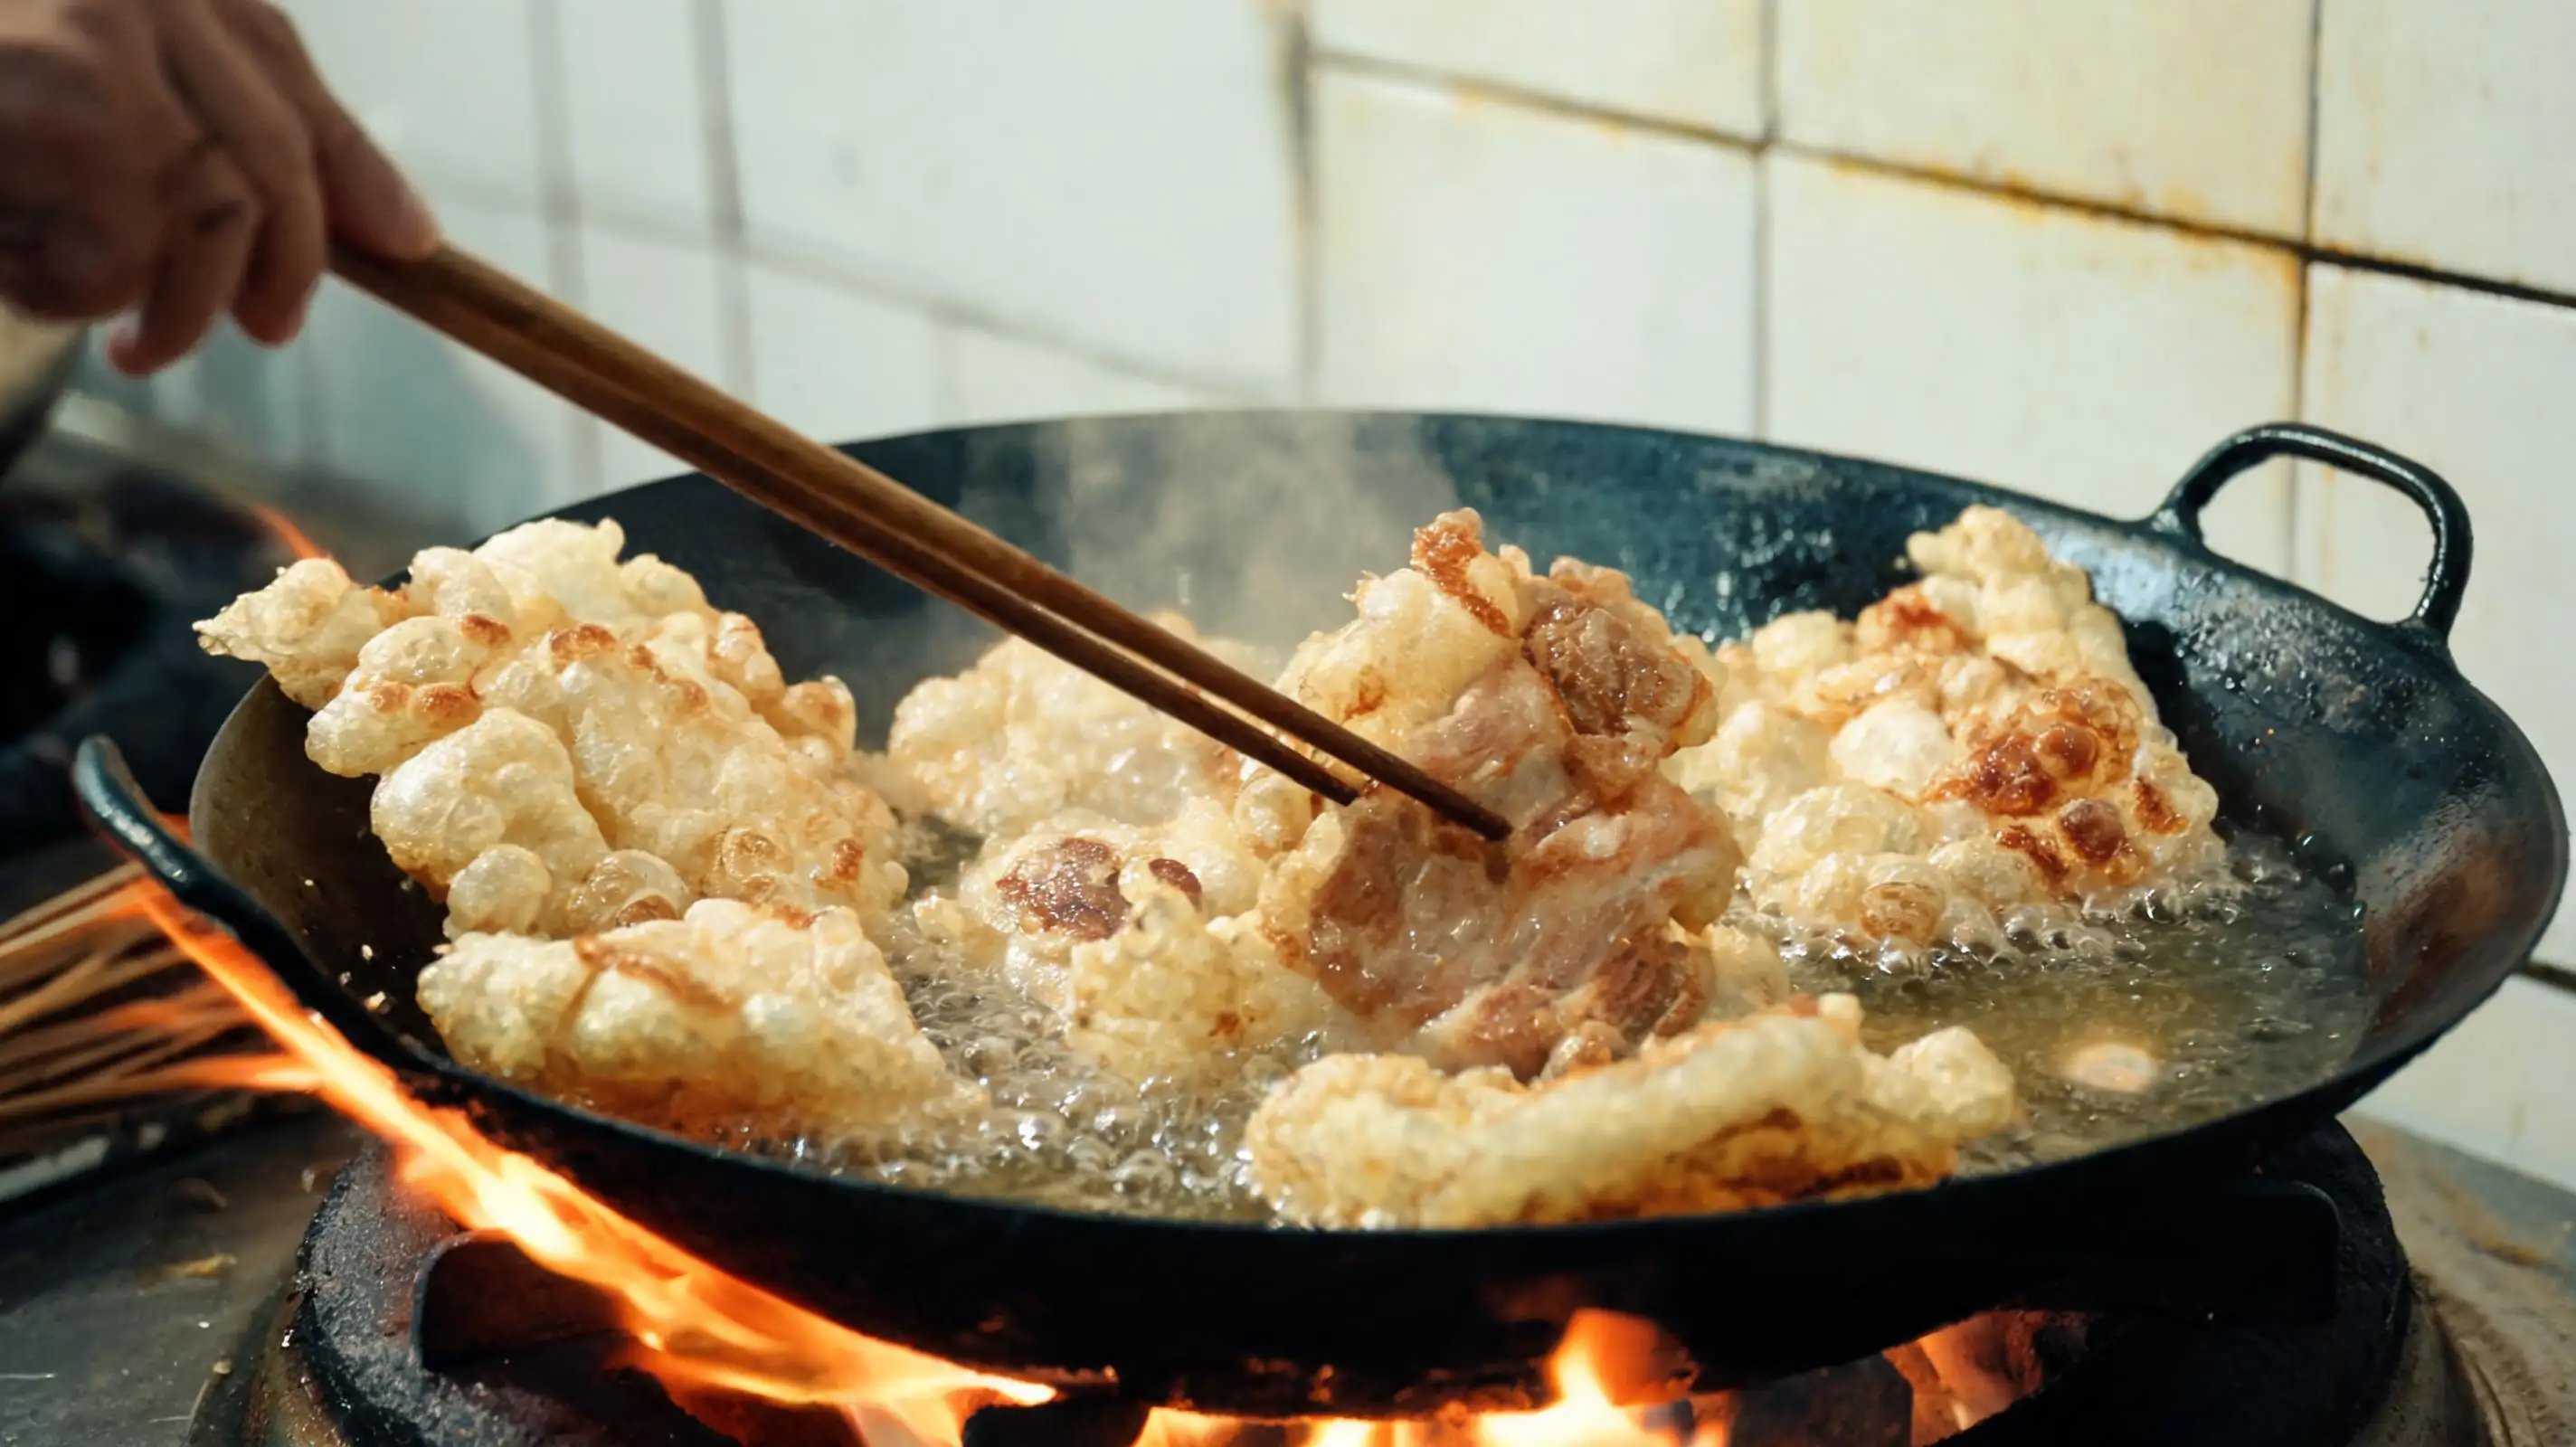
## 📸 4 · The First Fry
**Oil at 170°C. Not less. Check with a wooden chopstick — bubbles should rise immediately.**
Lower each piece gently into the oil, one at a time.
Don't crowd the wok. **Six pieces maximum per batch.**
Fry for 2–3 minutes, turning once, until the batter sets and turns pale cream.
Pull them out before they color — this fry is for structure, not crust.
The wok is black iron. The flame is loud.
The oil bubbles sound like the first full minute of a rainstorm.
---
## 📸 5 · The Second Fry
**This is where it becomes guobaorou.**
Raise the oil to 200°C. Return all the pieces at once.
Fry for 60–90 seconds, stirring constantly with long chopsticks.
**Watch the crust — it will go from pale to golden in under a minute at this temperature.**
Pull it the moment it turns golden-beige with scattered brown spots.
The batter puffs. The surface blisters and crinkles.
**That texture is irreversible once it cools — so the rest of the process takes under two minutes.**
---
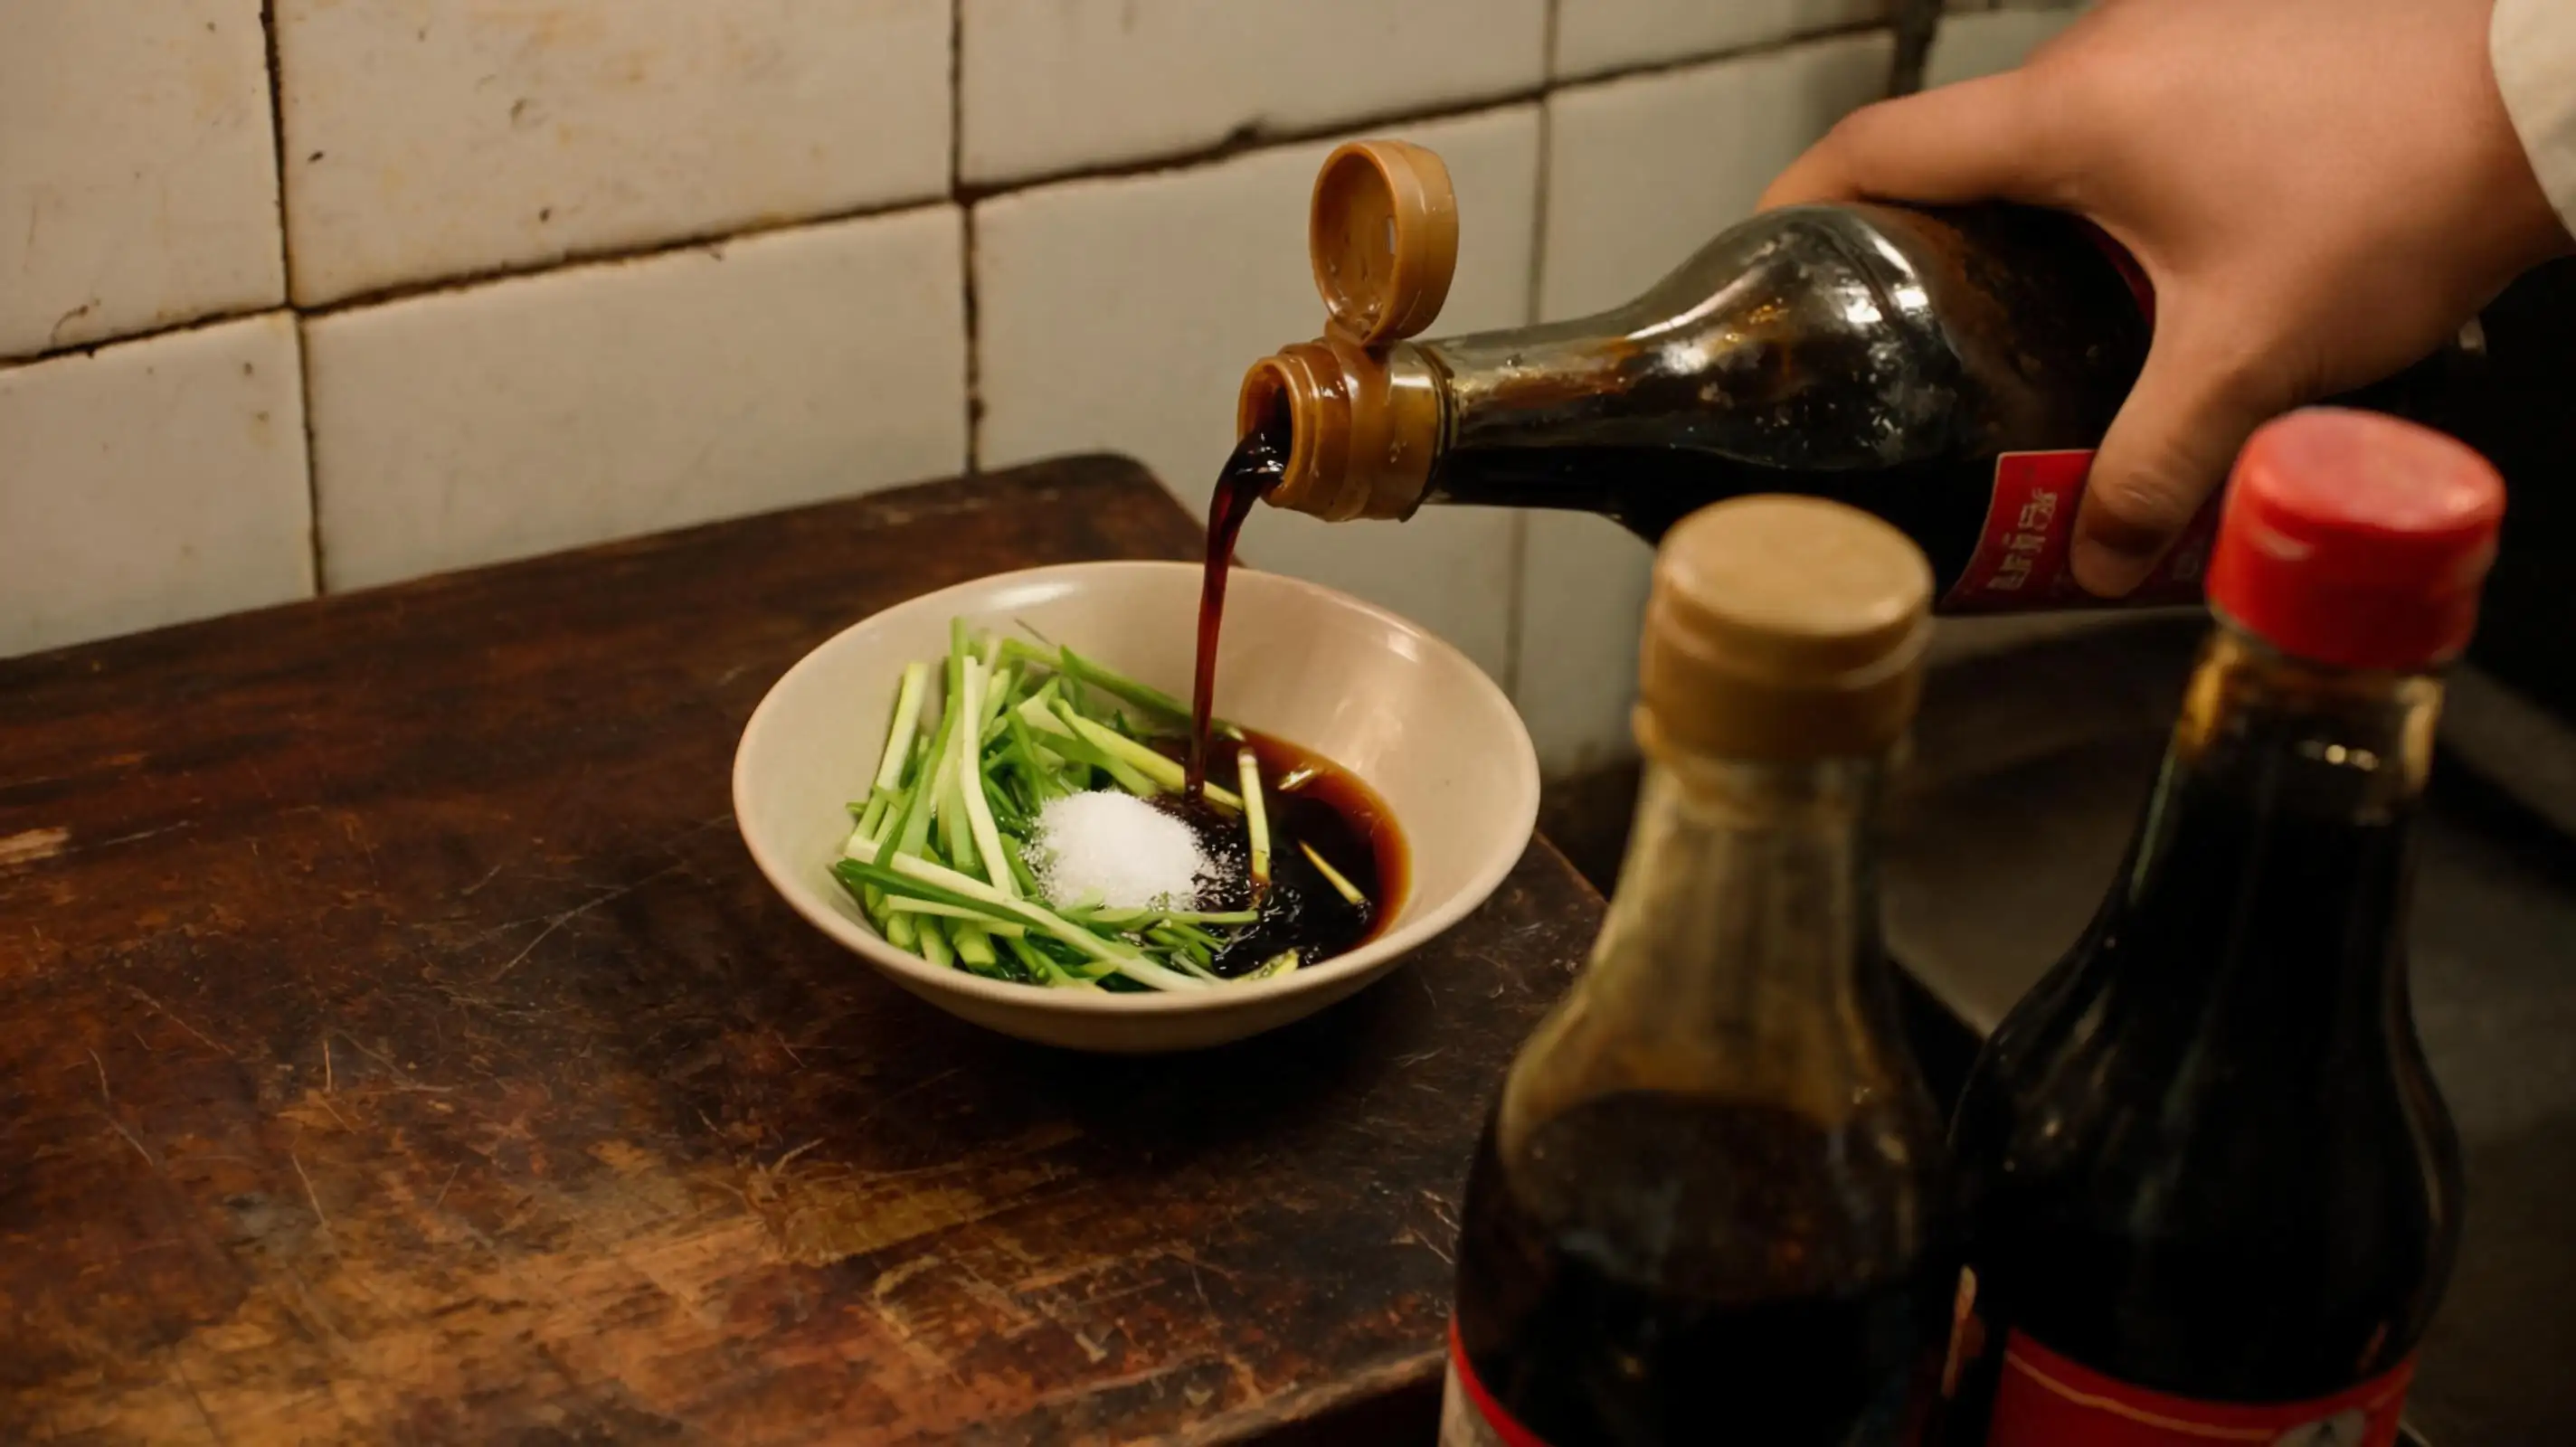
## 📸 6 · The Sauce
**Three core ingredients. One acid, one sweet, one aromatic.**
Into a small bowl: julienned green scallion, a spoon of sugar,
and a generous pour of aged dark vinegar from the bottle that's been on this counter for years.
Add a splash of soy sauce. Stir once.
**This is not a sweet-and-sour sauce. It's a seasoning glaze.**
The vinegar should hit first, the sugar just behind,
the scallion releasing its raw fragrance into both.
No ketchup. No starch thickener. No color.
That's how you know it's Changchun.
---
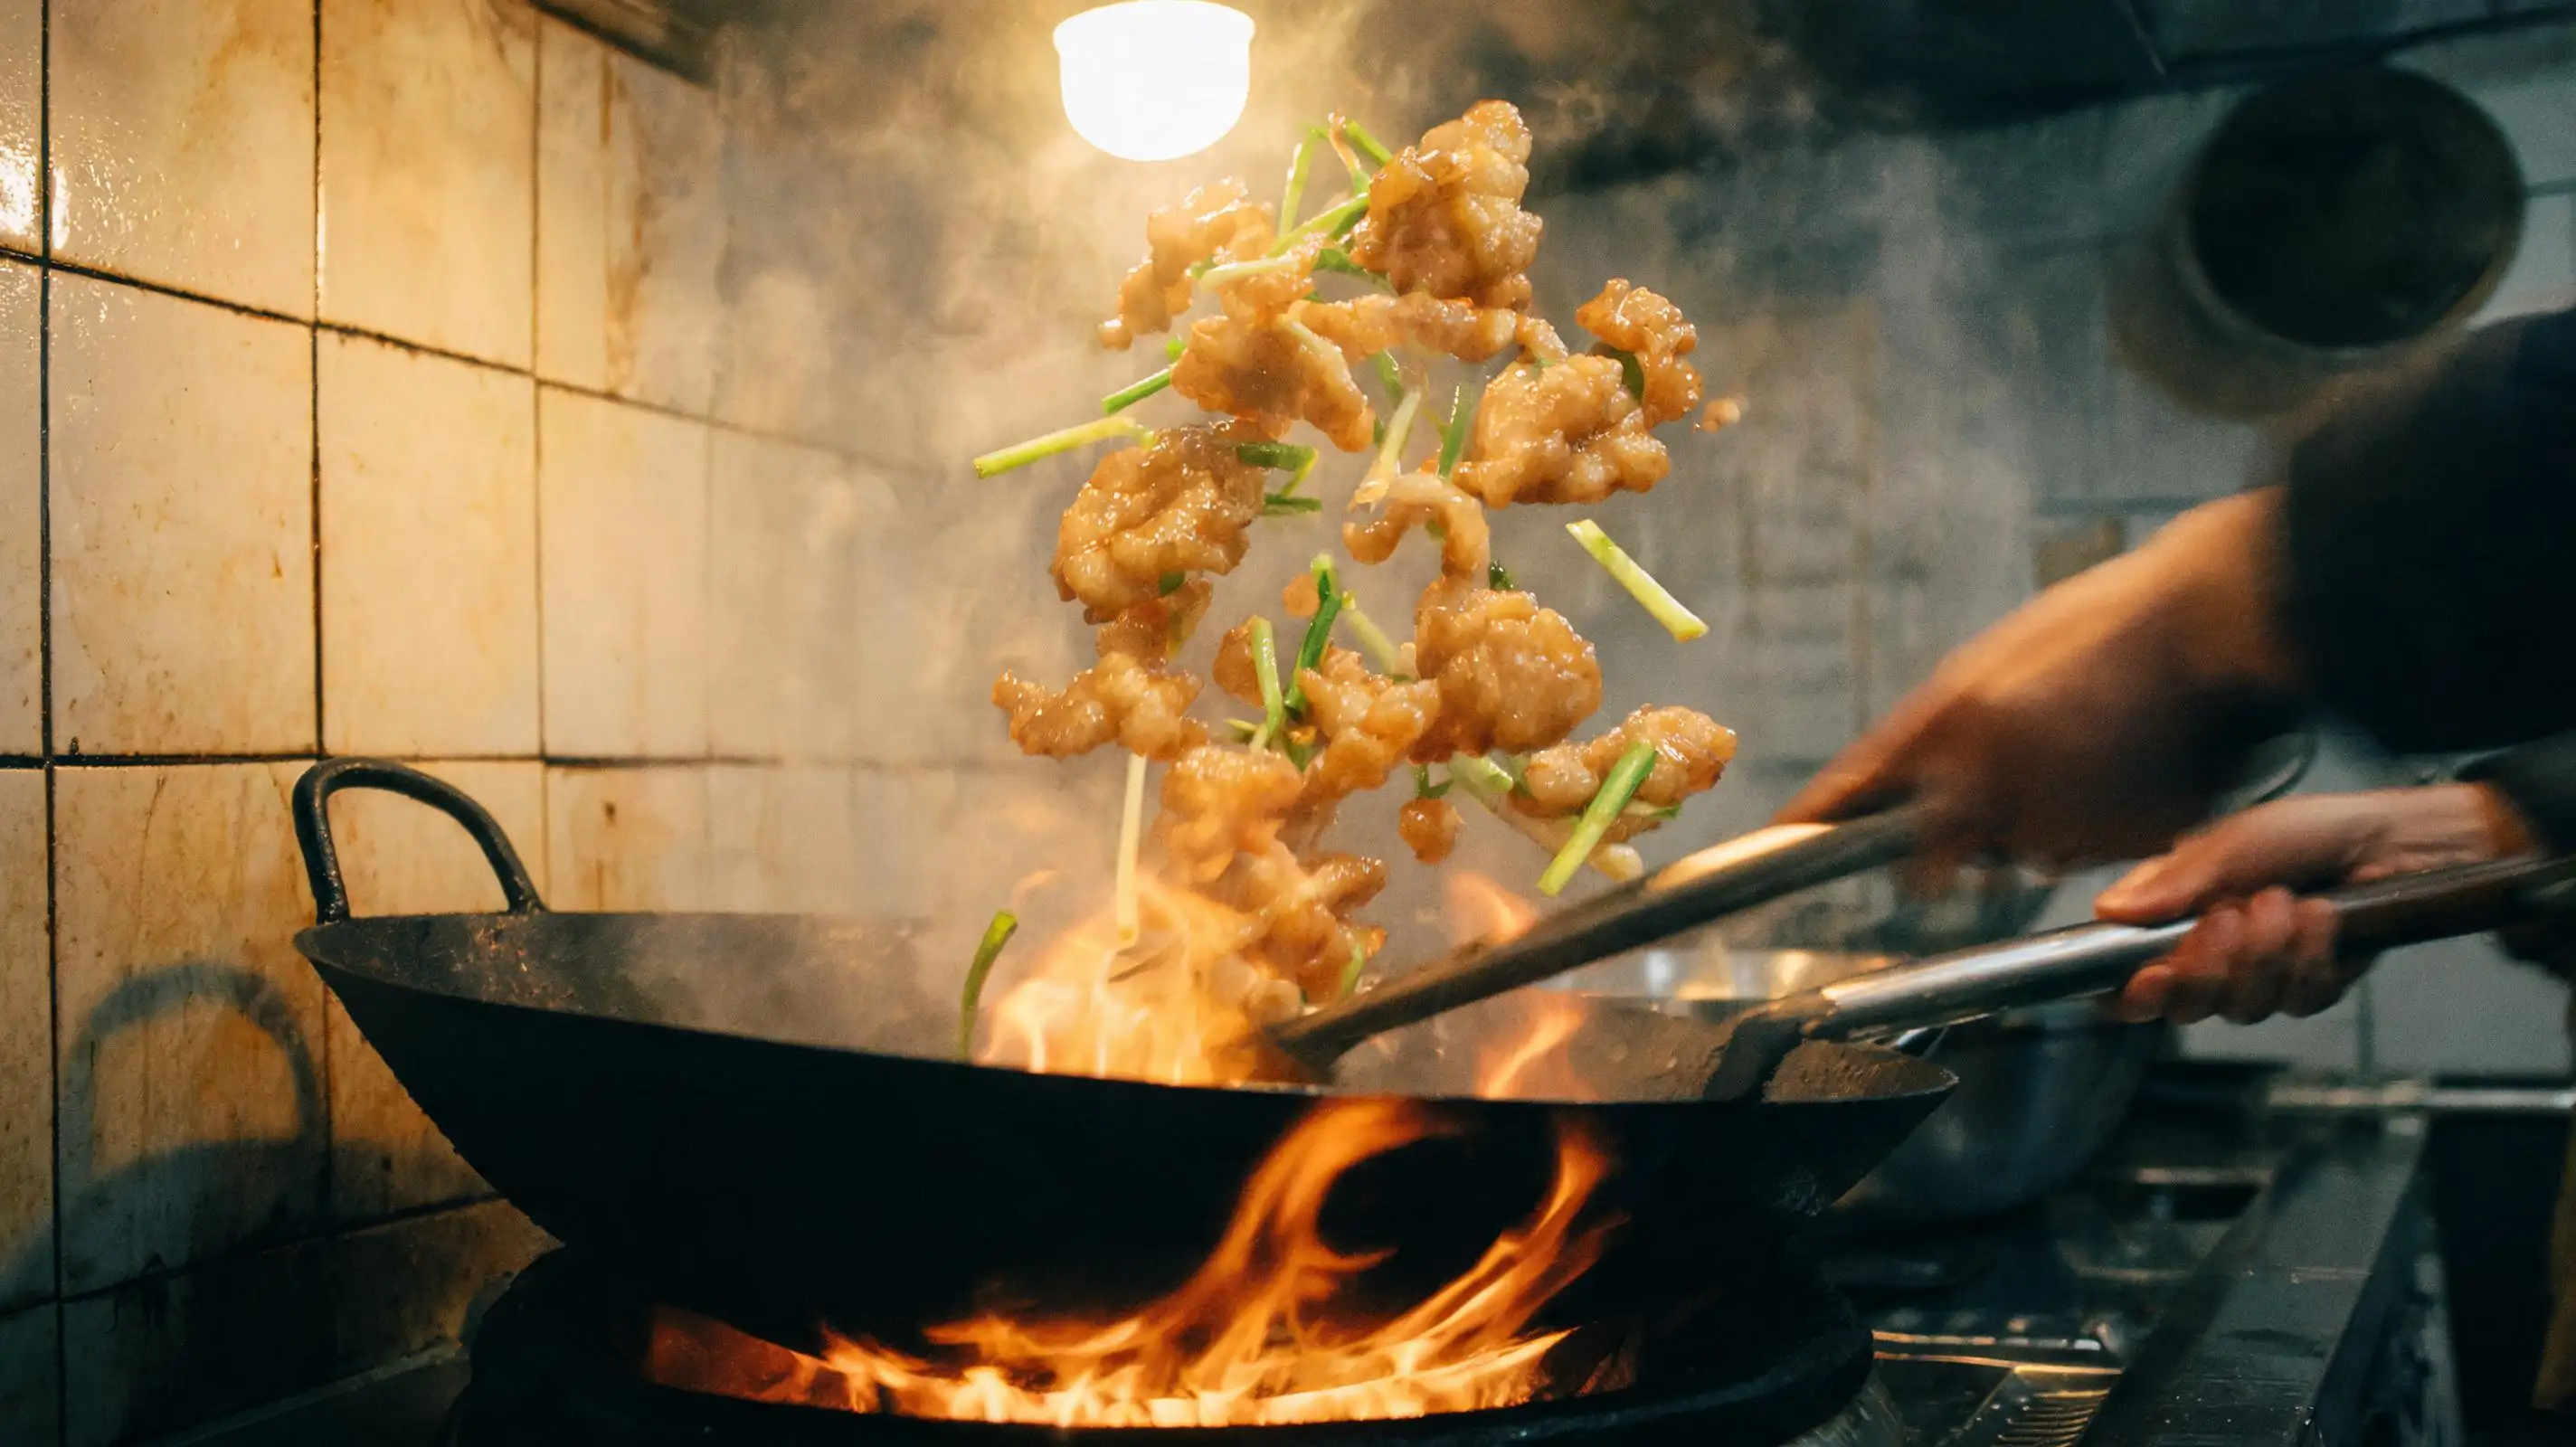
## 📸 7 · The Toss
**The wok is still hot. You have 90 seconds.**
Pour the sauce directly into the hot wok and let it sizzle for five seconds —
then add the fried pork all at once.
Toss hard: spatula under, wrist flip, everything airborne.
**Three tosses. No more.**
The goal is a thin, even glaze — not a sauce pool.
Each piece should be lightly coated and glistening,
the crust still audibly crispy, the scallion barely wilted.
If you hear the crunch when you set the plate down, you're done right.
---
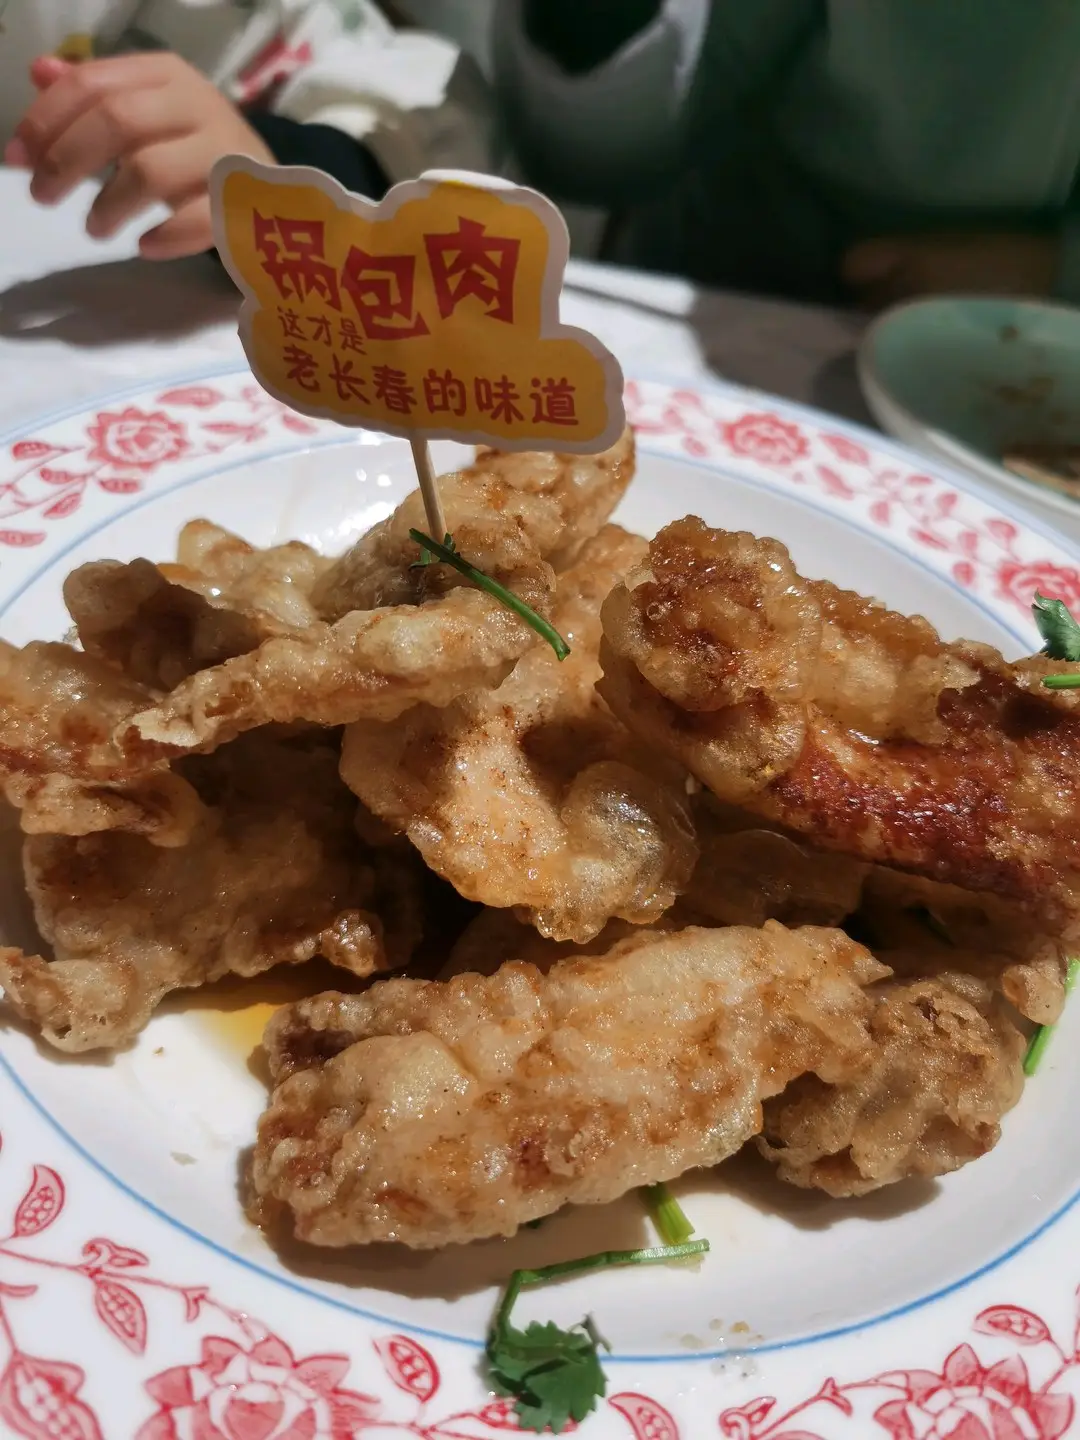
## 📸 8 · The Plate
Pile it high on the white flower plate.
A few sprigs of cilantro at the edge.
**No sauce on the side. No dipping. No extra seasoning.**
This is a dish that finishes in the wok.
Everything it needs, it already has.
First bite: the crunch hits before the flavor does.
Second bite: vinegar, scallion, pork — in that order.
Third bite: you understand why people from Changchun
get genuinely angry when someone serves them the red version.
*This is the taste of old Changchun.*
*This is what the sign says.*
*They're right.*
> Not the red one. Not the tomato version.
> **This is the real one.**
> Pale gold. Thick crust. One pass of vinegar and scallion.
> The way Changchun has been making it for decades.
---
## 📸 1 · The Cut
**Only pork loin. Nothing else.**
Sliced thin and uniform — each piece no more than 5 mm thick,
cut straight across the grain with a single heavy stroke of the cleaver.
**Consistent thickness means consistent fry time.**
Too thick and the center stays raw. Too thin and the batter overwhelms the meat.
The board is old. The knife is heavy.
Every cut lands the same way.
---
## 📸 2 · The Batter
**Potato starch. Cold water. That's it.**
Mix until the batter is thick — it should coat the back of a chopstick
and hold its shape when you lift it. Not runny. Not dry.
**Potato starch, not corn starch, not flour.**
It's what gives Changchun-style guobaorou its signature thick, blistered,
almost glass-like crust after the second fry.
No egg. No baking powder. No tricks.
The starch does everything if you mix it right.
---
## 📸 3 · The Coat
**Press each piece in fully. Don't dip — press.**
Lower the pork slice into the batter and use your fingers to work it in,
ensuring every surface is covered. Lift it and let the excess drip back.
**The batter should cling, not drip.**
Too much batter and the crust will detach from the meat.
Too little and it won't blister properly in the oil.
You'll know you got it right when the piece holds its shape going into the wok.
---
## 📸 4 · The First Fry
**Oil at 170°C. Not less. Check with a wooden chopstick — bubbles should rise immediately.**
Lower each piece gently into the oil, one at a time.
Don't crowd the wok. **Six pieces maximum per batch.**
Fry for 2–3 minutes, turning once, until the batter sets and turns pale cream.
Pull them out before they color — this fry is for structure, not crust.
The wok is black iron. The flame is loud.
The oil bubbles sound like the first full minute of a rainstorm.
---
## 📸 5 · The Second Fry
**This is where it becomes guobaorou.**
Raise the oil to 200°C. Return all the pieces at once.
Fry for 60–90 seconds, stirring constantly with long chopsticks.
**Watch the crust — it will go from pale to golden in under a minute at this temperature.**
Pull it the moment it turns golden-beige with scattered brown spots.
The batter puffs. The surface blisters and crinkles.
**That texture is irreversible once it cools — so the rest of the process takes under two minutes.**
---
## 📸 6 · The Sauce
**Three core ingredients. One acid, one sweet, one aromatic.**
Into a small bowl: julienned green scallion, a spoon of sugar,
and a generous pour of aged dark vinegar from the bottle that's been on this counter for years.
Add a splash of soy sauce. Stir once.
**This is not a sweet-and-sour sauce. It's a seasoning glaze.**
The vinegar should hit first, the sugar just behind,
the scallion releasing its raw fragrance into both.
No ketchup. No starch thickener. No color.
That's how you know it's Changchun.
---
## 📸 7 · The Toss
**The wok is still hot. You have 90 seconds.**
Pour the sauce directly into the hot wok and let it sizzle for five seconds —
then add the fried pork all at once.
Toss hard: spatula under, wrist flip, everything airborne.
**Three tosses. No more.**
The goal is a thin, even glaze — not a sauce pool.
Each piece should be lightly coated and glistening,
the crust still audibly crispy, the scallion barely wilted.
If you hear the crunch when you set the plate down, you're done right.
---
## 📸 8 · The Plate
Pile it high on the white flower plate.
A few sprigs of cilantro at the edge.
**No sauce on the side. No dipping. No extra seasoning.**
This is a dish that finishes in the wok.
Everything it needs, it already has.
First bite: the crunch hits before the flavor does.
Second bite: vinegar, scallion, pork — in that order.
Third bite: you understand why people from Changchun
get genuinely angry when someone serves them the red version.
*This is the taste of old Changchun.*
*This is what the sign says.*
*They're right.*