·5/15/2026
from
WÁNDÒU HUÁNG
# · WÁNDÒU HUÁNG ·
## Palace Pea Cake — The snack that survived a dynasty
> It's just peas and sugar. That's the whole thing
> The Qing court kept it for three hundred years, and nobody changed the recipe
> You'll understand why after the first bite
---
## Ingredients
| Item | Amount |
|------|--------|
| Dried split yellow peas (去皮干豌豆) | 500 g |
| White sugar (白砂糖) | 160 g |
| Cold water — for soaking | enough to cover by 5 cm |
| Water — for boiling | 1.2 L |
> Yield: about 30–35 mahjong-tile pieces · Best served cold · Keeps refrigerated 3 days
---
## Step 1 · The Peas
### Start with split, not whole
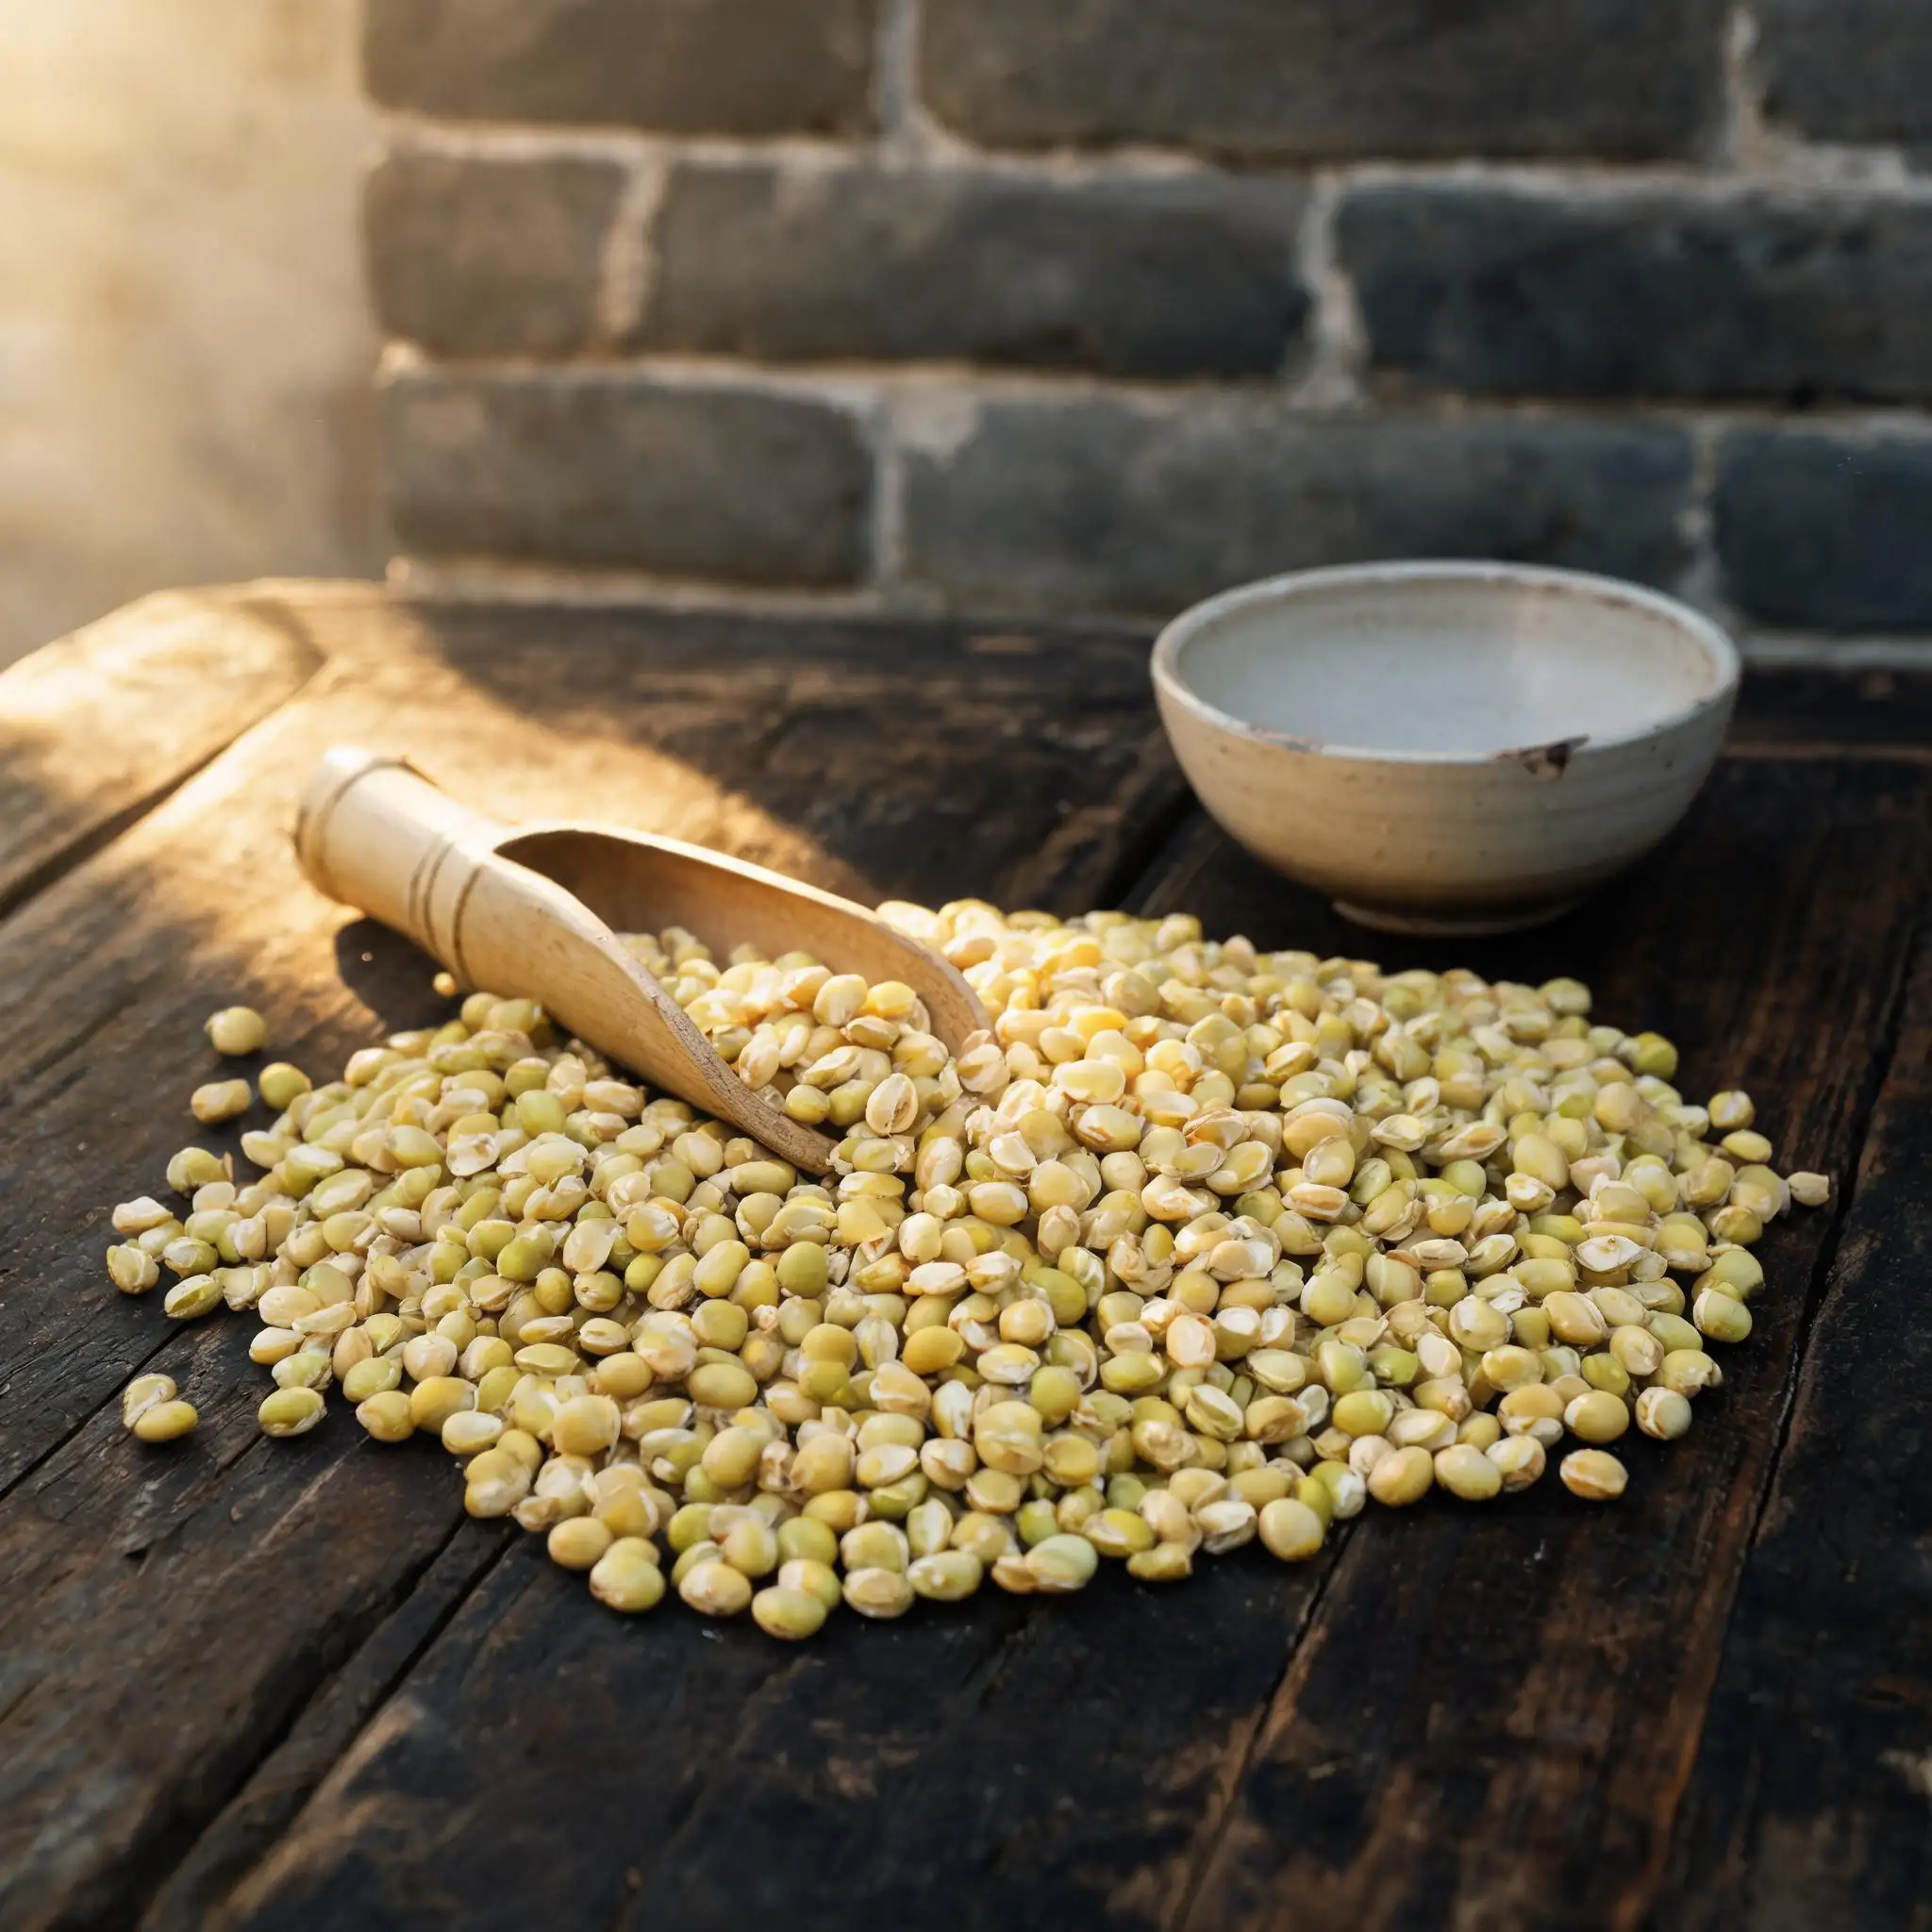
You want *split* dried yellow peas — the kind that are already hulled, pale yellow, flat on one side. Whole green peas will fight you. The split ones cook down without argument.
Spread them on the table and go through them once. Pull out any that look shriveled or discolored. It takes two minutes. The finished texture is worth it.
- **Color check: pale straw yellow, uniform**
- **Discard any that are grey or shriveled**
- **500 g dry yields roughly 1.1 kg cooked paste**
---
## Step 2 · The Soak
### Give them at least four hours, overnight is better
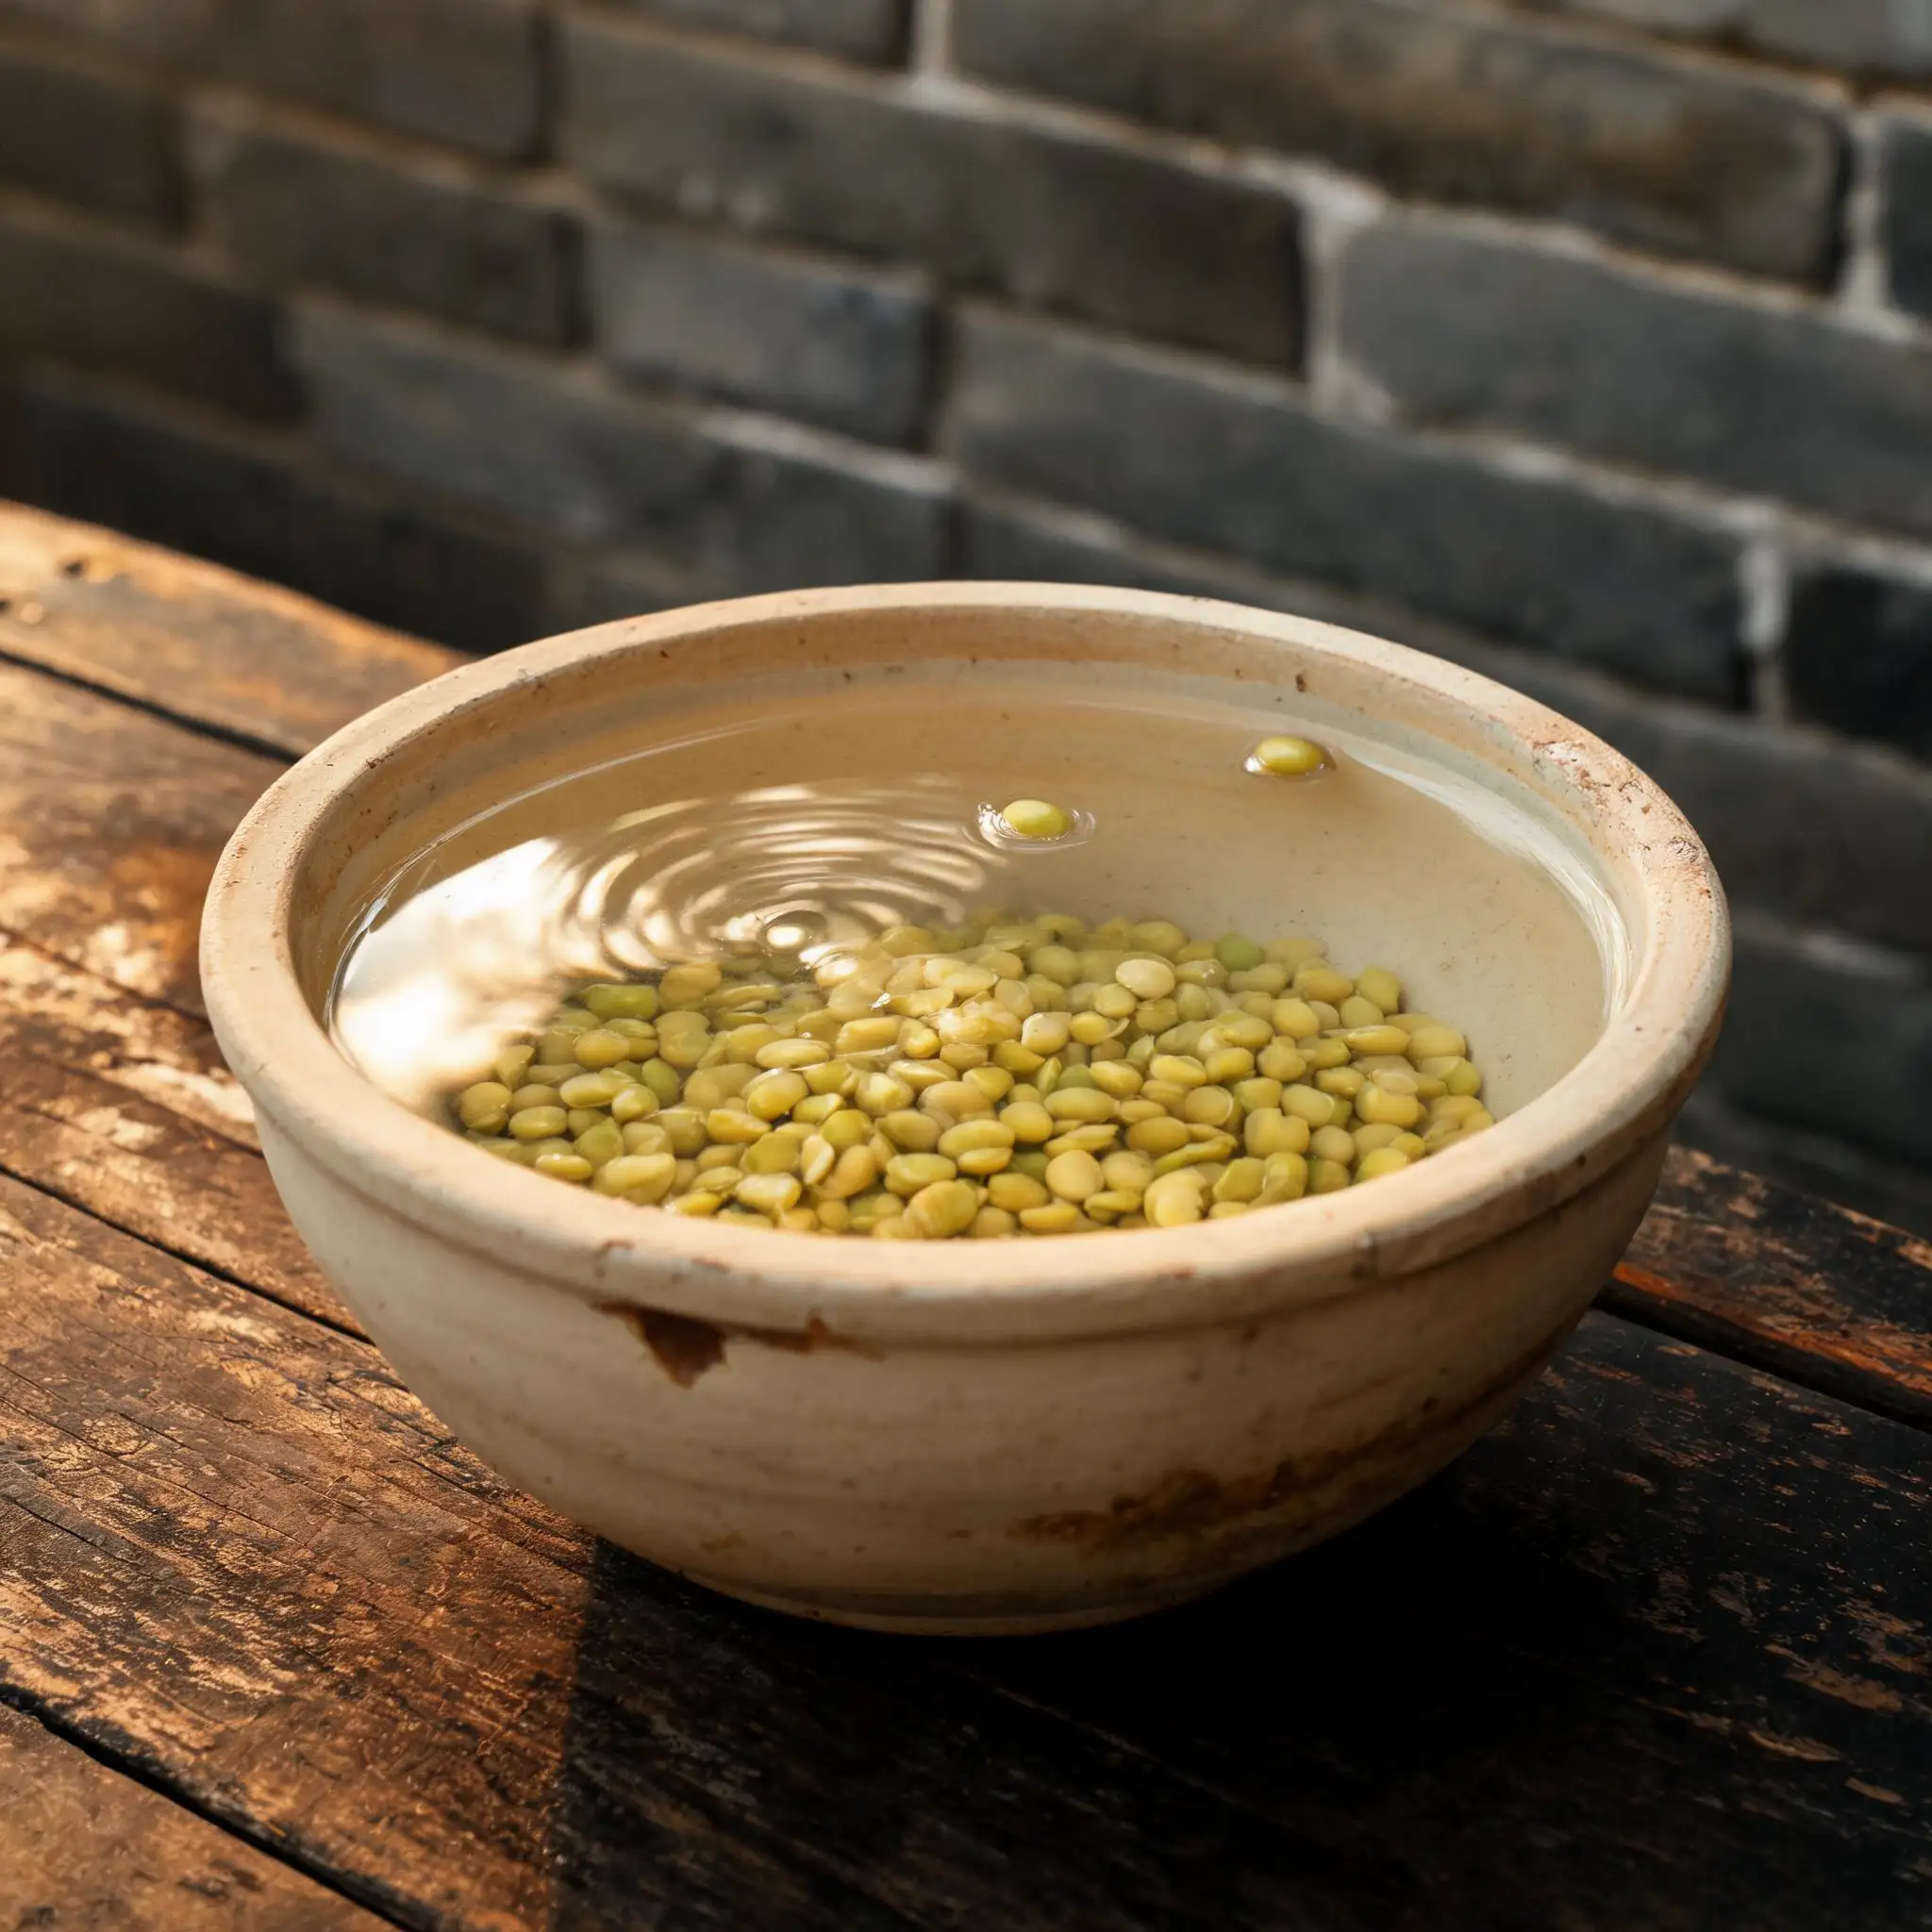
Cover the peas with cold water by a good five centimeters — they'll swell up significantly. Room temperature is fine. The soak softens the cell walls so they break down evenly when boiled, which means no lumps in the final paste.
After soaking, the peas turn a deeper yellow and feel slightly soft when you press one between your fingers. That's what you want.
| Soak time | Result |
|-----------|--------|
| 4 hours | Workable, slight resistance when boiling |
| 8 hours | Ideal — peas cook down evenly |
| Overnight | Best texture, no extra effort |
> ⚠️ Don't soak longer than 18 hours in warm weather — they can start to ferment
---
## Step 3 · The Boil
### Full heat until they completely fall apart
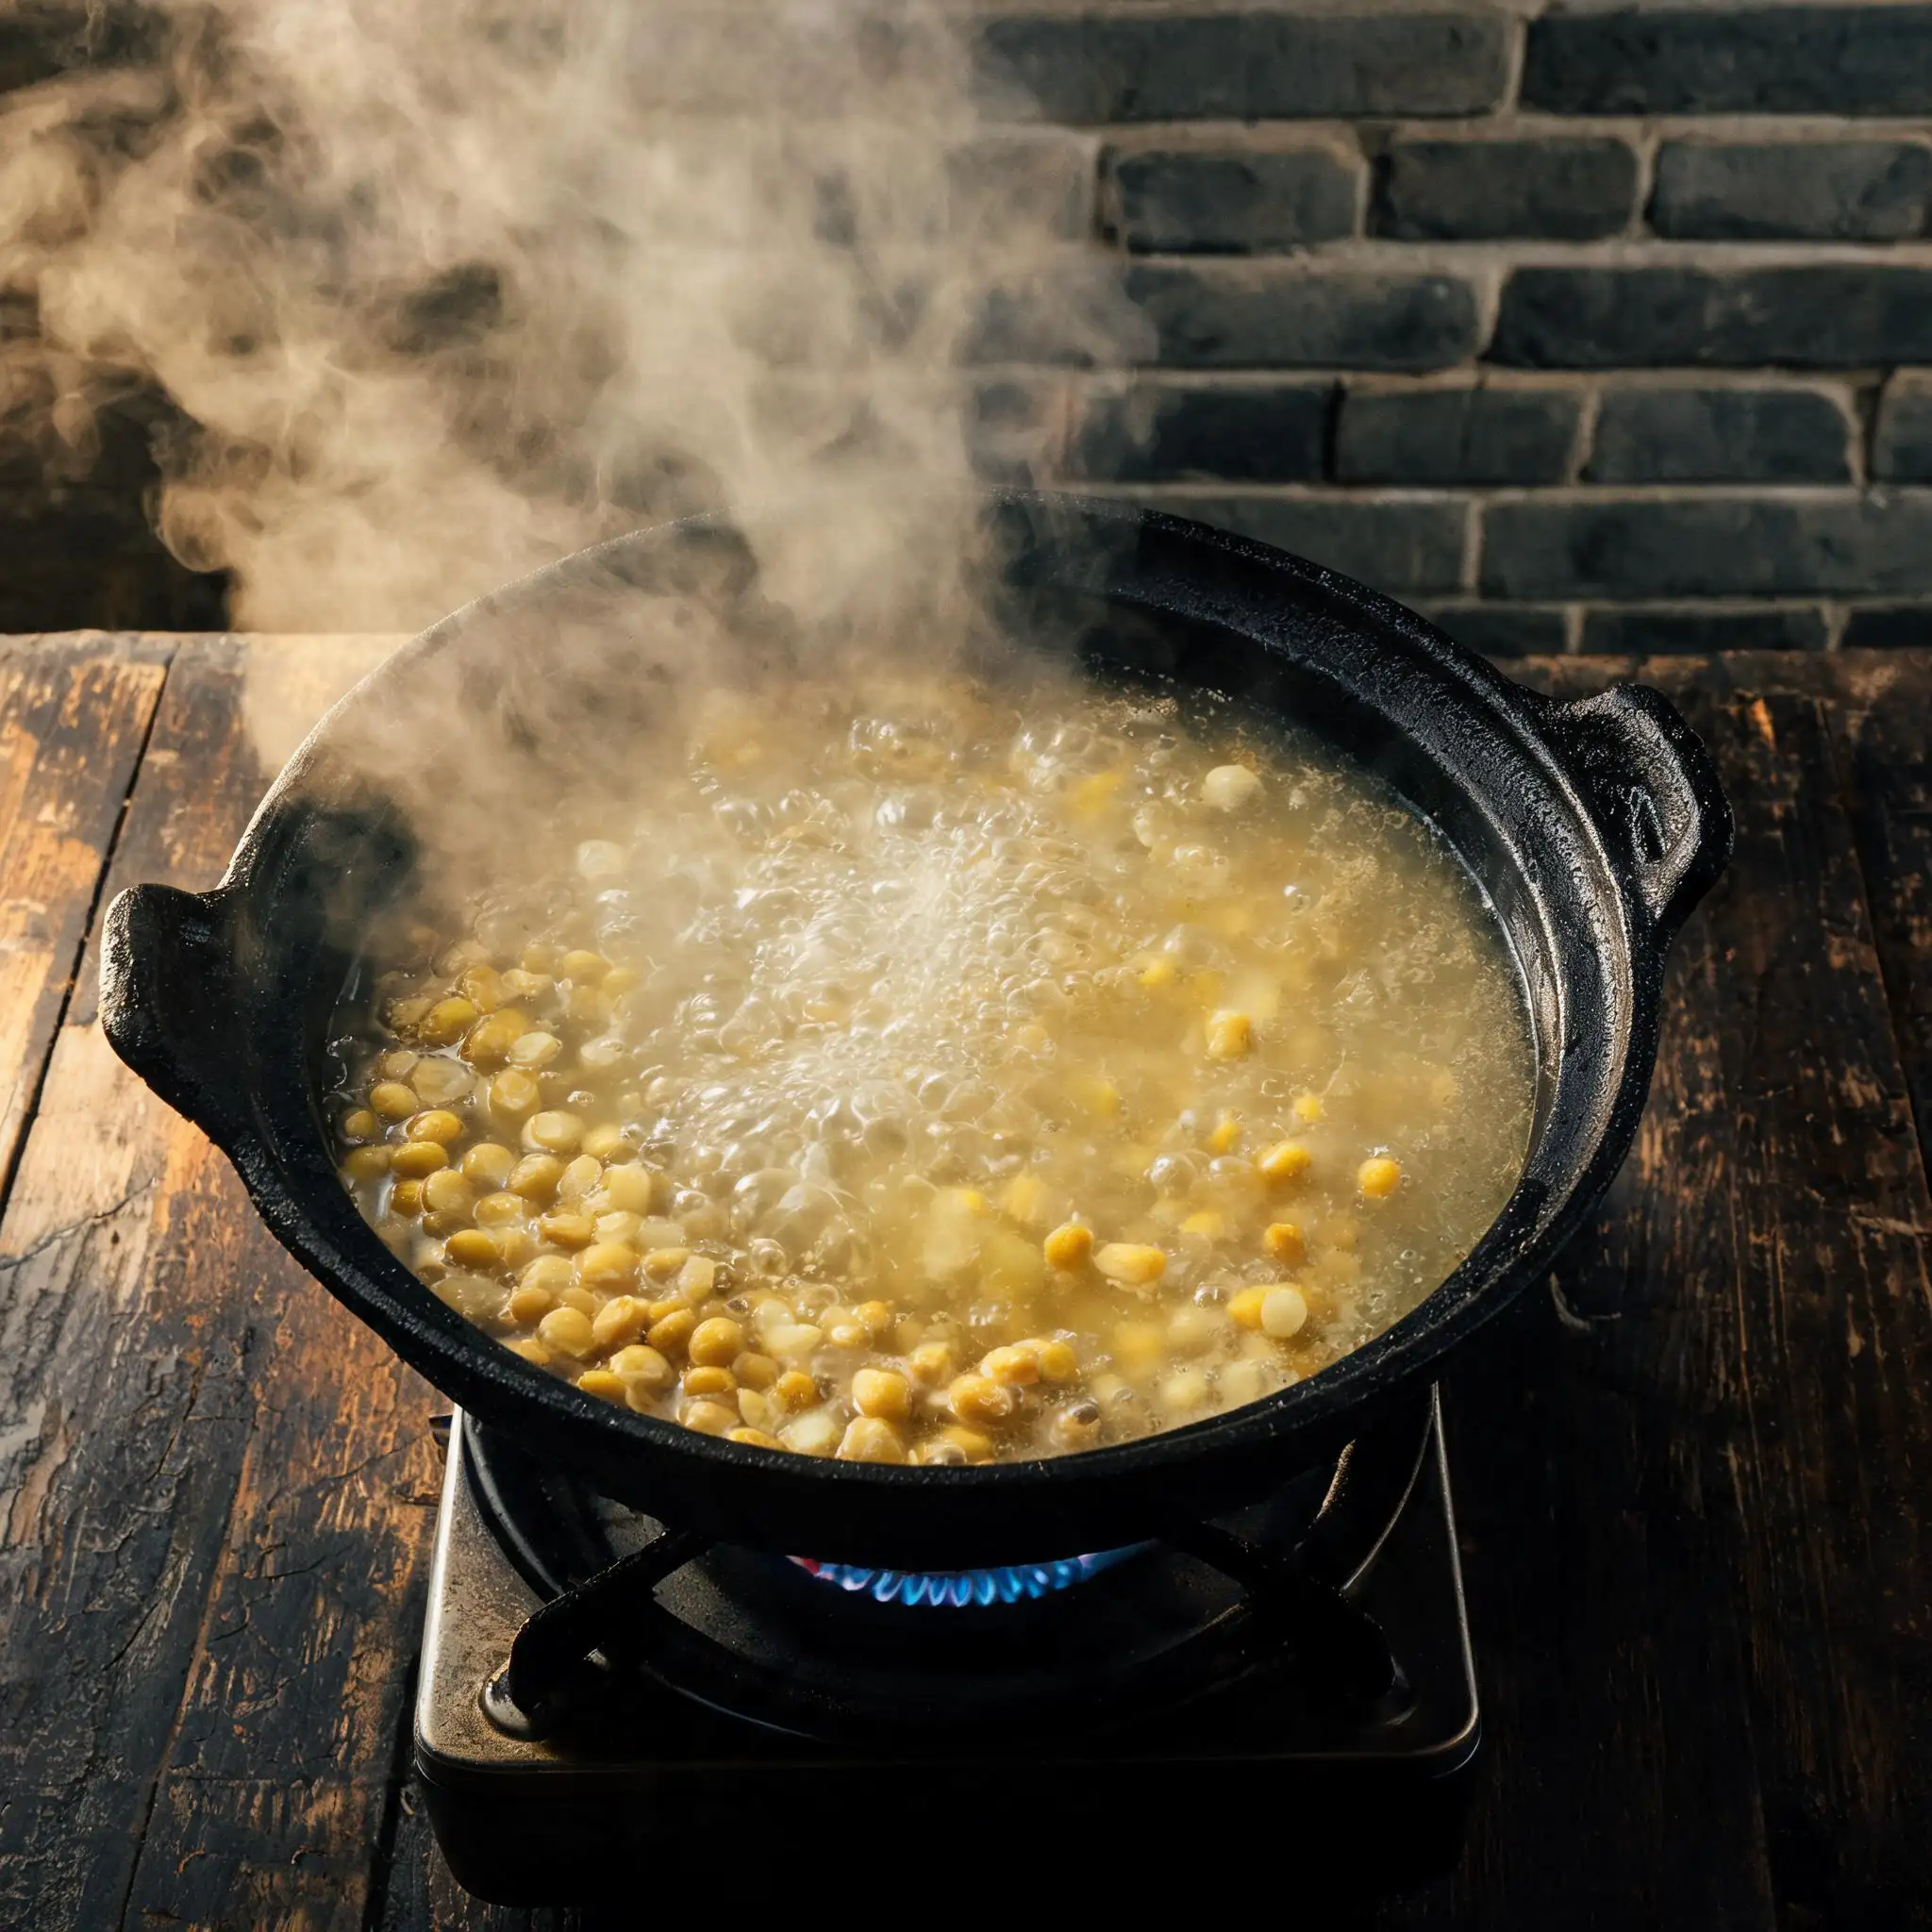
Drain the soaked peas and add fresh water — about 1.2 liters for 500 g dry peas. Bring to a hard boil, then keep it at a steady rolling boil. No lid. You want the water to reduce while the peas cook.
This takes 40–50 minutes. The peas should dissolve into a thick, cloudy yellow broth. When you press a pea against the side of the pot with a spoon and it disappears with no resistance, you're done. If you can still see individual pea shapes, keep going.
- **Don't add salt — it toughens the skins**
- **Skim the foam in the first 10 minutes**
- **The water should reduce to roughly half by the time the peas are done**
> ⚠️ The bottom scorches fast toward the end — stir every few minutes once it thickens
---
## Step 4 · The Sieve
### Push everything through — this step makes the texture
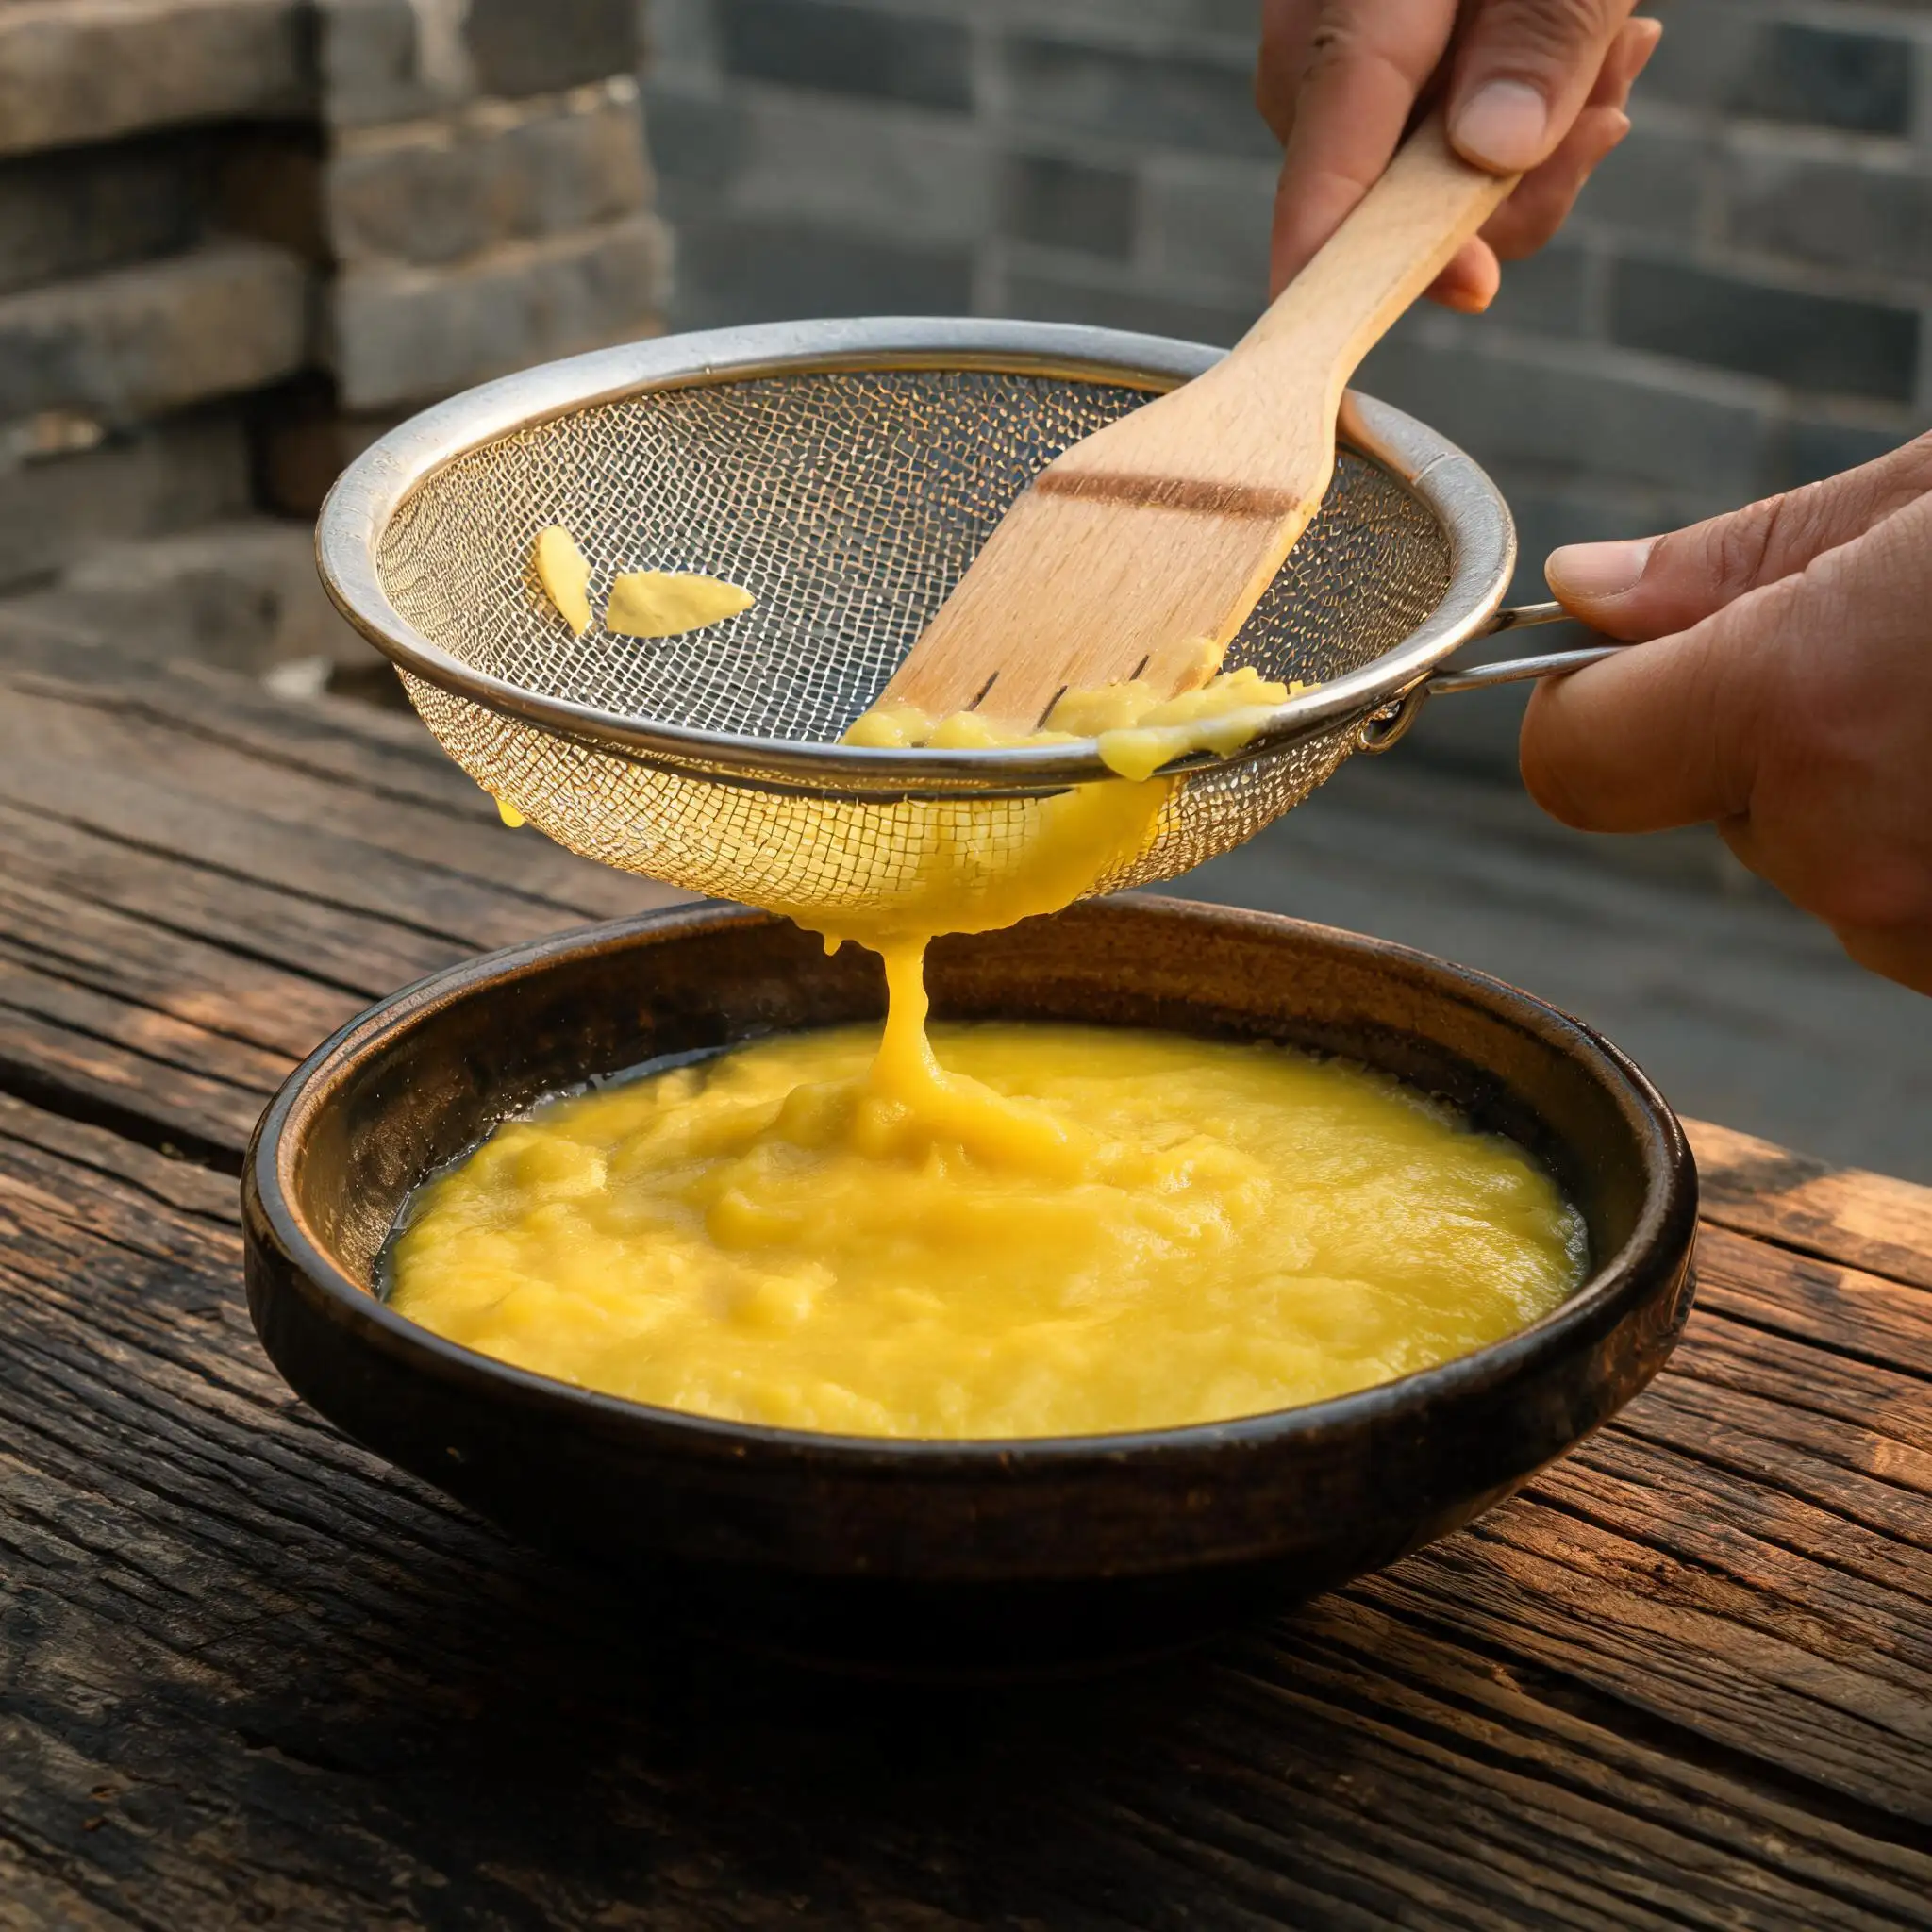
Pour the cooked pea mixture through a fine-mesh strainer into a bowl. Use a wooden spatula to press and scrape in circular motions. The smooth paste falls through; only a small amount of thin pea skin stays behind on the mesh. Scrape the underside of the strainer as you go.
What ends up in the bowl should be completely smooth — no graininess, no skin fragments. If you hit a spot that feels slightly gritty, push it through again. The paste at this stage is loose and pourable, almost like thick soup.
- **Work in batches if your strainer is small**
- **The skins left on the strainer should be minimal — almost nothing**
- **Don't discard the liquid that comes through; it's part of the paste**
---
## Step 5 · The Cook
### Stir without stopping
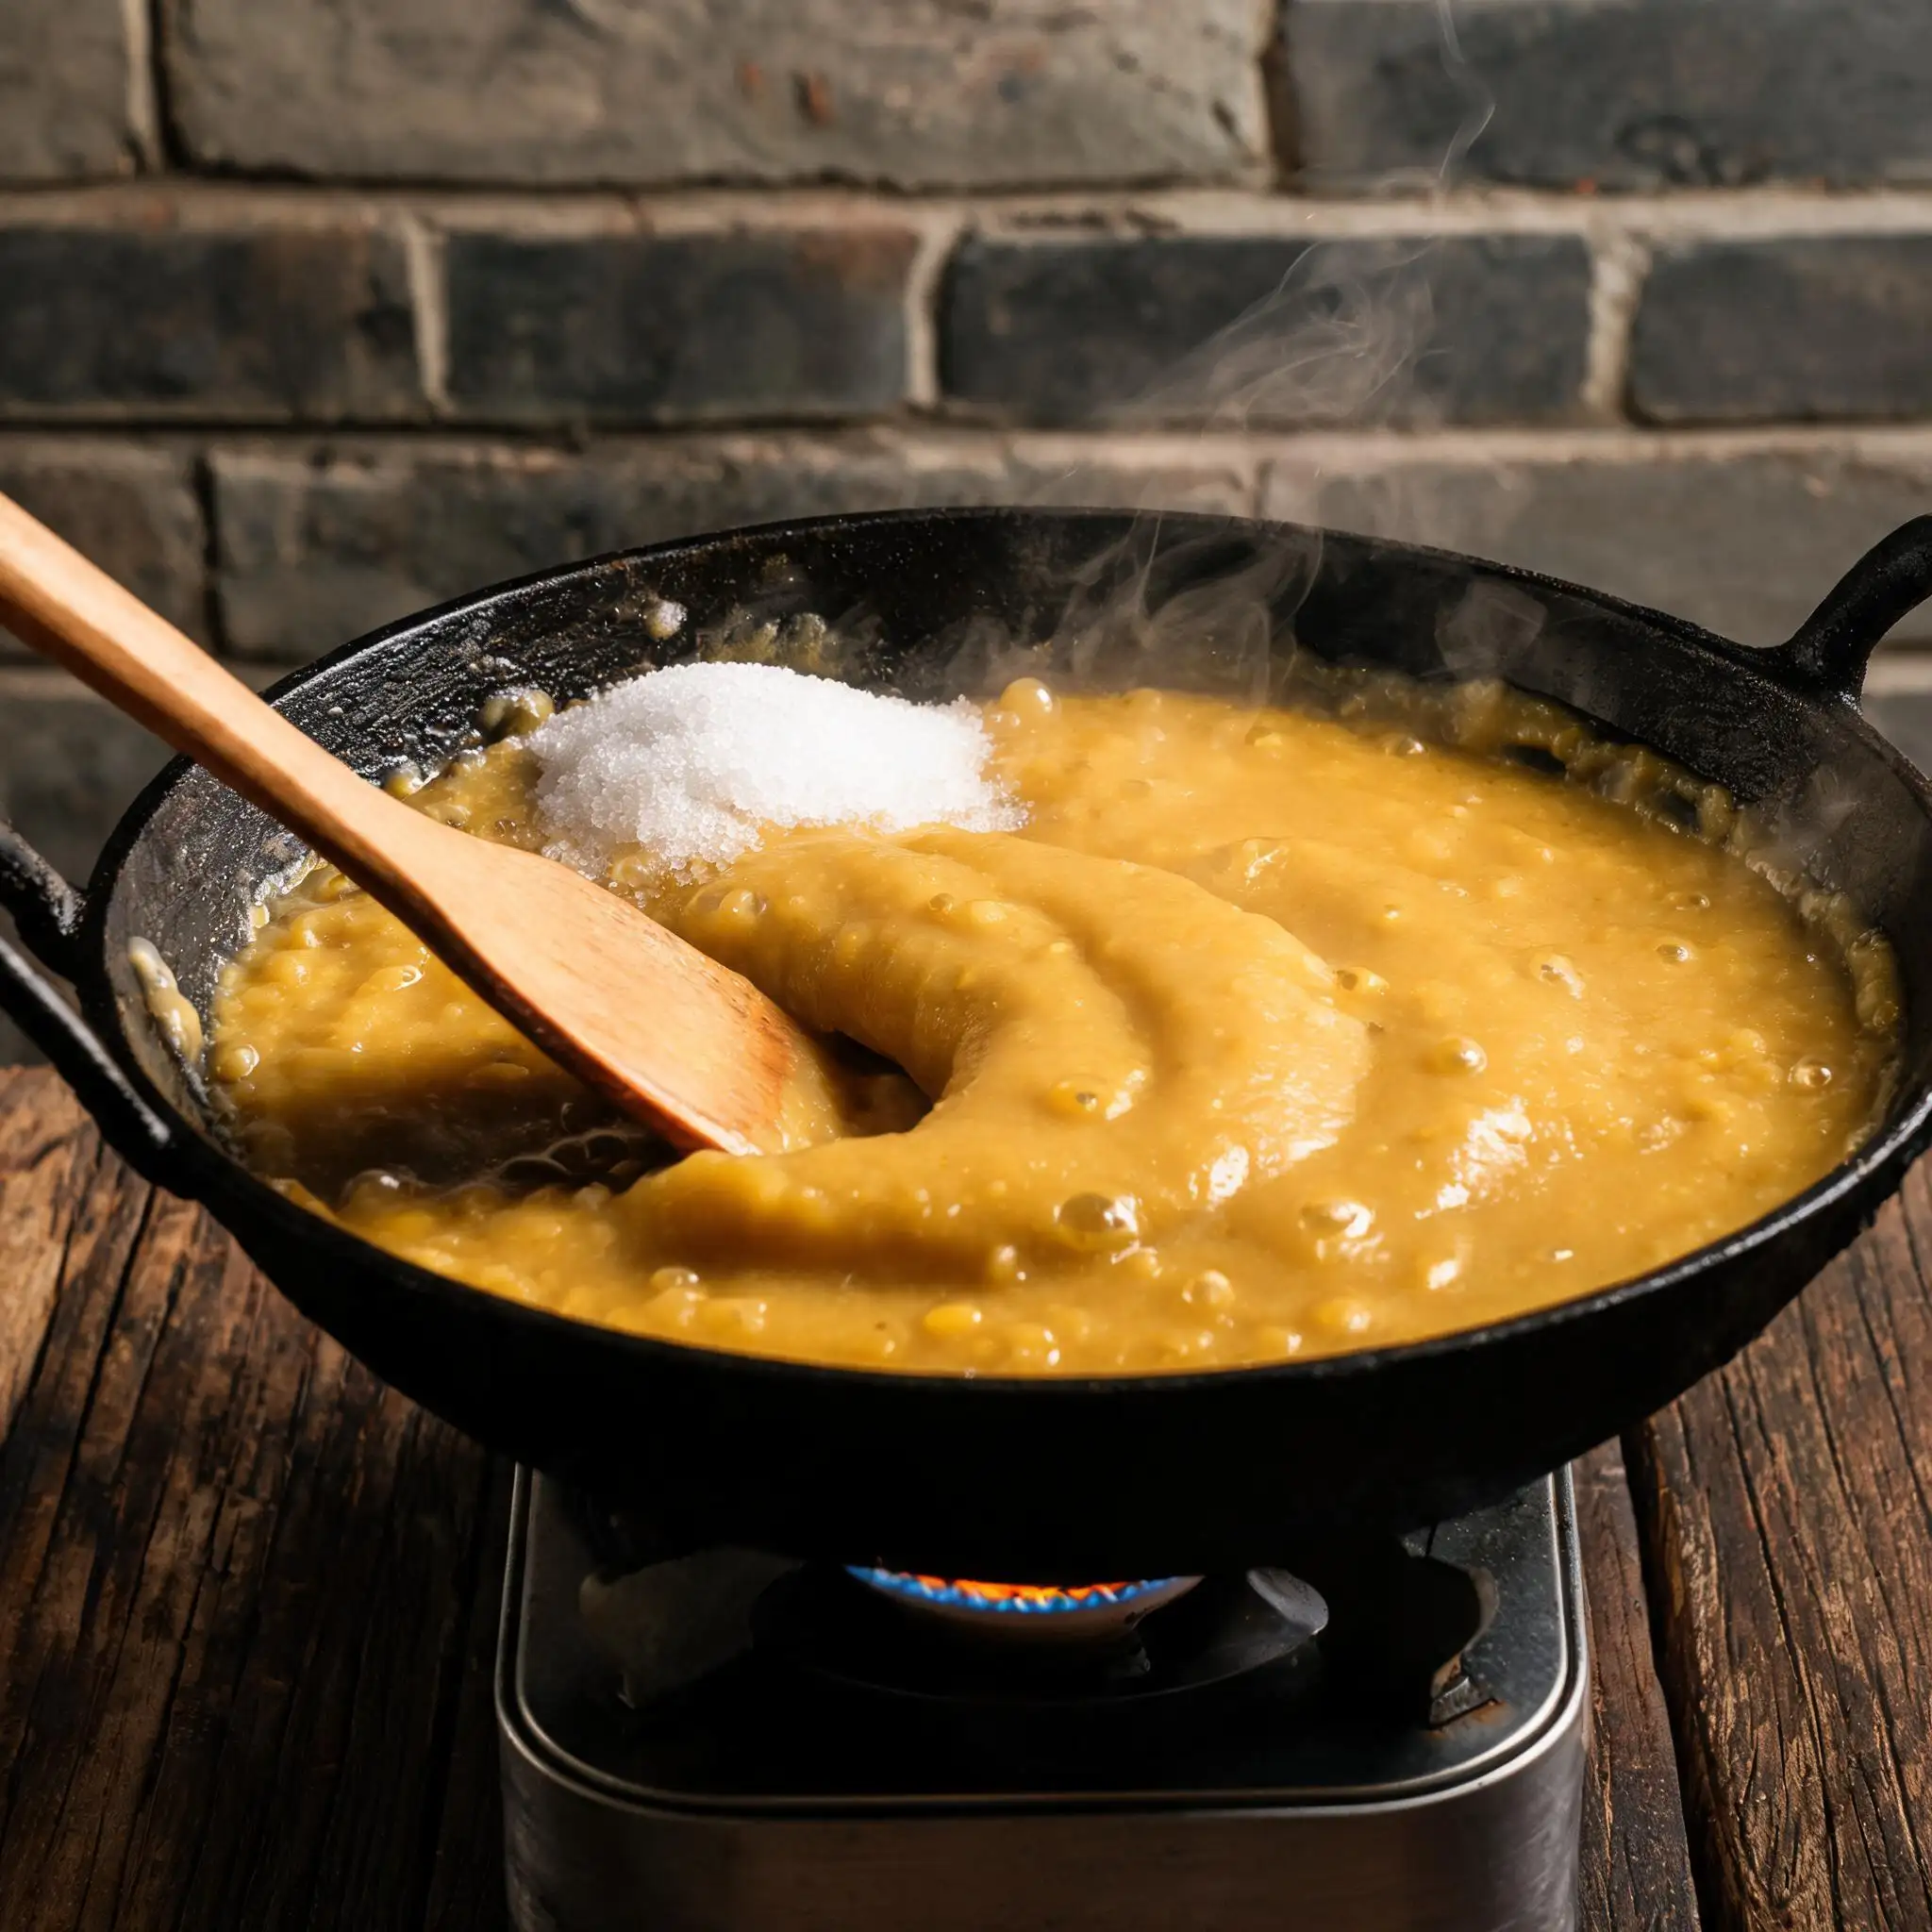
Pour the strained paste into a heavy pan — cast iron works best. Add the sugar. Turn the heat to medium-low and start stirring. You will not stop stirring until this is done.
As the mixture heats, it loosens first, then gradually thickens. After about 20–25 minutes, it becomes dense enough that when you drag the spatula through the center, the trail stays open for a second before closing back. That's when it's ready. Pull it off the heat immediately.
| Stage | Visual cue | Time (approx) |
|-------|------------|----------------|
| Early | Loose, pourable, bubbling gently | 0–10 min |
| Mid | Thickening, spatula leaves soft trails | 10–20 min |
| Ready | Trail stays open 1–2 seconds, paste pulls away from pan edge | 20–25 min |
> ⚠️ If you stop stirring even briefly at the end stage, the bottom will burn and you'll taste it in every bite
---
## Step 6 · The Mold
### Smooth it flat and leave it alone
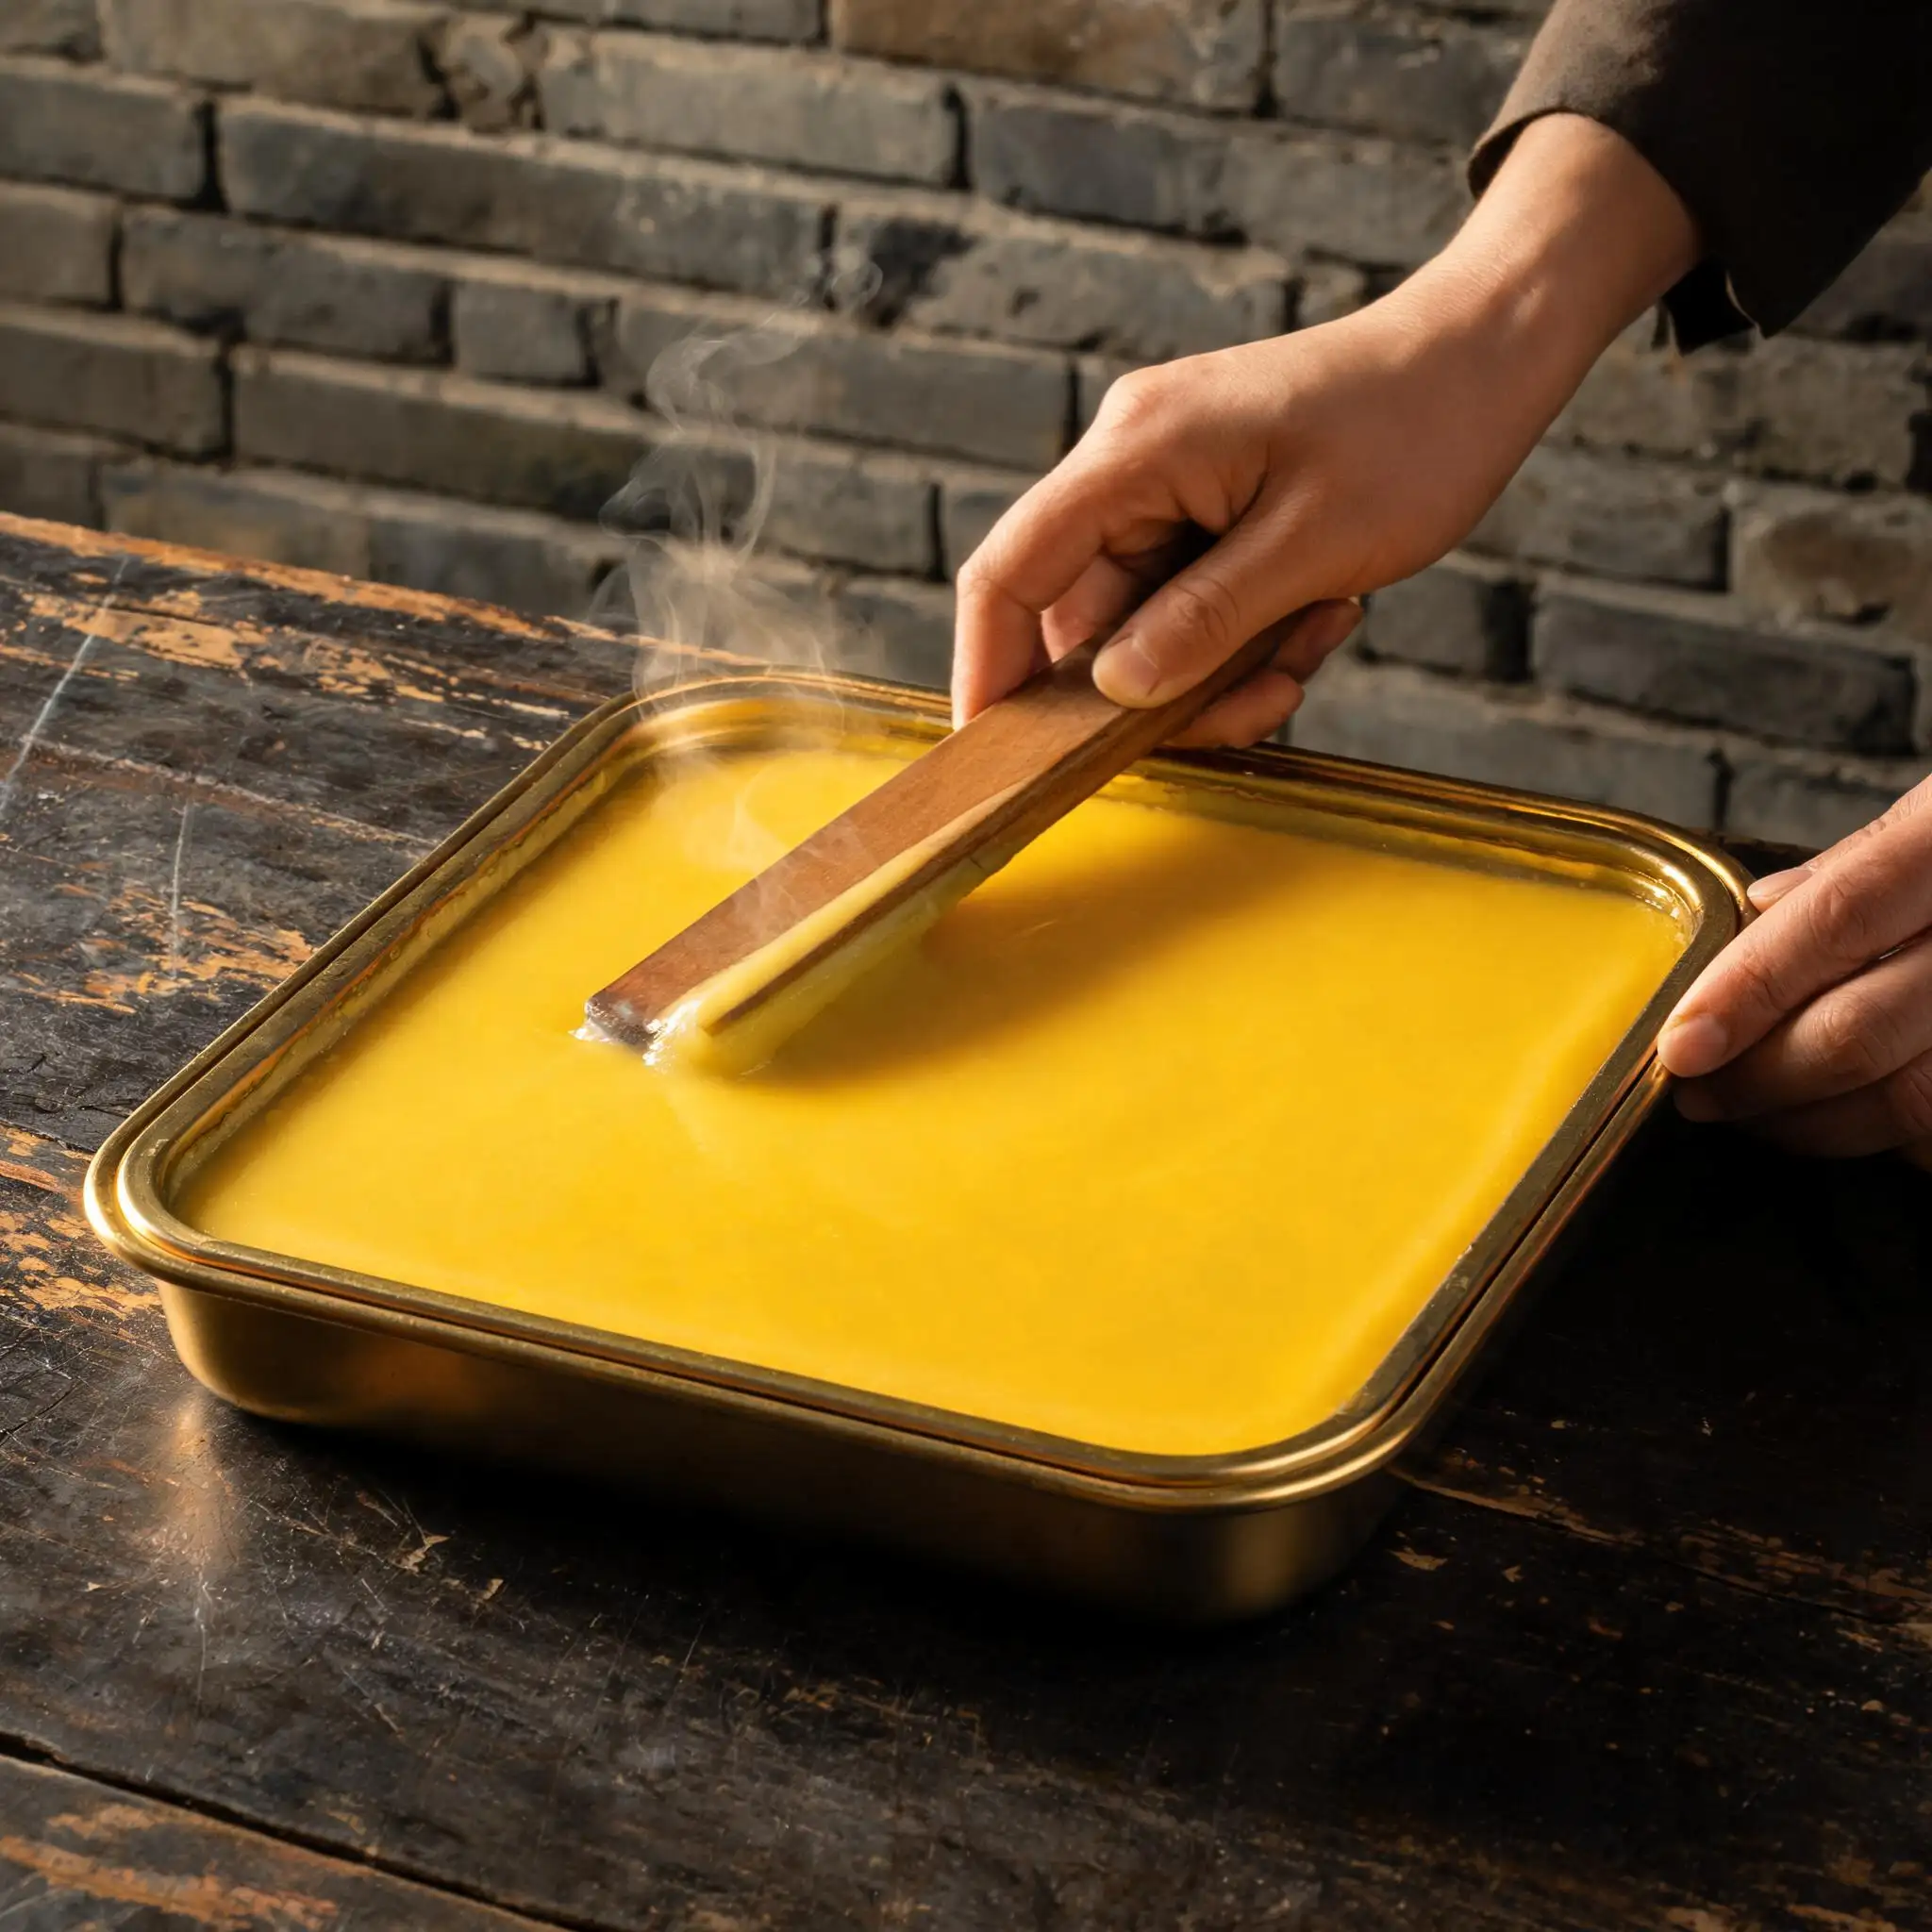
Pour the hot paste immediately into a lightly oiled shallow square tray — a brass or stainless steel baking pan works well. Use a scraper or the back of a spoon to level the surface as flat and smooth as you can. The paste sets as it cools, so whatever texture the surface has now is the texture it keeps.
Let it cool to room temperature on the counter — about an hour. Then move it to the refrigerator uncovered for at least two hours, or overnight. The cold firms it into something you can actually cut cleanly.
- **Oil the tray lightly — just a thin wipe with a neutral oil**
- **Aim for an even layer about 1.5 cm thick**
- **Don't cover it while it's still warm — condensation will pit the surface**
---
## Step 7 · The Cut
### Cold, sharp, one clean press
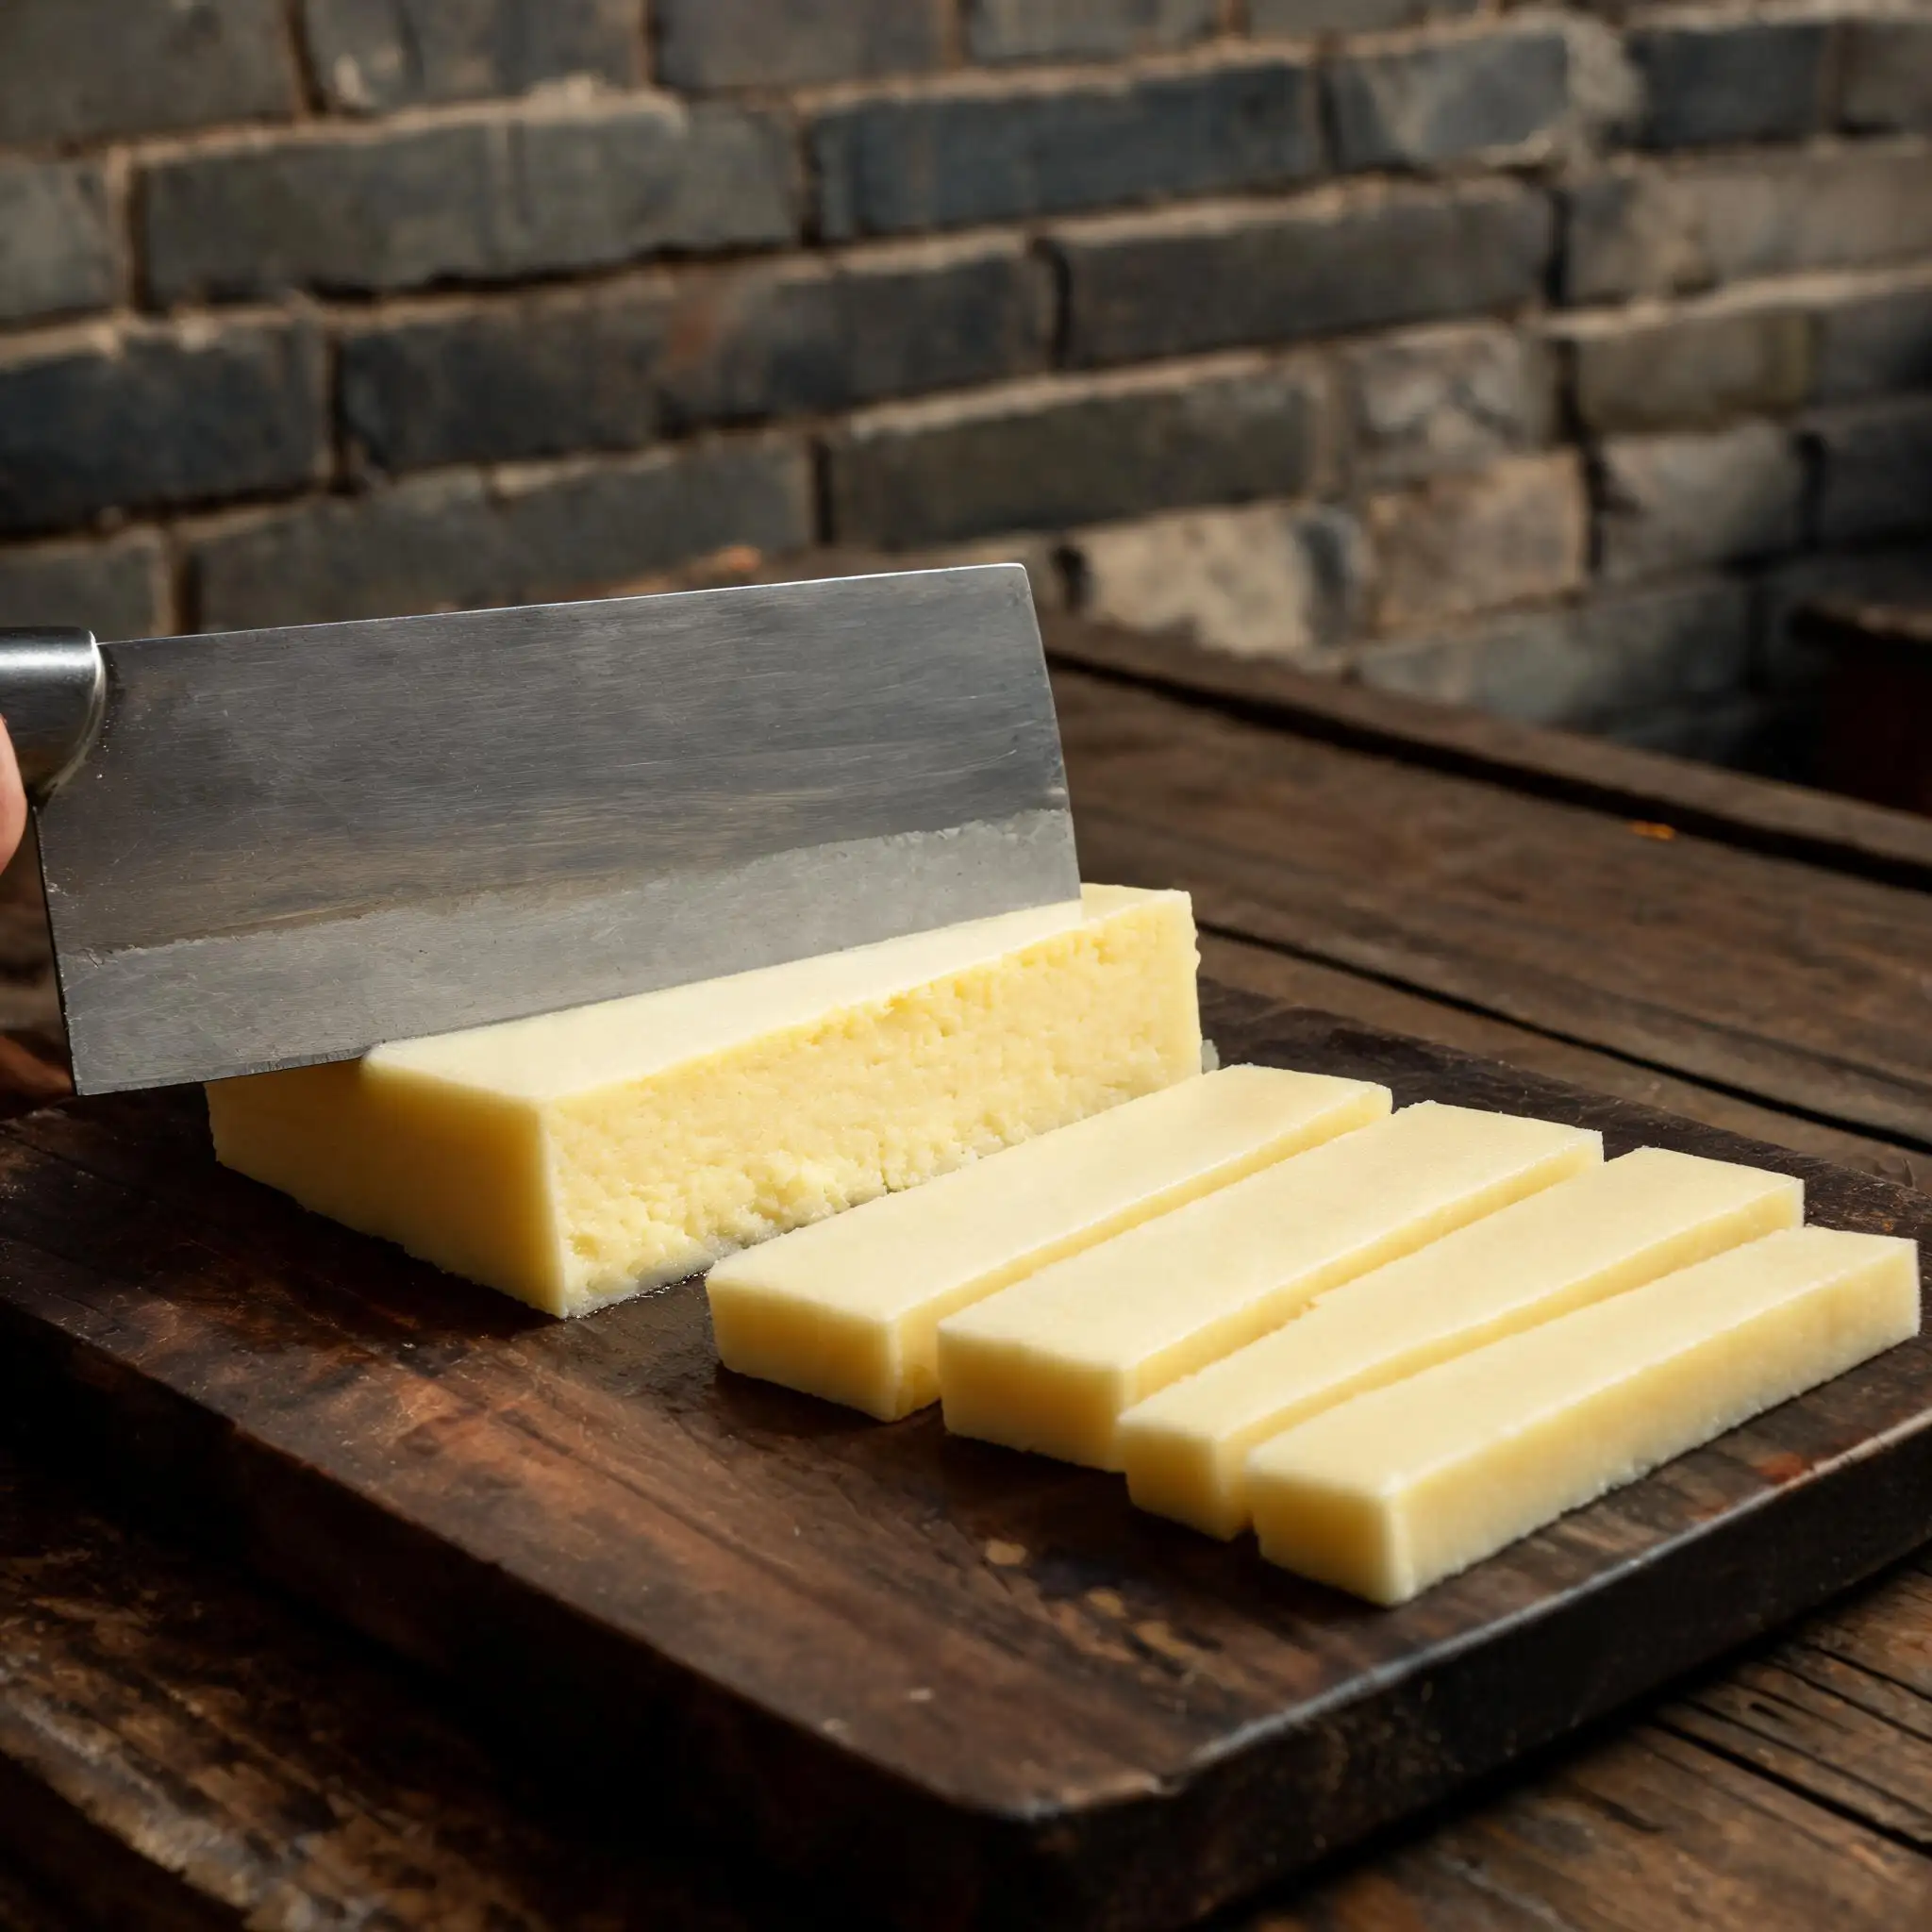
Once fully chilled, run a knife around the edge of the tray and turn the slab out onto a cutting board. Use a long, sharp knife — a Chinese cleaver works perfectly. Cut in one clean downward press, not a sawing motion. Sawing drags and leaves rough edges.
Aim for pieces roughly the size of a mahjong tile: about 3.5 cm × 2.5 cm × 1.5 cm. Compact, small, enough for two bites.
- **Wipe the knife between cuts for cleaner edges**
- **If the slab cracks when you turn it out, it went too long in the pan — still tastes fine**
- **The cut surface should look smooth and slightly translucent at the edges**
---
## Step 8 · The Serve
### Cold, plain, nothing extra
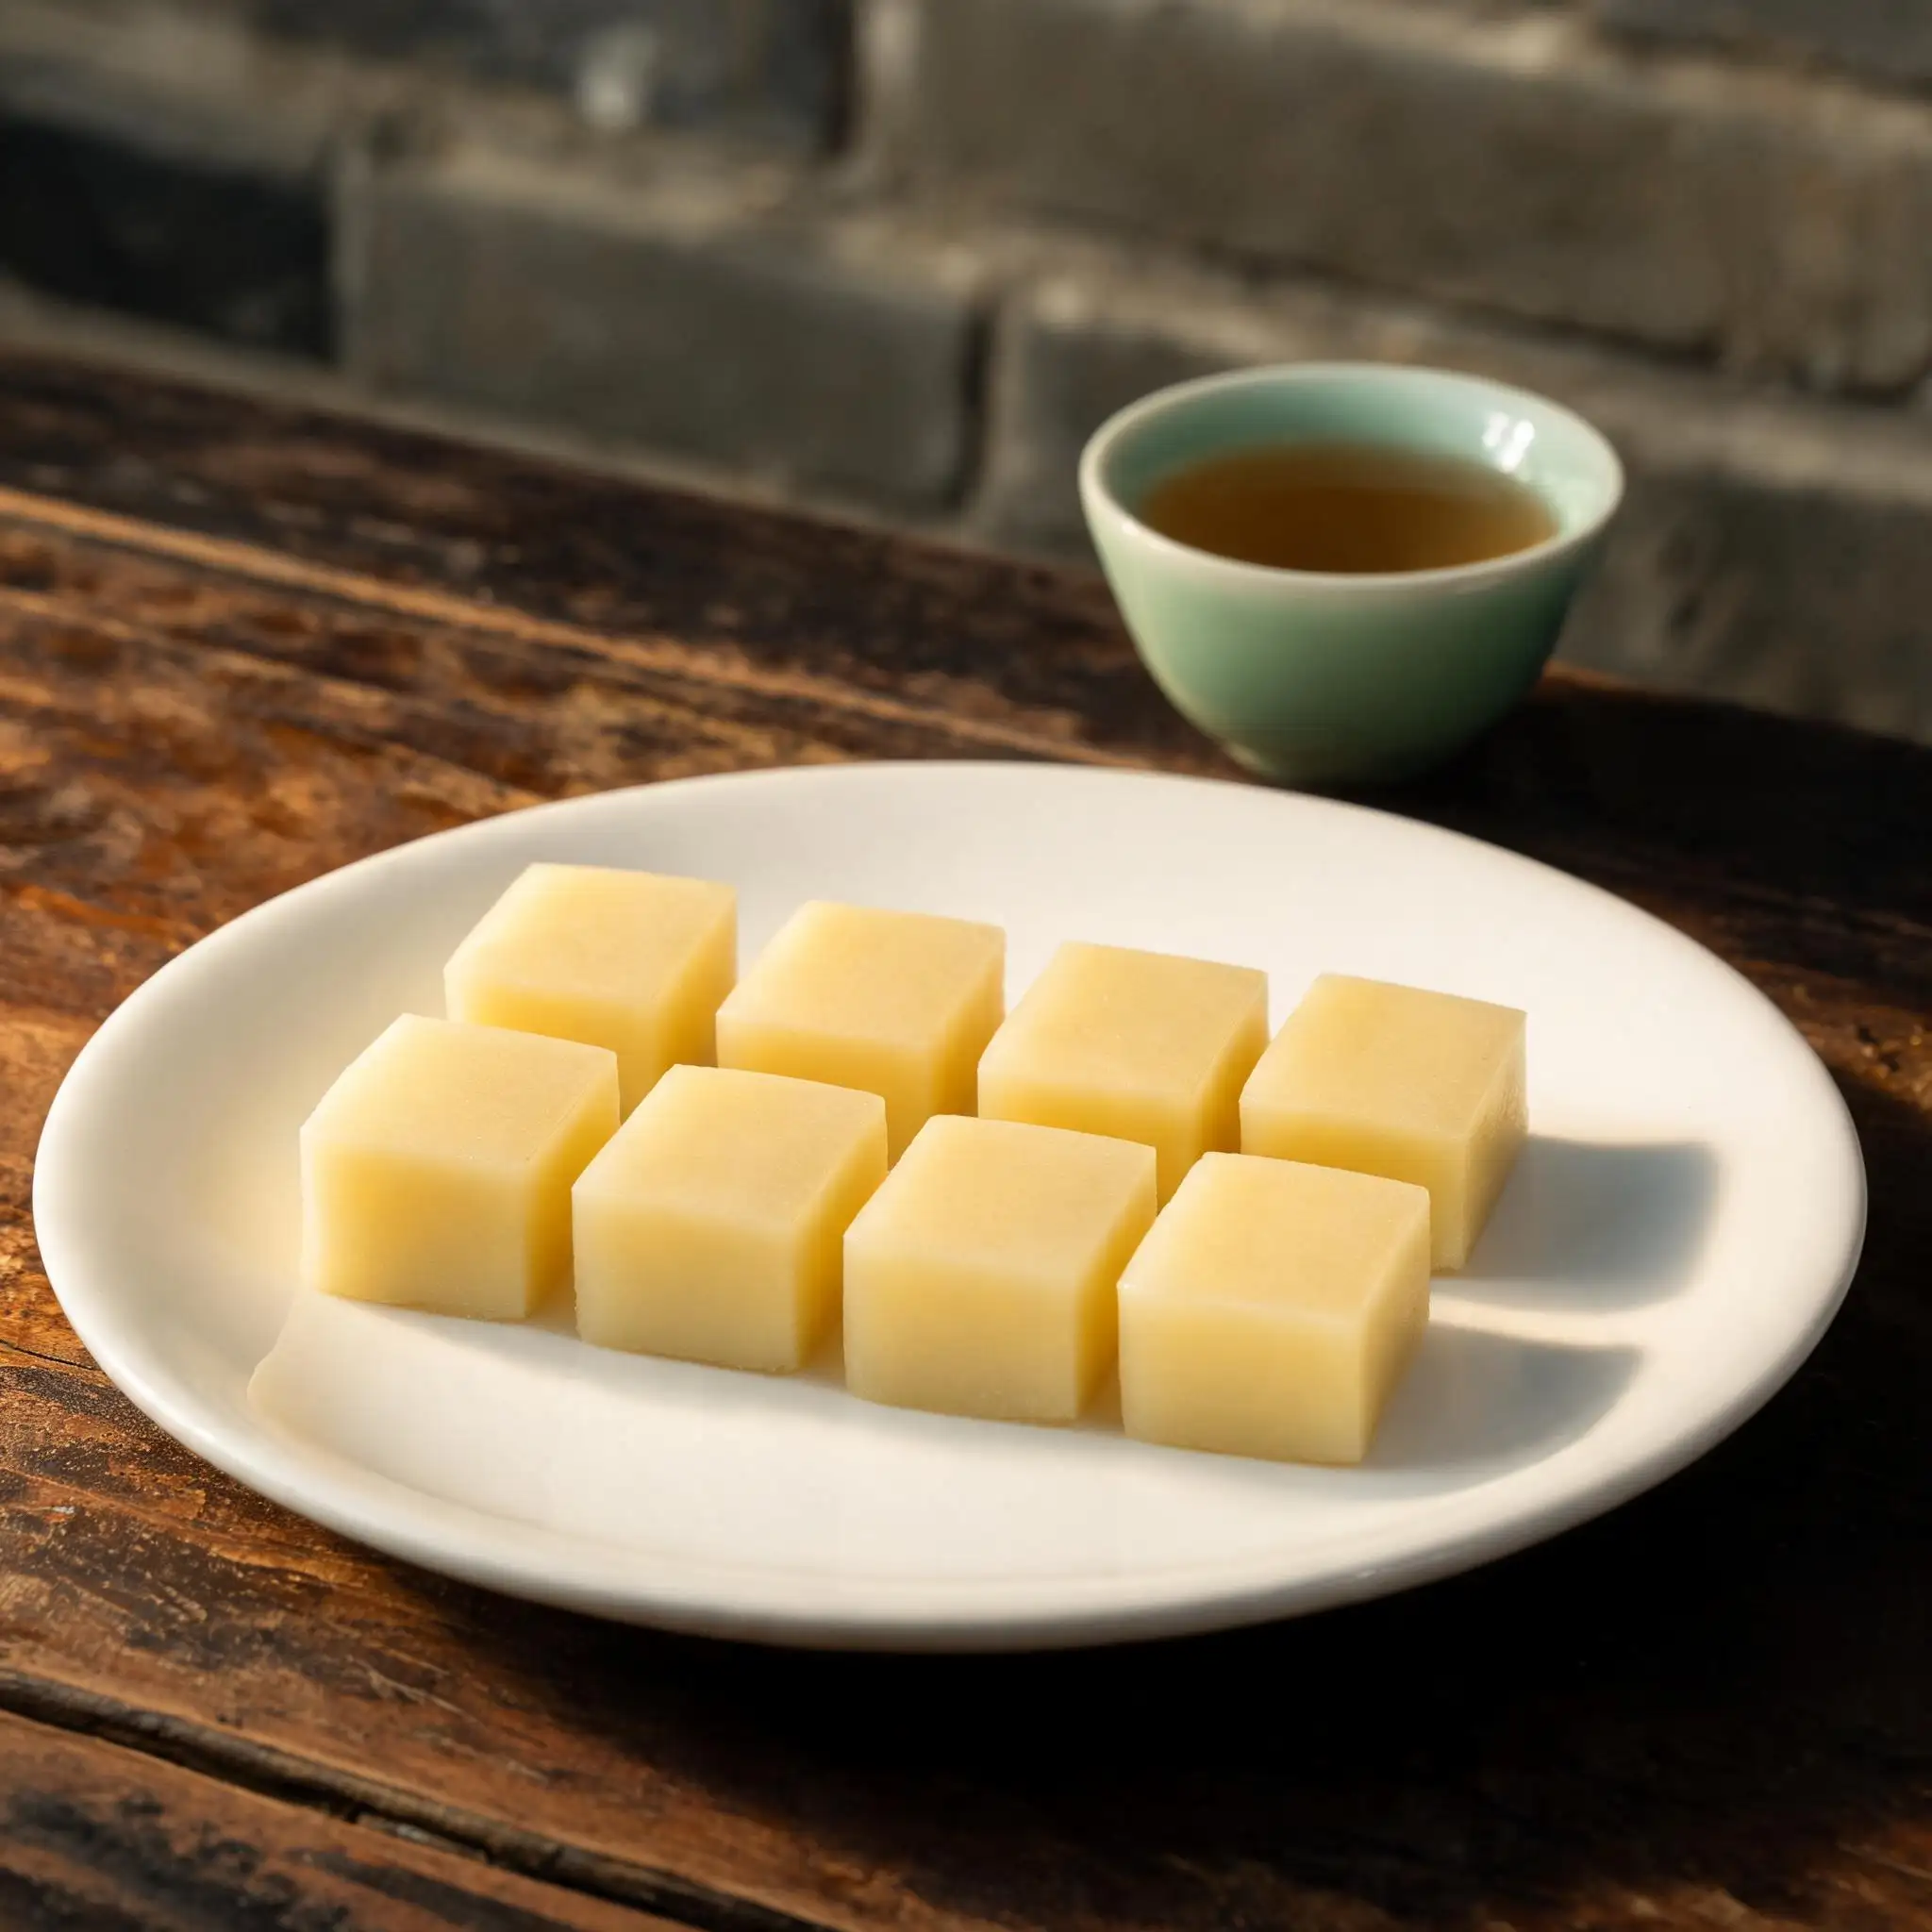
Arrange the pieces on a white plate and serve cold. No syrup, no garnish, no sauce. The flavor is subtle — clean pea sweetness with a very slight grassy note — and anything added to it competes with that.
A cup of light green tea alongside is the traditional pairing. The slight bitterness of the tea makes the pea cake taste sweeter without you touching the sugar level.
This is one of those things where the simplicity is the point. Two ingredients, made properly. That's the whole recipe.
- **Serve within an hour of plating — it dries out slightly if left uncovered too long**
- **The texture should be firm but not rubbery — it yields cleanly when you bite through**
- **Leftovers keep 3 days covered in the refrigerator**
## Palace Pea Cake — The snack that survived a dynasty
> It's just peas and sugar. That's the whole thing
> The Qing court kept it for three hundred years, and nobody changed the recipe
> You'll understand why after the first bite
---
## Ingredients
| Item | Amount |
|------|--------|
| Dried split yellow peas (去皮干豌豆) | 500 g |
| White sugar (白砂糖) | 160 g |
| Cold water — for soaking | enough to cover by 5 cm |
| Water — for boiling | 1.2 L |
> Yield: about 30–35 mahjong-tile pieces · Best served cold · Keeps refrigerated 3 days
---
## Step 1 · The Peas
### Start with split, not whole
You want *split* dried yellow peas — the kind that are already hulled, pale yellow, flat on one side. Whole green peas will fight you. The split ones cook down without argument.
Spread them on the table and go through them once. Pull out any that look shriveled or discolored. It takes two minutes. The finished texture is worth it.
- **Color check: pale straw yellow, uniform**
- **Discard any that are grey or shriveled**
- **500 g dry yields roughly 1.1 kg cooked paste**
---
## Step 2 · The Soak
### Give them at least four hours, overnight is better
Cover the peas with cold water by a good five centimeters — they'll swell up significantly. Room temperature is fine. The soak softens the cell walls so they break down evenly when boiled, which means no lumps in the final paste.
After soaking, the peas turn a deeper yellow and feel slightly soft when you press one between your fingers. That's what you want.
| Soak time | Result |
|-----------|--------|
| 4 hours | Workable, slight resistance when boiling |
| 8 hours | Ideal — peas cook down evenly |
| Overnight | Best texture, no extra effort |
> ⚠️ Don't soak longer than 18 hours in warm weather — they can start to ferment
---
## Step 3 · The Boil
### Full heat until they completely fall apart
Drain the soaked peas and add fresh water — about 1.2 liters for 500 g dry peas. Bring to a hard boil, then keep it at a steady rolling boil. No lid. You want the water to reduce while the peas cook.
This takes 40–50 minutes. The peas should dissolve into a thick, cloudy yellow broth. When you press a pea against the side of the pot with a spoon and it disappears with no resistance, you're done. If you can still see individual pea shapes, keep going.
- **Don't add salt — it toughens the skins**
- **Skim the foam in the first 10 minutes**
- **The water should reduce to roughly half by the time the peas are done**
> ⚠️ The bottom scorches fast toward the end — stir every few minutes once it thickens
---
## Step 4 · The Sieve
### Push everything through — this step makes the texture
Pour the cooked pea mixture through a fine-mesh strainer into a bowl. Use a wooden spatula to press and scrape in circular motions. The smooth paste falls through; only a small amount of thin pea skin stays behind on the mesh. Scrape the underside of the strainer as you go.
What ends up in the bowl should be completely smooth — no graininess, no skin fragments. If you hit a spot that feels slightly gritty, push it through again. The paste at this stage is loose and pourable, almost like thick soup.
- **Work in batches if your strainer is small**
- **The skins left on the strainer should be minimal — almost nothing**
- **Don't discard the liquid that comes through; it's part of the paste**
---
## Step 5 · The Cook
### Stir without stopping
Pour the strained paste into a heavy pan — cast iron works best. Add the sugar. Turn the heat to medium-low and start stirring. You will not stop stirring until this is done.
As the mixture heats, it loosens first, then gradually thickens. After about 20–25 minutes, it becomes dense enough that when you drag the spatula through the center, the trail stays open for a second before closing back. That's when it's ready. Pull it off the heat immediately.
| Stage | Visual cue | Time (approx) |
|-------|------------|----------------|
| Early | Loose, pourable, bubbling gently | 0–10 min |
| Mid | Thickening, spatula leaves soft trails | 10–20 min |
| Ready | Trail stays open 1–2 seconds, paste pulls away from pan edge | 20–25 min |
> ⚠️ If you stop stirring even briefly at the end stage, the bottom will burn and you'll taste it in every bite
---
## Step 6 · The Mold
### Smooth it flat and leave it alone
Pour the hot paste immediately into a lightly oiled shallow square tray — a brass or stainless steel baking pan works well. Use a scraper or the back of a spoon to level the surface as flat and smooth as you can. The paste sets as it cools, so whatever texture the surface has now is the texture it keeps.
Let it cool to room temperature on the counter — about an hour. Then move it to the refrigerator uncovered for at least two hours, or overnight. The cold firms it into something you can actually cut cleanly.
- **Oil the tray lightly — just a thin wipe with a neutral oil**
- **Aim for an even layer about 1.5 cm thick**
- **Don't cover it while it's still warm — condensation will pit the surface**
---
## Step 7 · The Cut
### Cold, sharp, one clean press
Once fully chilled, run a knife around the edge of the tray and turn the slab out onto a cutting board. Use a long, sharp knife — a Chinese cleaver works perfectly. Cut in one clean downward press, not a sawing motion. Sawing drags and leaves rough edges.
Aim for pieces roughly the size of a mahjong tile: about 3.5 cm × 2.5 cm × 1.5 cm. Compact, small, enough for two bites.
- **Wipe the knife between cuts for cleaner edges**
- **If the slab cracks when you turn it out, it went too long in the pan — still tastes fine**
- **The cut surface should look smooth and slightly translucent at the edges**
---
## Step 8 · The Serve
### Cold, plain, nothing extra
Arrange the pieces on a white plate and serve cold. No syrup, no garnish, no sauce. The flavor is subtle — clean pea sweetness with a very slight grassy note — and anything added to it competes with that.
A cup of light green tea alongside is the traditional pairing. The slight bitterness of the tea makes the pea cake taste sweeter without you touching the sugar level.
This is one of those things where the simplicity is the point. Two ingredients, made properly. That's the whole recipe.
- **Serve within an hour of plating — it dries out slightly if left uncovered too long**
- **The texture should be firm but not rubbery — it yields cleanly when you bite through**
- **Leftovers keep 3 days covered in the refrigerator**