·5/11/2026
from
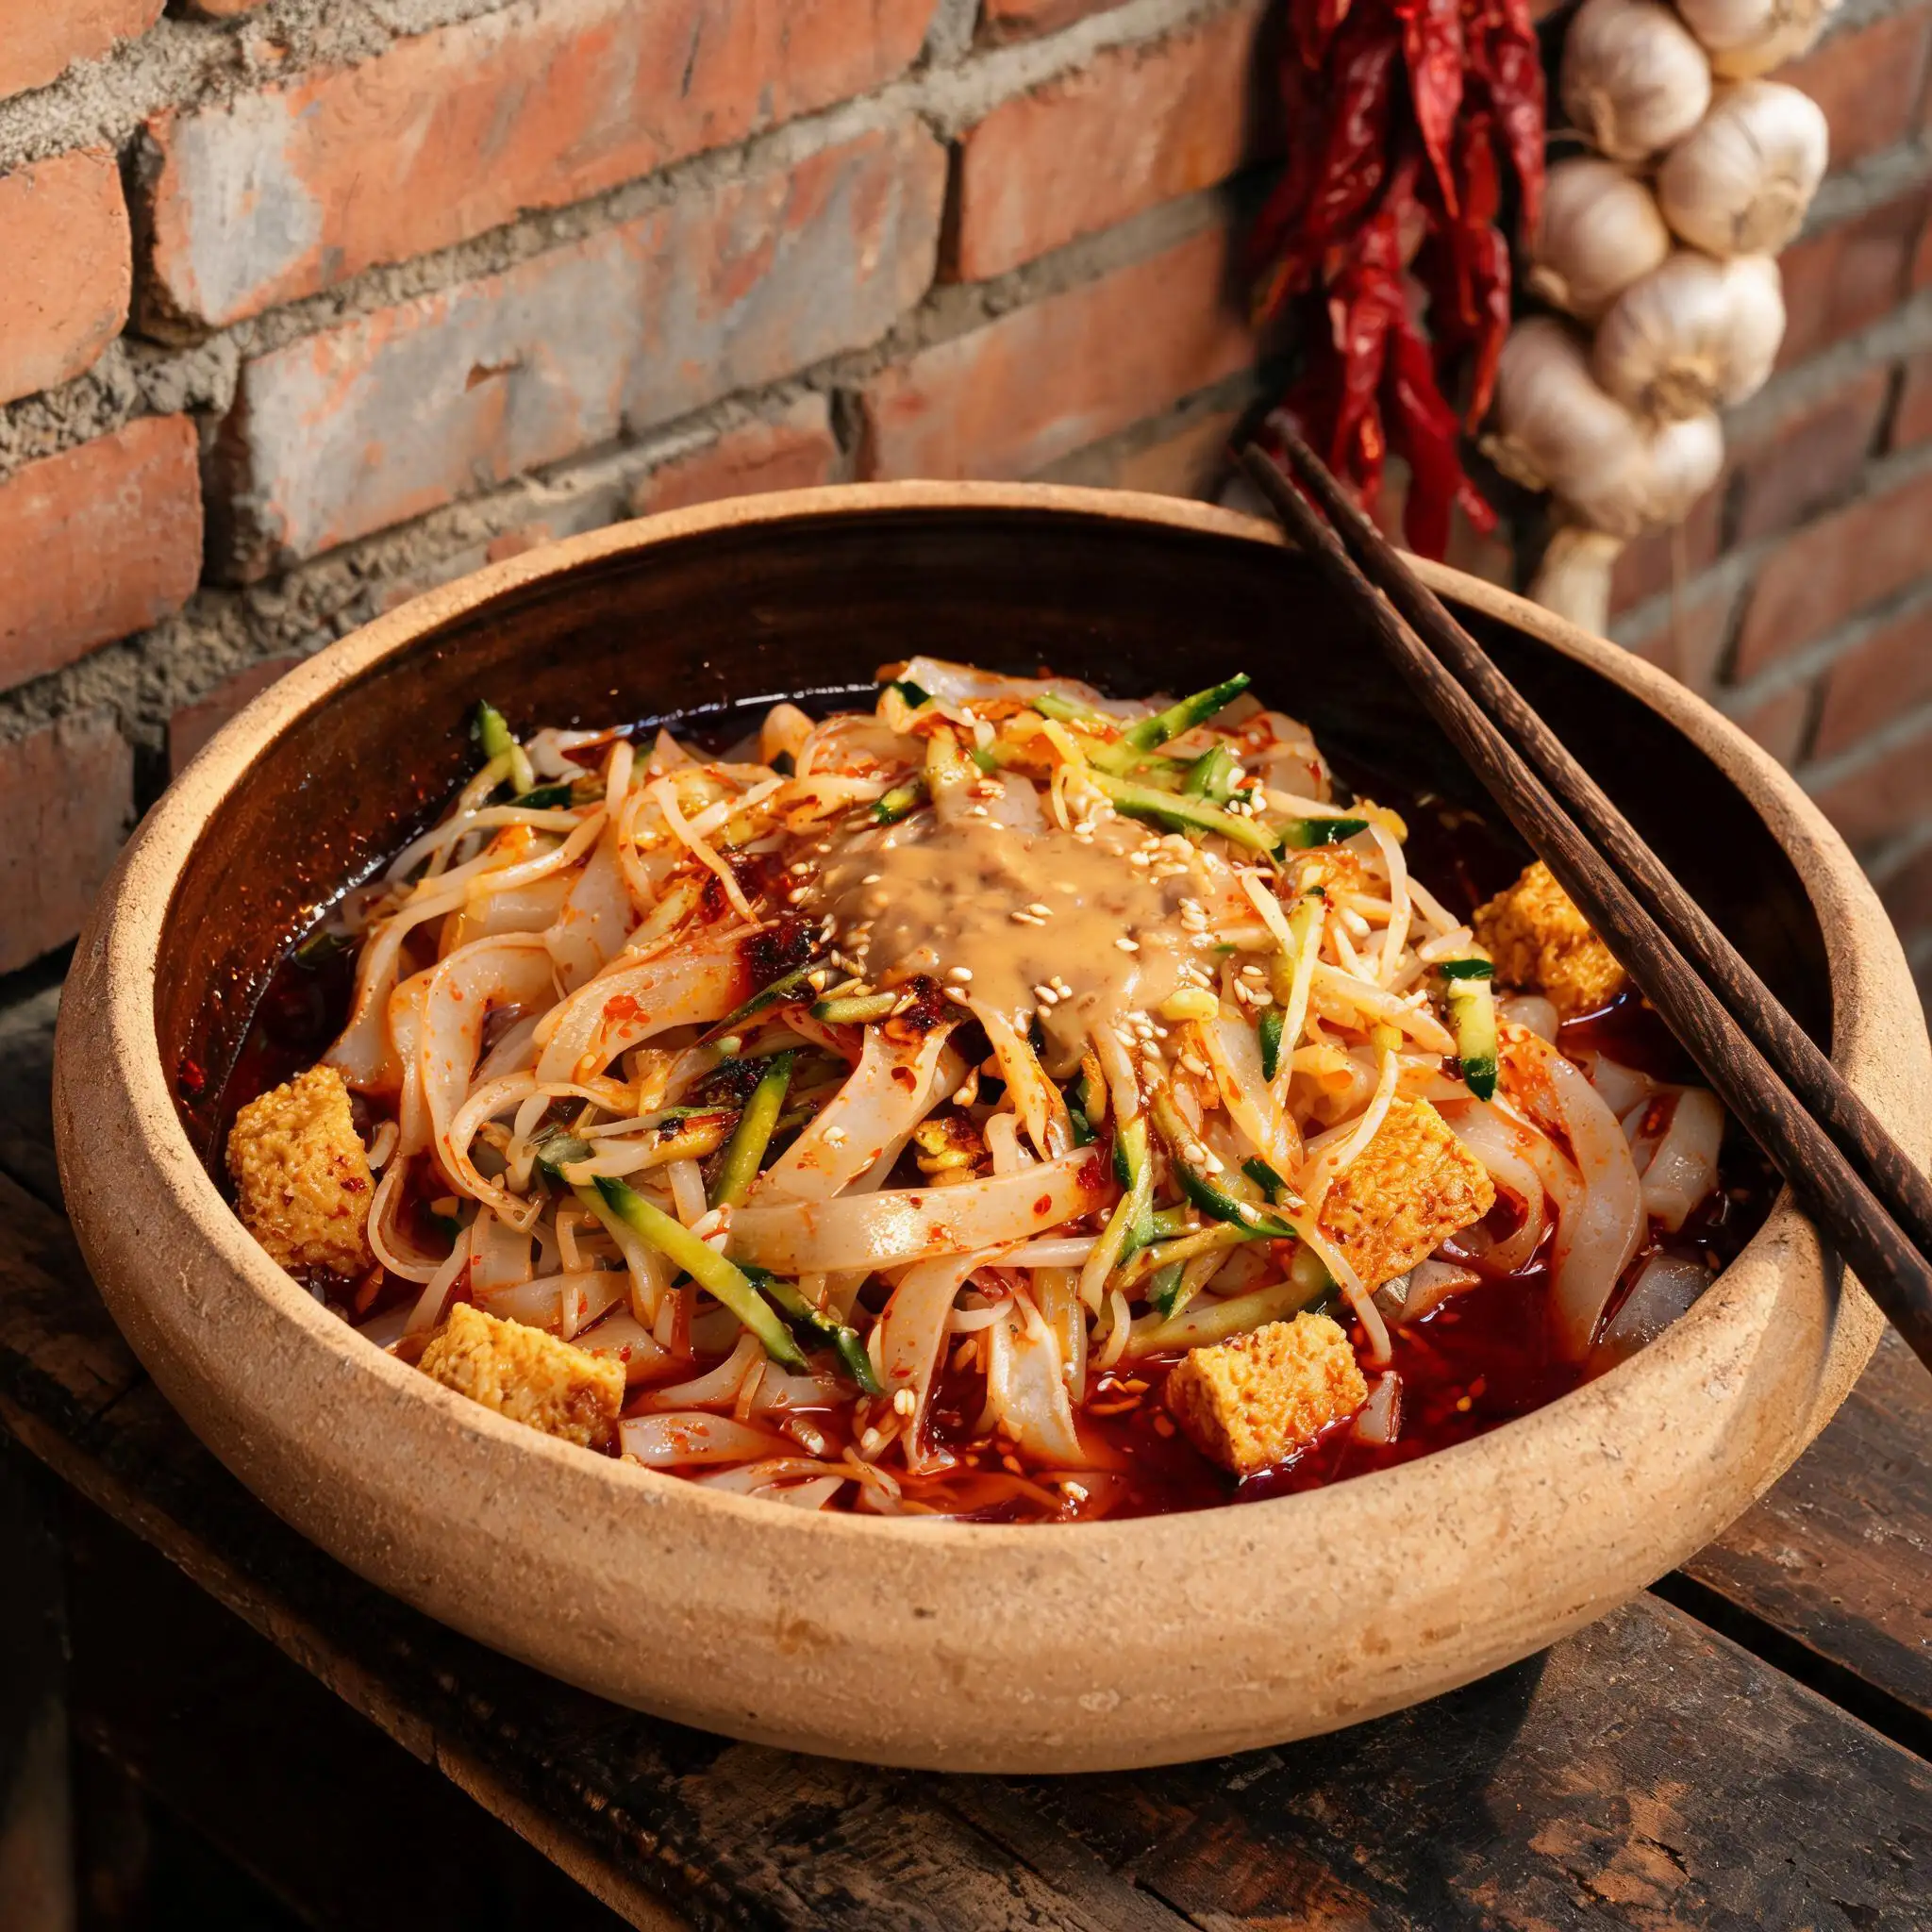
Must-eat in summer-LIÁNG PÍ
# · LIÁNG PÍ ·
## Cold Skin Noodles — Nine Steps to the Street Stall That Stops Traffic
> Somewhere between glass and silk, somewhere between a noodle and a dream
> This is not fast food — it is *patience*, *fire*, and *red oil* made visible
> One bowl. Nine steps. No going back
---
## Ingredients
| Item | Amount |
|------|--------|
| All-purpose flour | 300 g |
| Water (for dough + washing) | 600 ml |
| Mung bean sprouts | 100 g |
| Cucumber | ½ medium |
| Wheat gluten (washed from dough) | from above |
| Chili oil | 3 tbsp |
| Mashed garlic | 1½ tbsp |
| Chinese black vinegar | 1½ tbsp |
| Sesame paste (tahini) | 1 tbsp |
| Light soy sauce | 1 tsp |
| Salt | to taste |
| Sesame seeds | a pinch, to finish |
> Yield: 2–3 servings · Best eaten immediately · Does not keep well once dressed
---
## Step 1 · The Lineup
### Everything in its place before the fire begins
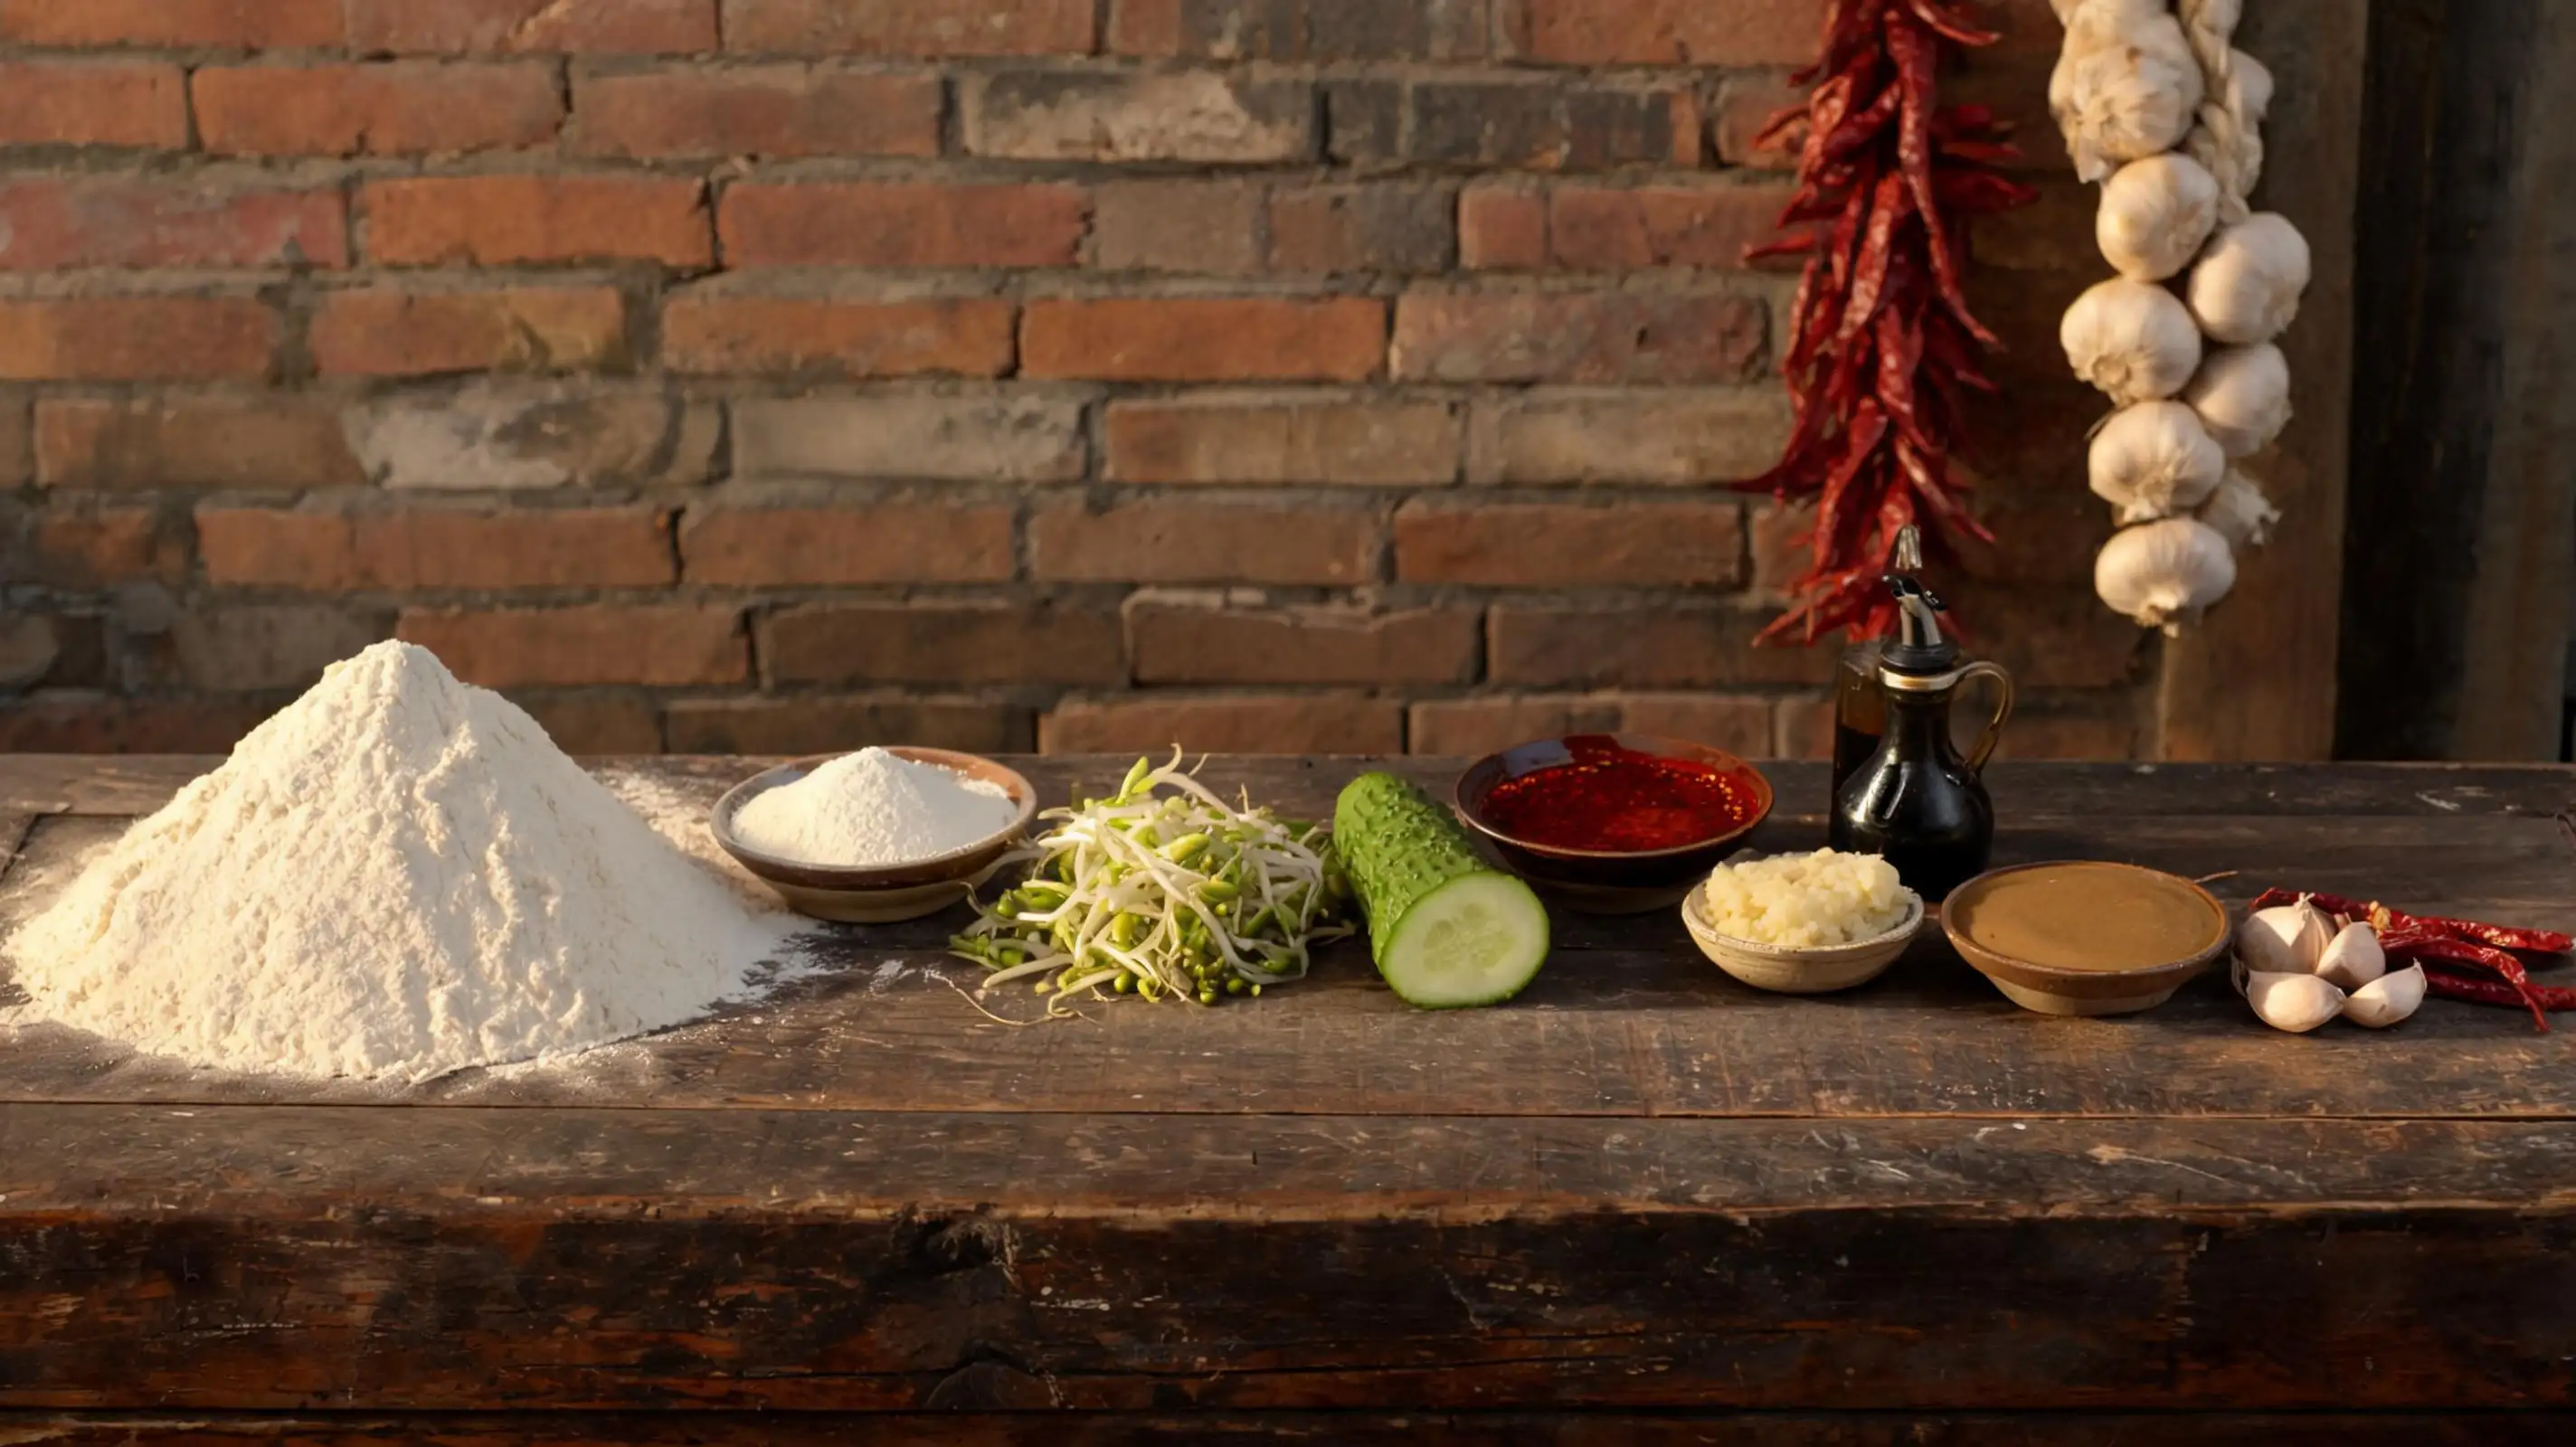
Flour, water, bean sprouts, cucumber, chili oil, garlic, vinegar, sesame paste — lay them out in order on the worn wooden counter. This is the moment of commitment. **No shortcuts live in this bowl.**
---
## Step 2 · The Wash
### Knead the dough. Then knead it again — underwater.
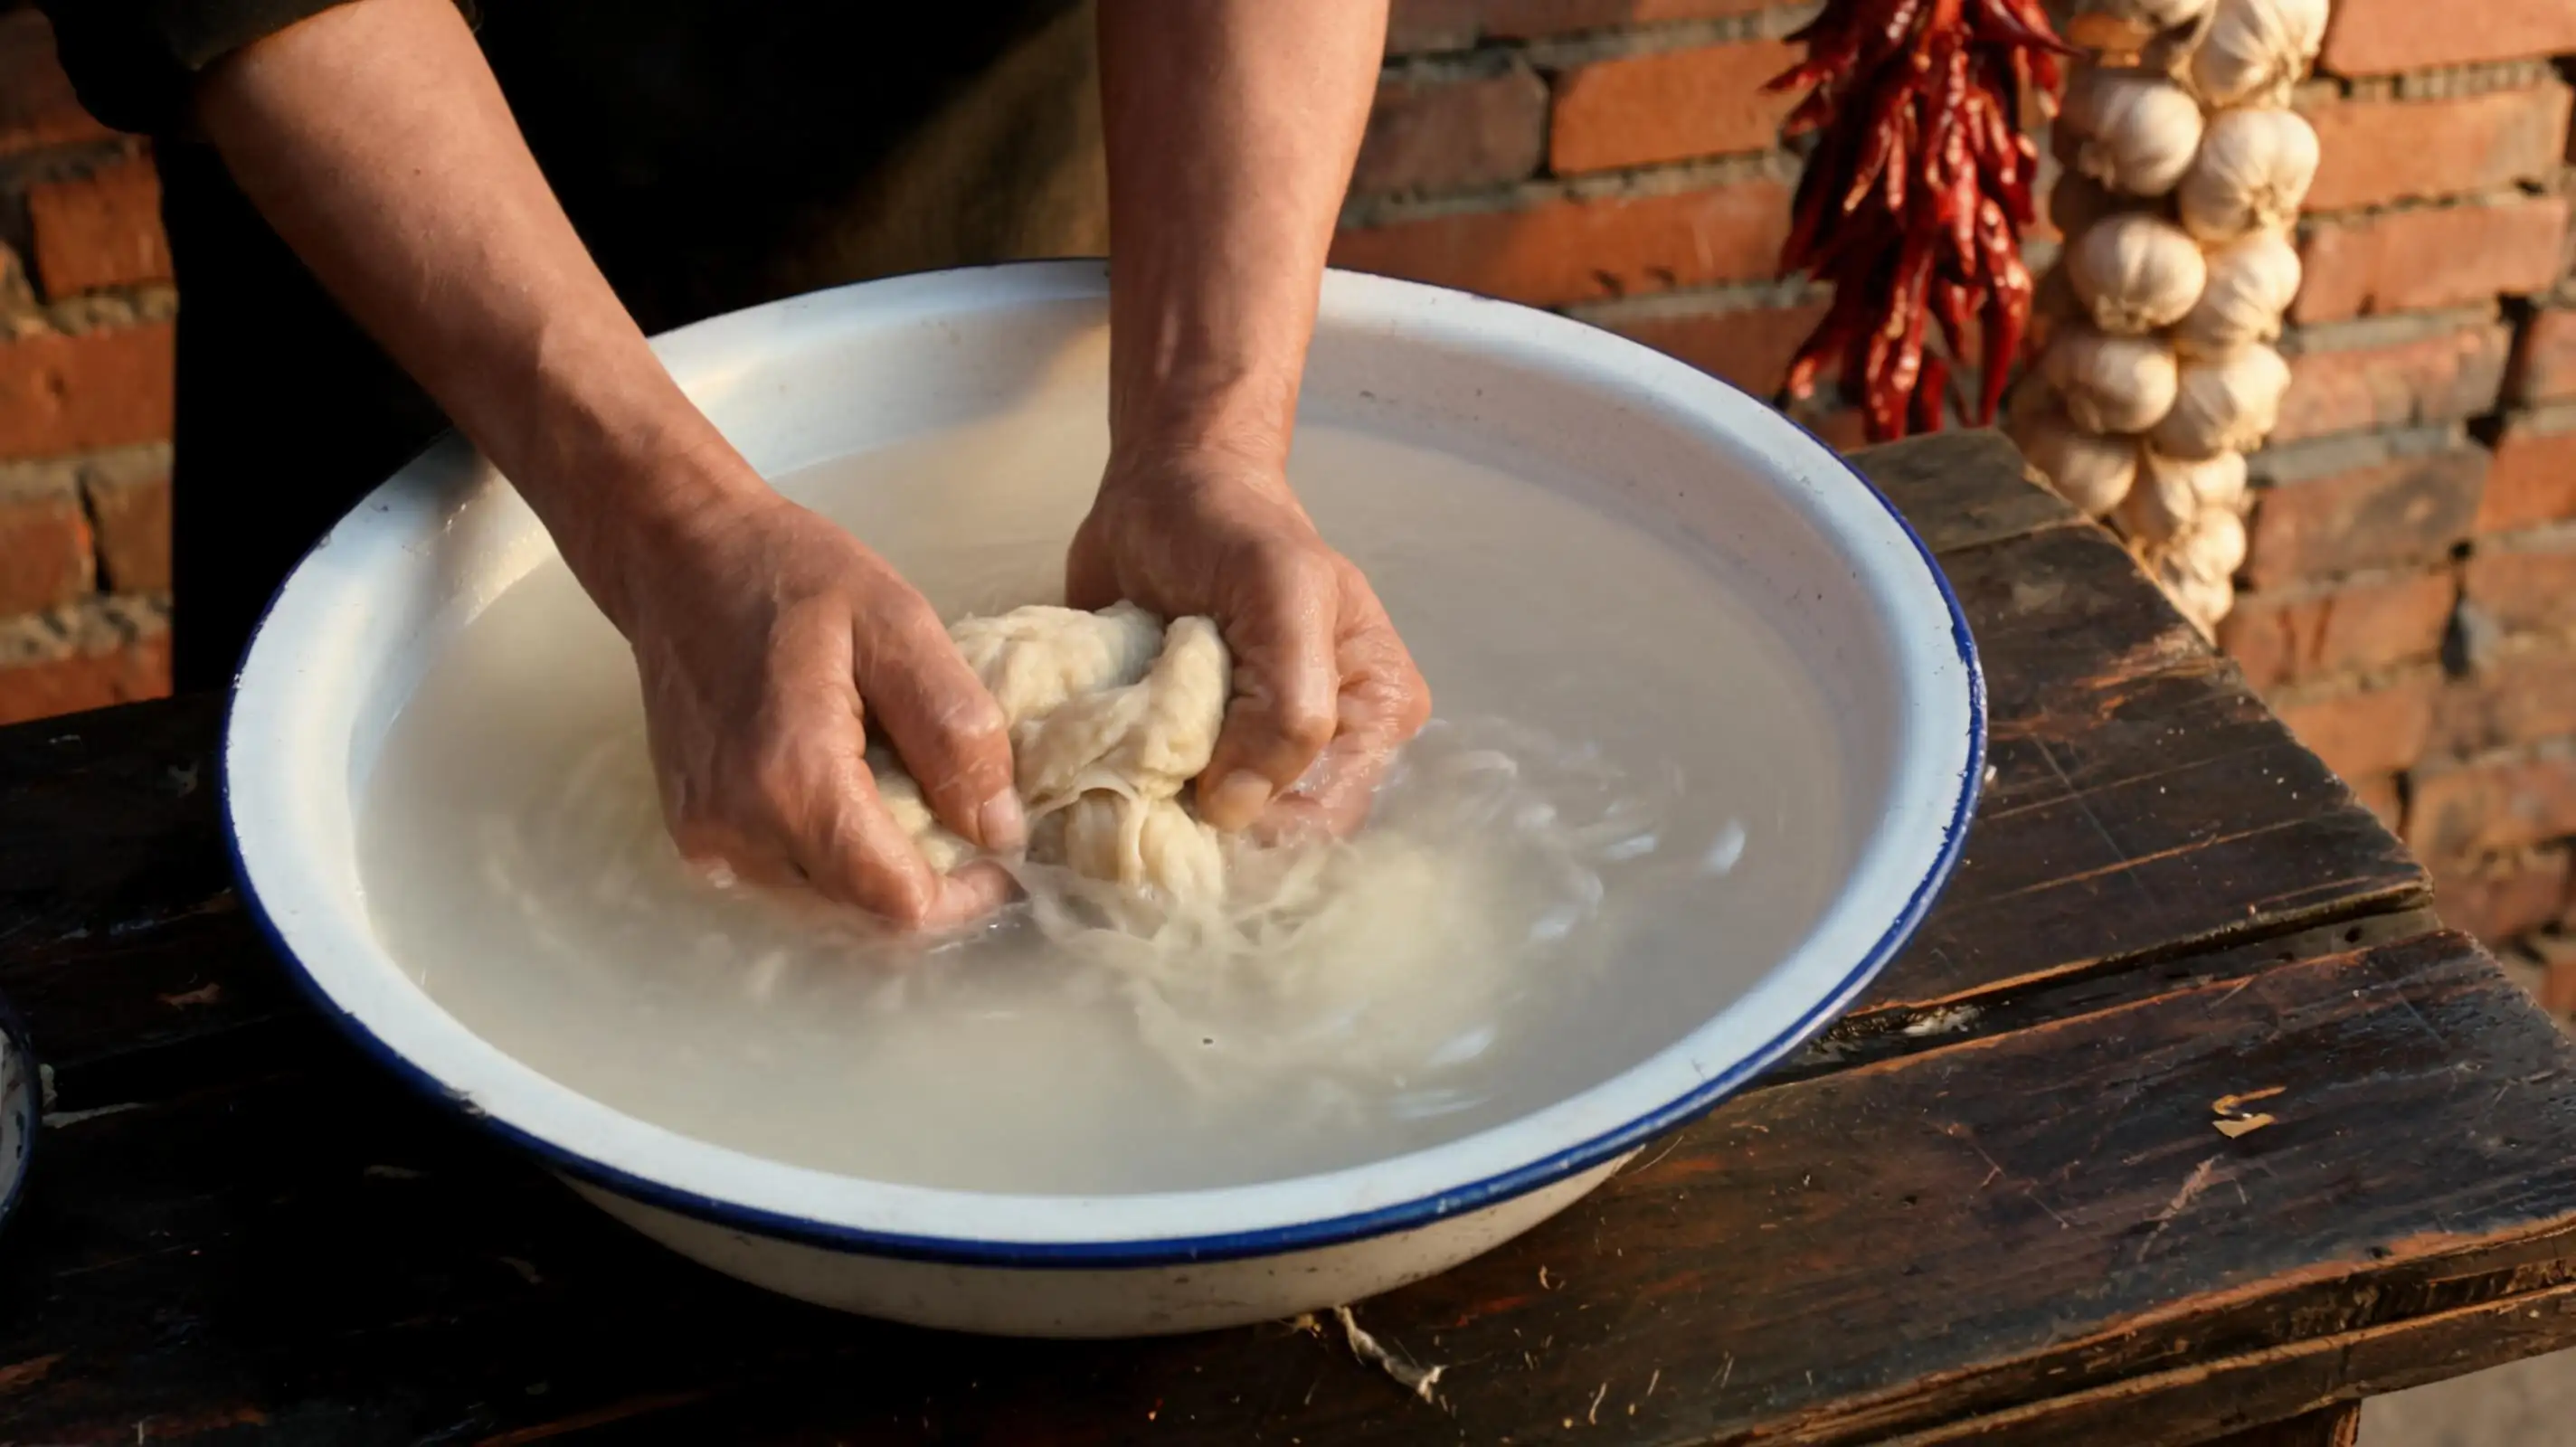
Mix flour and water into a firm dough and let it rest 30 minutes. Then submerge it in a basin of cold water and **knead, squeeze, and pull repeatedly** until the water turns thick and milky white with dissolved starch. What remains between your hands is raw wheat gluten — rubbery, elastic, alive.
**- Knead in 3–4 rounds, refreshing the water each time until it runs nearly clear**
**- The gluten ball should feel like firm chewing gum when done — bouncy, not sticky**
> ⚠️ Don't rush this step. Under-washed dough leaves too much starch in the gluten, making it dense and chewy instead of spongy.
---
## Step 3 · The Settle
### Patience is the only ingredient you cannot buy.
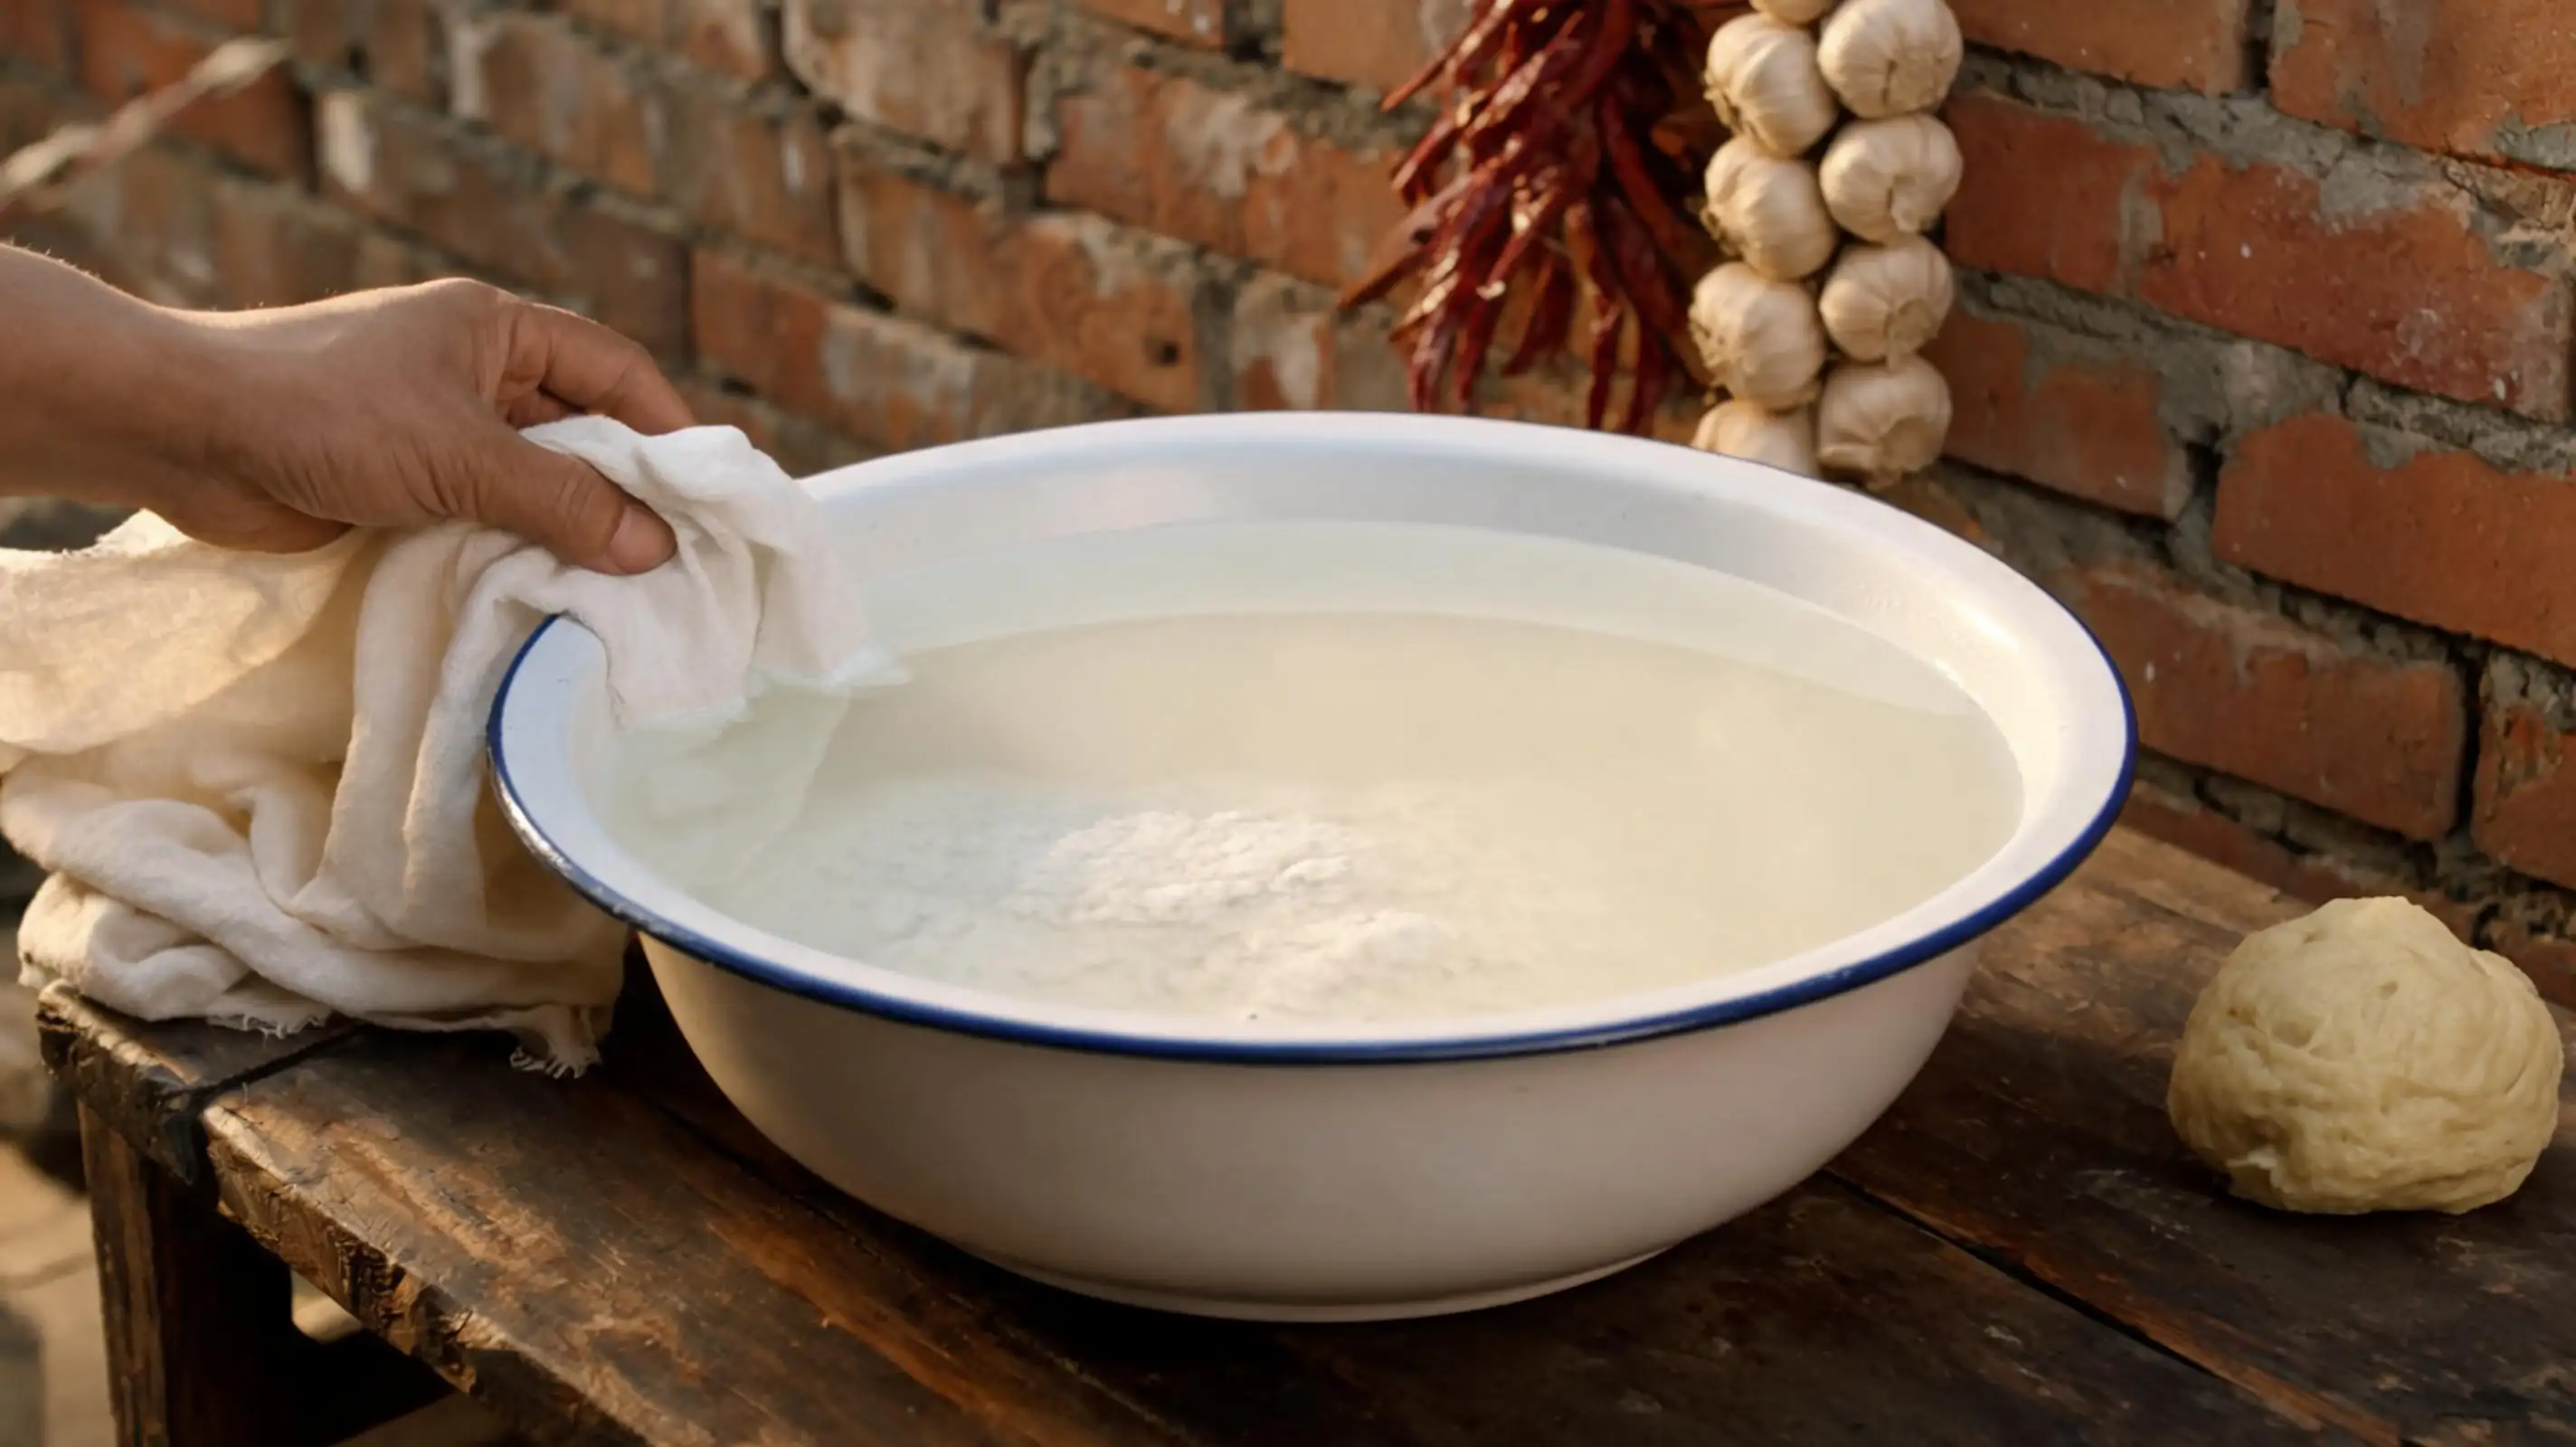
Combine all the starch-laden washing water into one large basin. Cover with a cotton cloth and *leave it completely undisturbed* for **a minimum of 4 hours** — overnight is better. The heavy starch sinks slowly to the bottom, leaving clear water above.
| Rest Time | Result |
|-----------|--------|
| 2 hours | Partially separated, sheets will be uneven |
| 4 hours | Good separation, reliable texture |
| Overnight | Best separation, most elastic sheets |
> ⚠️ When ready, gently pour off the clear top water. **Do not stir.** The dense white paste at the bottom is your gold.
---
## Step 4 · The Pour
### Thin as paper. Onto fire.
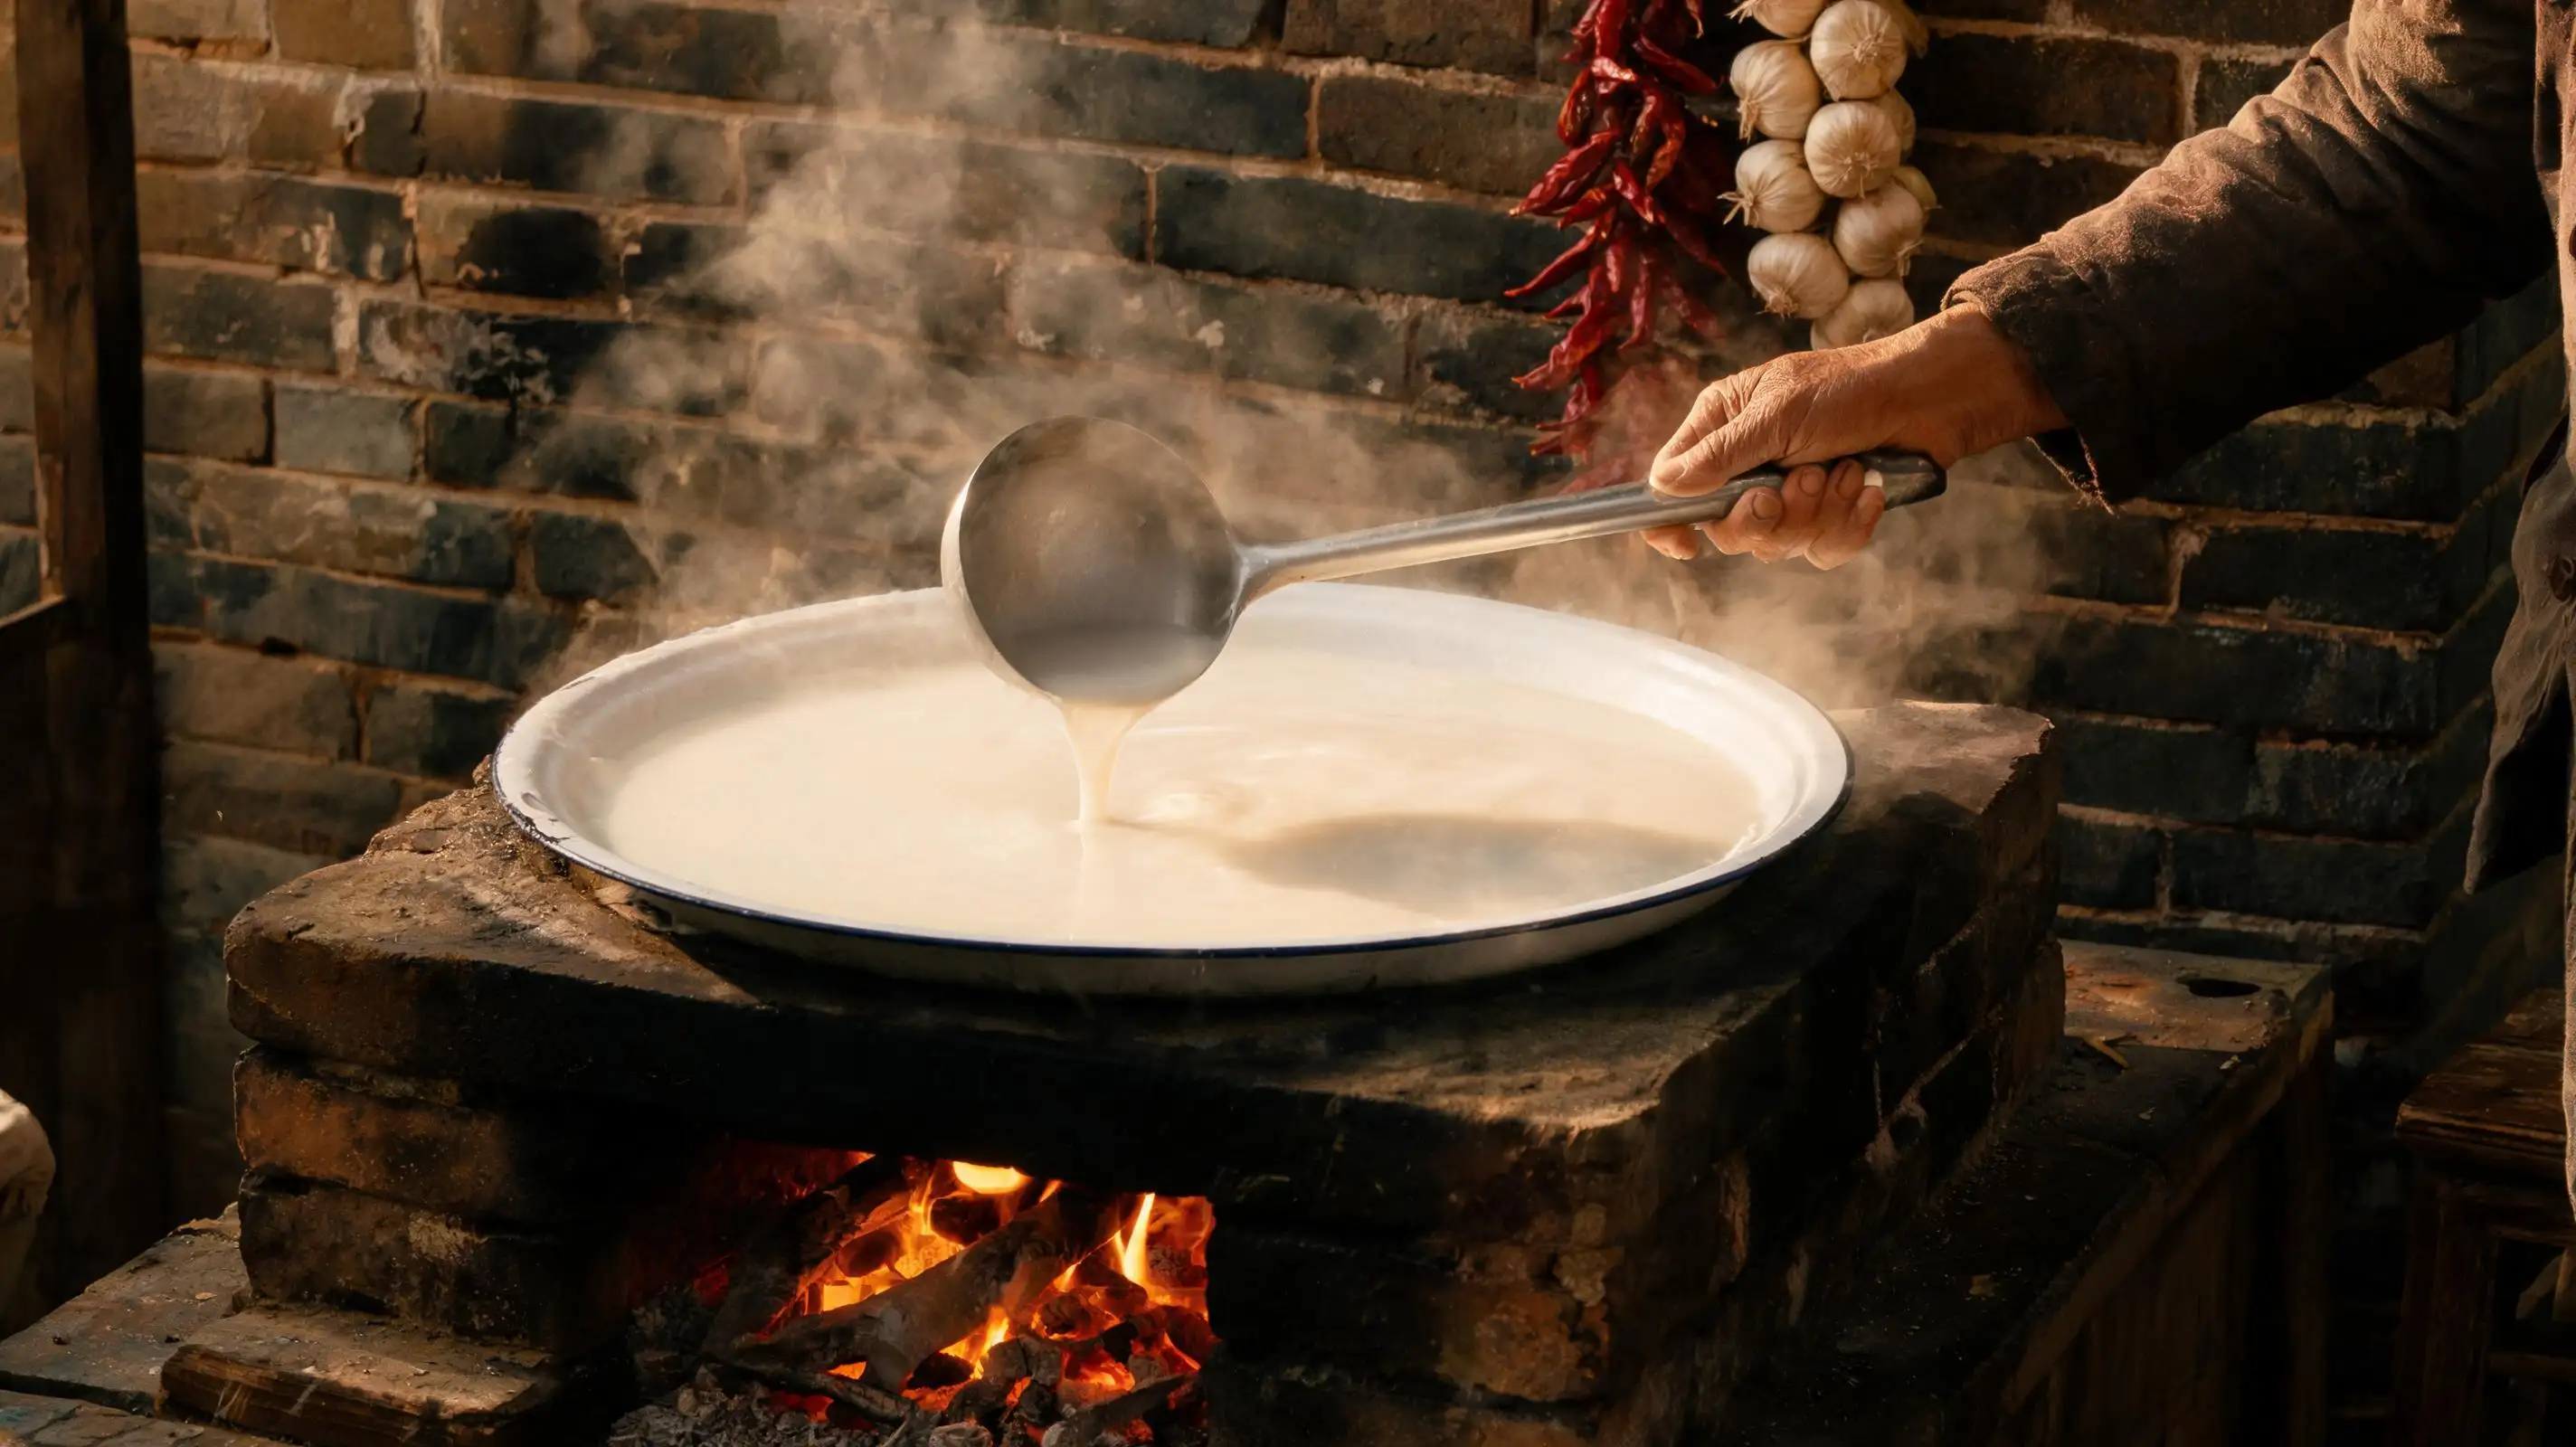
Stir the starch paste until smooth, then ladle a thin, even layer — **no more than 4mm deep** — into a flat round enamel plate. Set it over vigorously boiling water and cover. The white liquid will turn transparent in 2–3 minutes, bubbling up in the center like a slow-motion lens.
**- Tilt the plate immediately after pouring to coat the base evenly before the starch sets**
**- The sheet is done when the entire surface turns translucent with no white patches remaining**
---
## Step 5 · The Peel
### This is why you waited.
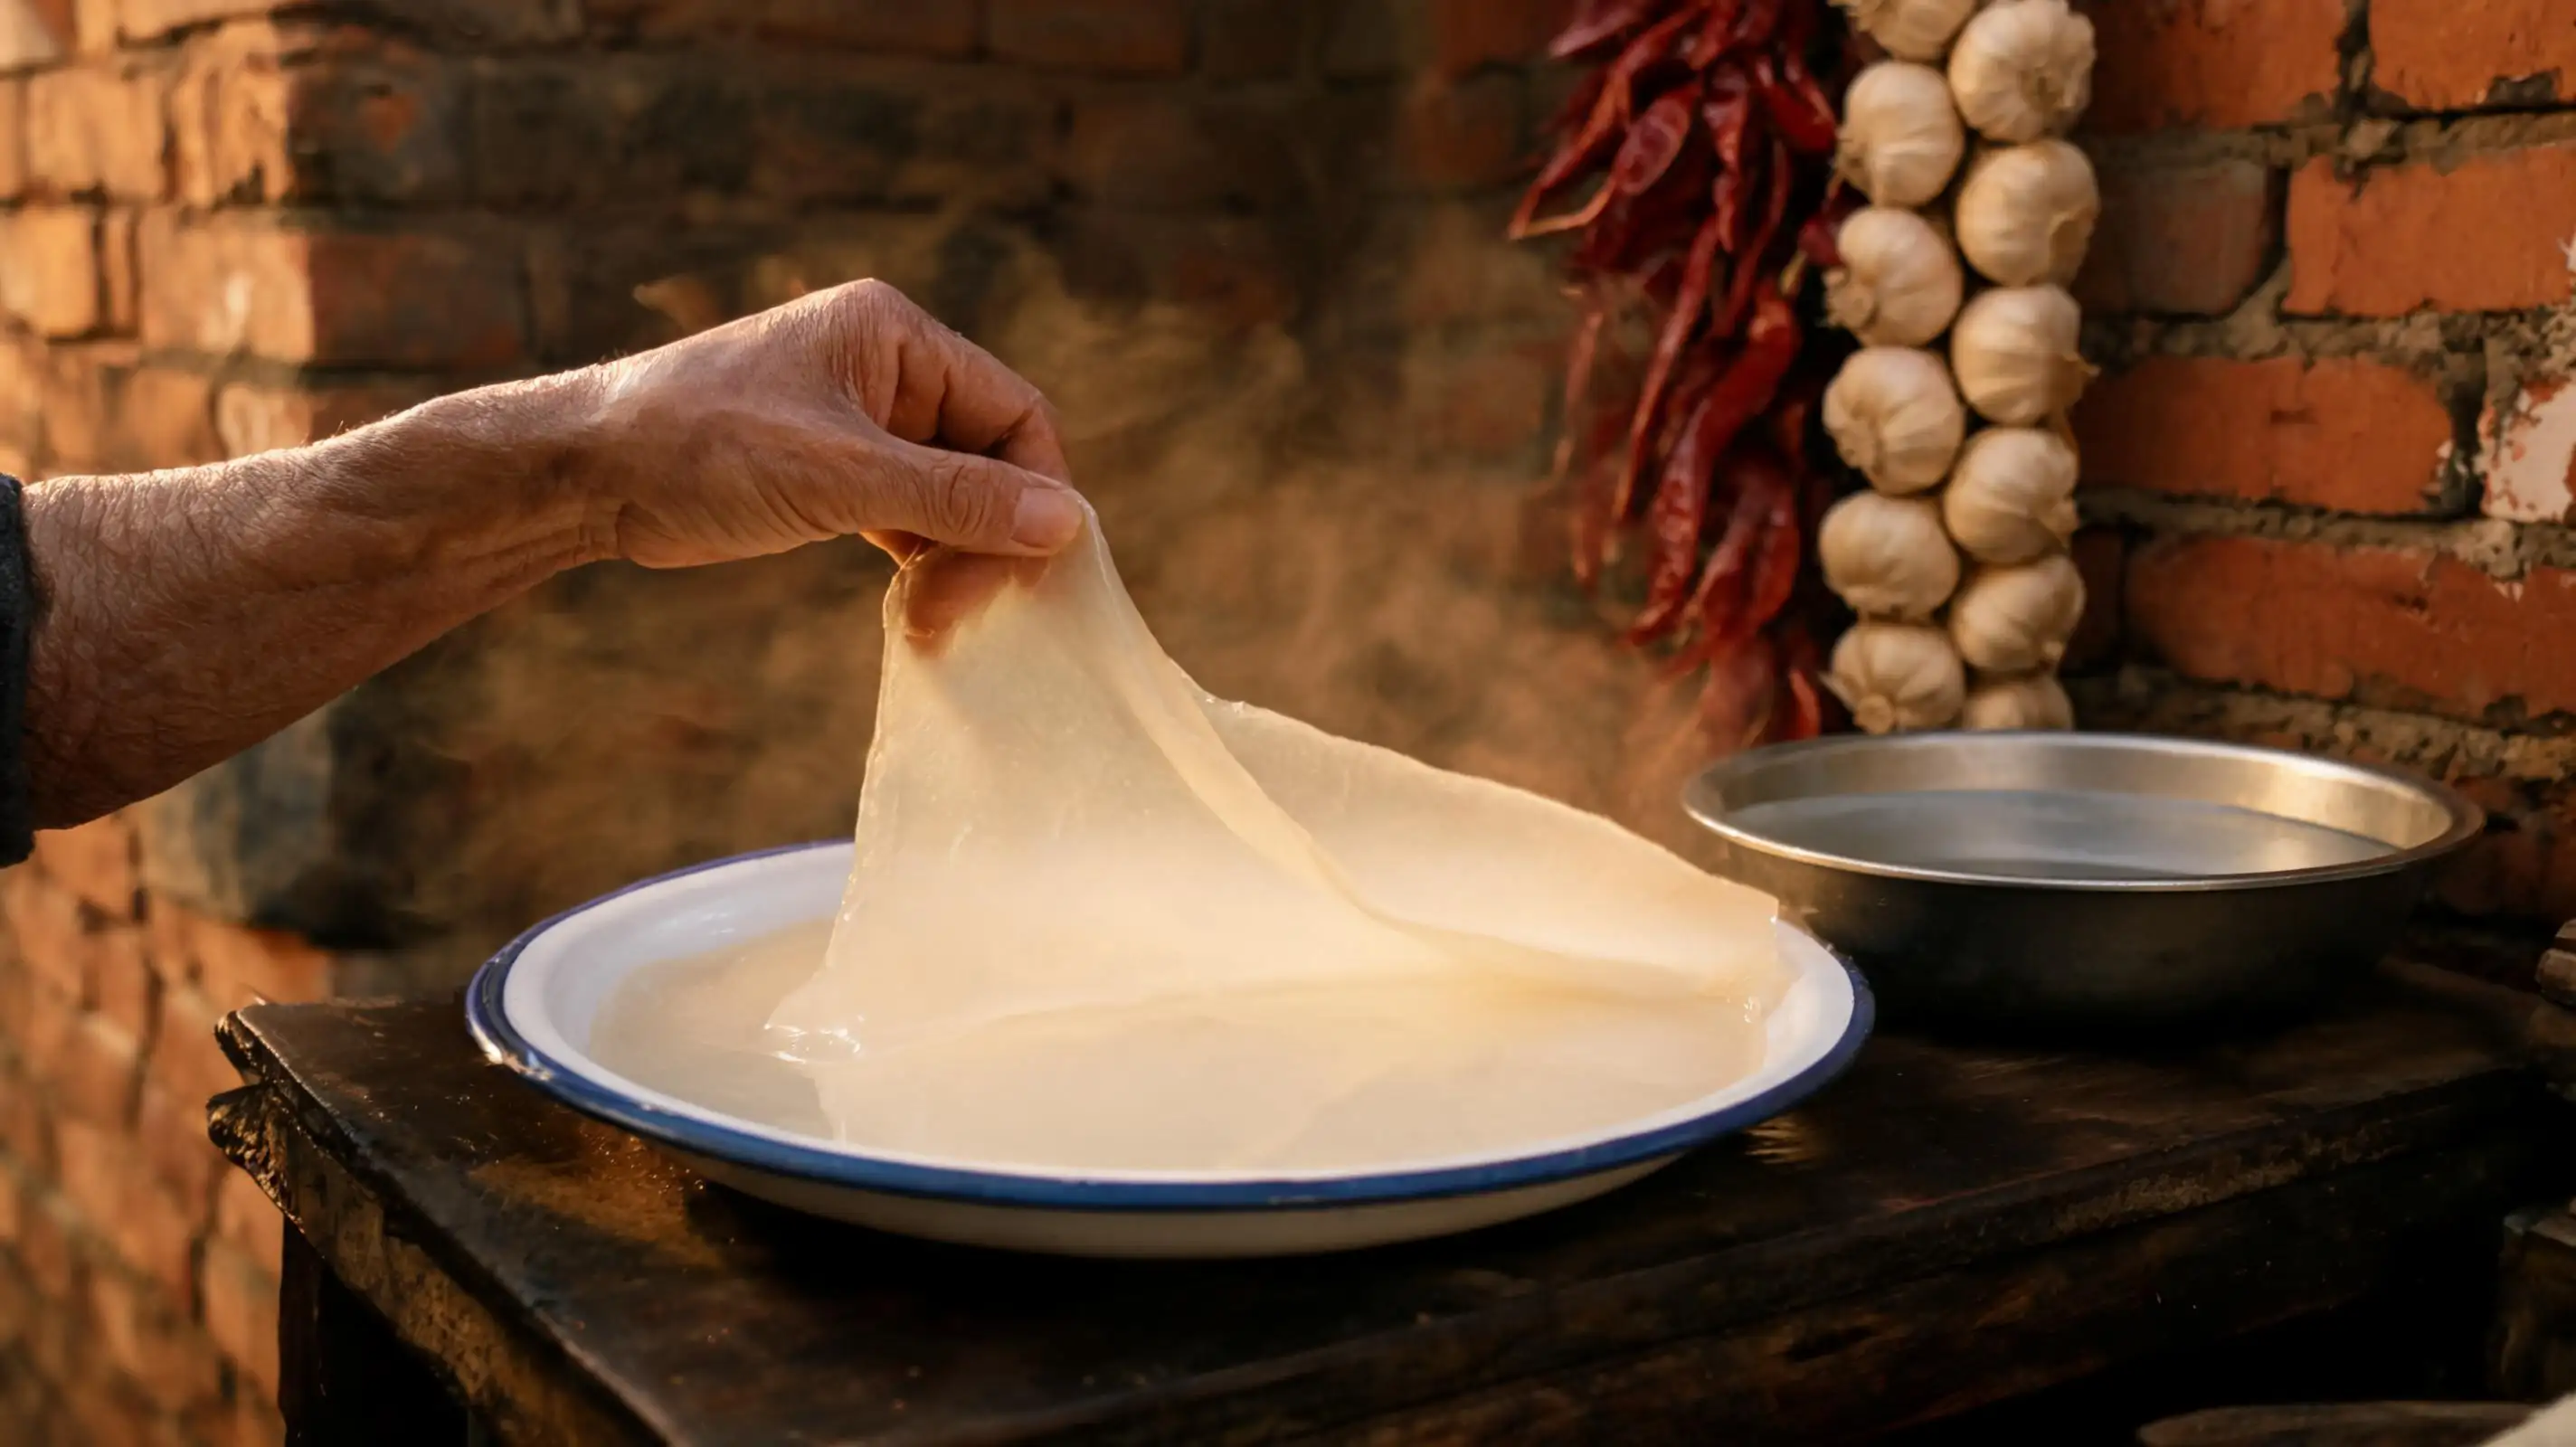
Lower the hot plate into cold water for 30 seconds, then slide a fingertip under the edge of the translucent sheet. *Lift slowly.* The skin releases in one clean, glossy piece — cool, elastic, almost weightless. Stack each finished sheet with a light brush of oil to prevent sticking.
**- If the sheet tears, your starch ratio is too low — add 10% more starch next batch**
**- Work quickly; the sheets toughen as they cool too long in the open air**
---
## Step 6 · The Gluten
### The dough that refused to dissolve gets its reward.
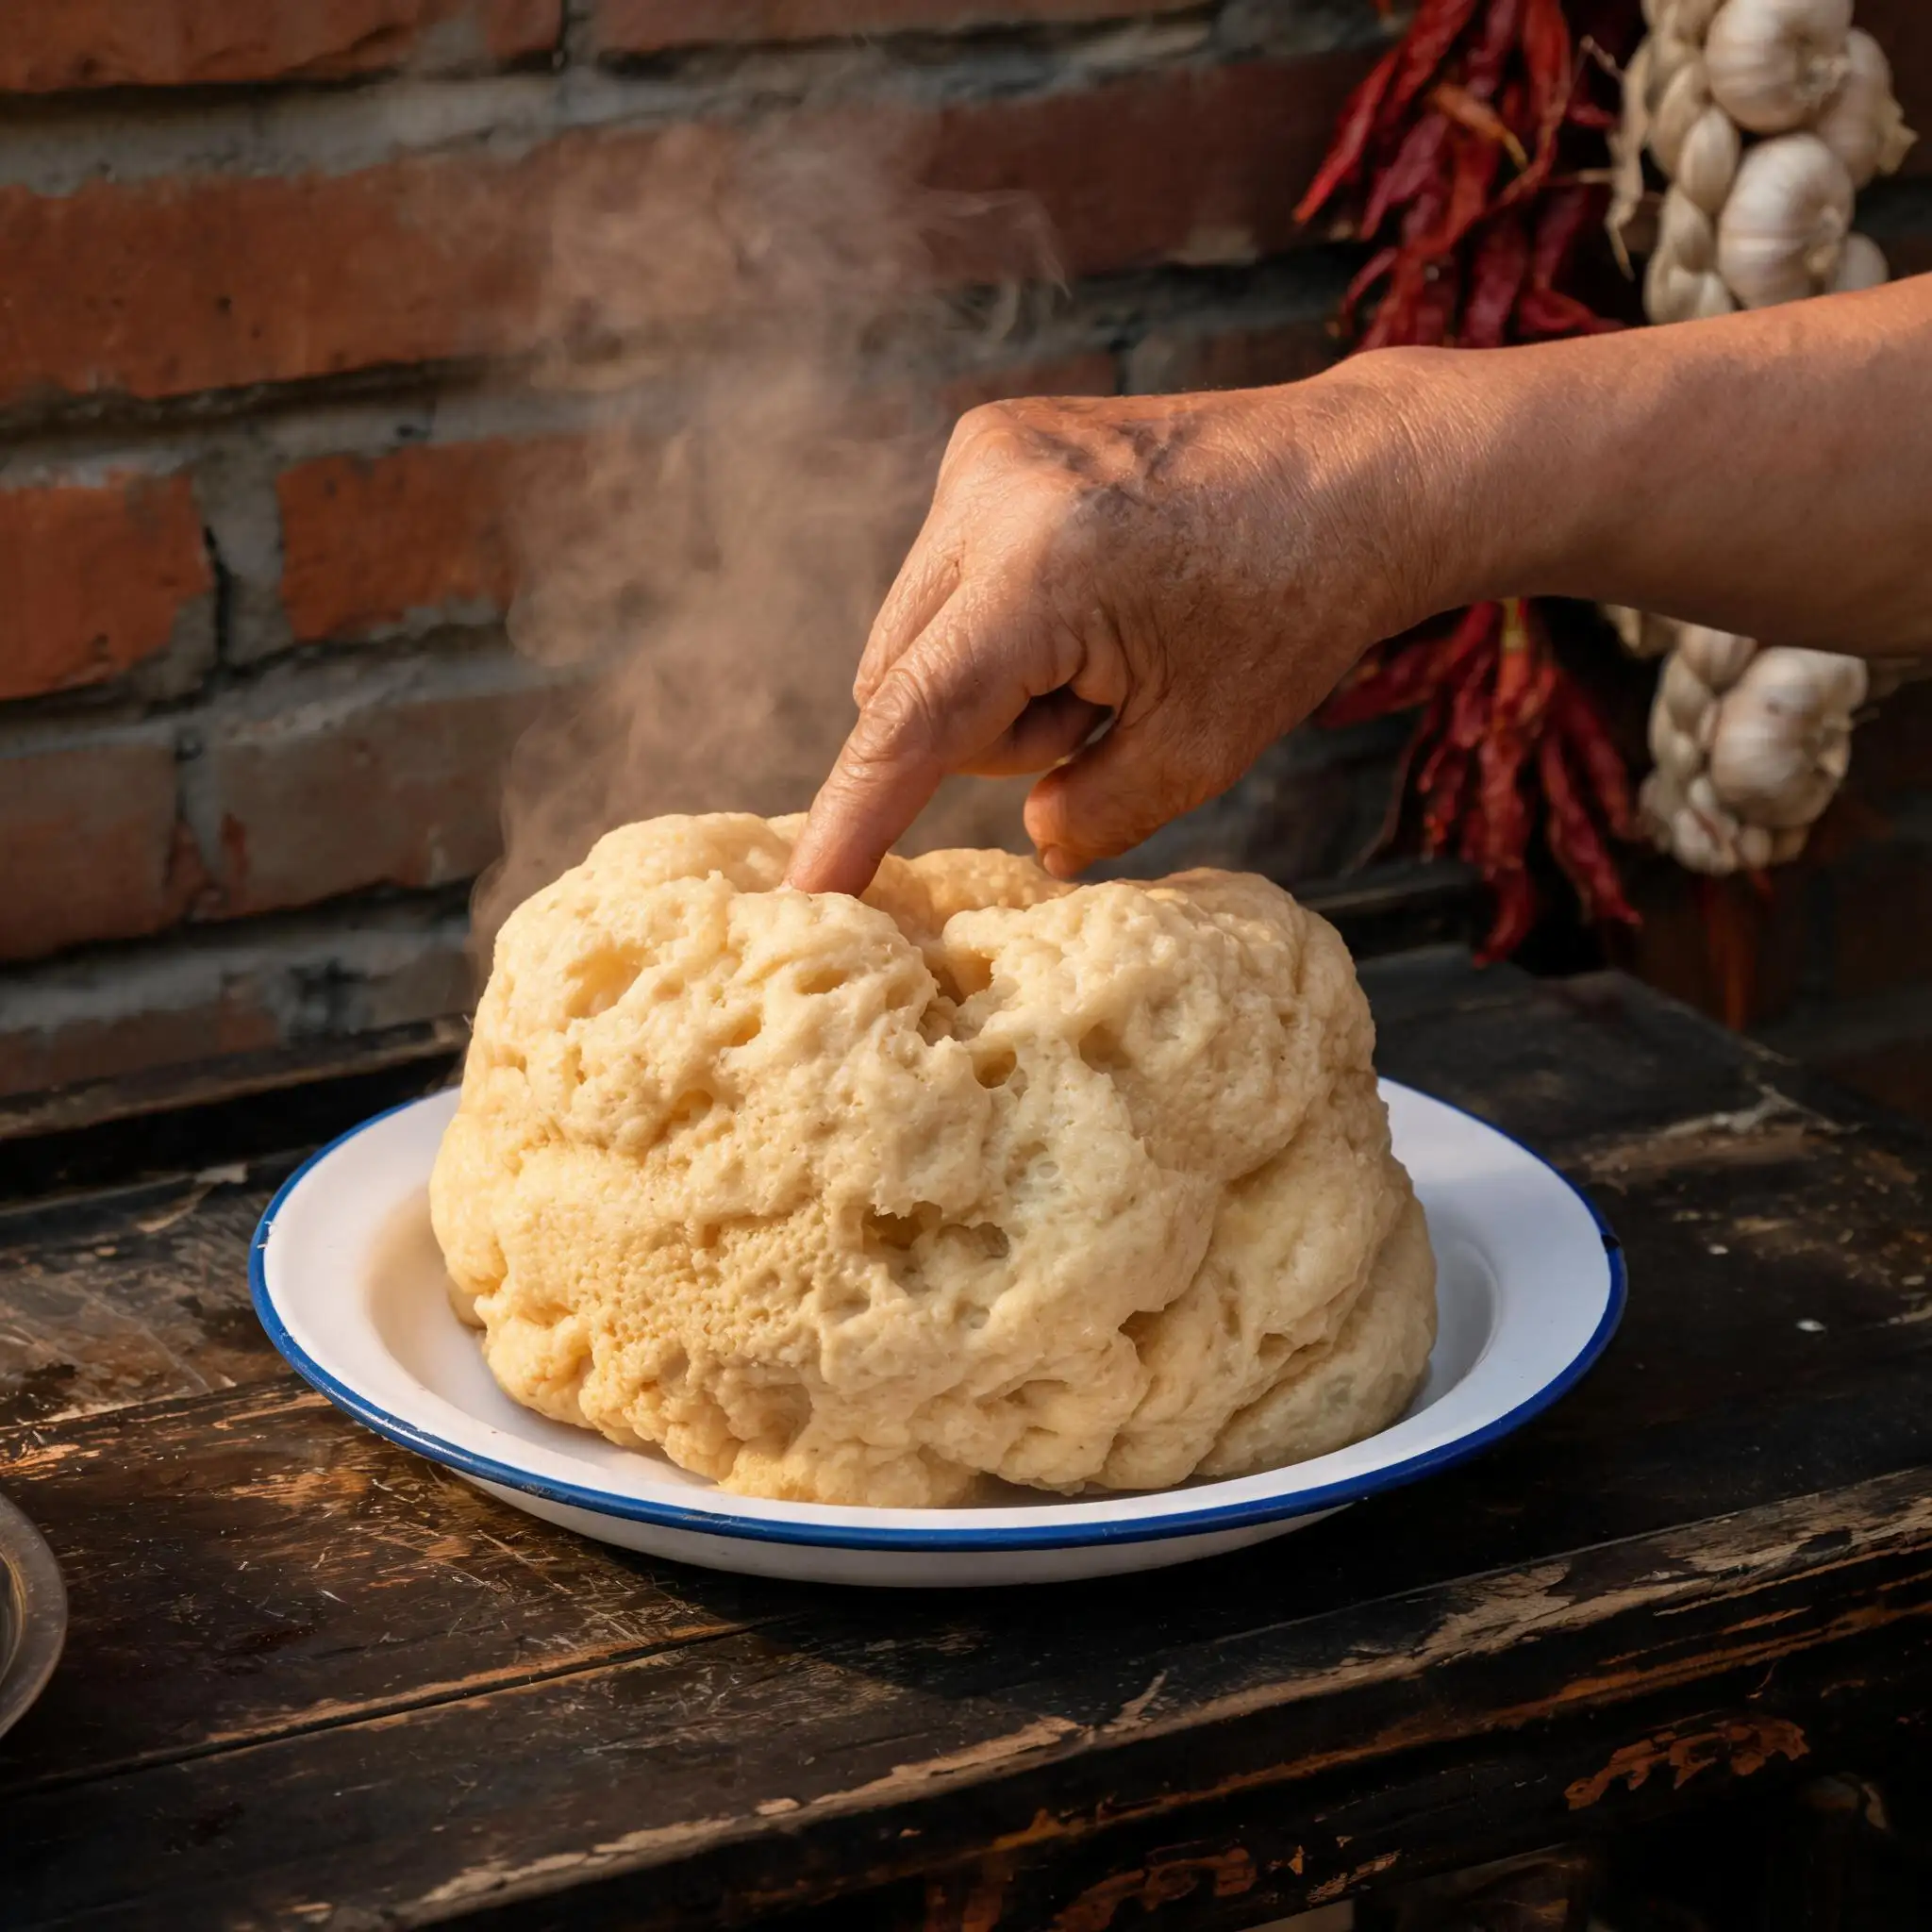
Place the raw gluten ball into a steamer over high heat. In 15–20 minutes it transforms entirely: *swelling to three times its size*, its surface erupting into an irregular honeycomb of golden, spongy craters. Press it gently — it springs back with a satisfying bounce.
**- Slice the steamed gluten into rough chunks; irregular edges hold the sauce better**
**- A toothpick inserted in the center should come out clean**
---
## Step 7 · The Cut
### Stack. Press. Slice. No dragging.
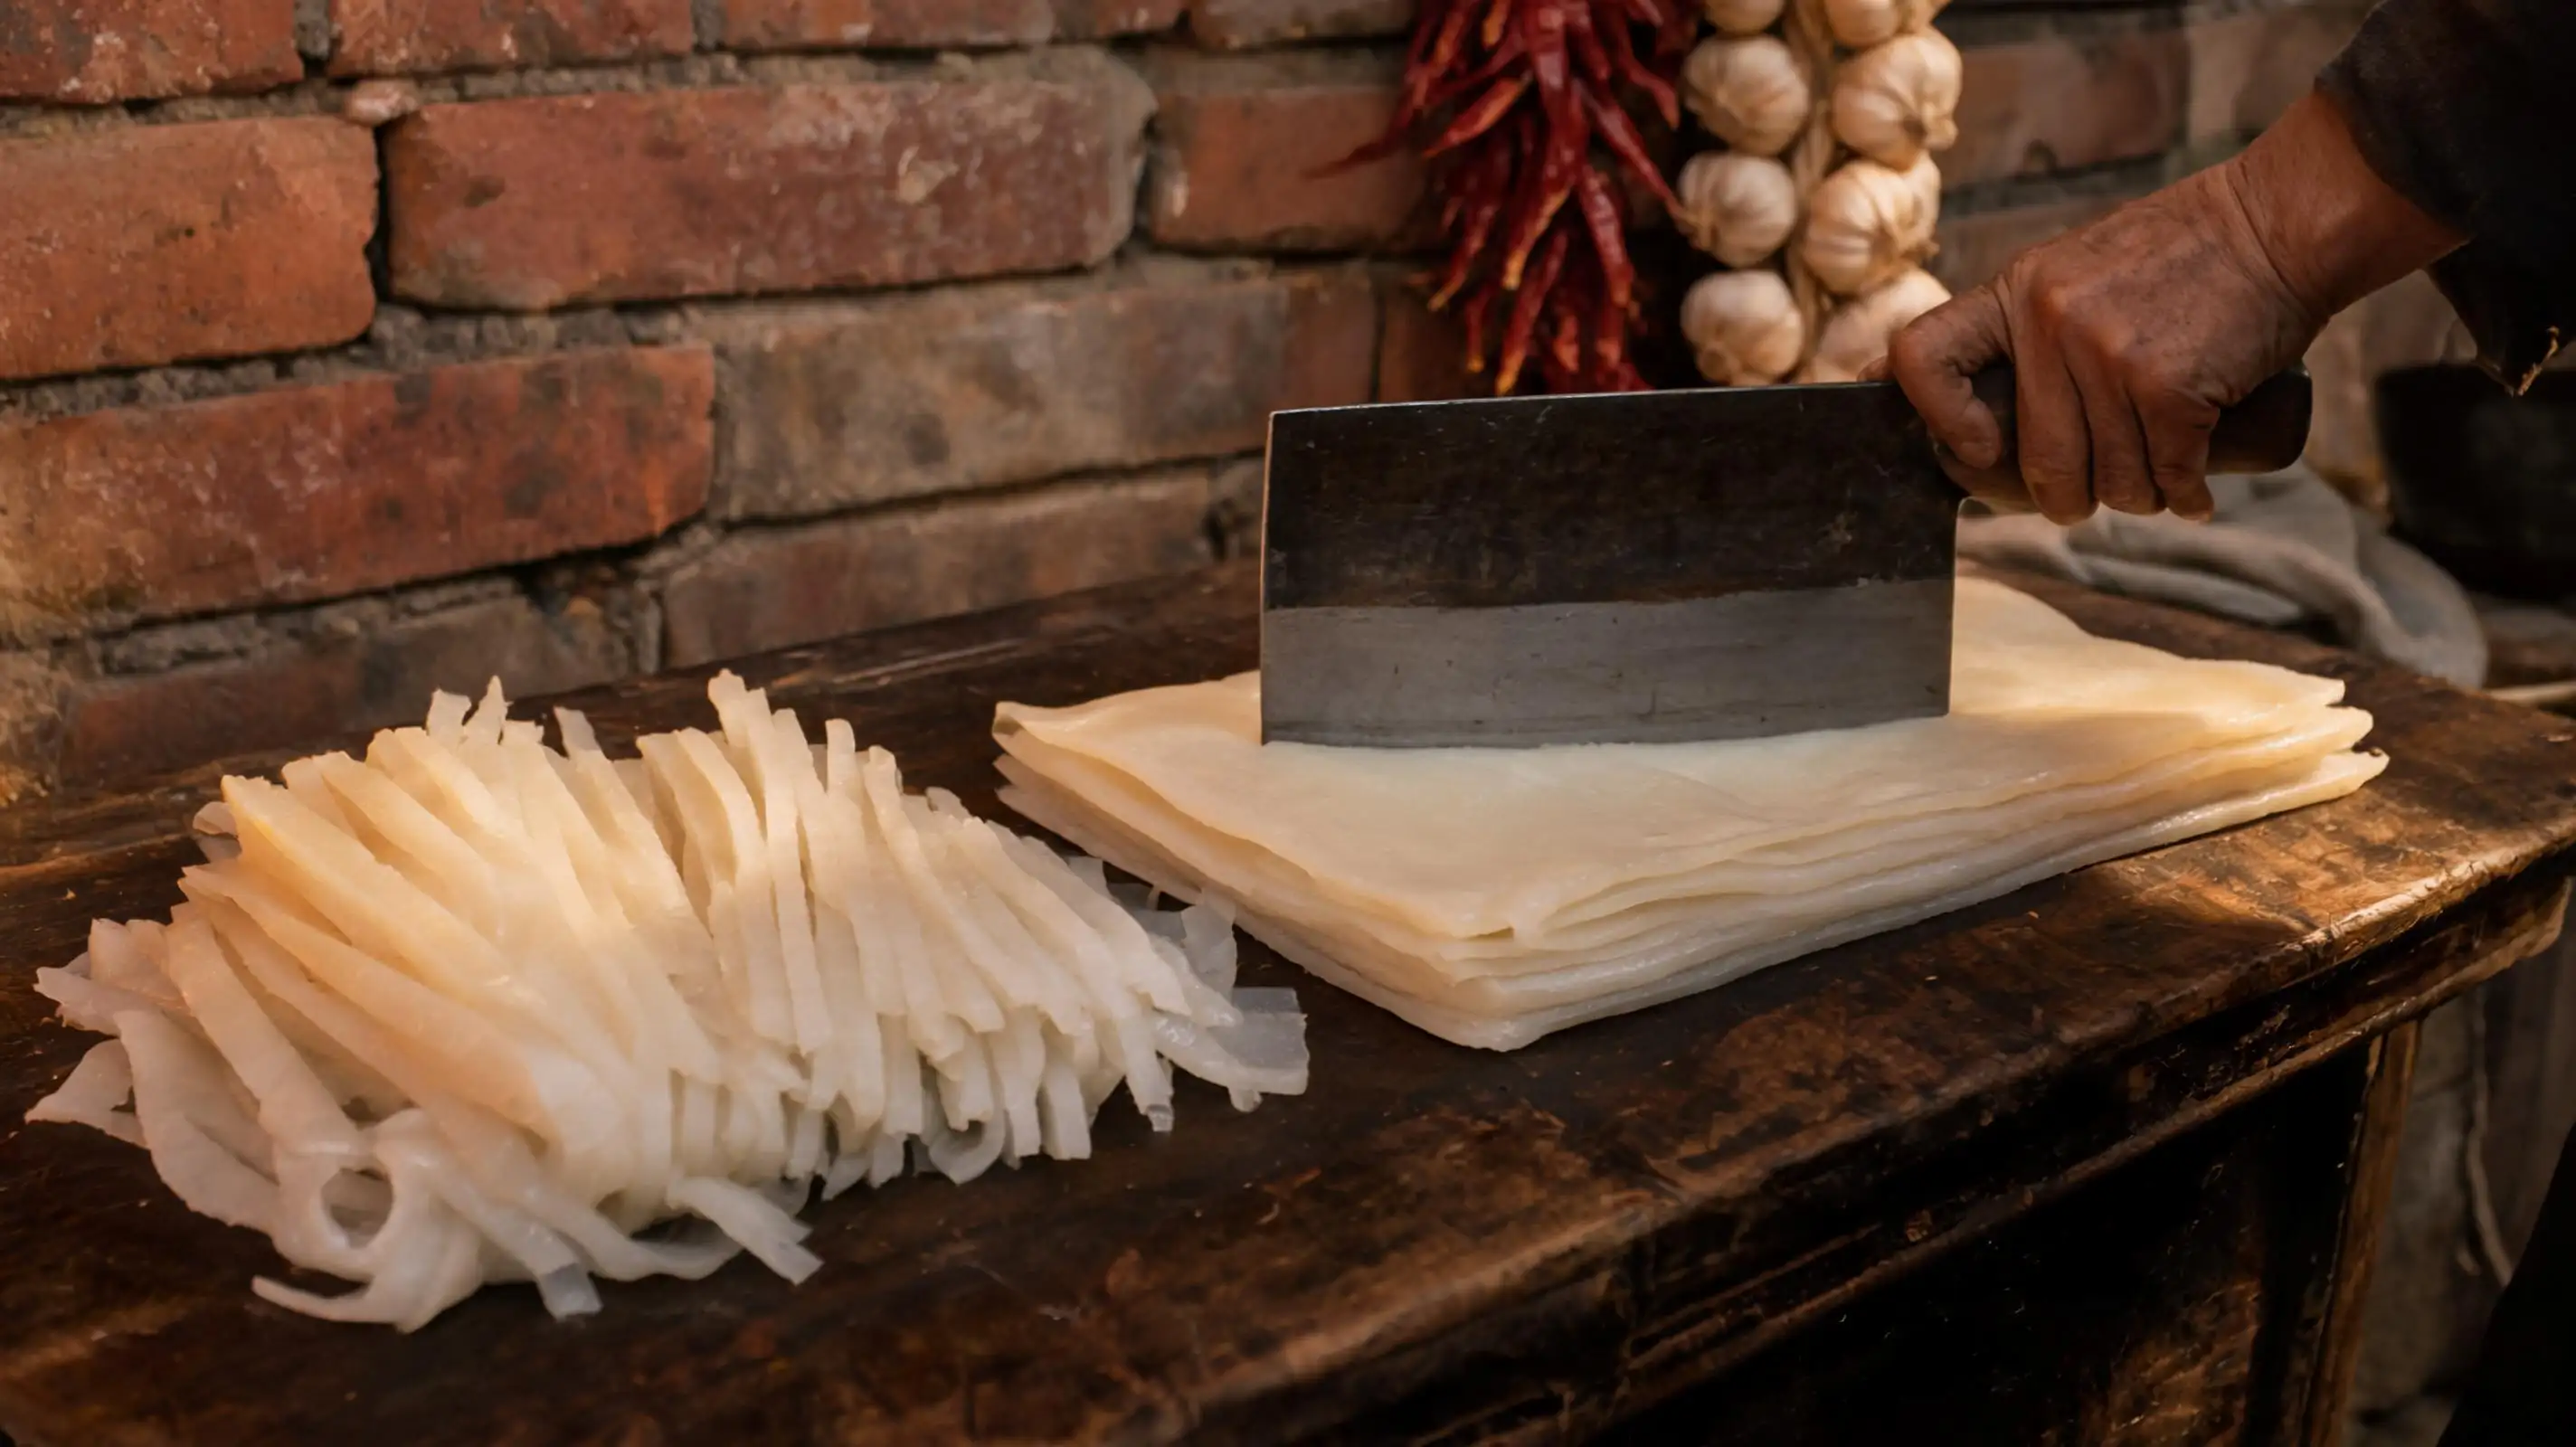
Layer 4–5 cooled sheets into a neat stack and press down firmly with the flat of the blade before each cut. Drive the cleaver straight down — **never drag** — into strips approximately 8–10mm wide. The knife should feel effortless through the cool, elastic layers.
**- Wipe the blade between cuts to prevent sticking**
**- Wider strips (12mm+) hold sauce better; thinner strips (6mm) are silkier — cut to preference**
---
## Step 8 · The Dress
### This is where a bowl becomes a bowl.
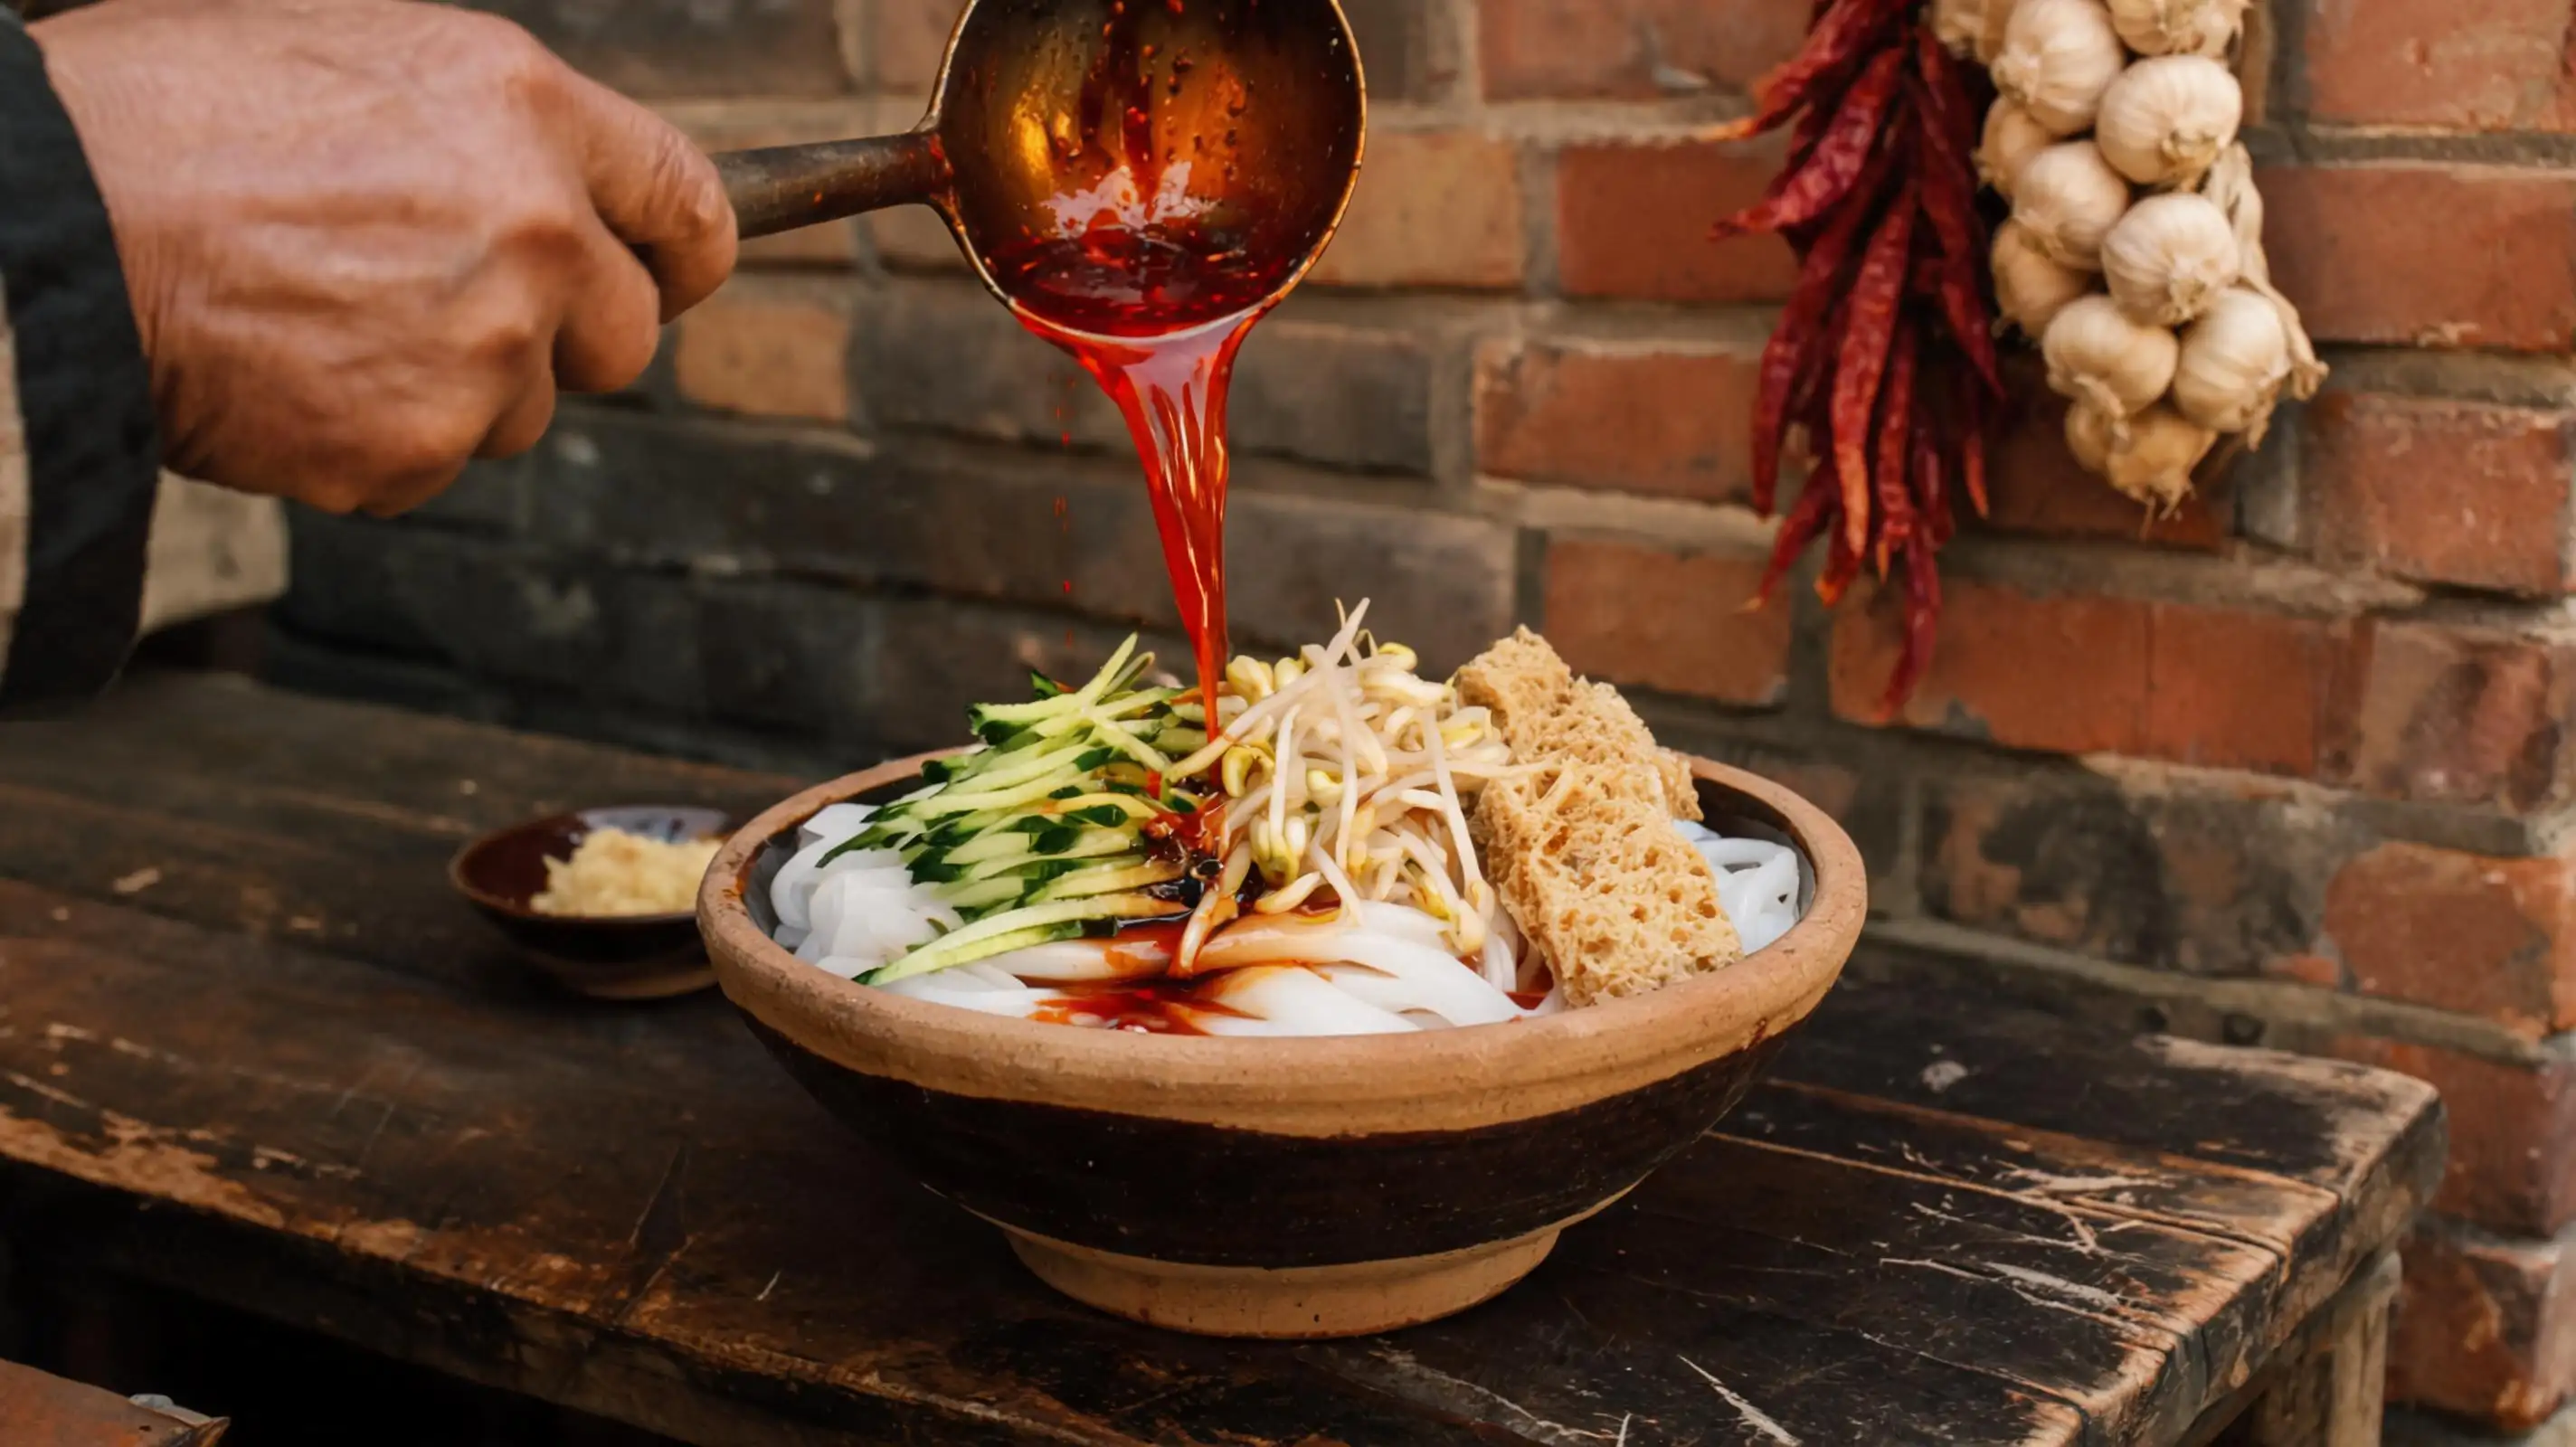
Into the dark pottery bowl: a portion of noodle strips, a mound of julienned cucumber, a handful of blanched bean sprouts, torn gluten chunks. Then — **hold the ladle high** and pour the chili oil in a slow, deliberate cascade. Watch it pool and spread, vivid crimson over white. Add garlic paste, a splash of vinegar, soy sauce, sesame paste.
**- The garlic must be freshly mashed — pre-minced garlic loses its punch**
**- Pour the vinegar along the bowl edge, not
## Cold Skin Noodles — Nine Steps to the Street Stall That Stops Traffic
> Somewhere between glass and silk, somewhere between a noodle and a dream
> This is not fast food — it is *patience*, *fire*, and *red oil* made visible
> One bowl. Nine steps. No going back
---
## Ingredients
| Item | Amount |
|------|--------|
| All-purpose flour | 300 g |
| Water (for dough + washing) | 600 ml |
| Mung bean sprouts | 100 g |
| Cucumber | ½ medium |
| Wheat gluten (washed from dough) | from above |
| Chili oil | 3 tbsp |
| Mashed garlic | 1½ tbsp |
| Chinese black vinegar | 1½ tbsp |
| Sesame paste (tahini) | 1 tbsp |
| Light soy sauce | 1 tsp |
| Salt | to taste |
| Sesame seeds | a pinch, to finish |
> Yield: 2–3 servings · Best eaten immediately · Does not keep well once dressed
---
## Step 1 · The Lineup
### Everything in its place before the fire begins
Flour, water, bean sprouts, cucumber, chili oil, garlic, vinegar, sesame paste — lay them out in order on the worn wooden counter. This is the moment of commitment. **No shortcuts live in this bowl.**
---
## Step 2 · The Wash
### Knead the dough. Then knead it again — underwater.
Mix flour and water into a firm dough and let it rest 30 minutes. Then submerge it in a basin of cold water and **knead, squeeze, and pull repeatedly** until the water turns thick and milky white with dissolved starch. What remains between your hands is raw wheat gluten — rubbery, elastic, alive.
**- Knead in 3–4 rounds, refreshing the water each time until it runs nearly clear**
**- The gluten ball should feel like firm chewing gum when done — bouncy, not sticky**
> ⚠️ Don't rush this step. Under-washed dough leaves too much starch in the gluten, making it dense and chewy instead of spongy.
---
## Step 3 · The Settle
### Patience is the only ingredient you cannot buy.
Combine all the starch-laden washing water into one large basin. Cover with a cotton cloth and *leave it completely undisturbed* for **a minimum of 4 hours** — overnight is better. The heavy starch sinks slowly to the bottom, leaving clear water above.
| Rest Time | Result |
|-----------|--------|
| 2 hours | Partially separated, sheets will be uneven |
| 4 hours | Good separation, reliable texture |
| Overnight | Best separation, most elastic sheets |
> ⚠️ When ready, gently pour off the clear top water. **Do not stir.** The dense white paste at the bottom is your gold.
---
## Step 4 · The Pour
### Thin as paper. Onto fire.
Stir the starch paste until smooth, then ladle a thin, even layer — **no more than 4mm deep** — into a flat round enamel plate. Set it over vigorously boiling water and cover. The white liquid will turn transparent in 2–3 minutes, bubbling up in the center like a slow-motion lens.
**- Tilt the plate immediately after pouring to coat the base evenly before the starch sets**
**- The sheet is done when the entire surface turns translucent with no white patches remaining**
---
## Step 5 · The Peel
### This is why you waited.
Lower the hot plate into cold water for 30 seconds, then slide a fingertip under the edge of the translucent sheet. *Lift slowly.* The skin releases in one clean, glossy piece — cool, elastic, almost weightless. Stack each finished sheet with a light brush of oil to prevent sticking.
**- If the sheet tears, your starch ratio is too low — add 10% more starch next batch**
**- Work quickly; the sheets toughen as they cool too long in the open air**
---
## Step 6 · The Gluten
### The dough that refused to dissolve gets its reward.
Place the raw gluten ball into a steamer over high heat. In 15–20 minutes it transforms entirely: *swelling to three times its size*, its surface erupting into an irregular honeycomb of golden, spongy craters. Press it gently — it springs back with a satisfying bounce.
**- Slice the steamed gluten into rough chunks; irregular edges hold the sauce better**
**- A toothpick inserted in the center should come out clean**
---
## Step 7 · The Cut
### Stack. Press. Slice. No dragging.
Layer 4–5 cooled sheets into a neat stack and press down firmly with the flat of the blade before each cut. Drive the cleaver straight down — **never drag** — into strips approximately 8–10mm wide. The knife should feel effortless through the cool, elastic layers.
**- Wipe the blade between cuts to prevent sticking**
**- Wider strips (12mm+) hold sauce better; thinner strips (6mm) are silkier — cut to preference**
---
## Step 8 · The Dress
### This is where a bowl becomes a bowl.
Into the dark pottery bowl: a portion of noodle strips, a mound of julienned cucumber, a handful of blanched bean sprouts, torn gluten chunks. Then — **hold the ladle high** and pour the chili oil in a slow, deliberate cascade. Watch it pool and spread, vivid crimson over white. Add garlic paste, a splash of vinegar, soy sauce, sesame paste.
**- The garlic must be freshly mashed — pre-minced garlic loses its punch**
**- Pour the vinegar along the bowl edge, not